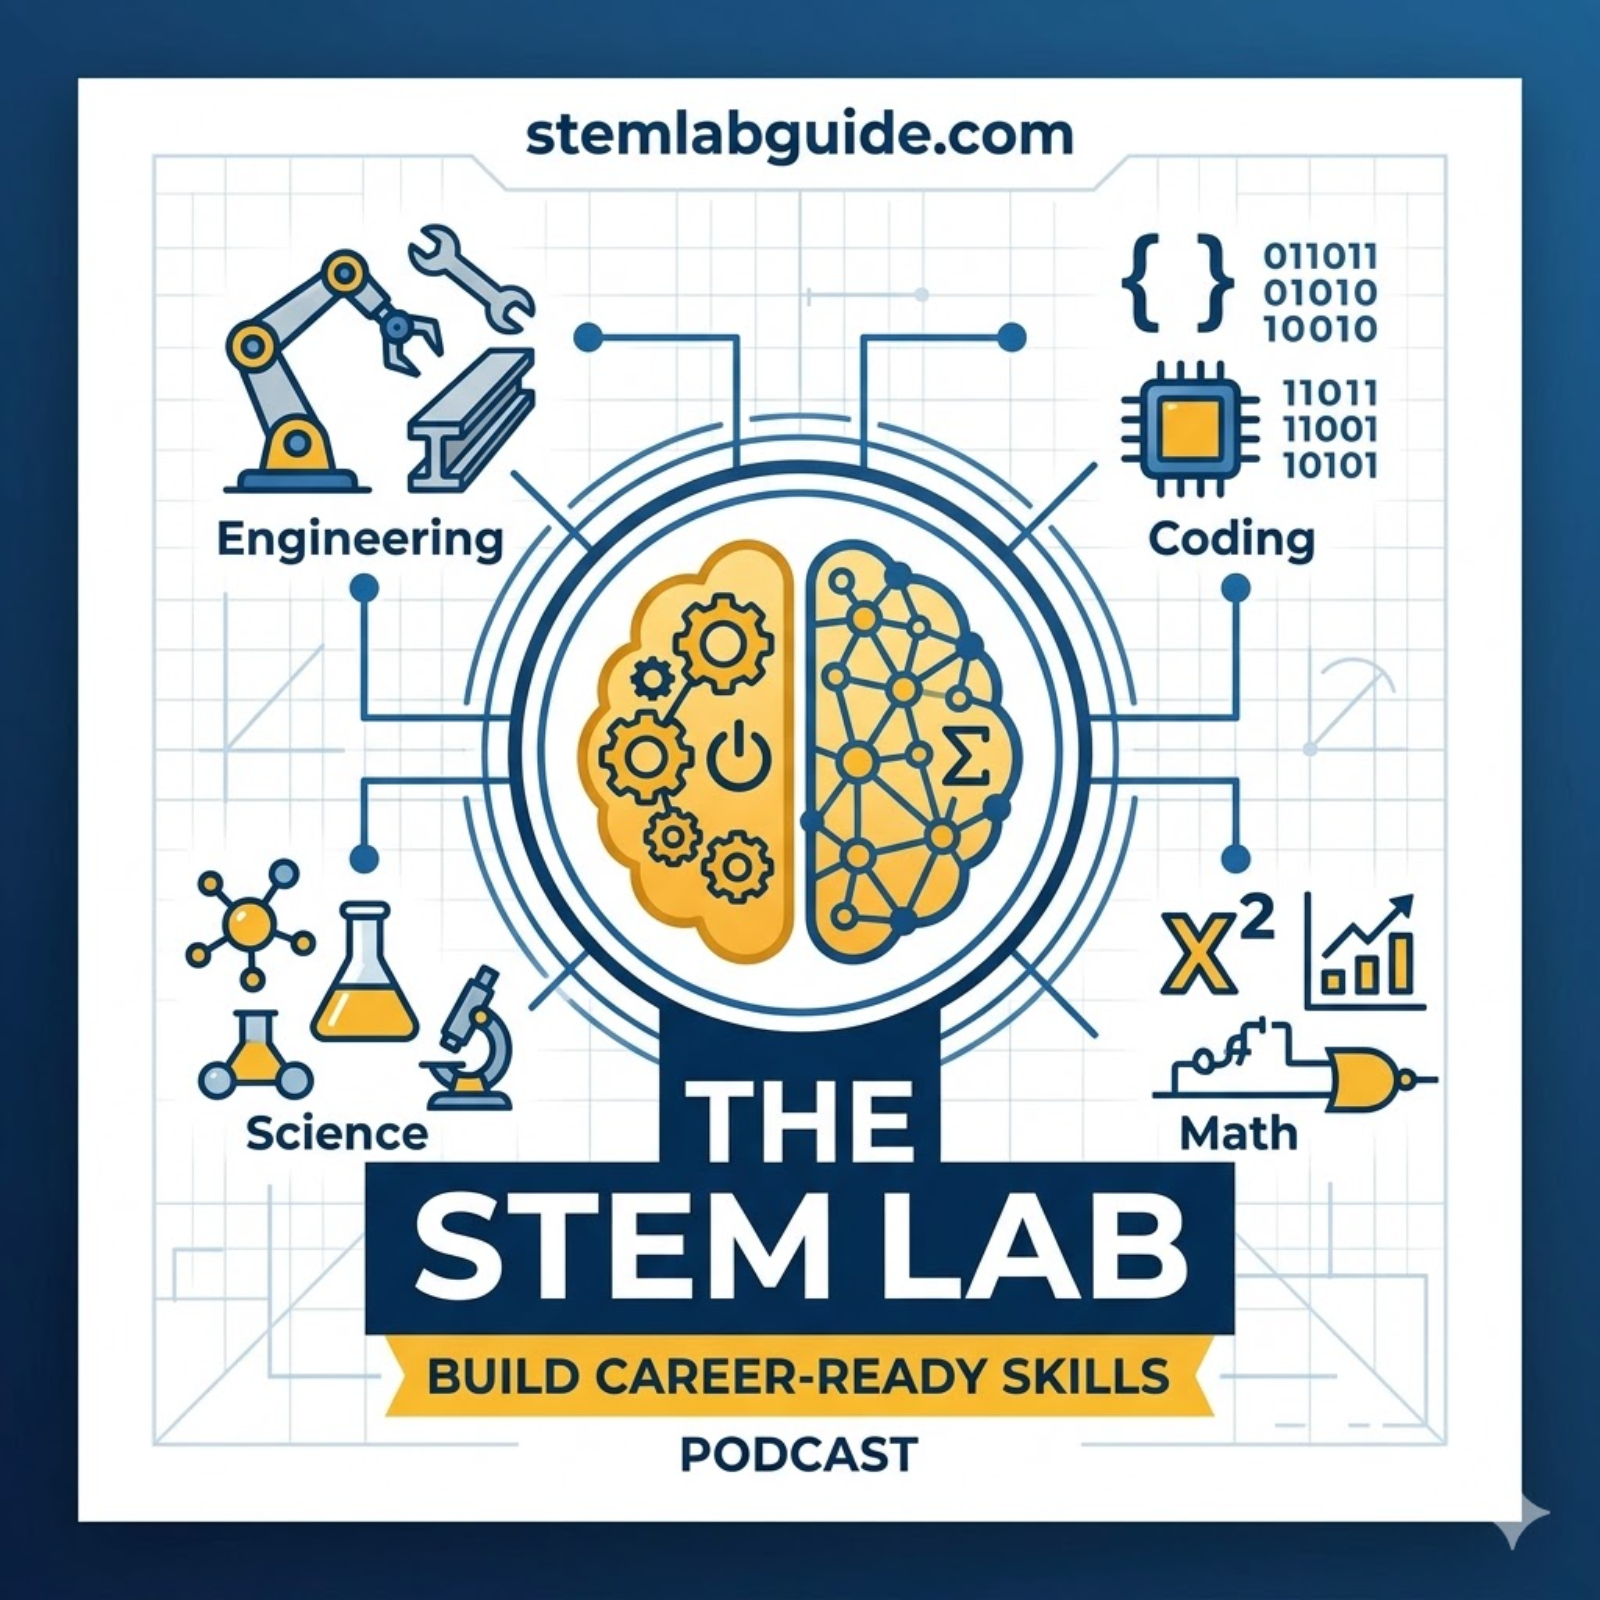
The STEM Lab
106 episodes — Page 2 of 3
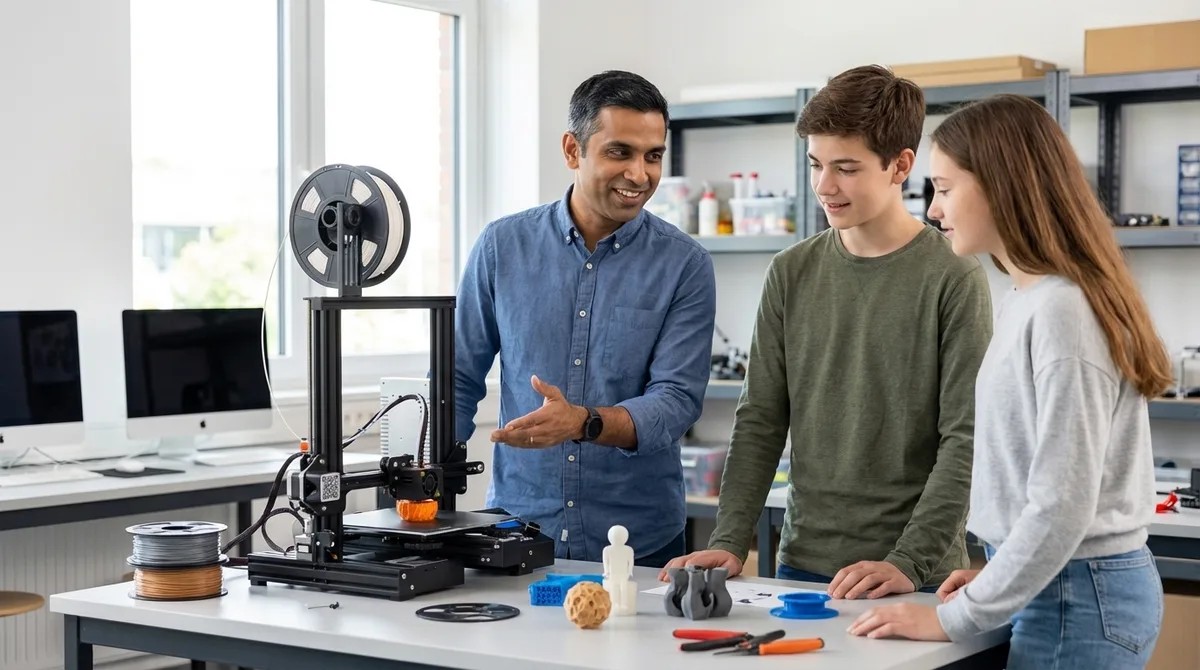
How to Build a Home STEM Lab: Complete Setup Guide for Skill-Building Success
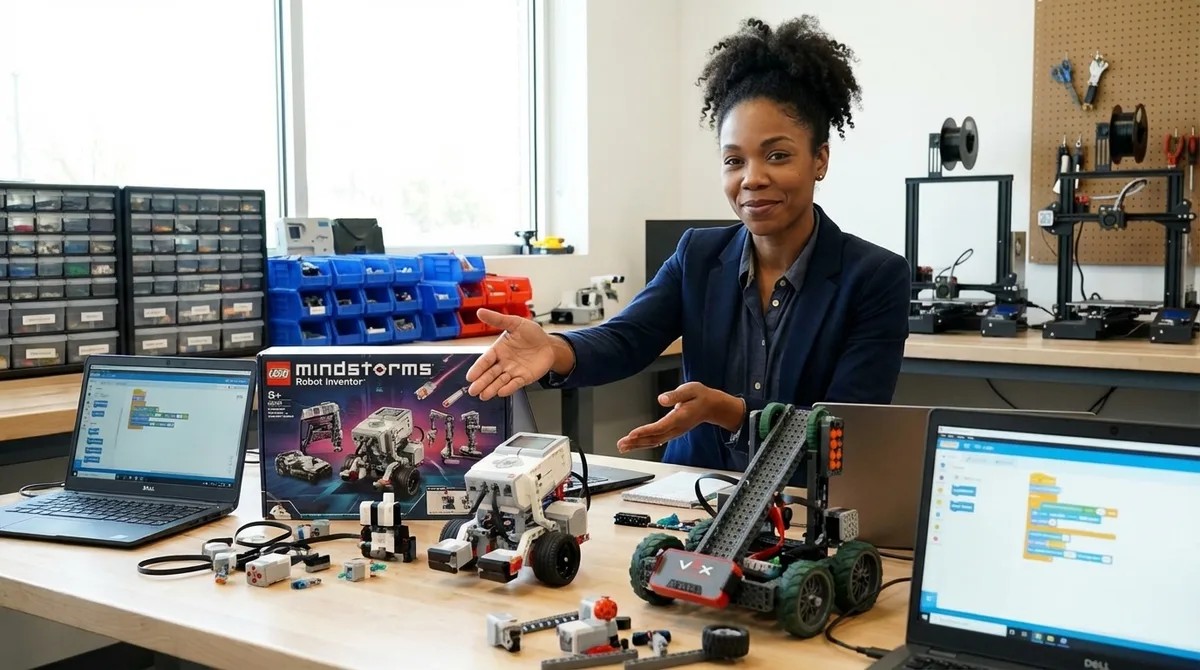
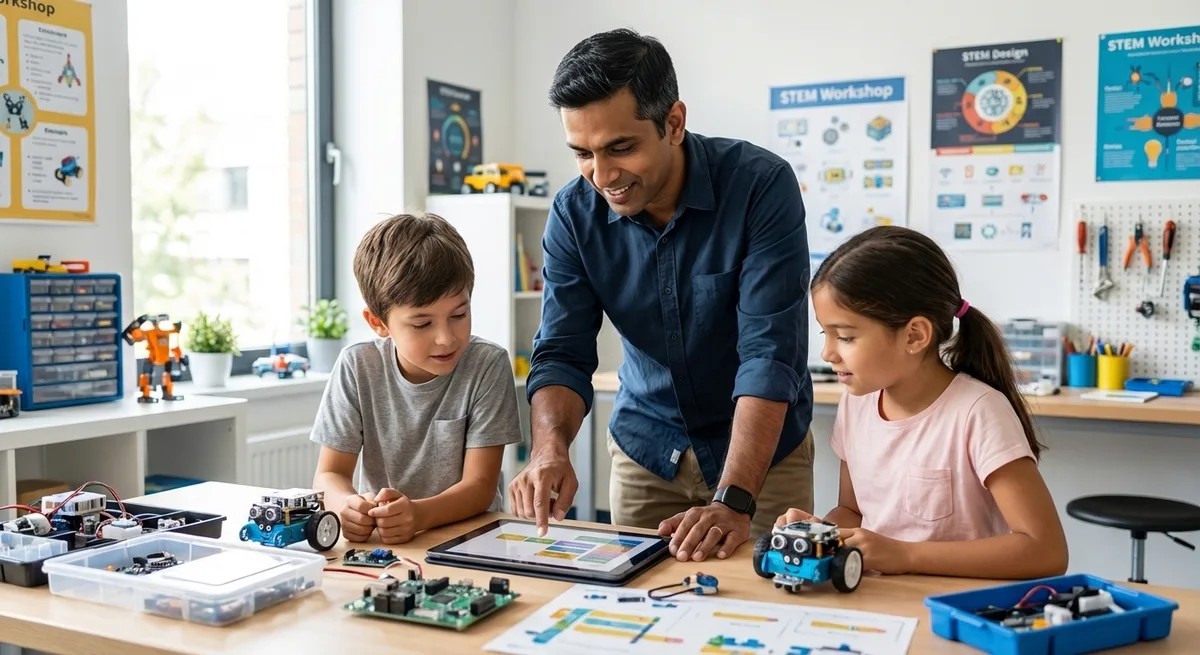
Most families approach building a home STEM lab like a shopping spree, grabbing flashy gadgets without understanding how they connect. In this episode, Rajiv Patel shares the phased implementation framework he's developed through years of testing STEM curricula with real families. You'll learn why successful labs function as integrated systems rather than equipment collections, and how to architect yours so every component builds toward measurable skill milestones—from early coding foundations all the way to professional-grade competencies that hiring managers now expect from entry-level candidates. A functional home STEM lab operates on three architectural principles: hardware compatibility layering (so tools scale from manipulatives to professional IDEs), infrastructure adequacy (power, ventilation, storage planned for 18–24 months of growth), and curriculum alignment (equipment mapped to specific competencies like "debugs Python syntax errors independently" rather than vague age ranges). Most families dangerously underestimate power requirements—running a 3D printer, computer, oscilloscope, and task lighting on one circuit will trip breakers mid-project and teach kids that tools are unreliable when the real failure is infrastructure planning. Environmental controls matter more than most guides admit: 3D printing needs 18–26°C and under 60% humidity for consistent results, while soldering requires minimum 40 CFM ventilation to avoid legitimate health risks that force families to abandon entire skill domains. Hardware selection should follow a capability dependency model, not age-indexed catalogs—each platform must expose progressively lower levels of abstraction while maintaining backward compatibility with prior learning, or you create "skill transfer debt" where children must unlearn proprietary logic systems. Proper tool organization using shadow boards or labeled bins reduces session setup time from 15 minutes to 90 seconds, dramatically lowering the friction that discourages kids from iterating on projects. The 2024 IEEE Spectrum salary survey confirms entry-level engineering roles now assume baseline proficiency in CAD software, version control, and hardware prototyping—competencies a properly architected home lab delivers by design. Read the full article: https://stemlabguide.com/how-to-build-a-home-stem-lab
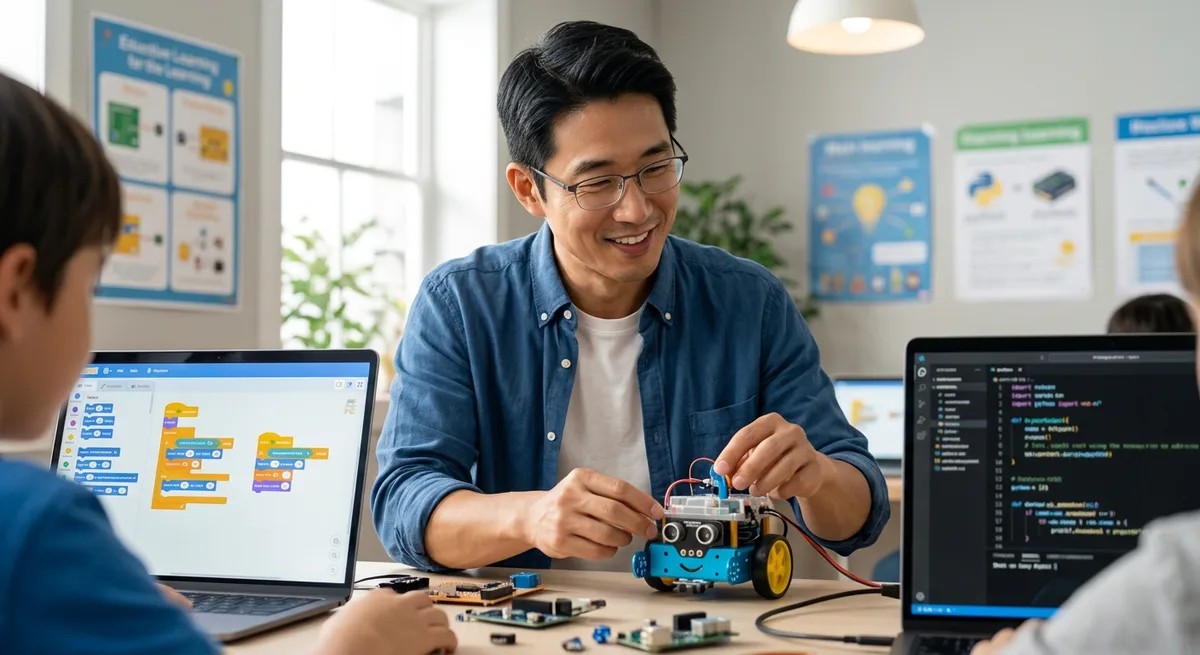
How to Transition from Block-Based to Text-Based Robot Programming
Your kid has mastered Scratch and is now asking how "real programmers" do it—but that leap from colorful blocks to typed code is exactly where most young learners either break through or burn out. This episode walks parents and educators through the critical transition from block-based to text-based robot programming, covering the eight-to-twelve-week journey that transforms playful drag-and-drop coders into students writing actual Python or Arduino C++. Host Lakshmi Venkataraman shares the strategic scaffolding, platform choices, and cognitive insights needed to make this milestone stick without the frustration that derails so many promising young programmers. Choose a robot platform that supports both block and text modes for the same hardware—this continuity lets students see that code is just another way to express logic they already understand, rather than an entirely foreign skill. The "dual-view" approach is your most powerful teaching tool: build every new concept in blocks first, then immediately view or write the equivalent text code to develop representational fluency. Learners need specific readiness markers before starting: at least 20–30 hours of block-based experience, fourth-grade reading level for error messages, basic algebra understanding, and minimum 15 words-per-minute typing speed. Poor documentation is the silent killer of text-based transitions—prioritize platforms with extensive guides in both formats, active user forums, and clear API references. Avoid the "double novelty" trap: introducing new syntax alongside unfamiliar hardware overwhelms working memory, so keep the robot platform consistent while the coding language changes. Think long-term about platform durability—the best transition robots support expandability toward advanced concepts like object-oriented programming, sensor fusion, or ROS integration. Read the full article: https://stemlabguide.com/how-to-transition-from-block-based-to-text-based-robot-programming
Complete Robotics Learning Path Checklist: From Beginner Kits to Competition-Level Builds
Standing in the robotics aisle wondering which kit won't become another dust collector? This episode maps out the complete progression from screen-free logic toys for four-year-olds to competition-ready builds for teenagers. Chloe Miller breaks down exactly what hardware to buy at each developmental stage, which programming languages unlock which capabilities, and how to sequence purchases so each kit builds on the last. If you want to build an engineer rather than assemble a toy collection, this is your blueprint. The foundation stage (ages 4–7) should be entirely screen-free—directional robots like Cubetto and marble-run builders like Turing Tumble teach sequencing and debugging instincts before introducing any abstract code symbols. Block-based programming (ages 7–10) is where spatial logic transforms into algorithmic thinking, with tools like LEGO SPIKE Essential and Sphero INDI letting kids construct programs visually while avoiding syntax frustrations. Arduino-compatible boards disguised as friendly toys (like mBot Neo) secretly introduce industry-standard microcontrollers that can later transition to real Arduino C++ programming. Bluetooth pairing issues plague many mid-tier robots—keeping devices within three meters and avoiding crowded WiFi environments prevents most dropped connections during programming sessions. Camera-vision robots like Cue teach sensor fusion and computer vision basics, shifting focus from how robots move to how they perceive their environment. Multi-terrain rovers like VEX GO force kids to grapple with real engineering trade-offs—treads versus wheels, weight distribution, center of gravity—preparing them directly for competition formats. Read the full article: https://stemlabguide.com/complete-robotics-learning-path-checklist
Robotics Programming Languages for Kids Explained: Scratch, Blockly, Python, and C++
Choosing the right programming language for your child's robotics journey isn't about finding the easiest option—it's about building a capability ladder that can take them from dragging colorful blocks to writing the same code used at Boston Dynamics and NASA. In this episode, Kazuki Tanaka draws on three years of fabrication lab experience to break down the four tiers of robotics programming languages and explain exactly how each one translates kid-friendly instructions into actual robot motion. Whether your child is just starting out or ready to level up, this episode helps you understand which language fits their developmental stage and where each path ultimately leads. Robotics programming languages differ from standard coding instruction because they bridge digital commands and physical outcomes—kids aren't just watching pixels change, they're commanding motors, reading sensors, and experiencing real-time feedback that accelerates learning. Scratch and Blockly aren't toy languages; behind the visual interface, they generate actual code and build abstract syntax trees just like professional compilers, making them legitimate starting points for sophisticated autonomous navigation routines. The four capability tiers progress from visual block languages (Scratch, Blockly) to simplified text languages (MicroPython, CircuitPython) to industry-standard interpreted languages (Python) to compiled languages used in professional robotics (C++). Visual languages use hardware abstraction layers that hide complex calculations involving wheel diameter, track width, and encoder resolution—pedagogically sound for beginners but creating knowledge gaps that must be addressed when transitioning to advanced work. Interpreted Python offers immediate feedback that dramatically accelerates iteration during learning, but introduces timing jitter measured in milliseconds that becomes problematic for competition-level robots requiring microsecond precision. Starting at the wrong entry point can cause talented learners to bounce off programming entirely, making proper progression planning more important than simply choosing what looks fun or appears easiest. Read the full article: https://stemlabguide.com/robotics-programming-languages-for-kids-explained

How to Build Your First Robot with a Kids Robotics Kit: Step-by-Step Beginner Guide
You've seen it happen: a kid tears open a shiny new robotics kit, dumps out dozens of parts, and immediately freezes with overwhelm. In this episode, veteran robotics educator Kazuki Tanaka draws on eight years of testing platforms and rebuilding failed projects with frustrated kids to explain exactly what separates kits that build real skills from those that end up collecting dust. Whether you're a parent, teacher, or makerspace coordinator, you'll learn the specific criteria that determine whether a first robot leads to a second one—or becomes a source of discouragement. The ideal first robot has 15–30 parts maximum; anything more introduces decision fatigue before kids experience success, so start with a simple two-motor wheeled platform that teaches drivetrain basics without overwhelming new builders. Snap-fit connections work better than screws for children under ten, while threaded fasteners teach valuable mechanical concepts for kids eleven and up—physical compatibility matters more than most people realize. Programming interface selection should be based on readiness, not features; block-based coding suits ages seven to twelve, while text-based languages like Python work for kids twelve and up or those transitioning from blocks. Before purchasing, verify the compatibility matrix for your household devices—many families discover too late that their robot won't connect to an older iPad or Chromebook, killing momentum instantly. Rechargeable lithium batteries cost 5–10 cents per build hour after initial investment, compared to 50–75 cents for disposables; this difference dramatically affects long-term enthusiasm and project sustainability. Expandability determines whether a kit lasts six months or several years—look for available GPIO pins, I2C/SPI/UART protocols, and third-party component compatibility rather than proprietary lock-in. Read the full article: https://stemlabguide.com/how-to-build-your-first-robot-with-a-kids-robotics-kit
Robotics Kit Compatibility Checklist: Software, Hardware, and Expandability Requirements
Buying a robotics kit that won't connect to your computer or grow with your child's skills is like purchasing an expensive paperweight. This episode breaks down the exact compatibility factors you need to check before spending hundreds of dollars on educational robotics equipment. Host Rajiv Patel walks through software dependencies, hardware interfaces, and expansion pathways that determine whether a kit becomes a genuine learning tool or an isolated dead-end. Whether you're a parent evaluating options for a six-year-old or an educator planning purchases for high schoolers, this checklist will save you from the secondary purchases that plague 63% of robotics kit buyers within six months. Operating system "compatibility" often means wildly different things across platforms—a kit might offer full IDE functionality on Windows but only a limited browser interface on Mac, so verify exactly what features you'll get on your specific device. Programming language progression matters more than initial ease of use; look for kits that support both block-based coding and text-based languages like Python or C++ on the same hardware so learners can advance without replacing equipment. Cloud-dependent kits introduce serious risks, including internet outage paralysis and platform discontinuation—22 educational robotics cloud services shut down between 2020 and 2025, potentially stranding users. Kits supporting standard programming environments like Arduino IDE can access thousands of community libraries for advanced capabilities like sensor fusion and machine learning, while proprietary platforms lock you out of these resources. Mobile app functionality typically delivers only 40–60% of desktop features, making tablets suitable for young learners but inadequate for serious programming work that requires keyboard input and multi-window workflows. Always check whether projects can export to open formats like Python files or Arduino sketches; proprietary file formats trap your work and prevent skill migration as learners advance to new platforms. Read the full article: https://stemlabguide.com/robotics-kit-compatibility-checklist

What Are Educational Robotics Kits: Components, Programming, and Learning Outcomes Explained
Most robot toys promise to teach coding but really just deliver flashy entertainment. So what separates genuine educational robotics kits from glorified gadgets? In this episode, developmental psychologist Dr. Priya Mehta breaks down the components, programming environments, and cognitive benefits that define true educational robotics systems. Whether you're a parent evaluating STEM purchases or an educator building a robotics curriculum, this deep dive reveals what actually matters when choosing kits that build real problem-solving skills. Educational robotics kits are distinguished by three defining features: expandability with sensors and third-party components, industry-standard programming environments like Python and Scratch, and progressive complexity that scales from block-based coding to professional text-based languages. The physical assembly process creates what Dr. Mehta calls "causal reasoning loops"—when children connect motors, troubleshoot mechanical failures, and modify code to fix problems, they're practicing the predict-test-observe-refine cycle that underlies scientific thinking. Core hardware components include microcontrollers (the robot's brain), structural elements ranging from LEGO bricks to anodized aluminum beams, actuators like DC motors and servos for movement, and sensors including ultrasonic, color, gyroscope, and touch sensors for environmental awareness. Block-based programming removes syntax barriers while teaching sequential thinking, loops, conditionals, and variables—but the transition to text-based languages like Python represents a critical cognitive leap equivalent to moving from arithmetic to algebra. The build-code-test cycle transforms failures into teaching moments: when a robot overshoots a turn, children must diagnose whether it's a mechanical problem like wheel friction or a coding problem like incorrect timing values, practicing troubleshooting skills that transfer across disciplines. Battery systems vary significantly across price points, with premium kits offering rechargeable lithium-ion packs and charging docks while budget systems require separate AA batteries and chargers—a hidden cost factor worth considering. Read the full article: https://stemlabguide.com/what-are-educational-robotics-kits
How to Choose a Robotics Kit for Your Child's Skill Level
Choosing a robotics kit for your child isn't as simple as matching their age to the number on the box—that approach leads to expensive equipment gathering dust in closets. In this episode, Kazuki Tanaka draws on years of running fabrication labs to share a systematic framework for matching your child's actual abilities to the right kit. Whether your kid has never touched a coding toy or is ready to graduate from Scratch to Python, you'll learn how to assess their real skill level, decode the specifications that matter, and build a learning path toward industry-standard tools. Age ranges on packaging are unreliable—assess your child's programming foundation, spatial reasoning, and tolerance for troubleshooting instead, since some seven-year-olds are ready for text-based coding while some twelve-year-olds still need visual block systems. The programming language a kit uses shapes your child's future options: block-based languages build computational thinking but don't transfer to professional environments, Python connects directly to AI and robotics research tools, and Arduino C++ opens doors to embedded systems and firmware development. Avoid kits with proprietary programming languages that only run on the manufacturer's custom software—these create dead ends that won't prepare kids for real-world robotics platforms. Mechanical assembly skills matter as much as coding ability; watch your child build with LEGO or K'NEX to gauge whether they're ready for complex gear ratios or need color-coded parts with minimal structural challenges. Budget calculations should include expansion packs, replacement parts, and subscription software costs—not just the sticker price—plus your realistic time commitment for the first three to five builds. Block-based programming is foundational but not terminal; plan to spend one to two years maximum before transitioning to text-based languages that transfer to professional tools like TensorFlow, OpenCV, and ROS. Read the full article: https://stemlabguide.com/how-to-choose-a-robotics-kit-for-your-child-s-skill-level
Best Coding Robot Kits Under $100: Budget-Friendly STEM Learning
Wondering if you can transform your child's screen time into genuine skill-building without emptying your wallet? In this episode, Chloe Miller shares insights from a year of hands-on testing with budget coding robots in her Pacific Northwest workshop. She reveals why price tags don't predict learning outcomes, but factors like expandability, programming language support, and progressive skill paths absolutely do. Whether you're a parent seeking meaningful STEM engagement or an educator stretching a tight budget, this episode breaks down exactly what separates a lasting learning platform from an expensive dust collector. Programming language pathways matter more than flashy features—look for kits supporting Scratch, Python, or Arduino IDE rather than proprietary apps that dead-end after a few months and lock you into one manufacturer's ecosystem. Offline capability is a critical but often overlooked feature; cloud-dependent kits can become useless when companies discontinue services, and hidden subscription costs quickly erode that sub-$100 value. Expandability transforms a budget robot into a years-long learning investment—check for standard GPIO pins, JST/Grove/Qwiic connectors, and compatibility with common components like servo motors and third-party sensors. Durability benchmarks to watch for include metal gearboxes, impact-resistant ABS plastic, sealed battery compartments, and rubber wheels that actually grip real surfaces during outdoor testing. Ignore the age ranges printed on boxes; instead, look for kits specifying concrete learning outcomes like "implement conditional logic and nested loops" that reveal actual pedagogical progression. The best kits allow children to transition from block-based to text-based programming on the same hardware, saving you from buying twice as skills advance. Read the full article: https://stemlabguide.com/best-coding-robot-kits-under-100
LEGO Mindstorms vs VEX Robotics: Which Kit Builds Better Engineering Skills
Choosing a robotics kit for your child isn't just about motors and plastic—it's about selecting the engineering language they'll speak for years to come. This episode breaks down the fundamental differences between LEGO Mindstorms and VEX Robotics, two platforms that take radically different paths toward building real engineering skills. Whether you're weighing competition pathways, programming depth, or long-term skill development, host Chloe Miller dissects both systems to help you make the right call for your young engineer. VEX Robotics builds competition-ready mechanical engineering skills with industry-standard C++ programming, while LEGO Mindstorms excels at rapid prototyping with accessible entry points through Scratch and Python. LEGO's Python implementation is a walled garden—you can't import external libraries, interface with APIs, or use professional IDEs like VS Code, making it training wheels rather than the Python used in real-world applications. VEXcode lets kids toggle between block-based programming and C++ text in the same IDE, showing the actual code equivalent of every block they place—a bridge to text-based programming that LEGO can't match. The VEX V5 brain runs FreeRTOS, the same real-time operating system used in Tesla autopilot systems and Mars rovers, meaning kids learn control theory applicable to aerospace and autonomous vehicle engineering. LEGO's cloud-dependent app means losing internet access mid-session can cut off advanced sensor libraries, while VEXcode works entirely offline after initial download. VEX offers a 5-8 year progression pathway with open architecture accepting third-party sensors and custom parts, compared to LEGO's 2-4 year lifespan in a closed ecosystem requiring 3D-printed adapters for any hacking. Read the full article: https://stemlabguide.com/lego-mindstorms-vs-vex-robotics
Best Arduino Robotics Kits for Kids: Industry-Standard Programming Platforms
Your kid could be debugging C++ code on the same open-source platform that engineers use to prototype solar farm sensors and smart grid devices—and the right Arduino robotics kit makes that possible today. In this episode, Chloe Miller draws on five years of hands-on experience building Arduino-powered systems for solar monitoring and hydroponics to break down what separates genuine skill-building platforms from toy robots destined for the landfill. If you're a parent wondering how to choose an Arduino kit that grows with your child from simple LED projects to multi-sensor autonomous systems, this guide answers the questions that actually matter for long-term STEM learning. Open-source hardware and software compatibility should top your checklist—genuine Arduino boards or explicitly compatible clones mean your child won't face subscription fees, forced obsolescence, or proprietary lock-in when a company drops support. Age labels are nearly meaningless; instead, evaluate kits by the concrete programming skills they build, from reading analog sensor values and writing conditional logic to implementing serial communication and interrupt-driven code. The best kits create a clear progression from block-based coding environments like ArduinoBlocks or mBlock to native C++ syntax, which is where real computational thinking develops and mirrors professional development pathways. Modular, industry-standard components—like L298N motor drivers, HC-SR04 ultrasonic sensors, and shield-compatible boards—let your child reuse parts across hundreds of future projects, from line-following robots to hydroponic pump controllers. Avoid kits with proprietary connectors or all-in-one boards that can't be disassembled; Arduino's real power lies in its library of reconfigurable sensors and actuators that adapt to whatever your child wants to build next. Practical details matter for longevity: compartmentalized storage cases prevent tiny resistors from vanishing, and offline IDE compatibility ensures troubleshooting doesn't depend on stable internet access. Read the full article: https://stemlabguide.com/best-arduino-robotics-kits-for-kids
Best Robotics Kits for Kids: Complete Guide to Building Real Engineering Skills
Most "educational" toys end up forgotten in closets, but the right robotics kit is fundamentally different—it's a gateway to systems thinking, real debugging, and hands-on engineering skills that translate directly to careers in renewable energy, autonomous vehicles, and beyond. In this episode, Chloe Miller draws on years of testing these kits with real kids in real labs to break down exactly what separates genuine learning tools from expensive plastic. Whether you're a parent building a home STEM lab or an educator choosing equipment for a classroom, this guide answers a critical question: how do you select a robotics kit that grows with a child's skills rather than collecting dust? Educational robotics kits are closed-loop systems where sensors gather environmental data, control boards process programmed logic, and actuators respond—giving kids immediate, visible feedback on the code they write. The best kits use industry-standard platforms like Arduino, Raspberry Pi, or ESP32, which means children learn on the same hardware used in university labs and professional prototyping, building skills that transfer directly to real STEM careers. Expandability is essential: kits with standardized mounting holes (M3/M4 threading) allow integration of 3D-printed parts, salvaged components, and third-party sensors, transforming a starter kit into an open-ended engineering platform. Power requirements vary dramatically—entry-level kits use AA batteries (4.5–6V), while advanced builds require lithium-polymer packs (7.4–11.1V) that demand safe charging practices and fireproof storage. Programming environments should support dual modes: block-based coding (Scratch, Blockly) for ages 6–10 teaches logic without syntax frustration, while text-based languages (Python, C++) for ages 11+ introduce real-world debugging and library management. Before purchasing, verify whether a kit requires constant internet access for cloud-based programming or functions fully offline—a critical consideration for device independence and areas with unreliable connectivity. Read the full article: https://stemlabguide.com/best-robotics-kits-for-kids

What Is Supervised vs Unsupervised Learning: Kid-Friendly AI Guide
Your child asks how Netflix knows what they'll like or how Siri learned to understand voices, and suddenly you're scrambling to explain machine learning without losing them in technical jargon. In this episode, Lakshmi Venkataraman breaks down the two fundamental ways machines learn from data—supervised and unsupervised learning—using analogies that work at the kitchen table. Whether your learner is just starting with visual coding or transitioning to text-based languages, understanding this core distinction unlocks how AI actually thinks. Supervised learning works like studying with an answer key—the algorithm learns from labeled examples (like photos tagged "cat" or "dog") and adjusts its internal parameters through thousands of iterations until it can accurately label new data it's never seen before. Unsupervised learning is like dumping mixed LEGO bricks on a table and asking your child to sort them without instructions—the machine finds patterns, groupings, and hidden relationships in raw data completely on its own. A common misconception among young learners is that machines memorize examples like flashcards, but supervised learning is actually about pattern recognition and generalizable learning, which is why models are tested on data they've never encountered during training. Platforms like Scratch's ML extension and Google's Teachable Machine let elementary and middle school kids train image classifiers using their webcam in under ten minutes, making supervised learning accessible without writing code. The training and testing process in machine learning mirrors the scientific method—hypothesis (model structure), experimentation (training), and validation (testing)—reinforcing inquiry skills your child already practices in science class. Hardware like the Raspberry Pi 5 or AIY Vision Kit allows kids to run simple supervised learning models locally, which addresses both screen-time management and data privacy concerns while providing hands-on experience with real frameworks like TensorFlow Lite. Read the full article: https://stemlabguide.com/what-is-supervised-vs-unsupervised-learning
How to Build Your First Machine Learning Model with Kids: Step-by-Step Guide
By 2026, machine learning skills won't be optional—they'll be expected in virtually every job posting. Yet most schools are still teaching coding fundamentals from a decade ago. This episode tackles a problem many parents don't even realize they have: how do you actually teach your kids to build real ML models that translate to professional skills, not just flashy toys that lead nowhere? Host Rajiv Patel, drawing on fifteen years of enterprise AI experience, walks through exactly what to look for in ML learning platforms and which tools deliver genuine, transferable skills for kids ages 8 and up. Start kids ages 8–10 with visual dataset tools, then transition to Python-based platforms around ages 11–13—and always prioritize systems that export to industry-standard formats like TensorFlow or scikit-learn rather than proprietary ecosystems. Platform choice matters more than most parents realize: tools should teach concepts that transfer to professional workflows, support Python integration, and provide clear pathways from visual block-based learning to actual code. Dataset quality determines model quality, so effective platforms provide both curated datasets (like MNIST or CIFAR-10) and tools for creating custom datasets—kids need to understand data collection, labeling, and bias before training their first model. Entry-level ML education runs fine on standard laptops with 8GB RAM and dual-core processors; cloud-dependent platforms introduce latency and subscription costs, while offline-capable tools offer better learning control. Google Teachable Machine stands out as the fastest path from concept to working model for ages 8–12, offering zero installation friction, TensorFlow export formats for real deployment, and completely free local processing without data collection. Skip platforms that hide model evaluation behind animations—kids need to understand training/validation/test splits, accuracy metrics, and overfitting from the start, as these are fundamental quality controls, not advanced concepts. Read the full article: https://stemlabguide.com/how-to-build-your-first-machine-learning-model-with-kids
AI Project Ideas for Kids by Skill Level: Complete Learning Checklist
When parents search for AI projects for kids, they're usually looking for a quick weekend activity—but that's the wrong approach entirely. This episode maps out a complete skill progression from block-based pattern recognition for seven-year-olds all the way to deploying supervised learning models by age fifteen. Host Rajiv Patel breaks down projects organized by technical capability rather than arbitrary age brackets, following the same learning path he uses with his own children and recommends to hiring managers seeking junior ML engineers. If you're focused on long-term skill acquisition over entertainment value, this roadmap connects childhood projects directly to industry-standard competencies. The beginner tier (ages 7–10) requires no coding at all—physical card sorting games, decision tree board games, and LEGO sorting algorithms teach classification, training data, and feature identification using only paper, markers, and household items. Google's Teachable Machine exports directly to Scratch 3.0, letting kids train image classifiers and integrate them into games—demonstrating the full train-test-deploy cycle without Python syntax barriers. Decision tree board games using "20 questions" mechanics teach surprisingly advanced concepts like tree depth, overfitting, and generalization that map directly to scikit-learn's DecisionTreeClassifier used in production systems. The intermediate tier (ages 10–13) requires Python fundamentals first, with projects averaging 15–20 hours each—including spam filters using Naive Bayes and handwritten digit recognition with the MNIST dataset. A motivated ten-year-old with prior Scratch experience will consistently outpace an unmotivated thirteen-year-old starting cold, which is why the checklist organizes projects by technical capability rather than age. Even early projects like LEGO brick sorting introduce real ML concepts such as multi-variable classification and confusion matrices—measuring how many pieces were misclassified builds intuition for evaluation metrics used in professional workflows. Read the full article: https://stemlabguide.com/ai-project-ideas-for-kids-by-skill-level

What Is Neural Networks for Kids: Simple Explanation with Activities
Ever wondered how to explain the technology behind Siri or facial recognition to your kids without getting lost in jargon? This episode breaks down neural networks in a way that's accessible for families, revealing how these systems learn through practice and mistakes rather than following pre-written instructions. Kazuki Tanaka walks through exactly how neural networks process information, using handwritten digit recognition as a concrete example, and shares how kids can start experimenting with these concepts in a home STEM lab using affordable hardware like a Raspberry Pi. Neural networks don't follow rigid if-then rules like traditional programs—they learn patterns from examples by adjusting the strength of connections between artificial neurons, similar to how your brain recognizes a dog instantly without running through a mental checklist. The architecture consists of three main parts: an input layer that receives raw data (like 784 pixel values from a handwritten digit), hidden layers that process information through weighted connections, and an output layer that produces the final answer. Training happens through backpropagation, where the network makes guesses, measures how wrong they are, then works backward through layers to nudge weights bit by bit—kids can watch accuracy climb from 10% random guessing to 95% in just minutes. You don't need expensive hardware for educational neural network projects—a Raspberry Pi 4 with 4GB RAM running Python and TensorFlow Lite can handle digit recognition without requiring internet connectivity once libraries are installed. Key terms to know include epochs (complete passes through training data), learning rate (how much weights adjust each step), and overfitting (when a network memorizes examples instead of learning general patterns). The fundamental shift from traditional programming is that instead of writing explicit rules, you provide examples and let the system discover its own rules through weight adjustment—this is the core concept kids need to grasp. Read the full article: https://stemlabguide.com/what-is-neural-networks-for-kids
How to Explain Machine Learning to Kids: Age-Appropriate Teaching Methods
Most parents make the mistake of jumping straight into coding tutorials when teaching machine learning, only to watch their kids lose interest within minutes. This episode breaks down why that approach fails and what actually works: building genuine understanding from the ground up through hands-on, age-appropriate methods. Lakshmi Venkataraman walks you through a complete framework for teaching machine learning concepts to children ages 5 through 11+, from physical sorting activities that establish pattern recognition to supervised learning experiments that mirror real data science challenges. Whether you're a parent, teacher, or STEM educator, you'll learn exactly how to make abstract algorithms tangible and engaging. Kids need to understand what computers are actually learning before touching any code—pattern recognition and classification form the essential cognitive foundation that makes machine learning concepts click. A simple physical sorting activity with buttons, LEGO bricks, or toy animals teaches the same core concepts data scientists use: feature extraction and decision boundaries. The teacher-student metaphor transforms machine learning from a mysterious black box into something relatable—the computer is a student learning from labeled examples, making mistakes, and improving over time. Age-appropriate complexity matters: 5-7 year olds work with 2-3 obvious categories, 8-10 year olds handle overlapping features requiring multiple decision points, and 11+ tackle ambiguous cases that introduce confidence scores and error rates. Free tools like Google Teachable Machine provide browser-based, no-installation-required platforms for kids ages 8 and up to experiment with training their own models. Older students can explore real machine learning challenges like training data quality, bias in examples, and overfitting—these aren't oversimplifications but the actual problems engineers solve daily. Read the full article: https://stemlabguide.com/how-to-explain-machine-learning-to-kids

AI Concepts Every Child Should Learn: Essential Skills Checklist
As artificial intelligence reshapes everything from healthcare to entertainment, parents are left wondering what their kids actually need to understand about AI—and when. This episode delivers a practical, age-by-age checklist for building genuine AI literacy, starting with preschoolers and extending through middle school. Dr. Priya Mehta cuts through the hype to focus on real cognitive building blocks, showing you which concepts matter at each developmental stage and how to teach them without defaulting to screens. Pattern recognition is the cognitive foundation for all AI understanding—when your four-year-old sorts blocks by color or predicts what comes next in a sequence, they're building the same skills computers use in classification algorithms and prediction modeling. Physical, tactile learning experiences like sorting shells or building with LEGOs create neural pathways that screen-based activities can't replicate in early childhood, making screen-free approaches especially valuable for foundational concepts. Teaching children that data represents real things—connecting abstract symbols to concrete objects—introduces data abstraction, a cornerstone of computational thinking that prepares them for more advanced AI concepts later. Input-output logic becomes critical between ages six and nine, when children shift from "this happened" to "this happened because"—the causal reasoning at the heart of algorithm design. The frustration of a robot ignoring poorly ordered commands teaches computational precision: children learn that AI systems require unambiguous, logically sequenced instructions and cannot infer intent the way humans do. Simple activities like rolling dice help children grasp probabilistic thinking and randomness, essential concepts for understanding how AI systems handle uncertainty and make predictions without guaranteed outcomes. Read the full article: https://stemlabguide.com/ai-concepts-every-child-should-learn
Python vs Scratch for Teaching AI to Kids: Which Language Is Better?
Choosing the right programming language to teach your child AI can feel overwhelming when one option is colorful and kid-friendly while the other powers real systems at NASA. This episode dives into the Python versus Scratch debate with a parent's perspective, backed by hands-on testing with kids and concrete data on career outcomes. Rajiv Patel breaks down exactly when each language makes sense, what hardware you'll actually need, and the specific age where Scratch stops being helpful and starts holding young learners back. Python aligns with 89% of machine learning job postings according to 2025 Stack Overflow data, while Scratch has zero professional application—meaning a transition to text-based coding becomes inevitable regardless of where your child starts. Scratch's machine learning extensions like ML4Kids run on remote servers with pre-trained models, so children label data and observe results rather than actually building or training neural networks themselves. The architectural gap is significant: Python connects directly to NumPy arrays, tensor operations, and GPU acceleration, while Scratch's visual blocks can't represent concepts like backpropagation or hyperparameter tuning without losing essential meaning. Hardware requirements differ dramatically—Python-based AI education needs at least 8GB of RAM (16GB preferred) for training models, while Scratch runs in a browser on a 2GB tablet but depends on cloud connectivity for ML features. A practical transition timeline emerges from testing: Scratch works beautifully for ages 7–10 to build foundational logic, but by age 11 or 12, children serious about AI need to move to Python to develop employable skills. The real-world skill gap became clear in one family's experience—a child using Scratch ML couldn't explain why training data size affected accuracy, but after switching to Python with a Raspberry Pi, she understood overfitting by watching it happen in TensorBoard logs. Read the full article: https://stemlabguide.com/python-vs-scratch-for-teaching-ai-to-kids
Best AI Learning Kits for Kids: Top Educational Robotics & Coding Tools
When your kid asks how Alexa understands them, that's your cue to move them from AI consumer to AI creator. In this episode, Chloe Miller breaks down what separates genuine machine learning education from flashy toys that just simulate intelligence. After two years of hands-on testing in her workshop, she reveals the specific features that determine whether an AI kit will actually teach your child to train models, recognize patterns, and understand algorithmic ethics—or just collect dust after the novelty wears off. The best AI kits support progressive language transitions, starting with block-based coding like Scratch for foundations, then moving to Python for real machine learning libraries like TensorFlow Lite and scikit-learn—avoid platforms that trap kids in proprietary apps with no pathway to actual data science tools. True AI education means kids create training datasets, label examples, run training cycles, and evaluate model accuracy; a robot that follows a line using sensors isn't teaching machine learning, it's teaching sensor logic. Hardware matters more than marketing suggests—basic Arduino boards can only simulate AI, while kits with ARM Cortex chips or Raspberry Pi 4/5 can actually run TensorFlow Lite models and handle real training workloads. Watch for hidden long-term costs: a $120 kit with a $15/month cloud subscription becomes a $300 investment in year one, and proprietary consumables lock you into a single vendor when standard USB cameras and I2C sensors work just as well. Age ranges on boxes are meaningless without skill milestones—eight to ten-year-olds should train image classifiers visually, eleven to thirteen-year-olds should write Python scripts to adjust hyperparameters, and fourteen-plus need exposure to neural network architecture and bias in training data. Expandability determines whether a kit is a toy or a career investment: look for compatibility with Arduino, Raspberry Pi, and open-source hardware so kids can deploy trained models to robots, sensors, or home automation systems. Read the full article: https://stemlabguide.com/best-ai-learning-kits-for-kids
How to Teach Kids AI & Machine Learning: Complete Parent's Guide
Your child's phone can recognize faces, understand speech, and recommend videos—but these aren't just features, they're teachable skills that kids as young as third grade can learn to build themselves. In this episode, Lakshmi Venkataraman breaks down exactly how parents can guide their children through AI and machine learning concepts without needing a computer science background. Whether you're wondering where to start or how to make these abstract ideas concrete, this guide walks you through age-appropriate approaches, specific tools, and learning paths that build real understanding. The most important mindset shift in AI education is moving kids from passive consumers ("my phone does this cool thing") to active investigators who understand the underlying logic and can build similar systems themselves. Machine learning doesn't mean computers think like humans—it's a pattern recognition process where systems learn from thousands of examples rather than being explicitly programmed step by step. The training process works through an iterative cycle: the system makes predictions, checks them against correct answers, calculates errors, and adjusts its parameters—repeating this millions of times until predictions become accurate. Google's Teachable Machine is a free, browser-based tool that lets kids train image classifiers using their webcam in under five minutes, making the connection between training data and model behavior visceral rather than theoretical. AI accuracy depends entirely on the quality and representativeness of training data—which creates natural opportunities for discussing AI bias and limitations with children. Breaking the misconception that AI has consciousness or human-like understanding early on matters enormously for building accurate comprehension of how these systems actually work. Read the full article: https://stemlabguide.com/how-to-teach-kids-ai-machine-learning
How to Teach Kids 3D Design Skills with Tinkercad and Fusion 360
Your kid already thinks in 3D every time they play Minecraft or Roblox—so why not channel that spatial intuition into real engineering skills? This episode walks you through a structured 12-to-16-week curriculum that takes children from dragging shapes in a browser to building dimensionally accurate, manufacturable models in industry-standard CAD software. Whether you're a parent, educator, or makerspace leader, you'll learn exactly how to progress learners from Tinkercad's accessible block modeling to Fusion 360's parametric workflows—the same tools used in professional product design. Before opening any software, have kids sketch orthographic projections of physical objects with measurements—this 30-minute exercise reveals whether they're ready for CAD and prevents weeks of frustration later. Tinkercad's lack of parametric history is actually a useful teaching tool; the frustration of manually updating every dimension motivates learners to embrace Fusion 360's timeline-based approach. Hardware matters more than you might think: a three-button mouse is essential for parametric modeling, and 16GB of RAM significantly improves the Fusion 360 experience. Start Tinkercad sessions by ignoring the built-in tutorials, which emphasize artistic expression over engineering discipline—instead, begin with a precise 20mm calibration cube to establish that every dimension should be intentional. Building a reference library of five measured objects using digital calipers creates ready-made validation exercises for later, mirroring real reverse-engineering workflows in product design careers. Fusion 360's core advantage comes down to one feature: edit any step in the parametric timeline and watch downstream operations update automatically, eliminating the manual propagation headaches of simpler tools. Read the full article: https://stemlabguide.com/how-to-teach-kids-3d-design-skills-with-tinkercad-and-fusion-360
Everything You Need to Set Up a Kids 3D Printing Station: Complete Checklist
So you bought a 3D printer for your kid, tore open the box with excitement, and then watched the first print turn into a tangled mess of plastic spaghetti. You're not alone—and the printer itself is only one piece of a much larger puzzle. In this episode, Kazuki Tanaka draws on his experience building eleven 3D printing stations across makerspaces and home workshops to walk you through the complete checklist for getting it right the first time. Whether you're a parent setting up a creative learning space or an educator launching a makerspace program, this guide covers the safety requirements, hardware decisions, software progression, and ongoing costs that most setup guides completely ignore. Active ventilation is essential even for PLA filament—a six-inch inline duct fan rated for 100+ CFM costs around forty dollars and makes a measurable difference in air quality, since all 3D printing releases ultrafine particles. Temperature stability matters more than you'd think: keep your printing area between 65–80°F with minimal drafts, because a single AC vent or open window can warp a four-hour print at hour three. For kids under twelve or homes with curious pets, enclosed printers like the Flashforge Adventurer 5M Pro are worth the extra cost for built-in HEPA filtration and protection from hot components. The software learning path should progress from Tinkercad (free, browser-based, works on any device) to Fusion 360's free student license, mirroring the actual skills mechanical engineers use daily. Budget realistically: expect $400–$900 for initial setup including the printer, then $20–$30 monthly for filament during active use—and store that filament in airtight containers with desiccant to prevent moisture damage. Fire safety is non-negotiable—keep a Type ABC extinguisher within ten feet and install a smoke detector directly above the printer, not across the room. Read the full article: https://stemlabguide.com/everything-you-need-to-set-up-a-kids-3d-printing-station
Understanding 3D Printer Filament Types: PLA, ABS, and PETG for Young Makers
Ever watched a kid's enthusiasm deflate after their 3D print warped into a useless blob halfway through? The culprit usually isn't the printer or the design—it's the filament choice. This episode breaks down the three most common 3D printer materials—PLA, ABS, and PETG—through the lens of what actually matters for young makers: safety requirements, skill progression, and building real engineering intuition that transfers to future careers. PLA delivers 95 percent-plus first-print success rates and requires no ventilation, making it ideal for beginners and classroom environments, but it becomes brittle under sustained loads or temperatures above 60 degrees Celsius. ABS contracts nearly double the rate of PLA during cooling (0.8 to 1.0 percent), which explains why prints warp and lift off the bed—solving this requires heated beds at 90 to 110 degrees and draft-free enclosures. PETG bridges PLA's ease of use with ABS's durability, offering chemical resistance to oils and weak acids plus outdoor UV tolerance, but its hygroscopic nature means moisture absorption will ruin prints if filament isn't stored with desiccants. The temperature variables young makers adjust—nozzle heat, bed temperature, cooling rates—mirror actual process control parameters used in injection molding and manufacturing engineering careers. Layer adhesion works differently across materials: PLA relies on mechanical interlocking, ABS achieves solvent-like welding between layers, and PETG balances both mechanisms—explaining why PLA splits along layer lines while ABS bends before breaking. Starting with PLA builds confidence, but progressing to ABS and PETG teaches thermal management and material science fundamentals that easy-to-print materials never reveal. Read the full article: https://stemlabguide.com/understanding-3d-printer-filament-types
How to Choose Your First 3D Printer for Teen STEM Projects
Most parents spend hundreds of dollars on a 3D printer only to watch it collect dust after a few prints—not because their teen lost interest, but because the machine wasn't matched to an actual learning path. In this episode, Rajiv Patel draws on over fifteen years of additive manufacturing experience to break down exactly what matters when choosing a first printer for teens aged thirteen to eighteen. Whether you're a parent or educator, you'll learn how to evaluate build volume, print quality specs, and workspace requirements to ensure this investment builds real CAD-to-prototyping skills rather than becoming an expensive paperweight. The sweet spot for build volume is 220 by 220 by 250 millimeters—this handles 94% of educational and hobby projects without the frustrating heat-up times and calibration complexity of larger machines that actually discourage iterative learning. Layer height marketing is mostly noise; 0.2mm layers offer the ideal balance for beginners, providing visible learning opportunities and reasonable print times while being forgiving of early calibration mistakes. Additive manufacturing technician roles are projected to grow 23% through 2030 with median salaries exceeding $58,000, making FDM printing fundamentals directly transferable to mechanical engineering and product design careers. Your workspace needs more planning than you might expect: a dedicated 15-amp circuit, stable surface rated for 15–25 pounds, and ventilation meeting at least half an air change per hour (with HEPA filtration recommended for ABS printing). Direct drive extruders outperform Bowden systems when it comes to handling flexible filaments like TPU, while lead screw Z-axis systems provide better layer consistency than belt-driven alternatives. Before buying, measure your teen's actual project ideas with calipers—if 90% fit within 200 cubic millimeters, paying for 300mm capability wastes money and adds unnecessary complexity. Read the full article: https://stemlabguide.com/how-to-choose-your-first-3d-printer-for-teen-stem-projects

Complete 3D Printer Safety Checklist for Kids and Teens
Whether you're setting up a 3D printer for your child's first project or managing a school makerspace, knowing which safety concerns actually matter—and which are overblown—can be the difference between confident supervision and constant anxiety. In this episode, fabrication lab consultant Kazuki Tanaka shares the exact safety framework he uses when auditing makerspaces for insurance compliance, drawing from eight years of experience supervising kids as young as eight. You'll learn how to set up your workspace, choose the right equipment, and establish protocols that prevent the injuries that actually happen in real printing environments. Your workspace setup determines roughly 80 percent of safety outcomes—place printers on stable, heat-resistant surfaces with at least 15 centimeters of clearance on all sides and one meter minimum from anything flammable. For children ages 8–12, position the printer so the build plate sits at chest level, which prevents them from reaching over hot components like the nozzle and heated bed. Enclosed printers are strongly recommended for makers under 14 or those prone to distraction, as enclosures physically prevent fingers from reaching moving belts, hot nozzles, or the build plate mid-print. Every printer should have a physical emergency stop button that users can locate and press with their eyes closed—building muscle memory before the first print matters when someone gets startled. Most 3D printing injuries are minor burns from touching hot nozzles or pinched skin from moving parts, so keep a basic first aid kit with burn gel and tweezers within arm's reach. Configure slicer software with maximum temperature limits appropriate for each filament type—for PLA, cap the hot end at 220°C and the bed at 70°C to prevent inexperienced users from accidentally overheating materials. Read the full article: https://stemlabguide.com/complete-3d-printer-safety-checklist-for-kids-and-teens
What Is FDM 3D Printing: Technology Explained for Young Learners
The same 3D printing technology that aerospace companies use to manufacture jet engine components is now accessible enough for kids to use in their bedrooms. In this episode, Rajiv Patel breaks down FDM 3D printing—what it is, how it works, and why it's become the most practical entry point for young learners exploring additive manufacturing. Whether you're a parent setting up a home STEM lab or an educator looking to introduce real manufacturing workflows, this episode answers the essential question: what do kids actually need to know about FDM technology to build genuine engineering skills? FDM (Fused Deposition Modeling) builds objects by extruding melted plastic filament layer by layer, making it fundamentally different from resin or powder-based 3D printing methods that require more complex safety precautions and material handling. The technology became affordable for education after key patents expired in 2009, driving printer costs from over $15,000 down to under $300 for capable educational models. The FDM workflow follows four stages—design, slicing, printing, and post-processing—giving young learners hands-on experience with the same CAD-to-physical process used in professional engineering firms. Slicing software is where real engineering decisions happen: students learn to balance trade-offs between layer height, infill density, print speed, and structural strength, then observe the consequences when parts fail under stress. PLA filament is ideal for young learners because it prints at lower temperatures (190–220°C), requires no heated enclosure, and eliminates many safety concerns present with materials like ABS. Skills gained from FDM printing—tool path planning, iterative design thinking, and dimensional accuracy—appear directly in job descriptions for mechanical engineering, product design, and manufacturing roles. Read the full article: https://stemlabguide.com/what-is-fdm-3d-printing
Enclosed vs Open Frame 3D Printers for Kids: Safety and Performance Compared
Choosing a 3D printer for your child involves more than just comparing price tags—it's a decision that affects their safety, learning trajectory, and the skills they'll carry into future maker projects. This episode dives into the real differences between enclosed and open-frame 3D printers based on over 800 hours of observation with young learners ages 8 to 17. Whether you're a parent setting up a home workshop or an educator outfitting a makerspace, you'll discover which design actually matches your supervision capacity, material needs, and long-term educational goals. Enclosed printers offer HEPA filtration, finger guards, and automatic door shutoffs, allowing parents to leave the room during prints—but this protection can create a false sense of safety that limits hazard awareness development. Open-frame printers require constant supervision for kids under 13, yet learners using them diagnosed bed adhesion failures 40% faster than those on enclosed machines because they could see problems as they happened. Material choice should drive your decision: PLA works safely on either design, but ABS and PETG require enclosed printers with filtration—open-frame ABS printing spiked formaldehyde levels to 8x higher than the same print in an enclosed machine. Thermal stability dramatically affects print success, with enclosed printers showing only 5–8°C temperature variance compared to 12–15°C swings on open frames, resulting in 35% fewer warp failures. Budget differences are significant—youth-appropriate enclosed models run $350–$900 while comparable open-frame printers cost $200–$500, though consumable costs remain identical. Each design builds different career-relevant skills: enclosed printers mirror industrial Stratasys and Ultimaker systems used in prototyping careers, while open frames teach mechanics-first troubleshooting that transfers to advanced CoreXY builds. Read the full article: https://stemlabguide.com/enclosed-vs-open-frame-3d-printers-for-kids
Best Beginner 3D Printers for Elementary School Students
When your kid graduates from crayons to Tinkercad and starts designing articulated robot arms, suddenly you need a real 3D printer—but the market is flooded with machines that either lack essential safety features or require technical troubleshooting far beyond elementary capabilities. This episode breaks down what actually matters when choosing a 3D printer for kids ages six to twelve, based on testing seventeen models against real-world household conditions. You'll learn which specifications enable independent operation and which marketing claims to ignore entirely. Build volumes of 100–150mm cubed hit the sweet spot for elementary projects—kids ages six to nine rarely design objects over 120mm and lose patience with prints longer than eight hours, making massive build plates counterproductive. Enclosed printers allow limited unsupervised operation once kids learn verification protocols, while open-frame machines require constant adult presence due to 200°C print heads and curious sibling risk factors. Software progression matters more than raw features—look for three-tier interfaces that start with one-button simplicity for early grades and scale to full parameter control by grade six, mirroring professional CAD-to-manufacturing pipelines. Proprietary filament systems with RFID-chipped cartridges inflate annual costs by $120–180 compared to printers accepting standard 1.75mm PLA from any manufacturer, based on typical elementary consumption of half a kilogram monthly. Automatic bed leveling eliminates the failure mode responsible for 60–70% of beginner frustration—manual systems universally failed tests where kids ages seven to eleven attempted independent print initiation after deliberate de-leveling. Hidden software subscriptions can inflate total ownership costs well beyond the purchase price, so prioritize models offering lifetime slicing tool access over annual licensing schemes. Read the full article: https://stemlabguide.com/best-beginner-3d-printers-for-elementary-school-students
Creality Ender 3 vs Flashforge Adventurer: Which 3D Printer Is Better for Teens
Choosing a 3D printer for a teenager isn't just about specs—it's about what skills they'll actually develop. This episode dives into hundreds of hours of real workshop data comparing the Creality Ender 3 V3 SE and Flashforge Adventurer 5M, revealing which machine builds genuine fabrication skills and which one prioritizes faster results. If you're a parent or educator trying to decide between a budget-friendly option that demands troubleshooting and a pricier enclosed printer that "just works," this breakdown challenges the conventional advice you'll find elsewhere. The Ender 3's assembly process serves as a skill checkpoint—teens who complete it demonstrate spatial reasoning and mechanical aptitude, while those who bail often won't maintain the machine long-term. The Ender 3 teaches manual calibration, g-code literacy, and hardware troubleshooting that transfers directly to industry tools, while the Adventurer 5M focuses on CAD-to-print workflow and rapid design iteration. A hidden design flaw in the Ender 3's cooling fan shroud causes curling on steep overhangs, requiring teens to successfully print a replacement part before they can fix the printer's weakness—frustrating circular logic for beginners. The Adventurer 5M's proprietary filament cartridge system locks users into Flashforge's ecosystem at $25–30 per kilogram versus $15–20 for generic PLA, and hacking standard spools voids the warranty. Software matters significantly: the Ender 3 works with industry-standard Cura and PrusaSlicer offering full g-code control, while the Adventurer uses proprietary FlashPrint with limited third-party support. The cheaper printer may cost more long-term through upgrades and time investment, but that "frustration tax" might be exactly what builds transferable technical skills. Read the full article: https://stemlabguide.com/creality-ender-3-vs-flashforge-adventurer
Best Budget 3D Printers for Kids Under $300
Budget 3D printers have reached a turning point—machines under $300 now deliver capabilities that cost thousands just five years ago. But with massive quality differences hiding in that narrow price band, how do you choose one that actually builds skills rather than becoming a closet ornament? Host Kazuki Tanaka breaks down findings from over 200 hours of hands-on testing with seven different models, revealing which printers help kids persist through the learning curve and which ones create more frustration than inspiration. Auto-leveling systems add $40–60 to manufacturing costs but are worth every cent for young users—three failed prints in a row from bed leveling issues is the fastest way to kill a kid's interest in 3D printing. Enclosed printers are essential for unsupervised use with elementary-age children, preventing burns and containing fumes, while open-frame designs teach more about mechanics but shouldn't be used independently until around age thirteen. Proprietary slicers and filament requirements trap users in vendor ecosystems and inflate ongoing costs by 2–3x—starting kids on industry-standard software like Cura means they're learning the same tools aerospace engineers use. Most budget machines reliably print PLA at $15–20 per kilogram, but claims of PETG and ABS compatibility often fall short because sub-$300 hotends struggle with temperature stability above 240°C. SD card file transfer beats WiFi printing for educational settings despite feeling old-school—it's more reliable and forces kids to learn file management skills that mirror professional manufacturing workflows. The Creality Ender 3 V3 SE emerges as a top pick for teens, offering auto-leveling, direct drive extrusion for flexible filaments, and unmatched community support where every problem has already been solved and documented online. Read the full article: https://stemlabguide.com/best-budget-3d-printers-for-kids-under-300
Best 3D Printers for Kids and Teens: Complete Buyer's Guide for Educational STEM Learning
Most parents shopping for a kid-friendly 3D printer end up with an expensive paperweight that teaches nothing but frustration. In this episode, Rajiv Patel draws on eight years of experience watching which machines actually produce students who land engineering internships with real skills. He breaks down the critical differences between printers marketed to families and those that build genuinely employable competencies—covering everything from CAD workflows to the hands-on troubleshooting that mirrors professional product development. The best educational 3D printers share three traits: minimal troubleshooting that derails learning, compatibility with industry-standard CAD software, and durability to survive repeated failures during skill building. Open-frame printers frustrate beginners more than enclosed systems, but they teach root-cause analysis—a higher-value skill in today's hiring market than simply clicking "Print" on a black-box machine. The real learning objective isn't the printed object itself; it's the iterative cycle of modeling in CAD, optimizing slicer settings, diagnosing failures, and adjusting parameters—the same loop used in professional product development. First-layer adhesion determines print success more than any other variable, requiring bed leveling accurate to 0.05 millimeters—and manually adjusting this builds mechanical intuition that transfers to real engineering work. Understanding slicer parameters like layer height, infill density, and print speed teaches applied physics and manufacturing tradeoffs: strength versus material cost, speed versus surface quality, complexity versus failure risk. Common failure modes like warping, stringing, and clogging each have multiple potential causes, turning every failed print into a scientific method exercise of hypothesis testing and controlled variable experimentation. Read the full article: https://stemlabguide.com/best-3d-printers-for-kids-and-teens
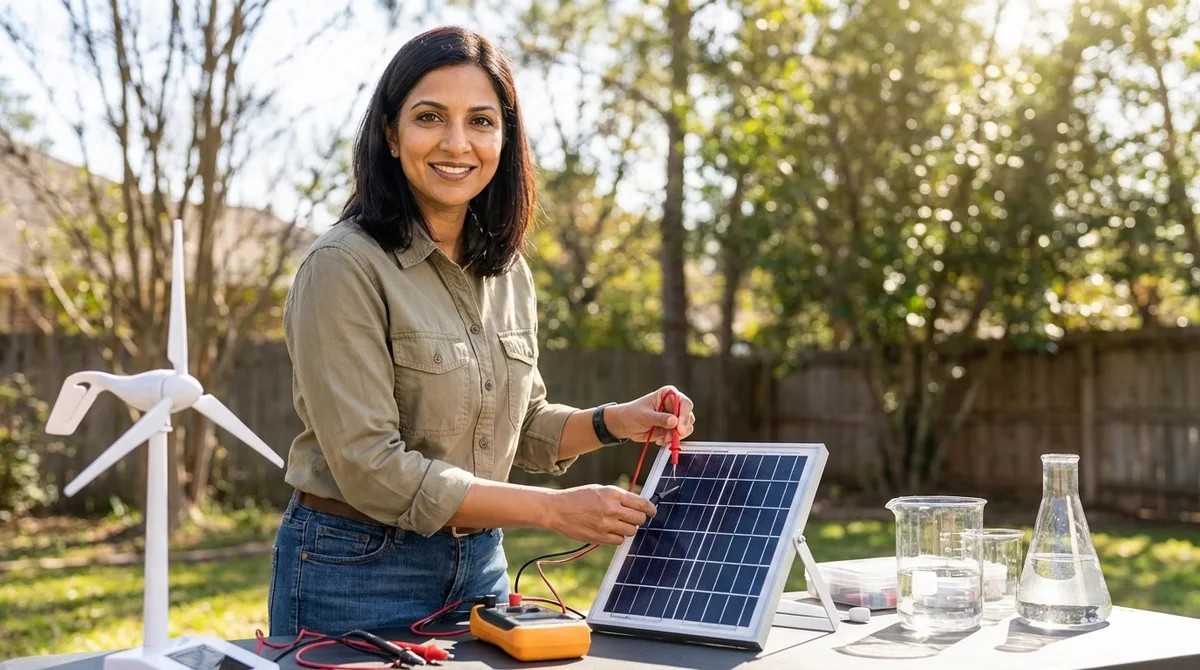
How to Measure Solar Panel Efficiency in Science Projects
Most science fair projects involving solar panels fail before they even begin—because students measure voltage alone and call it efficiency. In this episode, Lakshmi Venkataraman breaks down the complete process for accurately measuring solar panel efficiency, from understanding the real formula to setting up proper circuits and documenting results like a professional engineer. Whether you're a middle school student tackling an NGSS-aligned project or an educator guiding hands-on energy investigations, this guide transforms a simple demonstration into authentic scientific inquiry. You'll learn why you need both voltage and current, how to calculate light power input, and what efficiency percentages you should actually expect from educational panels. Voltage measurements alone tell you almost nothing about efficiency—you need both voltage and current under load conditions to calculate electrical power output using P = V × I. Solar panel efficiency is calculated by dividing electrical power output by light power input, then multiplying by 100; light power input requires knowing both light intensity (watts per square meter) and your panel's surface area. Always measure the active photovoltaic surface area, not the plastic or metal frame—and photograph your panel next to the ruler immediately to prevent measurement errors that propagate through all your calculations. Educational solar panels typically perform in the 5–15% efficiency range, while commercial silicon panels achieve 15–22%—this gap creates valuable discussion opportunities about real versus theoretical performance. Your equipment list should include a digital multimeter, a resistive load (10–100 ohm resistor, small DC motor, or LED), a light source with known wattage, and a lux meter or smartphone app to measure light intensity. Optional additions like a protractor for angle testing, neutral density filters to simulate clouds, or an infrared thermometer for temperature variables can elevate a basic project into a multi-variable engineering investigation. Read the full article: https://stemlabguide.com/how-to-measure-solar-panel-efficiency-in-science-projects
Everything You Need for a Renewable Energy Science Experiment
Ever watched a kid's excitement deflate when their solar panel spins a motor but they can't explain *why* or measure *what's happening*? This episode breaks down exactly what supplies you need to transform a basic renewable energy demo into a real science experiment with variables, data, and genuine learning. Host Lakshmi Venkataraman draws on years of classroom experience to walk you through every category of equipment—from energy-generation components to measurement tools—so you can set up your child for actual scientific inquiry, not just a cool-looking display. Small solar panels with exposed terminals (rather than pre-wired connections) force students to build circuits themselves, which teaches fundamentals that plug-and-play kits skip entirely. DC hobby motors do double duty: they consume energy when powered by solar panels and *generate* energy when spun by wind or hand, demonstrating energy conversion reversibility in one cheap component. Different colored LEDs light up at different voltage thresholds (red at ~1.8V, blue/white at ~3V), giving you a built-in visual experiment for comparing power output without extra equipment. Hand-crank generators create a kinesthetic connection to energy production—students physically feel the resistance increase as they power a load, making abstract concepts concrete. NiMH rechargeable batteries are safer and more forgiving than lithium-ion for student experiments, though charging times can stretch to hours or days, which disrupts immediate feedback loops. The critical shift from demonstration to experiment happens when you add measurement tools like digital multimeters—without data collection, students are just watching things spin instead of doing science. Read the full article: https://stemlabguide.com/everything-you-need-for-a-renewable-energy-science-experiment

Solar vs Wind Energy Projects: Which STEM Kit Is Better for Learning?
Standing in the store aisle with two renewable energy kits in hand, most parents ask the wrong question—they wonder which technology is greener when they should be asking which learning path fits their child's brain. This episode breaks down the fundamental difference between solar and wind STEM kits: solar teaches electrical engineering (circuits, voltage, semiconductors) while wind teaches mechanical engineering (aerodynamics, gear ratios, structural loads). Host Chloe Miller shares hands-on testing insights from her own lab, including turbine blades that shattered in Pacific Northwest wind and solar panels coaxed to work under Seattle drizzle, to help you choose the kit that builds skills that actually stick. Solar and wind kits aren't interchangeable—they develop completely different engineering skill sets, with solar focusing on circuit design and electrical troubleshooting while wind emphasizes mechanical problem-solving and material selection. Solar kits offer immediate feedback that's ideal for younger learners (light hits panel, motor spins), but the real educational value comes when something fails and kids must isolate variables to diagnose problems. Skill progression matters more than kit complexity: beginners (ages 6–9) learn cause-and-effect, intermediate learners (10–13) tackle series versus parallel wiring and multimeter use, and advanced students (14+) build Arduino-based charge controllers using the same logic found in EV battery management systems. Budget solar kits often ship with underpowered panels (under half a watt) that barely light an LED—look for at least one to two watts per panel and check the spec sheet rather than trusting marketing claims. For indoor testing, you'll need at least a 100-watt incandescent or LED grow light to generate meaningful power from educational solar panels. Durability is a real concern: solar panels crack easily under impact, and junction boxes with weak solder joints are common failure points in cheaper kits—households with kids under eight should enforce strict handling rules. Read the full article: https://stemlabguide.com/solar-vs-wind-energy-projects
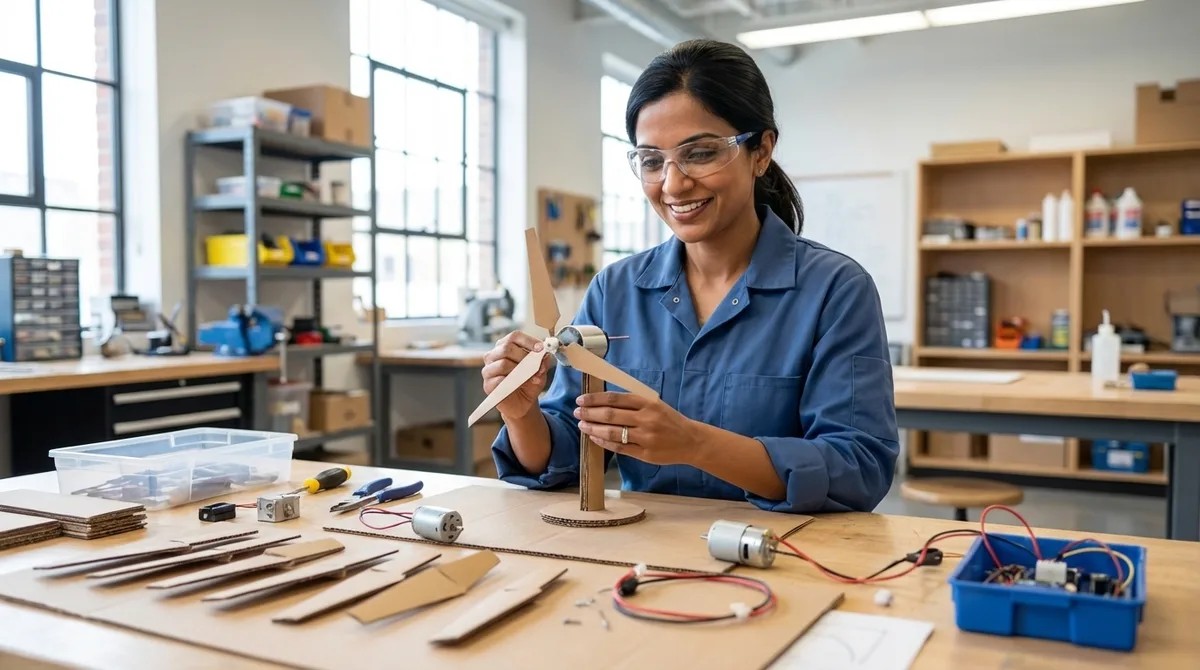
How to Create a Wind Turbine Science Project Step-by-Step
Most kids assume flat blades catch the most wind—and that's exactly why their turbines barely spin. In this episode, Lakshmi Venkataraman walks you through a classroom-tested blueprint for building a wind turbine that actually works, lights an LED, and teaches real energy conversion principles. Designed for upper elementary through middle school students (grades 4–8), this project goes far beyond craft time to introduce iterative engineering thinking used in actual renewable energy careers. If you've ever wanted to turn a science fair project into a genuine learning experience about clean energy, this is your starting point. Blade pitch angle—not surface area—determines how efficiently a turbine captures wind energy; a 10–20 degree pitch with an airfoil shape generates lift and maximizes rotational force, which is why flat blades underperform. Material choice significantly impacts durability and testing accuracy: cardstock warps in humidity, thin balsa wood survives dozens of trials, and 3D-printed PLA blades allow rapid iteration just like real engineering teams use. The turbine hub requires precise 120-degree blade spacing to prevent wobble; imbalanced blades waste kinetic energy and undermine the mechanical efficiency lesson. A small DC hobby motor (1.5–6V, 300–1000 RPM) functions as your generator, converting rotational kinetic energy into electrical output measurable with a basic multimeter. Standardized components like LEGO Technic connectors reduce confounding variables when running comparative tests across multiple blade designs. Optional enhancements including wind tunnels, Arduino-based data logging, and 3D printer access can elevate this from a demonstration into a rigorous experimental investigation suitable for high school physics. Read the full article: https://stemlabguide.com/how-to-create-a-wind-turbine-science-project-step-by-step
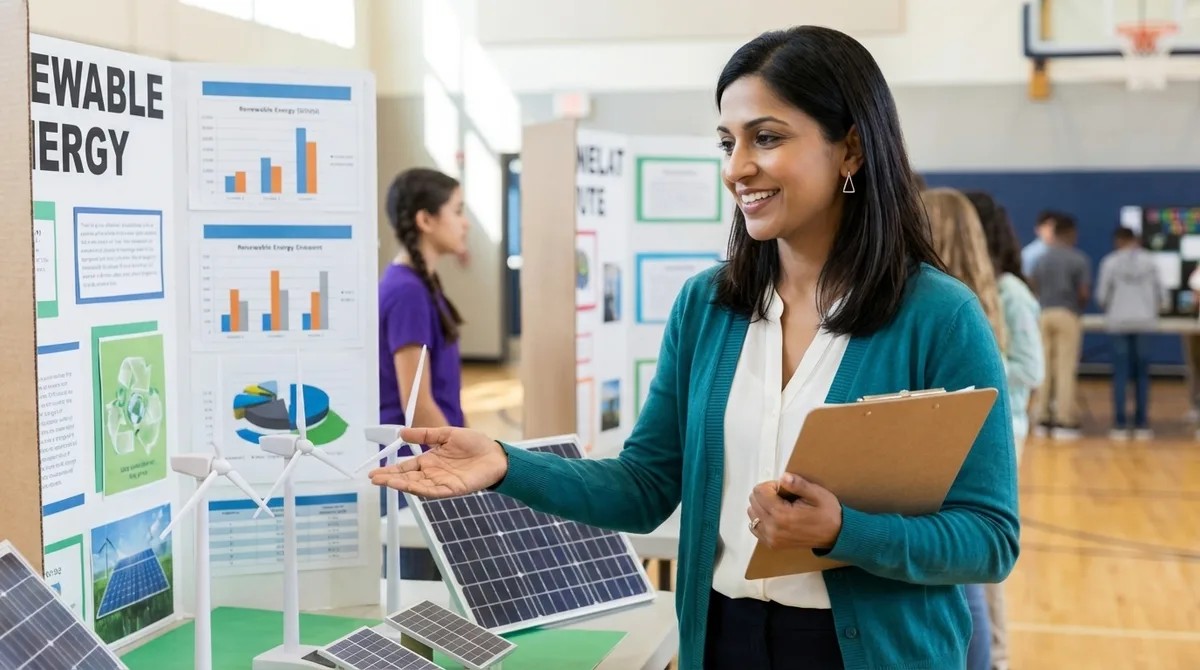
Renewable Energy Science Fair Projects Checklist: Planning to Presentation
Ever started a science fair project with excitement only to find yourself scrambling three days before the deadline? Renewable energy projects are especially prone to this pattern because they involve equipment delivery times, technical compatibility issues, and measurement protocols that most students don't anticipate. This episode walks through the complete workflow for renewable energy science fair projects—from narrowing your concept to a single measurable question, through lab setup specifications, to presentation elements that actually satisfy judging rubrics. Whether you're a student tackling solar, wind, or another renewable source, or a parent helping guide the process, this checklist approach prevents the common pitfalls that derail otherwise promising projects. Narrow your focus to one energy type and one measurable question—"Which blade angle produces maximum voltage?" beats "How does wind energy work?" because specificity drives every supply purchase and data point you'll collect. Research industry-standard measurement protocols before building anything; calculating solar panel efficiency requires understanding power output divided by solar irradiance multiplied by panel area, not just shining a flashlight and observing results. Map your timeline backward from the fair date, building in at least four to six weeks and accounting for equipment delivery delays and the learning curve on assembly—brilliant projects collapse when students assume components arrive overnight. Solar projects need artificial lighting with known lumen output rather than natural sunlight, which introduces too many variables; wind projects require open testing space away from wall interference for reliable measurements. Consider hybrid approaches for first-time projects: use a pre-engineered kit for the core energy generation component to ensure consistent variables, then design your own testing apparatus around it to demonstrate authentic problem-solving. Define success criteria beyond "it works"—establish your dependent variable (voltage, current, efficiency), independent variable (blade count, panel angle), and controlled variables (light intensity, temperature) before collecting any data. Read the full article: https://stemlabguide.com/renewable-energy-science-fair-projects-checklist
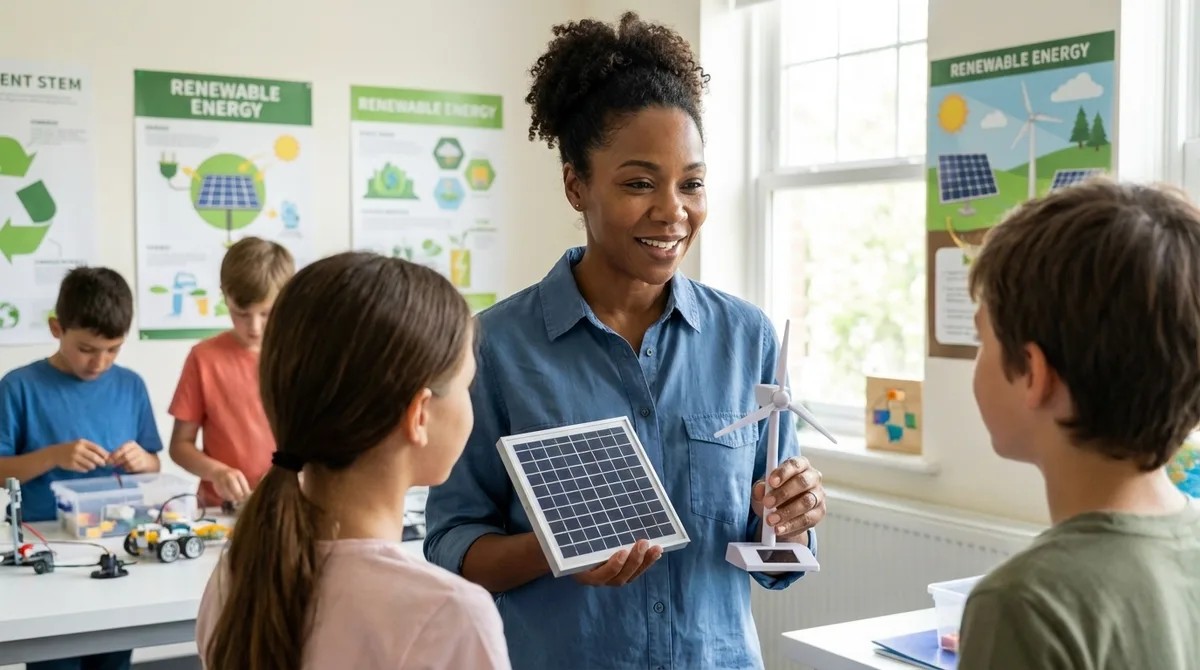
What Is Renewable Energy for Kids: A STEM Learning Guide
When your child asks why we can't just run cars on sunshine, they're not just being curious—they're asking the question that will define their generation's biggest challenges. This episode breaks down renewable energy in terms that make sense for young learners while giving parents the framework to turn those questions into real hands-on STEM projects. Host Chloe Miller explains how solar, wind, hydro, and other renewable sources actually work, why they matter for your child's future, and how building working energy systems transforms vague climate anxiety into genuine scientific understanding. Renewable energy comes from sources that replenish faster than we use them—sun, wind, water, geothermal heat, and organic matter—unlike fossil fuels that took millions of years to form and release stored carbon when burned. Solar panels work through the photovoltaic effect: photons knock electrons loose in silicon cells, creating electrical current that kids can measure with a multimeter and graph across different times of day, replicating real solar installer site assessments. Wind turbines demonstrate electromagnetic induction, where spinning magnets create changing magnetic fields that induce current in copper coils—the same principle powering every commercial power plant on Earth. Hands-on projects teach blade pitch optimization, flow rate calculations, and energy conversion efficiency—concepts that directly mirror the siting studies conducted before installing million-dollar commercial installations. Every renewable source faces intermittency challenges (no sun at night, fluctuating wind speeds, seasonal water flow), which is why understanding battery storage and grid integration matters as much as understanding the energy capture itself. Early exposure to renewable energy as a design challenge rather than a lecture topic builds scaffolding for careers in electrical engineering, environmental science, materials science, and energy policy—fields with urgent, well-funded problems waiting for solutions. Read the full article: https://stemlabguide.com/what-is-renewable-energy-for-kids
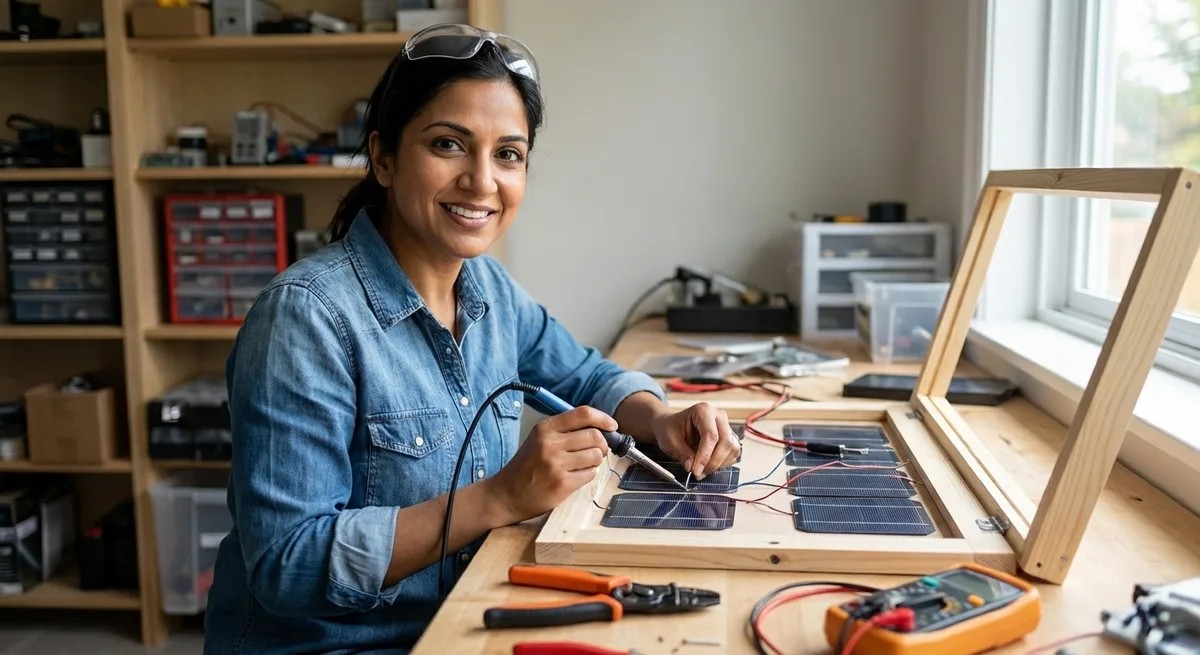
How to Build a Solar Panel Science Project from Scratch
Ever wondered if you could actually build a working solar panel at home without expensive equipment or an engineering degree? In this episode, Lakshmi Venkataraman walks you through creating a functional cuprous oxide solar cell using copper sheets, table salt, and basic household tools. Perfect for students ages 10 and up, parents, and educators looking for a meaningful hands-on science project, this guide demystifies the same photoelectric principles that Einstein won his Nobel Prize explaining—and that power industrial solar farms today. You can build a working solar cell on your kitchen table in 3-4 hours using copper flashing sheets, non-iodized table salt, and common household items—no specialized equipment required. The homemade cuprous oxide cell operates on identical photoelectric principles as commercial silicon panels, generating 0.1 to 0.3 volts per cell in full sunlight, enough to power small DC motors or LEDs. Solar panels don't store energy—they convert light directly into electrical current in real time, which is why your panel's output will fluctuate with changing light intensity. Surface preparation is critical for success: any oxidation, oils, or contaminants on your copper sheets create resistance barriers that reduce cell efficiency, mirroring the purity standards used in industrial solar manufacturing. This project teaches foundational physics concepts including voltage-current relationships, semiconductor behavior, and band gap energy—terms students will encounter again in high school chemistry and college material science courses. Adult supervision is required for the heating elements and sharp tools involved, making this an ideal collaborative project for families or classroom settings. Read the full article: https://stemlabguide.com/how-to-build-a-solar-panel-science-project-from-scratch
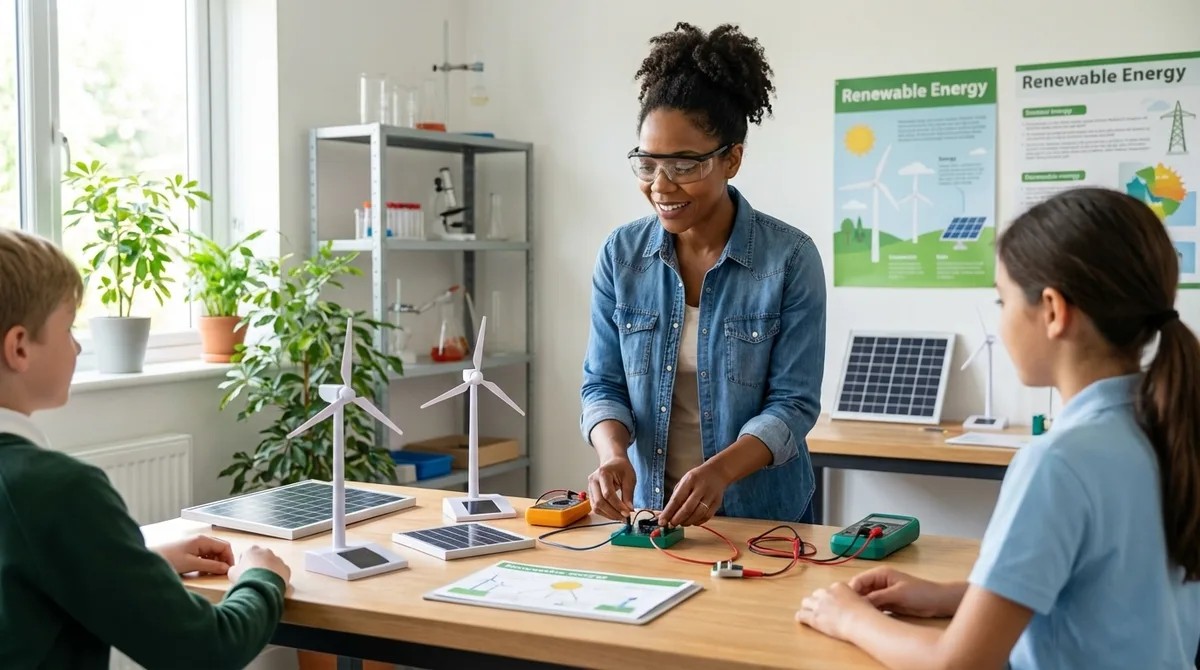
Top 7 Renewable Energy Lab Kits for STEM Education
Most renewable energy kits marketed toward kids are little more than toy circuits that light up an LED and call it learning. In this episode, Chloe Miller breaks down seven lab kits that actually teach the systems thinking and engineering principles behind real-world power generation. After six months of hands-on testing with calibrated multimeters and hundreds of assembly cycles, she reveals which kits genuinely prepare learners for careers in clean energy—and which ones waste your money. Whether you're a parent, educator, or STEM program coordinator, this guide cuts through the marketing hype to find tools that bridge the gap between classroom experiments and grid-scale problem solving. The Horizon Renewable Energy Science Education Set packs six functional energy systems into one platform, including a hydrogen fuel cell module that produces and stores actual gas—the same principle powering today's heavy-duty fuel cell trucks. Hydrogen fuel cells are seeing massive investment in transportation and grid storage, making early exposure to their efficiency limitations and safety requirements valuable career preparation for engineering programs. The Thames and Kosmos kit offers 125 experiments and a curriculum manual that doesn't shy away from hard truths, like why solar alone can't power a city and what role baseload generation plays in grid stability. Solar panel output drops dramatically in indirect light, so basement labs or cloudy climates like the Pacific Northwest require a 100-watt-plus halogen lamp for realistic experiments. Fuel cell membranes in some kits degrade after 40–50 cycles with no replacement parts available, so plan to complete those experiments in concentrated sessions rather than spreading them over months. The included voltmeters and ammeters in most kits have low precision (±5% accuracy), but they're sufficient for comparative experiments that teach core concepts like energy conversion efficiency and load balancing. Read the full article: https://stemlabguide.com/top-7-renewable-energy-lab-kits-for-stem-education

Best Wind Energy Science Project Kits for Students
Most wind energy kits teach kids how to assemble a spinning turbine—but not how energy actually converts from motion to electricity. In this episode, Lakshmi Venkataraman breaks down what separates genuine STEM learning tools from decorative science fair props, helping parents and educators choose kits that build real engineering thinking. Whether you're preparing for a science fair or looking to deepen a student's understanding of renewable energy principles, this guide covers the technical specs, skill progression, and data integration features that actually matter. The KidWind Basic Wind Experiment Kit offers the most comprehensive learning progression with industry-standard multimeter integration, while Thames & Kosmos Wind Power 2.0 provides the strongest bridge to real-world turbine engineering for older students. Effective kits scaffold learning in a specific sequence: mechanical energy capture, rotational dynamics, energy conversion, and finally electrical generation with measurable output—not just "build and watch it spin." Look for kits offering at least three to four blade configurations, adjustable mounting angles, and interchangeable generator components so students can isolate variables and test hypotheses rather than follow a single predetermined build. Without a multimeter to measure voltage and amperage changes based on design modifications, students are stuck making subjective observations instead of building the quantitative analysis skills needed for real STEM work. For middle and high school students with basic coding exposure, kits that integrate with Arduino IDE or MicroPython environments allow for data logging, graphing performance over time, and systematic iteration testing. Durability matters more than you'd expect—look for metal generator housings, reinforced blade mounts, and availability of replacement parts, as the best kits support ten to fifteen build cycles with different configurations. Read the full article: https://stemlabguide.com/best-wind-energy-science-project-kits-for-students
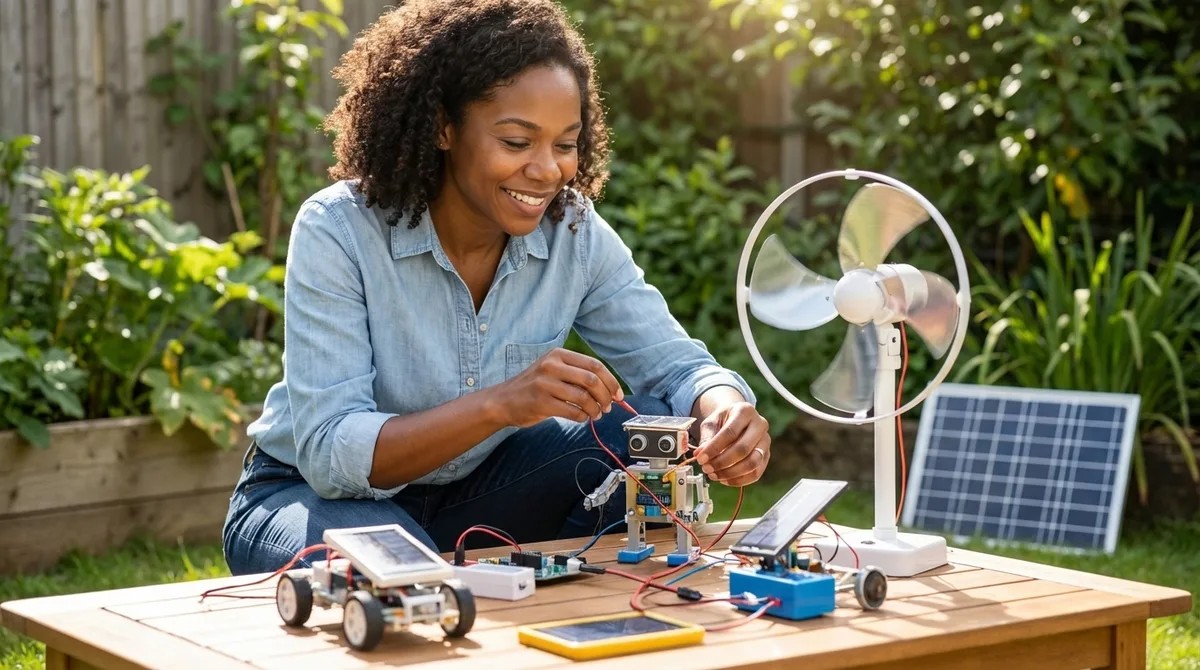
Best Solar Energy Kits for Science Projects in 2026
When a solar kit stops being homework and becomes a tool your kid uses to charge their phone, you know you've found something special. In this episode, Chloe Miller draws on her years of experience building off-grid solar installations to break down what separates genuine learning platforms from glorified toys. Whether you're a parent shopping for a science fair project or an educator building a renewable energy curriculum, this guide answers a critical question: which solar kits actually teach both the physics and the practical engineering skills students need for clean energy careers? Real solar kits produce measurable, variable electricity—not just enough to blink an LED. Look for multimeter compatibility and voltage outputs from 0.5V to 12V so students can test series versus parallel wiring and construct actual I-V curves. Expandability matters more than flashy features. Kits using standard barrel connectors, JST plugs, or alligator clips can interface with Arduino boards and Raspberry Pi systems, turning a single project into a building block for advanced experimentation. Avoid kits that require app connectivity, cloud-based logging, or subscriptions to function. Solar energy works offline, and the best educational kits reflect that with analog meters and printable data sheets. Durability separates serious learning tools from one-time demonstrations. Polycarbonate or tempered glass surfaces, reinforced solder joints, and UV-resistant casings let students experiment outdoors without destroying equipment on the first drop. Skip vague age ranges and look for explicit learning outcomes. A kit that states "students will measure open-circuit voltage and short-circuit current" teaches far more than one that simply promises kids will "learn about solar power." The Thames and Kosmos Solar Power Kit earns top marks for ages 10–14, offering six monocrystalline panels and 21 buildable models that support genuine efficiency calculations and real-world engineering progression. Read the full article: https://stemlabguide.com/best-solar-energy-kits-for-science-projects-in-2026
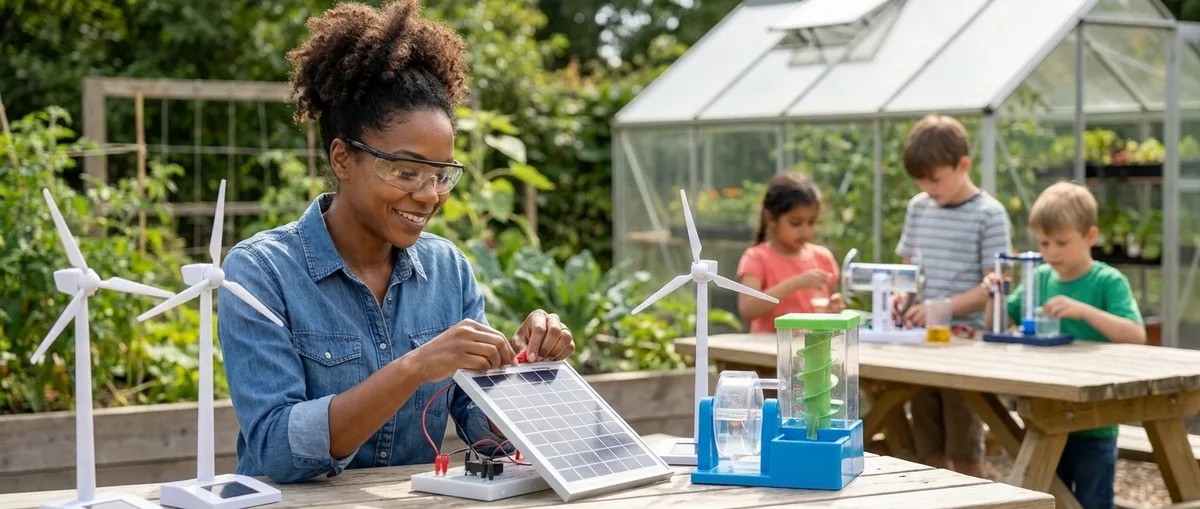
Renewable Energy Science Projects: Complete Guide to Solar, Wind & Sustainable Power Learning Kits
Climate change is reshaping what skills kids need to thrive, and understanding renewable energy systems is quickly becoming essential knowledge. In this episode, Chloe Miller draws on a decade of hands-on experience wiring solar panels and testing DIY turbines to explain how structured energy projects transform abstract climate concepts into concrete engineering skills. Whether you're a parent choosing a first solar kit or an educator designing curriculum for future grid designers, this guide breaks down exactly what separates toy demonstrations from projects that build real career-ready competencies. Effective renewable energy projects require students to build functional systems, troubleshoot variables, and quantify efficiency—not just watch an LED light up and clap. Every project follows the same workflow professional engineers use: energy capture, conversion, storage and regulation, load testing, and data logging. Physics sets hard limits on efficiency that students can learn firsthand—the Betz limit caps wind turbines at 59.3% theoretical maximum, while single-junction silicon solar cells max out around 33%. The gap between spec sheet voltage and real-world performance is where the actual learning happens—understanding why a 6-volt panel delivers only 4.8 volts under load teaches system thinking. The best kits are modular, expandable, and compatible with Arduino or Python-based data collection, mirroring workflows used by professional renewable energy engineers today. Solar PV installer jobs are projected to grow 48% between 2022 and 2032, making these hands-on skills directly relevant to one of the fastest-growing career paths available. Read the full article: https://stemlabguide.com/renewable-energy-science-projects
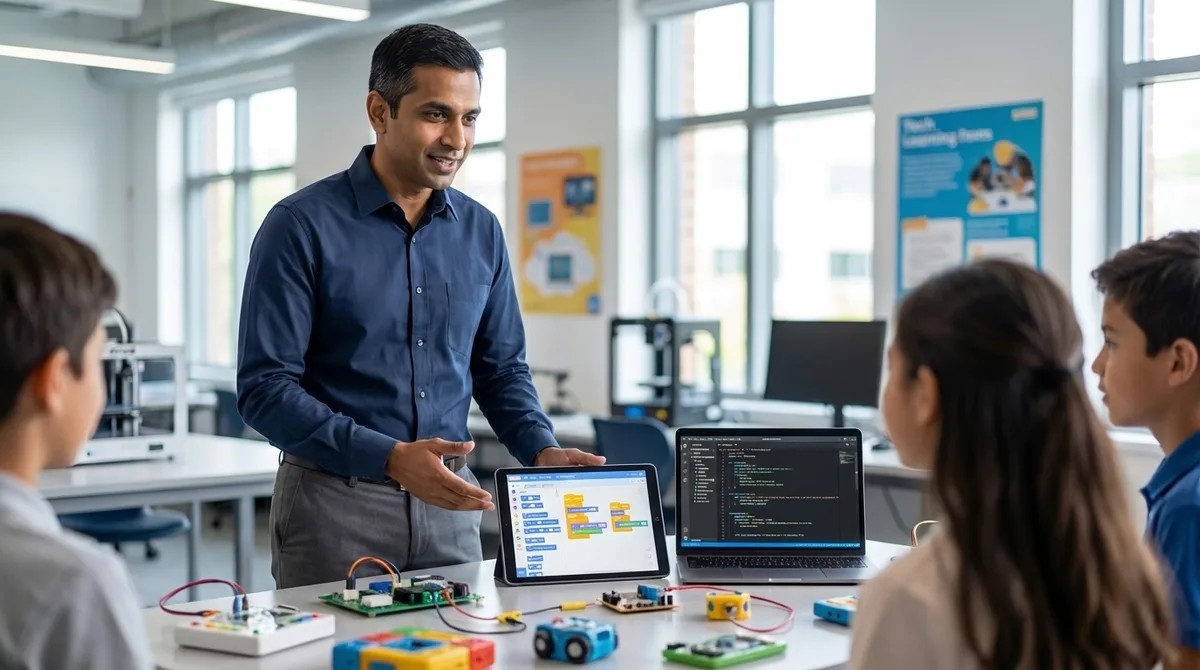
How to Transition from Screen-Free Coding to Scratch and Python Programming
Screen-free coding toys are fantastic for teaching young children logic and sequencing, but they hit a ceiling fast—and real programming lives on screens with actual code. This episode maps the exact progression path for moving kids aged six to ten from physical coding toys to Scratch and Python, covering the prerequisite skills they must demonstrate before advancing, which hardware bridges the gap most effectively, and how to sequence instruction over eight to sixteen weeks so learners don't plateau or regress. If you've invested in robot toys and coding board games and wonder what comes next, this is your blueprint. Never advance a child to Scratch until they can verbally articulate an eight-to-twelve-step algorithm before placing physical tokens—random trial-and-error swapping means they're not ready, and premature transition creates GUI dependence that's harder to fix than initial skill gaps. Scratch's hundred-plus blocks cause cognitive overload for kids used to eight-piece physical sets; hide all categories except Motion and Events for the first three sessions, then gradually unlock Control, Looks, and Sound over subsequent weeks. Specific debugging vocabulary signals readiness: listen for unprompted use of terms like "sequence," "loop," and "condition," plus error prediction statements like "this won't work because I'm missing a turn." Hardware bridges like the Sphero indi and LEGO SPIKE Essential provide tactile-to-digital continuity by accepting both physical inputs and Scratch commands for identical behaviors, making the abstract-to-visual leap concrete. Plan for forty-five to sixty minute sessions, three to four times weekly for the first month; supervision requirements drop significantly after week eight once learners demonstrate self-correction habits. System requirements matter more than parents expect—four gigs of RAM is the minimum, but eight gigs is preferred if running Scratch and a Python IDE simultaneously, and Thonny or Mu Editor are the recommended environments for learners under twelve. Read the full article: https://stemlabguide.com/how-to-transition-from-screen-free-coding-to-scratch-and-python-programming
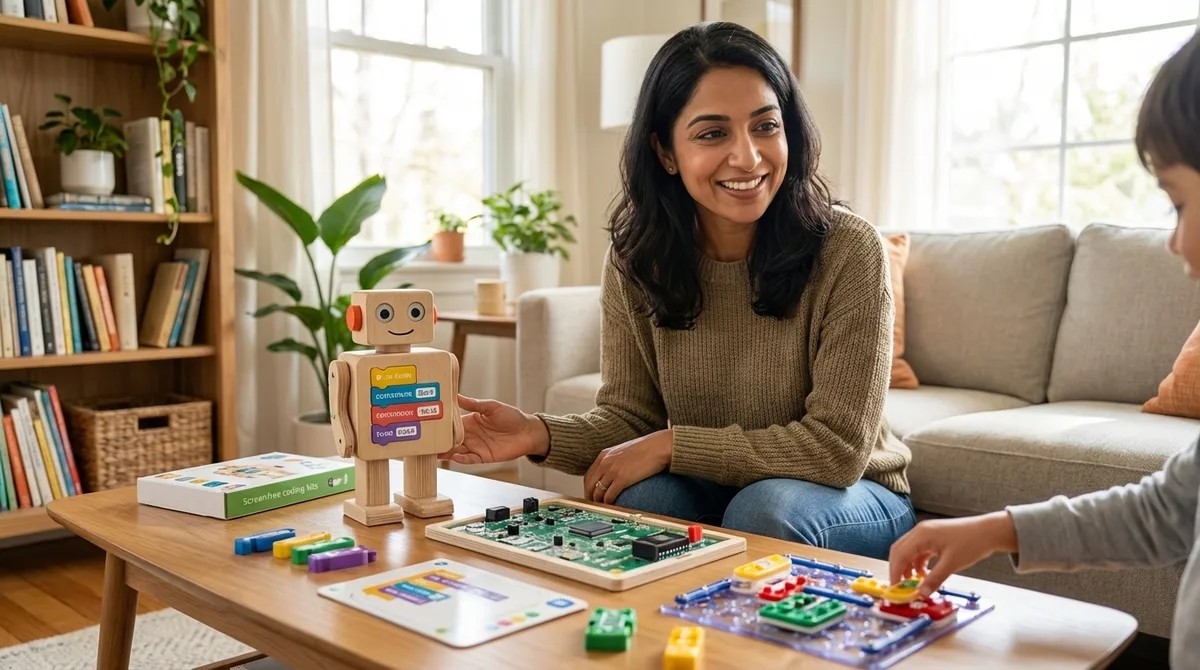
How to Choose Screen-Free Coding Kits for Different Age Groups and Skill Levels
Picking a screen-free coding kit sounds simple until you realize the age range on the box tells you almost nothing about whether it's right for your child. In this episode, Dr. Priya Mehta breaks down how to match coding kits to your child's actual developmental stage—not just their birthday—while building real programming logic through hands-on play. Whether your preschooler is ready for directional sequencing or your middle schooler needs conditional logic challenges, you'll learn exactly what to look for and what to avoid in the crowded world of tactile coding tools. Age ranges on coding kit packaging don't reflect cognitive readiness—a seven-year-old might think like a nine-year-old, or vice versa, so focus on developmental markers like the ability to follow multi-step commands or predict outcomes mentally. Not all screen-free coding kits teach genuine programming fundamentals; evaluate each kit against five computational thinking pillars: sequencing, loops, conditionals, functions, and debugging. The difference between placing three individual "forward" commands versus using a repeat mechanism matters—it's algorithmic efficiency versus rote memorization, and quality kits teach the former. Before evaluating any kit, assess your home setup: available floor space (minimum two by three feet), storage capacity, budget ceiling, tolerance for consumables like batteries or coding cards, and whether siblings will share resources. For ages three to five, look for directional sequencing without symbol recognition; ages six to eight need symbolic representation with coding cards; ages nine to twelve require if-then scenarios and loop optimization to avoid outgrowing the kit within months. The best screen-free kits make debugging visible—your child sees exactly where a robot deviates from the intended path and learns to adjust, rather than simply getting marked wrong. Read the full article: https://stemlabguide.com/how-to-choose-screen-free-coding-kits-for-different-age-groups-and-skill-levels
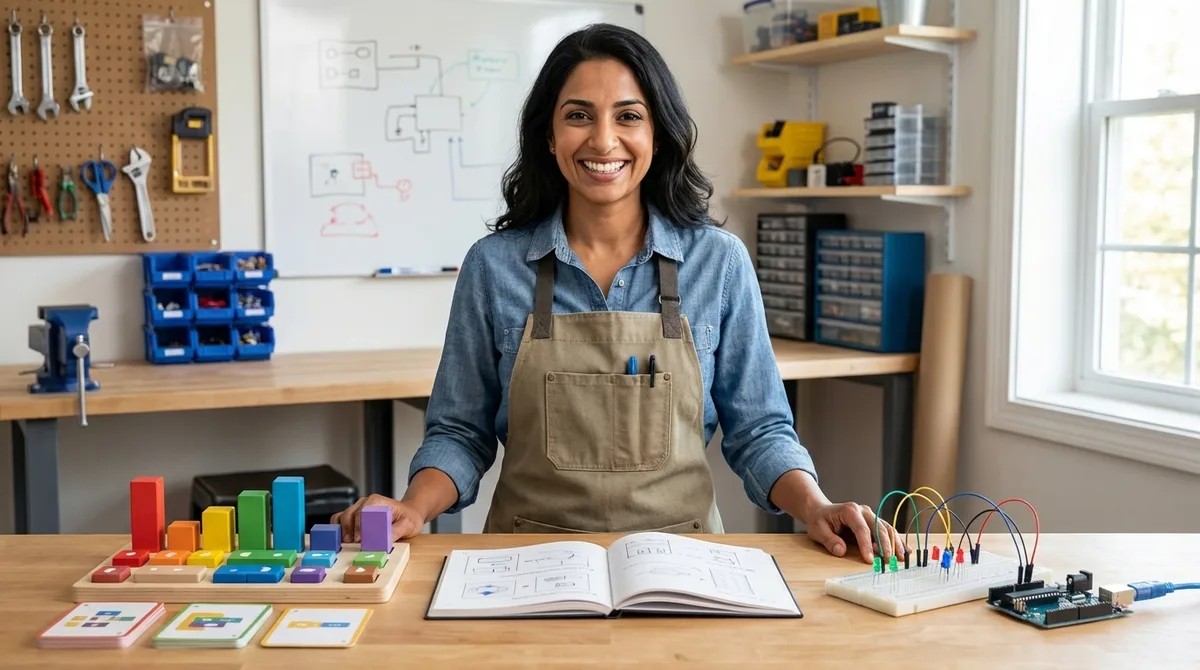
Progressive Learning Path Checklist: Screen-Free Coding to Arduino Programming
Most parents know coding is a valuable skill, but handing a tablet to a preschooler feels wrong—and research backs that instinct. This episode maps the complete progression from screen-free coding toys at age three all the way to writing Arduino code in C++, giving you a concrete roadmap for building computational thinking the right way. Dr. Priya Mehta breaks down exactly which tools work at each developmental stage and why the sequence matters more than the specific products you buy. Children as young as three can start building coding foundations through physical manipulation—pressing directional buttons on robot toys creates immediate cause-effect feedback that internalizes sequencing before symbols ever enter the picture. The cognitive skills that make programming intuitive later (sequencing, conditionals, debugging) can all be taught through unplugged board games, pattern blocks, and even daily routines like getting dressed in the right order. Between ages six and nine, children are ready for abstraction—learning that one card or block can represent multiple steps—which mirrors how real functions work in actual programming languages. Debugging mindset matters more than perfection: activities with intentional errors teach kids that mistakes aren't failures but information, a mental shift that prevents frustration when they eventually encounter syntax errors in text-based code. "Human robot" games where one child writes instructions and another executes them teach communication precision and reveal semantic errors in a low-stakes, screen-free way. Nested loops become visible and intuitive through physical manipulatives in ways that screen-based block coding can actually obscure, making ages eight to nine ideal for pattern abstraction activities. Read the full article: https://stemlabguide.com/progressive-learning-path-checklist

Screen-Free Coding Kit Evaluation Checklist: Lab Specs and Durability Standards
Most screen-free coding kits become expensive drawer clutter within months, teaching little that transfers to real programming skills. In this episode, Chloe Miller shares the exact evaluation checklist she developed after stress-testing dozens of unplugged coding systems in her own workshop. Whether you're a parent investing in your child's computational thinking or an educator building a classroom curriculum, you'll learn how to audit durability, pedagogical value, and environmental impact before spending a dollar. The central question: how do you separate kits that build careers from those that build landfill waste? Material composition determines longevity—ABS plastic tokens survive years of drops and spills, while laminated cardboard tiles start delaminating after just a few months in humid conditions. Connector durability matters more than you'd expect; the best modular kits use neodymium magnets rated for 10,000+ connection cycles or reinforced plastic pegs that won't shear under kid-level force. Not all kits teach transferable skills—verify that the system explicitly addresses computational thinking primitives like sequencing, loops, conditionals, debugging, and functions rather than just step-following activities. Check whether the instruction set has a ceiling; kits that omit conditionals or variables work for ages three to six, but by age seven, learners need if-then logic and parameter-based functions to progress. Replacement part policies reveal a kit's true sustainability—look for à la carte component purchasing, open-source 3D-printable parts, or modular designs where damaged sections swap out easily. Third-party expansion compatibility creates long-term value; kits that integrate with LEGO, Arduino boards, or other open-standard platforms make the transition from screen-free coding to text-based programming seamless. Read the full article: https://stemlabguide.com/screen-free-coding-kit-evaluation-checklist
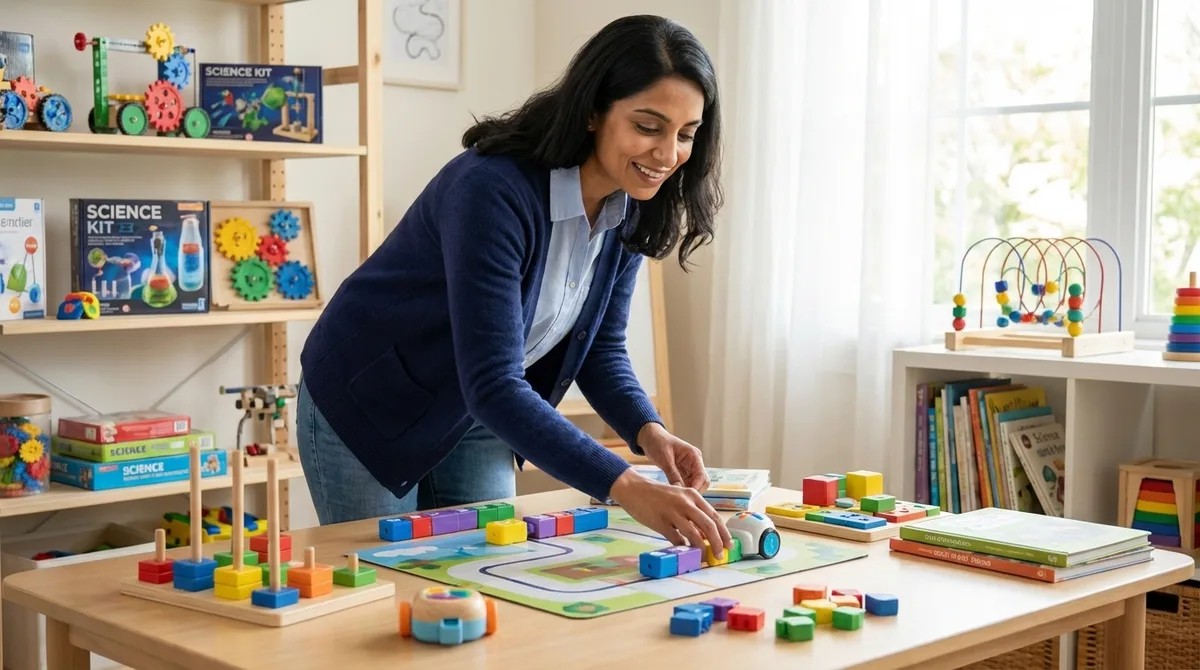
How Screen-Free Coding Prepares Kids for Text-Based Programming Languages
You want your child to learn programming, but the thought of parking them in front of a screen for hours feels wrong. Here's the surprising truth: starting with wooden blocks, cardboard tiles, and button-pressing robots isn't a compromise—it's actually the optimal path to Python, JavaScript, and beyond. Dr. Priya Mehta explains the science of embodied cognition and why physical coding tools build the exact mental frameworks that make text-based programming feel intuitive later on. Screen-free coding isolates computational thinking from typing and syntax, reducing cognitive load so children can master concepts like loops and conditionals without getting frustrated by semicolons and error messages. Physical manipulation creates motor memory that transfers directly to abstract programming—when kids later see a "for loop" in Python, their brains recognize it as the same repeat pattern they built with wooden tiles. The progression follows how children naturally learn language: sounds and gestures first, grammar rules later. Coding works the same way, with physical experience building neural pathways before formal syntax enters the picture. Debugging confidence develops naturally with tactile tools because children can see exactly where a sequence failed, swap out the incorrect card, and immediately test again—no cryptic error messages required. Universal programming concepts like sequencing, loops, conditionals, and functions are deliberately built into screen-free tools, making the translation to any text-based language remarkably smooth. Children under eight benefit most from this approach because their abstract reasoning is still developing while their spatial and motor skills are flourishing—physical coding meets them exactly where they are developmentally. Read the full article: https://stemlabguide.com/how-screen-free-coding-prepares-kids-for-text-based-programming-languages

What Is Screen-Free Coding: Understanding Unplugged Programming Education
What if your child could learn the same logical thinking skills as professional software engineers—without ever touching a tablet or computer? This episode explores screen-free coding, an educational approach that teaches programming concepts through wooden blocks, tangible robots, and hands-on problem-solving. Whether you're a parent concerned about screen time or an educator looking for developmentally appropriate STEM activities, you'll discover why this tactile method might be the ideal entry point for young learners ages three and up. Screen-free coding teaches real programming concepts like sequencing, loops, conditionals, and debugging through physical objects such as wooden blocks, plastic tiles, and coding cards—no digital devices required. This approach emerged from computer science education research in the 1980s and aligns with Piaget's concrete operational stage, where children ages two to seven learn best through physical manipulation rather than abstract symbols. Screen-free coding systems work through three components: input tools (the physical pieces children arrange), processing mechanisms (analog or embedded systems that execute instructions), and output feedback (visible results that show success or failure). When children physically move a "forward" block next to a "turn right" block, they're building the same sequential thinking skills used by engineers writing Python or JavaScript—but through tactile engagement that activates multiple neural pathways simultaneously. Physical feedback loops make debugging intuitive: instead of cryptic error messages, children see exactly where their sequence failed when a robot bumps into a wall or takes a wrong turn, teaching problem-solving skills naturally. The method offers three key advantages over screen-based approaches: developmentally appropriate timing for children as young as three, executive function development through hands-on manipulation, and guilt-free STEM learning that respects screen-time guidelines. Read the full article: https://stemlabguide.com/what-is-screen-free-coding

Screen-Free Coding Subscription Boxes vs One-Time Purchase Kits: Which to Choose
Deciding between a coding subscription box and a one-time purchase kit isn't just about the sticker price—it's about matching the purchasing model to how your child actually learns. In this episode, Dr. Priya Mehta breaks down the real costs, learning benefits, and developmental fit of each approach so parents can stop wasting money on the wrong format. Whether your child thrives on structured novelty or prefers deep, self-paced exploration, you'll walk away knowing exactly which model supports your family's goals. Subscription boxes cost $180–$480 annually and deliver curated, sequential challenges, but materials are often consumable with limited reuse value—once you stop paying, the learning pipeline stops too. One-time purchase kits range from $40–$180 upfront and offer permanent ownership, unlimited reuse, sibling hand-me-down potential, and the ability to recoup 30–50% through resale. The real value metric is cost per developmental outcome: a one-time kit used over 18 months can drop to pennies per session, while subscription engagement often fades once deliveries end. Subscriptions excel at removing friction for parents who feel uncertain about mapping computational thinking progression—someone else handles the curriculum design and pacing. External pacing can backfire: subscriptions impose a rhythm that may rush children who need more time with a concept or bore those who master skills quickly and must wait for the next box. One-time kits suit independent learners who benefit from revisiting concepts, controlling their own pace, and integrating open-ended components with other learning tools. Read the full article: https://stemlabguide.com/screen-free-coding-subscription-boxes-vs-one-time-purchase-kits