The Smart Home Setup Podcast
109 episodes — Page 2 of 3

Best Govee Smart Lights: Top Wi-Fi RGB Strips, Bulbs & Outdoor Lighting
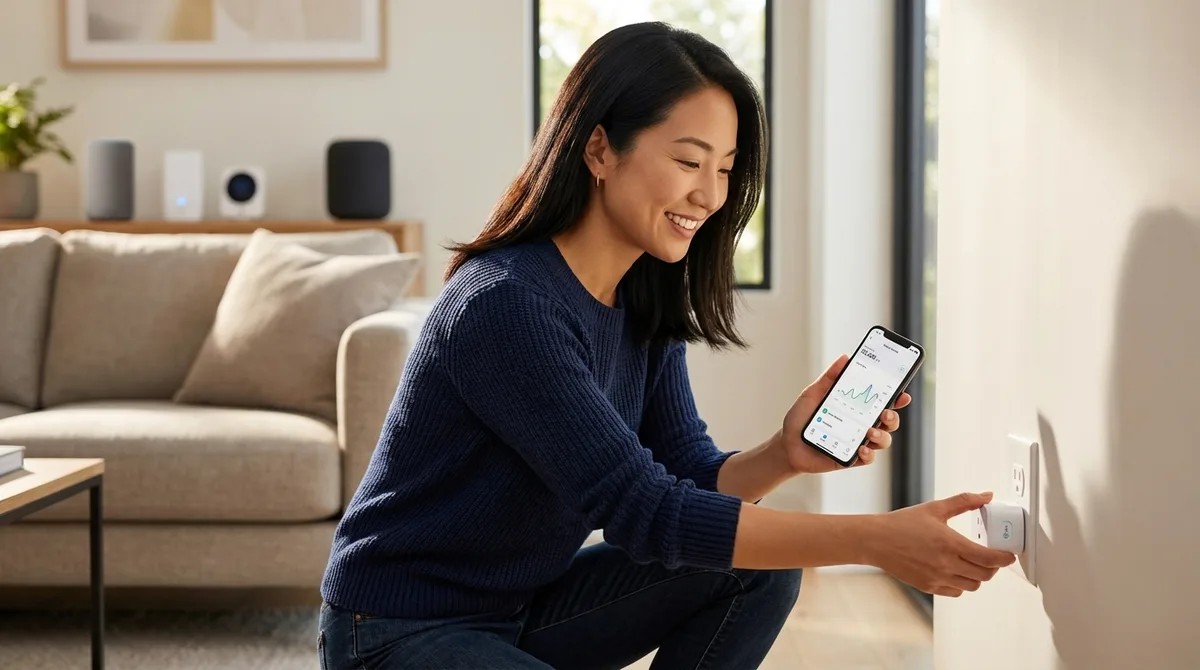
Looking for affordable smart lighting that won't lock you into an expensive hub ecosystem? This episode dives deep into Govee's Wi-Fi-based RGB lighting lineup, covering everything from immersive TV backlights to versatile LED strips. Host Marcus Chen draws on experience from over eighty installations to reveal which products deliver on their promises and which ones create unexpected headaches. Whether you're building out a home theater setup or adding accent lighting throughout your space, you'll learn the real-world trade-offs that most reviews skip over. All Govee lights connect via 2.4 GHz Wi-Fi only, which means no hub purchases but also no HomeKit, Matter, Thread, or Zigbee compatibility—they'll always operate as an isolated system separate from protocol-level smart home automations. The Govee Envisual TV Backlight T2's camera-based approach works with any content source without the HDMI handshake issues that plague sync boxes, but expect 50–80 milliseconds of latency that's noticeable during fast-paced gaming. Camera calibration on the T2 is highly sensitive to ambient light conditions, so windows or bright overhead lights will cause washed-out LED responses and require frequent recalibration. The adhesive backing on Govee strips tends to fail after six to eight months, especially on textured walls—plan on reinforcing with 3M Command strips for long-term installations. RGBIC strips display multiple colors simultaneously along their length, creating dynamic gradients that look dramatically better than standard single-color RGB strips for accent lighting applications. Before installing any Govee product, verify your Wi-Fi signal strength at the installation location—you need at least -70 dBm on the 2.4 GHz band, and mesh systems that aggressively push devices to 5 GHz will cause intermittent disconnections. Read the full article: https://mysmarthomesetup.com/best-govee-smart-lights

Lutron Caseta vs Philips Hue: Which Smart Lighting System Is Better?
Choosing between Lutron Caseta and Philips Hue can feel overwhelming when both systems promise to make your home smarter. This episode breaks down the real-world differences between these two popular smart lighting platforms, drawing on hundreds of actual installations. Whether you're a homeowner looking for reliable whole-home dimming or a renter wanting colorful accent lighting without electrical work, you'll learn exactly which system fits your specific situation and why the protocol differences matter more than most buyers realize. Lutron Caseta uses proprietary Clear Connect RF at 433 MHz, which operates on a frequency with minimal Wi-Fi and Zigbee interference, resulting in the most consistent dimming performance and fewer failed responses. Philips Hue runs on Zigbee 3.0 and now supports Matter via bridge firmware updates, allowing you to expose your lights to Matter controllers like Apple Home or Google Home without replacing your existing bulbs. Response latency differs significantly: Caseta delivers 150–250ms from switch to light with nearly instant physical switch response, while Hue runs 200–400ms from app or voice commands with physical switches adding another 100–150ms. Caseta installation requires replacing existing switches and typically needs a neutral wire, which most homes built after 1985 have—but older homes may require an electrician or the non-dimming PD-5WS switch as a workaround. Neither system communicates directly with the other; bridging Caseta switches to Hue bulbs requires a third-party hub like Home Assistant, and cloud-based routines through Alexa or Google introduce 1–2 seconds of latency. Fallback behavior is a critical difference: Caseta's physical switches always work even when the bridge or internet fails, while Hue bulbs stay in their last state during bridge failure and standard wall switches cut power entirely. Read the full article: https://mysmarthomesetup.com/lutron-caseta-vs-philips-hue

Best Philips Hue Smart Bulbs and Lights: Complete Zigbee Buying Guide
Still fumbling for light switches in the dark? This episode breaks down everything you need to know about Philips Hue smart bulbs before you buy. Marcus Chen draws on years of hands-on installation experience to explain why these Zigbee-based lights remain the gold standard in 2026, which hub setup actually makes sense for your home, and how to avoid the costly mistakes that frustrate first-time smart lighting buyers. Whether you're building out your first smart home or expanding an existing ecosystem, this guide answers the critical questions about protocols, bulb types, and real-world performance. The Philips Hue Bridge is still essential for full functionality in 2026—Bluetooth-only control sacrifices automations, remote access, and platform integrations that make smart lighting worthwhile. Most homeowners who buy expensive Color Ambiance bulbs end up setting them to warm white within a month, so unless you're planning gaming setups or seasonal displays, White Ambiance bulbs save you 40% without sacrificing daily usefulness. Each powered Hue bulb acts as a Zigbee repeater, meaning 10–12 bulbs in a typical home create enough mesh density to virtually eliminate dropout issues—but smart switches that cut power break this network. Response time runs 200–300 milliseconds from trigger to light change, which feels instant to most users but creates a noticeable difference if you're switching between dumb switches and smart bulbs. Matter support arrived via firmware update in late 2024, but this makes the Bridge a Matter bridge—the bulbs themselves remain Zigbee devices that require the hub. Brightness mistakes are common: showroom displays make 800-lumen bulbs look adequate, but kitchens and bathrooms typically need 1100+ lumens for proper task lighting. Read the full article: https://mysmarthomesetup.com/best-philips-hue-smart-bulbs-and-lights
Smart Lighting for Home Automation: Complete Guide to Zigbee, Z-Wave, Matter & Wi-Fi Systems
Think your smart lights are just listening to your commands? They're also talking back—to corporate servers that log when you wake up, when you leave, and when you come home. In this episode, Chelsea Miller breaks down exactly how smart lighting protocols work at the technical level after discovering her own "smart" bulbs were phoning home every ninety seconds, even when switched off. Whether you're building a new system or auditing an existing one, this guide reveals which protocols keep your data local and which ones are quietly uploading your daily patterns to third-party analytics domains. Most commercial smart lighting from brands like Philips Hue, LIFX, and TP-Link defaults to cloud-first architecture, creating 200–800ms latency and detailed activity logs that companies monetize through data sales and targeted advertising. Zigbee and Z-Wave bulbs controlled through Home Assistant or Hubitat can operate entirely offline, with response times under 80 milliseconds and zero internet dependency. Zigbee runs on 2.4GHz channels that overlap with Wi-Fi, causing latency spikes during video calls—mapping your Wi-Fi channels and selecting Zigbee channel 15 or 25 eliminates most interference. Z-Wave operates at 900MHz with better wall penetration and no Wi-Fi interference, and Z-Wave Plus 800 series switches can achieve 40ms response times over three mesh hops. Matter's promise of cross-platform local control has a catch: Matter 1.0 required cloud commissioning, and while Matter 1.4 makes local-only commissioning mandatory, many existing devices won't receive the firmware updates needed to support it. Wi-Fi bulbs connect directly to your router without a hub, but this simplicity is exactly why they leak data so effectively—most manufacturers gate local control behind firmware that quietly enables cloud dependencies. Read the full article: https://mysmarthomesetup.com/smart-lighting-for-home-automation
Smart Device Fallback Behavior Checklist: What Happens When Wi-Fi or Hubs Fail
What happens to your smart home when the internet goes down? This episode tackles the uncomfortable reality that many "smart" devices become surprisingly dumb during Wi-Fi outages or hub failures. Keiko Tanaka breaks down exactly how every category of smart device behaves when connectivity disappears—from lights and thermostats to security cameras and sensors. Whether you're building a new smart home or troubleshooting an existing setup, understanding fallback behavior is essential for creating a home that works reliably, not just impressively. Zigbee and Thread bulbs paired with local hubs like Home Assistant or Hubitat keep working during internet outages, maintaining automations with 80–150 millisecond latency because they operate on local mesh networks independent of cloud services. Wi-Fi-only smart bulbs technically still work without internet if your local network stays up, but app response times can balloon from under 200 milliseconds to 2–5 seconds, disrupting the seamless experience that makes automation feel invisible. Most smart thermostats allow manual temperature adjustments during outages but lose cloud-dependent features like geofencing and occupancy-based scheduling—meaning your "eco mode when everyone leaves" automation silently fails. Cloud-dependent security cameras without local storage become completely non-functional during internet loss—no recording, no alerts, nothing—while cameras with microSD slots continue capturing footage you can access once connectivity returns. Matter 1.4 devices maintain local control even when cloud services go down, and multi-admin support means a bulb connected to both Google Home and Apple HomeKit responds to either ecosystem during outages. Battery-backup smart switches are rarer than you'd think—most Z-Wave and Zigbee switches reset to default states after power outages and require hub reconnection before automations resume. Read the full article: https://mysmarthomesetup.com/smart-device-fallback-behavior-checklist

Device Mesh Network Reliability Explained: Zigbee vs Z-Wave vs Thread
You tap the button to turn off a lamp and nothing happens—then three seconds later it finally responds. That maddening delay is the difference between a smart home that truly works and one that constantly reminds you it exists. In this episode, Keiko Tanaka breaks down why mesh network reliability matters more than raw specs, comparing how Zigbee, Z-Wave, and Thread each handle the crucial job of getting signals from your finger to your devices. Whether you're planning a new installation or troubleshooting an existing setup, understanding these architectural differences will help you build a home that responds before you've finished reaching for the manual switch. Mesh network reliability comes down to three qualities: latency (response speed), uptime (connection consistency), and fault tolerance (recovery from failures)—and each protocol balances these differently. Zigbee shares the crowded 2.4 GHz band with Wi-Fi and microwaves but compensates with dynamic routing that adjusts paths every few seconds, supporting up to 30 hops and 65,000 devices per network. Z-Wave deliberately avoids Wi-Fi interference by operating on sub-gigahertz frequencies, which penetrate walls better and deliver lower latency (100–250ms), but networks are limited to 232 devices and only four hops—requiring more intentional device placement. Thread also uses 2.4 GHz but its IPv6-based architecture makes every device internet-addressable, prioritizes battery life for sensors, and integrates seamlessly with Matter 1.4 for cross-platform compatibility. The four-hop limit on Z-Wave isn't necessarily a disadvantage—it forces better network design and typically results in faster, more predictable response times than protocols allowing dozens of hops. Real-world latency varies significantly: Zigbee typically runs 180–400ms, Z-Wave 100–250ms, and Thread 150–350ms, with retry attempts adding additional delays when primary routes fail. Read the full article: https://mysmarthomesetup.com/device-mesh-network-reliability-explained
How to Compare Smart Device Automation Logic and Conditional Triggers
Ever notice how your smart home sometimes feels more demanding than helpful? Lights that blast on at full brightness when you're stumbling to the kitchen at 2 a.m., or automations that ignore the fact you just manually adjusted something five minutes ago. The difference between frustrating smart home reactions and truly invisible automation comes down to how well you've structured your conditional logic. This episode walks through a rigorous methodology for comparing automation platforms, examining trigger conditions, latency expectations, and the interoperability quirks that determine whether your routines feel seamless or stubbornly mechanical. Write out every automation as explicit if-then-else pseudocode before touching any app—this reveals exactly what your platform must support, from nested conditions to Boolean operators, and prevents discovering limitations after devices are already installed. Protocol choice directly impacts automation reliability: Zigbee and Z-Wave sensors typically report within 100–400 milliseconds locally, while cloud-dependent Wi-Fi devices can take one to three seconds or fail entirely when your connection drops. Not all platforms handle layered decision trees equally—some require splitting complex logic into multiple automations that can conflict with each other, while others support elegant grouped conditions with AND-OR operators. Create a comparison matrix tracking each device's protocol, whether automation runs locally or in the cloud, actual measured latency (not manufacturer claims), and trigger granularity to understand what your system can realistically handle. Matter 1.4 aims to standardize trigger behavior across ecosystems, but as of 2026, implementation quality still varies significantly between manufacturers—test your specific devices rather than assuming compatibility. The goal is automation that anticipates needs rather than demands attention: lights that adjust before you notice dusk, climate that responds to occupancy patterns instead of scheduled guesses, technology that genuinely disappears into the background of daily life. Read the full article: https://mysmarthomesetup.com/how-to-compare-smart-device-automation-logic-and-conditional-triggers
Smart Home Ecosystem Compatibility Checklist: Avoiding Device Conflicts
Ever brought home a shiny new smart device only to discover it's completely incompatible with your existing setup? That $200 smart lock becomes an expensive paperweight when you realize it speaks Z-Wave while your hub only understands Zigbee. This episode walks you through the essential compatibility checks you need to make before buying any smart home device—covering protocols, hub requirements, ecosystem lock-in, and those sneaky cloud dependencies that can leave your home unresponsive when the internet goes down. Always verify the exact protocol (Zigbee, Z-Wave, Thread, Matter, or Wi-Fi) on the product specifications page, not the marketing copy—manufacturers often bury this critical detail in footnotes, and it determines whether your new device will actually work with your hub. Not all hubs are universal: Amazon Echo Hub supports Zigbee and Matter but not Z-Wave, while Samsung SmartThings handles Zigbee, Z-Wave, and Matter—mismatching protocols means adding another $100+ hub to your setup. Some devices like Philips Hue and Lutron Caseta require proprietary bridges even when using open protocols, adding $50–80 in extra costs plus dependency on manufacturer cloud services that could shut down. Matter devices offer the most ecosystem flexibility if you want to switch platforms later, while proprietary protocol devices keep you locked into a single ecosystem. Many Wi-Fi smart plugs won't respond to commands during internet outages even though your local network is fine—test cloud dependency by disconnecting your router before committing to dozens of devices. Use your full 14–30 day return window to stress-test device interactions and automations, not just basic pairing—some devices technically connect but create interference that knocks other devices offline. Read the full article: https://mysmarthomesetup.com/smart-home-ecosystem-compatibility-checklist

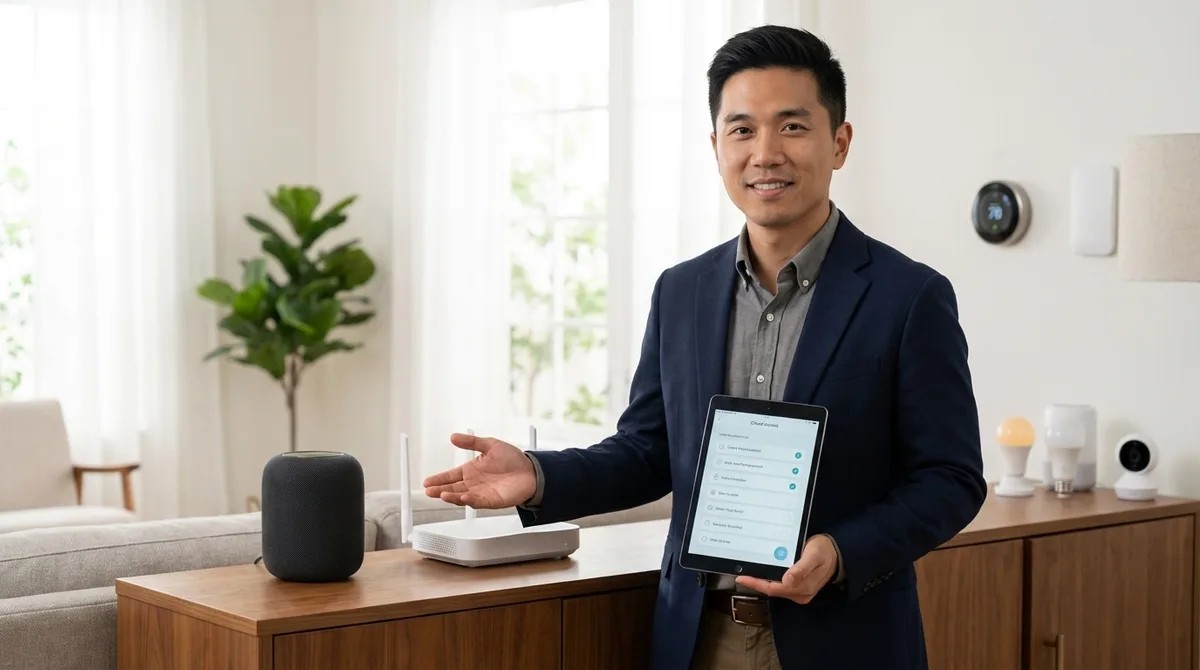
Understanding Hub Requirements: Which Smart Devices Need a Bridge in 2026
You've probably been there—standing in a dark hallway, tapping your phone while a smart light refuses to cooperate, only to discover a forgotten hub buried in your closet has crashed and taken your entire home offline. In this episode, Chelsea Miller draws on three years of hands-on testing with over forty smart home hubs to explain exactly which devices require bridges, why certain protocols demand dedicated hardware, and what that means for both reliability and your privacy. Whether you're building your first smart home or trying to untangle an existing setup, this breakdown of Zigbee, Z-Wave, Thread, and Matter will help you make informed decisions about which hubs you actually need—and which ones are just collecting your data. Not all smart devices need hubs: Wi-Fi devices connect directly to your router, while Zigbee and Z-Wave devices absolutely require dedicated coordinators or gateways because your router simply cannot speak those protocols. Hubs are data aggregation points that often phone home even when marketed as "local control"—Chelsea's 2024 audit found eleven of fourteen popular hubs sending telemetry to cloud servers, with one transmitting over 3,000 data packets daily. Thread devices still need a border router (found in HomePod minis, Nest Hubs, and some Wi-Fi 6E routers) to connect to your IP network, making these hubs in everything but name. When a Zigbee or Z-Wave hub fails, connected devices become completely inert—they won't even respond to physical button presses because the radio has no fallback communication method. Latency varies significantly by protocol: Zigbee averaged 87ms locally but spiked to 340ms during cloud outages, while Z-Wave runs 100-300ms but offers more consistent performance under network congestion. Ecosystem fragmentation is intentional—manufacturers want hub dependency because it creates lock-in, making it costly and complicated to switch platforms once you've invested in a particular protocol. Read the full article: https://mysmarthomesetup.com/understanding-hub-requirements
How to Test Smart Device Response Times and Latency Across Protocols
That split-second delay between triggering a motion sensor and watching your lights respond can mean the difference between automation that feels like magic and technology that feels clunky. In this episode, Keiko Tanaka breaks down exactly how to measure smart device latency across every major protocol—Zigbee, Z-Wave, Thread, Matter, and Wi-Fi—using tools you probably already own. Whether you're troubleshooting sluggish automations or optimizing an already-functional system, you'll learn the precise methodology for identifying where milliseconds are being lost. This one's for anyone who suspects their smart home could feel faster but doesn't know how to prove it or fix it. Latency compounds across your automation chain—a 200ms sensor wake time plus 150ms hub processing plus 100ms switch execution adds up to over half a second of noticeable lag that makes smart homes feel mechanical rather than seamless. Wi-Fi devices can add 300-500ms of extra latency during peak network usage compared to off-hours, while Zigbee and Thread mesh networks can actually reduce latency by providing shorter communication hops through additional nodes. Your Zigbee hub channel matters more than you think—if it's set to channel 20 while your Wi-Fi broadcasts on channel 11, the overlap degrades performance on both networks. Recording video at 60fps and counting frames gives you 16.7ms precision when measuring response times, far more accurate than stopwatch testing which introduces roughly 200ms of human reaction time variability. Hub CPU load above 70% introduces unpredictable delays, especially when the system is simultaneously processing energy monitoring data and running presence detection routines alongside motion sensor triggers. Testing during controlled time windows—late evening when network traffic drops but before devices enter sleep modes—creates reproducible conditions that make your measurements actually comparable across sessions. Read the full article: https://mysmarthomesetup.com/how-to-test-smart-device-response-times-and-latency-across-protocols
Smart Device Comparison Checklist: 12 Factors to Evaluate Before Purchase
Ever bought a smart device only to discover it won't talk to anything else in your home? You're not alone—and it's costing people hundreds of dollars in wasted purchases. In this episode, Marcus Chen breaks down the 12 critical factors you need to evaluate before buying any smart home device, from your first smart bulb to a whole-home system. If you've ever struggled with compatibility nightmares, surprise subscription fees, or automations that fail when the internet drops, this checklist will save you serious headaches and money. Protocol choice makes or breaks your setup: Zigbee sensors won't communicate with Z-Wave hubs without a bridge, and if you're starting fresh in 2026, Matter 1.4 devices offer the best cross-platform compatibility available right now. Cloud-dependent automations fail during internet outages, while local execution (through hubs like Home Assistant or SmartThings) keeps your system running—a critical distinction for door locks, thermostats, and security devices. Zigbee and Wi-Fi both operate on 2.4 GHz frequencies, meaning dense Zigbee mesh networks can experience interference from nearby routers, while Z-Wave avoids this by using sub-1 GHz frequencies. Automation response time varies dramatically by protocol: Zigbee and Z-Wave typically respond in 200–800 milliseconds, Wi-Fi devices can lag 1–5 seconds, and anything over 2 seconds feels frustratingly sluggish for motion-triggered lighting. Always verify what happens when your hub or internet goes offline—some devices default to "on," others to "off," and some retain their last state, which matters enormously for critical systems like heating or door locks. Don't buy based on promised features or manufacturer roadmaps; only purchase for functionality that exists today, especially when it comes to Matter bridging support through firmware updates. Read the full article: https://mysmarthomesetup.com/smart-device-comparison-checklist
Smart Home Protocol Compatibility Explained: Zigbee, Z-Wave, Thread, Matter, and Wi-Fi
Ever bought two "smart" devices only to discover they can't talk to each other? You're not alone. In this episode, Chelsea Miller breaks down the five major smart home protocols—Zigbee, Z-Wave, Thread, Matter, and Wi-Fi—explaining why they're not just different dialects but entirely different languages. Whether you're building your first smart home or troubleshooting a system that keeps failing at 2 AM, this episode reveals what manufacturers don't want you to know about compatibility, privacy, and which setups actually work when the marketing hype falls apart. Protocol choice directly impacts your privacy: Wi-Fi devices almost always require cloud accounts, while Zigbee, Z-Wave, Thread, and Matter can run entirely locally with the right controller—meaning your motion data doesn't have to leave your home. Zigbee and Wi-Fi both operate on the 2.4 GHz band, causing interference issues. Adjusting your Zigbee coordinator to channel 25 when your router uses channel 6 can reduce packet loss by 60%. Z-Wave devices are frequency-locked by region at the hardware level—a US system won't work in Europe, so moving continents means replacing everything. Matter isn't a radio protocol but a universal translator layer that runs on top of Thread, Wi-Fi, or Ethernet, allowing one device to work with Google Home, Apple HomeKit, Amazon Alexa, and Home Assistant without separate integrations. Thread promises local-only control with bank-grade AES-128 encryption, but testing revealed that half of Thread bulbs still required cloud accounts for initial pairing, undermining the privacy benefits. Mesh network resilience is real: in testing, a 23-device Zigbee network rerouted traffic through alternative paths within 8 seconds after three repeaters were unplugged, with automations still firing despite increased latency. Read the full article: https://mysmarthomesetup.com/smart-home-protocol-compatibility-explained

How to Compare Smart Home Device Protocols Before Buying
Ever wondered why some smart home devices keep working during internet outages while others become expensive paperweights? In this episode, Chelsea Miller breaks down the real technical and privacy differences between Zigbee, Z-Wave, Thread, Matter, and Wi-Fi protocols—information manufacturers deliberately leave out of their marketing. Whether you're building your first smart home or trying to escape cloud-dependent ecosystems, this intermediate-level guide gives you a practical framework for evaluating devices before they ever touch your network. Z-Wave and Zigbee offer the highest privacy because they're inherently local protocols that never touch the internet unless you explicitly bridge them to cloud services—while many Wi-Fi devices ping manufacturer servers every 3 to 7 minutes even when marketed as "local." Matter's promise of local control is manufacturer-dependent: some Matter 1.4 devices work perfectly offline, while others refuse to pair without an active internet connection for "verification purposes." Ecosystem lock-in risk varies dramatically—Zigbee and Z-Wave work with dozens of open-source hubs, but Wi-Fi devices often require manufacturer apps and cloud accounts that can disappear overnight, as Insteon users discovered in 2022. You can run a standalone OpenThread Border Router on a Raspberry Pi in about 90 minutes, giving you local Thread device control through Home Assistant without routing data through Google or Amazon servers. Protocol choice directly impacts automation latency: Zigbee delivers 80-150 millisecond response times, which matters significantly for time-sensitive triggers like motion-activated lighting. The ultimate ownership test is simple—if you can't run a device through Home Assistant or another open-source controller, you're renting functionality rather than owning hardware. Read the full article: https://mysmarthomesetup.com/how-to-compare-smart-home-device-protocols-before-buying

Zigbee Motion Sensors vs Z-Wave Motion Sensors: Latency and Reliability Compared
Ever walked into a dark room expecting the lights to snap on instantly, only to stand there awkwardly for three seconds? That frustrating inconsistency often comes down to your choice of motion sensor protocol. This episode breaks down the real-world differences between Zigbee and Z-Wave motion sensors—not just the spec sheet numbers, but how each protocol actually performs when you're navigating your home at 3 a.m. Whether you're building your first smart home or troubleshooting automation that feels sluggish, Keiko Tanaka unpacks the latency, mesh behavior, and reliability factors that determine whether your setup feels invisible or infuriating. Zigbee motion sensors respond 100–200 milliseconds faster than Z-Wave equivalents on paper, but Z-Wave's longer per-hop range (30+ meters vs. 10–15 meters) often means fewer hops and more consistent timing in larger homes. Z-Wave operates on a quieter sub-gigahertz frequency band that penetrates thick walls, brick, and metal studs more effectively, while Zigbee's 2.4 GHz band competes with Wi-Fi, Bluetooth, and even your microwave for airspace. Consistency matters more than raw speed—a Zigbee sensor that occasionally takes 1,200 milliseconds due to mesh dropout feels more broken than a Z-Wave sensor that reliably delivers 350 milliseconds every time. Battery life differs significantly: Zigbee sensors typically last 1–2 years, while Z-Wave sensors push 2–3 years on the same batteries. In a real-world test with exposed steel beams, Zigbee required three additional plug routers to maintain acceptable latency, while Z-Wave needed zero additional devices. End-to-end automation latency (motion detected to light on) typically lands at 200–350 milliseconds for Zigbee and 300–500 milliseconds for Z-Wave—both imperceptible to most people under normal conditions. Read the full article: https://mysmarthomesetup.com/zigbee-motion-sensors-vs-z-wave-motion-sensors
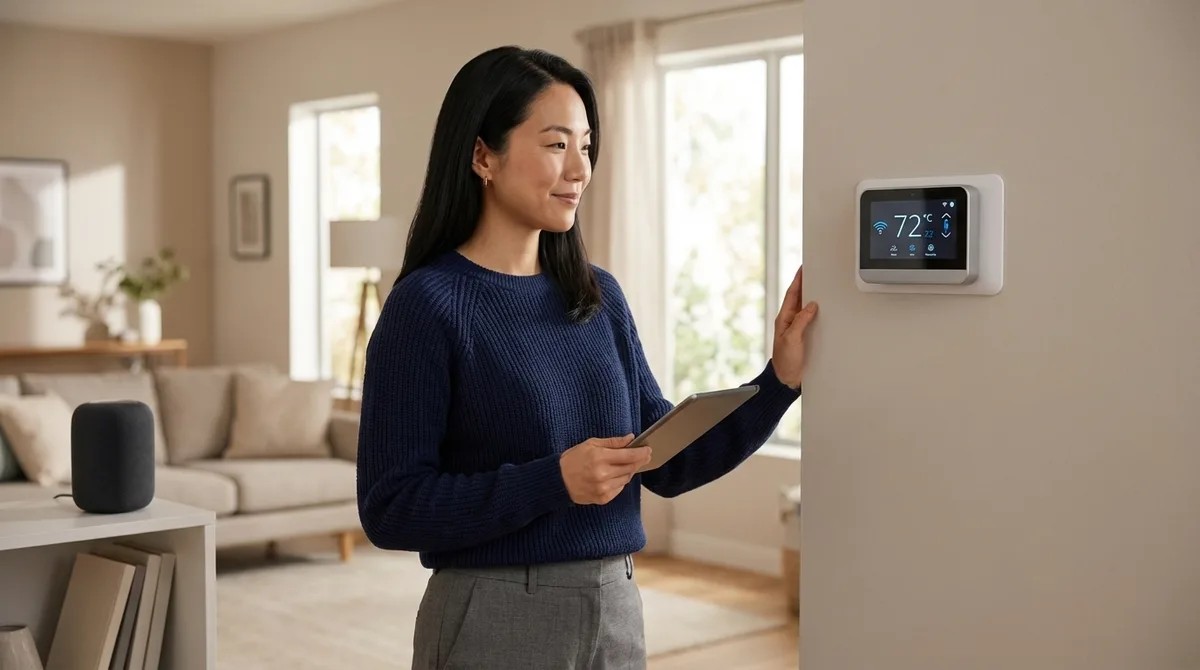
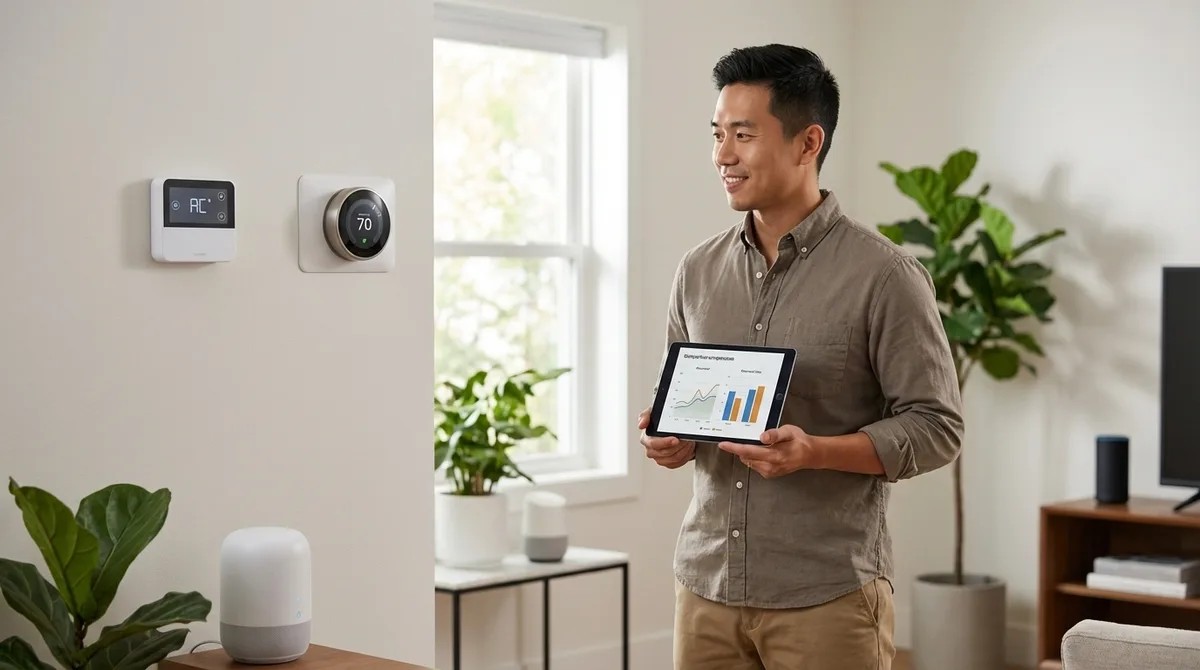
Top 7 Matter-Compatible Smart Thermostats for Multi-Protocol Homes
If your smart home runs on a mix of Thread, Zigbee, and Wi-Fi devices, you've probably struggled to find a thermostat that plays nice with all of them. In this episode, Keiko Tanaka breaks down seven Matter-compatible thermostats that finally deliver true cross-protocol climate control in 2026. Whether you're prioritizing aesthetics, complex HVAC setups, or budget-friendly options for rental properties, this guide helps you find the right fit for a home where multiple ecosystems need to work together seamlessly. The Google Nest Learning Thermostat (4th gen) offers Matter 1.4 certification with true local control, exposing temperature, humidity, occupancy, and scheduling data to Home Assistant, Apple Home, SmartThings, and Alexa simultaneously without cloud bridges. Ecobee Smart Thermostat Premium includes built-in air quality monitoring (VOC and CO2) that feeds into energy-saving automations, adjusting ventilation based on actual air conditions rather than arbitrary schedules. The Honeywell Home T10 Pro supports up to 20 wireless Thread-enabled room sensors that can be hidden in bookshelves or atop cabinetry, making it ideal for design-conscious homes with architectural details worth preserving. Carrier Cor Smart Thermostat exposes granular HVAC state data to your Matter controller, enabling dynamic load balancing automations that shift energy consumption toward cheaper or self-generated solar power during peak production. Amazon Smart Thermostat Plus offers budget-friendly Matter-over-Thread control for rental properties or secondary zones, though it relies entirely on external controllers for scheduling and automation logic. Thread border router functionality in several models extends your mesh network and maintains full thermostat operation even when internet connectivity drops, providing critical reliability for whole-home automation. Read the full article: https://mysmarthomesetup.com/top-7-matter-compatible-smart-thermostats-for-multi-protocol-homes
Google Home Hub vs Amazon Echo Hub vs Apple HomePod: Smart Home Controller Comparison
Choosing the wrong smart home hub can leave you with hundreds of dollars in devices that refuse to communicate with each other. In this episode, Marcus Chen breaks down the three major smart home controllers—Amazon Echo Hub, Google Nest Hub, and Apple HomePod—to help you make the right choice before buying your first smart bulb. Whether you're starting fresh or already invested in an ecosystem, this comparison covers protocol compatibility, automation capabilities, response times, and what happens when your internet goes down. Amazon Echo Hub is the only controller with built-in Zigbee radio, making it ideal if you already own Philips Hue bulbs, Sengled lights, or Aqara sensors—no separate bridge required for basic control. Apple HomePod processes all automations locally on the device itself, delivering the fastest response times (100–250 milliseconds) and keeping your smart home running even when internet connectivity drops. Google Nest Hub offers the most reliable Thread border router implementation, with consistent performance across 30+ Thread devices and self-healing mesh that reroutes within 2–3 seconds if a device goes offline. All three hubs only communicate with each other through Matter devices—cross-ecosystem compatibility remains limited without this standard protocol. Amazon's Zigbee implementation handles up to 50 devices reliably before mesh congestion becomes noticeable, at which point you'll need repeaters or network segmentation. None of these hubs support Z-Wave natively, so you'll need a third-party hub like SmartThings if your setup relies on that protocol. Read the full article: https://mysmarthomesetup.com/google-home-hub-vs-amazon-echo-hub-vs-apple-homepod
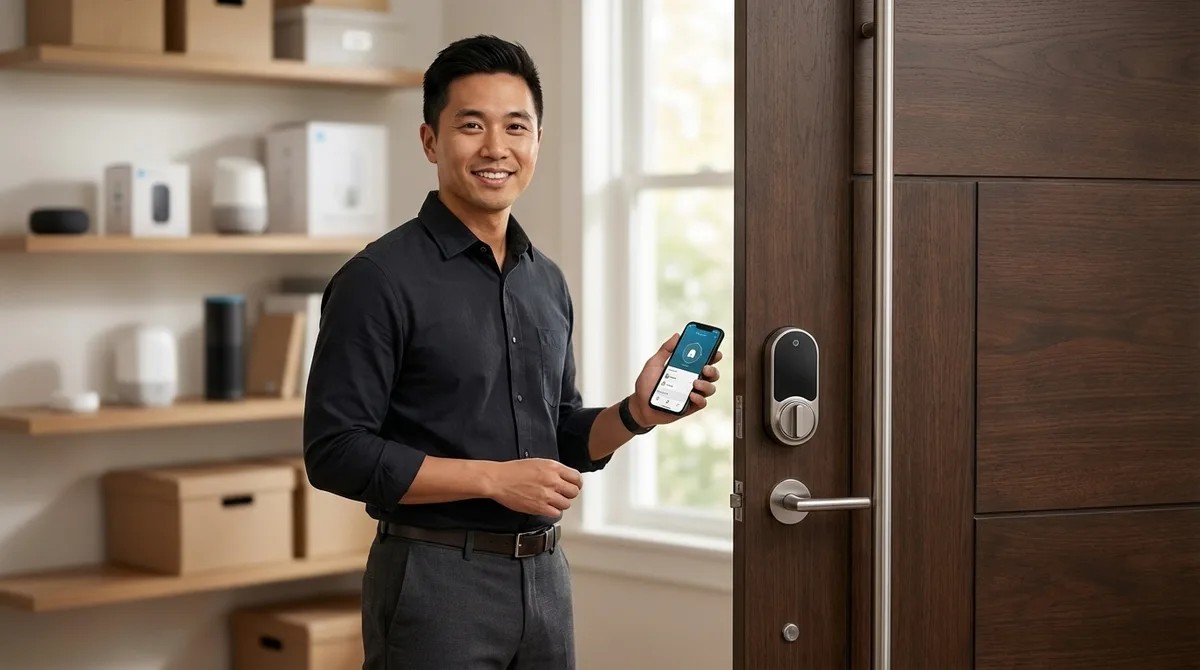
Best Thread-Enabled Smart Door Locks Under $300 in 2026
Struggling to pick a smart lock that won't drain batteries, lock you into one ecosystem, or require a computer science degree to set up? In this episode, Marcus Chen breaks down why Thread-enabled locks have become the gold standard in 2026 and walks through everything you need to know before spending a dime. Whether you're new to smart home tech or frustrated by past purchases that didn't live up to the hype, this guide covers the real-world details that product pages leave out—from border router requirements to door measurements that could make or break your installation. Thread locks require a Thread Border Router to function—your existing smart hub might not have one built in, so check compatibility before buying and budget an extra $50–100 if you need to add one separately. Thread and Matter aren't the same thing: Thread is the network protocol that lets devices communicate, while Matter is the application layer that enables cross-platform control across Apple Home, Google Home, Alexa, and SmartThings simultaneously. Matter 1.4 doesn't support lock codes yet, so you'll still need the manufacturer's app to manage guest codes, temporary access, or contractor entry—basic lock and unlock commands work across all platforms, but code management doesn't. Expect 6–12 months of battery life on four AA batteries with typical use, though locks acting as Thread routers or installed in freezing temperatures will drain faster—lithium batteries outperform alkaline in cold climates. Before ordering any smart lock, measure your door thickness (35–50mm), backset (60 or 70mm), and cross-bore diameter (typically 54mm)—non-standard doors from older homes often need adapter plates that aren't included. Retrofit Thread locks attach to your existing deadbolt's thumb turn and leave the exterior keyed cylinder intact, making installation faster and letting you keep your current keys. Read the full article: https://mysmarthomesetup.com/best-thread-enabled-smart-door-locks-under-300-in-2026

Matter Smart Lights vs Wi-Fi Smart Lights: Which Protocol Is Better?
Ever tap your phone to turn off the lights and wait... and wait... only to watch them finally respond seconds later? That frustrating lag isn't a dying bulb—it's your protocol choice working against you. In this episode, Keiko Tanaka breaks down the real-world differences between Matter and Wi-Fi smart lights, examining how each protocol shapes everything from response times to ecosystem flexibility. Whether you're building out a new smart home or troubleshooting a sluggish existing setup, this comparison reveals what's actually happening behind the scenes when you flip that virtual switch. Matter lights respond in 50–150 milliseconds locally, while Wi-Fi bulbs can lag 200–800 milliseconds due to cloud routing—a difference you feel every time you walk into a room. Wi-Fi bulbs create network congestion because each one maintains a persistent connection to your router; twenty bulbs means twenty devices competing for bandwidth with your phones and streaming devices. Matter-certified bulbs appear simultaneously in Apple Home, Google Home, and Alexa from a single QR code scan—no choosing sides or maintaining separate app connections. Thread mesh networking allows Matter lights to self-heal around failed nodes, maintaining local control even when your internet goes down, while most Wi-Fi bulbs become useless without cloud access. Wi-Fi bulb integrations are fragile—when manufacturers deprecate APIs or discontinue cloud support, you can lose access to entire lighting systems overnight. Matter automation executes locally on your controller, while Wi-Fi automation requires round trips through manufacturer clouds, adding latency and creating failure points. Read the full article: https://mysmarthomesetup.com/matter-smart-lights-vs-wi-fi-smart-lights

Best Zigbee Smart Plugs vs Z-Wave Smart Plugs for Home Automation
Ever wonder what your smart plugs are actually doing when you're not watching? Chelsea Miller spent three weeks capturing network traffic from twelve different smart plugs and discovered most of them are constantly sending data somewhere. This episode dives deep into the Zigbee versus Z-Wave debate, revealing which protocol actually keeps your home automations local and private. Whether you're building a privacy-first smart home or just want reliable control of your coffee maker, this breakdown of real-world testing across three separate networks will help you choose the right smart plugs for your setup. Zigbee plugs offer faster response times (200-400ms) and broader compatibility, while Z-Wave provides more reliable mesh performance and near-immunity to Wi-Fi interference—Chelsea's 14-day test showed Z-Wave maintained zero disconnections while Zigbee dropped four times during Wi-Fi channel switches. Using Zigbee or Z-Wave doesn't automatically mean local control—some plugs refuse to pair without phoning home first, and you should run packet captures to verify zero outbound connections after pairing to your local hub. Red flags for cloud dependency include mandatory mobile apps for initial pairing, firmware requiring internet access for local features, and manufacturer shutdown clauses buried in terms of service. Energy monitoring refresh rates matter more than most people realize—plugs reporting every 5 seconds enable useful automations, while 60-second intervals miss transient loads entirely and make conditional logic unreliable. Fallback behavior during hub crashes varies wildly between models: "retain last state" is ideal for most setups, but some plugs become completely unresponsive until manually power-cycled—test this before trusting critical devices. Matter 1.4 adoption for smart plugs remains disappointingly slow as of early 2026, and standard Zigbee or Z-Wave devices cannot bridge into Matter without manufacturer firmware updates. Read the full article: https://mysmarthomesetup.com/best-zigbee-smart-plugs-vs-z-wave-smart-plugs-for-home-automation
Smart Device Comparison Guide: How to Choose the Right Smart Home Products in 2026
Ever bought a smart device only to discover it won't talk to anything else in your home? You're not alone—most people cycle through multiple products before finding ones that actually integrate with their existing setup. In this episode, smart home consultant Marcus Chen breaks down the real framework for comparing smart devices, moving beyond marketing specs to focus on protocol compatibility, hub requirements, and automation capabilities. Whether you're building your first smart home or expanding an existing system, this guide will save you from expensive trial-and-error purchases. Smart device comparison isn't about feature lists—it's about validating protocol compatibility (Zigbee, Z-Wave, Thread, Matter, Wi-Fi) with your existing hub before you buy, not after the return window closes. Your hub choice dramatically affects what you can add: Amazon Echo supports Zigbee natively, Apple HomePod has no Zigbee or Z-Wave support at all, and Google Nest Hub requires separate bridges for those protocols. Each protocol has distinct trade-offs—Zigbee offers 30-100ms latency with mesh networking, while Wi-Fi devices typically run 100-300ms due to cloud round-trips and become useless during internet outages. The five-layer comparison framework covers protocol evaluation, hub requirements, ecosystem compatibility, automation logic capabilities, and fallback behavior when your internet goes down. Z-Wave provides better range (30-40 meters per hop) and interference immunity than Zigbee, making it particularly reliable for locks and garage doors in larger homes. Matter 1.4 promises unified compatibility across ecosystems, but in 2026 it's still maturing with some devices showing inconsistent controller synchronization—proceed with informed caution. Read the full article: https://mysmarthomesetup.com/smart-device-comparison-guide

How to Set Up Dynamic Load Balancing for Smart Home Energy Management
Ever had your circuit breaker trip mid-laundry because someone plugged in a space heater? In this episode, Marcus Chen explains how your smart home can automatically prevent electrical overloads by shifting power away from less critical devices before you hit capacity limits. This guide is for intermediate smart home enthusiasts ready to tackle conditional automation logic, covering the specific hardware, protocols, and setup steps needed to implement dynamic load balancing that reduces energy bills and eliminates frustrating breaker trips. Cloud-only energy monitors add 2–5 seconds of latency, which completely breaks load balancing—you need local API integration with 1–2 second update rates maximum for the system to react before breakers trip. Zigbee 3.0 and Matter over Thread smart plugs respond in 200–800 milliseconds, while typical Wi-Fi plugs add 1–3 seconds of delay, making protocol choice critical for effective load shedding. When installing current transformer clamps on your main panel feeds, the arrow direction matters—pointing the wrong way gives negative or inaccurate wattage readings that throw off your entire system. Space heaters (1,500W each), dehumidifiers (400–700W), and phone chargers make ideal shedding loads because they tolerate brief interruptions, while some appliances should never be automatically cut. The full setup requires 4–6 hours initially plus 2–3 hours for testing, and you'll need to know your panel's amperage rating (typically 100, 150, or 200 amps) and which circuits serve high-draw appliances. Local control capability across all devices is non-negotiable—internet outages cannot be allowed to disable your load balancing protection. Read the full article: https://mysmarthomesetup.com/how-to-set-up-dynamic-load-balancing-for-smart-home-energy-management
Smart Home Energy Audit Checklist: Identifying High-Consumption Devices and Phantom Loads
Your smart home might be silently adding hundreds of dollars to your annual electric bill—and you'd never know it because the waste happens while you sleep, spread across dozens of devices that never truly turn off. In this episode, Chelsea Miller shares findings from three years of monitoring every outlet in her fully local smart home setup, revealing exactly where the power goes. This is essential listening for anyone running energy management systems who wants real numbers instead of marketing promises, with a practical checklist for identifying high-consumption devices and phantom loads draining your wallet. Baseline infrastructure adds up fast: a typical network closet with a hub, router, mesh nodes, and NAS can draw 48 watts continuously—that's 420 kilowatt-hours annually (roughly $60) before a single smart bulb turns on. Repurposing an old desktop PC as a Home Assistant server could cost you 300+ kilowatt-hours more per year than a dedicated Raspberry Pi setup, translating to about $45 in wasted electricity. Smart features don't always mean smart savings: Level 2 EV chargers can draw 30–50 watts in standby even when no vehicle is connected, potentially consuming more annual energy than your entire lighting budget. Phantom loads from devices that appear "off" are major culprits—a TV soundbar with HDMI passthrough might draw 18 watts when off, nine times the manufacturer's claimed standby figure. Smart displays and wall-mounted tablets are sneaky energy drains, with devices like the Echo Show 10 pulling 7–10 watts idle and repurposed iPads drawing 8–12 watts if they never sleep. Your smart thermostat automations might actually trigger more frequent HVAC compressor cycles than a basic programmable thermostat would—check your runtime logs to confirm you're actually saving energy. Read the full article: https://mysmarthomesetup.com/smart-home-energy-audit-checklist

Understanding Peak and Off-Peak Energy Automation: TOU Rate Optimization Explained
Ever notice how your electricity bill climbs every summer despite your best intentions to run appliances at cheaper times? The reality is that manually shifting your energy use to off-peak hours is mentally exhausting, and almost nobody sticks with it. This episode breaks down how smart home automation can invisibly manage your energy consumption based on time-of-use rates—handling everything from pre-cooling your home before peak pricing kicks in to charging your EV overnight—without you changing a single habit. Peak and off-peak energy automation relies on three core components working together: energy monitoring hardware (smart plugs, circuit monitors, or whole-home panels), a central controller that stores rate schedules, and controllable endpoints like smart thermostats, water heater controllers, and EV chargers. Static time-of-use scheduling is the simplest approach, requiring no internet dependency and executing locally with sub-second latency, while dynamic pricing integration pulls real-time rates from utility APIs to adjust device behavior based on current electricity costs. Protocol choice significantly impacts performance—Wi-Fi devices introduce 200 to 500 milliseconds of command latency and depend on cloud connectivity, while Zigbee or Z-Wave systems execute locally with latency as low as 50 to 150 milliseconds once rate data reaches the hub. Thread-based devices maintain mesh network integrity even when the border router reboots, typically reforming within 2 to 5 seconds, making them more resilient during connectivity disruptions. The most advanced systems use machine learning to observe your historical consumption patterns, predict upcoming demand, and automatically pre-shift loads to minimize costs without requiring you to create any manual rules. As of early 2026, Matter 1.4 ecosystems theoretically support cross-platform rate-aware automations, but few utilities publish Matter-native APIs yet—most implementations still rely on RESTful endpoints that hubs translate internally. Read the full article: https://mysmarthomesetup.com/understanding-peak-and-off-peak-energy-automation
How to Create Energy-Saving Automations with Home Assistant and Matter Devices
Every watt you use on most smart energy platforms gets logged, profiled, and potentially sold—but it doesn't have to be that way. In this episode, Chelsea Miller walks you through building energy-saving automations that run entirely offline using Home Assistant and Matter 1.4 devices. You'll learn how to cut standby power, shift loads to off-peak hours, and respond to real-time consumption without sending a single packet to external servers. This guide is for anyone who already has Home Assistant running locally and wants to slash their energy bill while keeping their usage data completely private. Commission Matter devices directly through Home Assistant's interface rather than manufacturer apps to avoid creating cloud accounts that track your consumption patterns. Use a network packet sniffer like Wireshark to verify your devices aren't secretly phoning home—one budget Matter plug was caught sending data to an analytics CDN every ninety seconds despite claiming local-only operation. A typical "off" TV and soundbar can pull eighteen watts continuously, costing over two dollars monthly just to power a standby LED—phantom loads often account for ten to twenty percent of your electricity bill. Matter over Thread delivers thirty to eighty millisecond response times with mesh redundancy, making it ideal for mission-critical automations like preventing phantom loads. Before building any automations, audit your baseline consumption for forty-eight to seventy-two hours to identify which devices are actually wasting power and establish meaningful targets. Proper device naming conventions using underscores and lowercase text makes YAML automations significantly cleaner and easier to maintain long-term. Read the full article: https://mysmarthomesetup.com/how-to-create-energy-saving-automations-with-home-assistant-and-matter-devices
Smart Home Energy Management System Setup Checklist: Devices, Hubs, and Automations
Ever wonder why your "smart" thermostat needs to phone home every six minutes? In this episode, Chelsea Miller breaks down how to build a complete smart home energy management system that actually respects your privacy while cutting your power bill. After discovering her own devices were uploading granular occupancy data to cloud servers, she rebuilt her entire infrastructure around local control—and shares exactly which hardware, protocols, and automations work without external dependencies. If you're serious about energy efficiency but refuse to hand your usage patterns to data brokers, this checklist is your starting point. The Emporia Vue 2 measures 16 circuits with one-second sampling intervals, but you'll need to firewall its MAC address to prevent cloud sync—it attempts to phone home regardless of your settings. Avoid Samsung SmartThings V3 for energy management—it requires cloud authentication even for local Zigbee automations, making true offline operation impossible. The Venstar ColorTouch T7900 thermostat offers 100% local control via REST API with no cloud account required, unlike Ecobee and Nest which validate tokens through external servers even for local network commands. Zigbee plugs outperform Z-Wave for energy monitoring due to 50–150ms less latency, and Wi-Fi plugs should be avoided entirely since they constantly phone home and typically require manufacturer accounts. A UPS for your hub isn't optional—without power backup, all automations cease during outages and devices either revert to last state or lose connection entirely, leaving you blind to energy events when they matter most. Network isolation is critical: supposedly "offline" smart plugs have been caught attempting DNS lookups to advertising trackers even without companion apps installed, so run IoT devices on a segregated VLAN with no internet access. Read the full article: https://mysmarthomesetup.com/smart-home-energy-management-system-setup-checklist

What Is Real-Time Energy Monitoring in Smart Homes: Protocols and Accuracy Explained
Ever wonder why your electricity bill keeps climbing but you can't pinpoint the culprit? This episode breaks down real-time energy monitoring systems that show you exactly which devices are draining power second by second—and how homeowners typically cut their bills by ten to fifteen percent within six months of installation. Marcus Chen explains the technical differences between whole-home panel monitors and plug-level trackers, walks through the protocols that matter (Wi-Fi, Zigbee, and Matter), and reveals accuracy limitations manufacturers don't advertise. Whole-home monitors use current transformer (CT) clamps that sample four thousand to eight thousand times per second, achieving 95–98% accuracy for simple resistive loads but dropping to 85–90% accuracy for motors and compressors due to phase shift between current and voltage. Wi-Fi energy monitors connect directly without a hub but push data through the cloud, introducing two to five second delays—acceptable for tracking but too slow for real-time automations like load balancing. Zigbee smart plugs with energy monitoring only expose consumption data if your hub's API supports it; otherwise, readings stay locked in a proprietary app where you can't build useful automations. Matter-enabled energy monitors are emerging in 2026 with promises of cross-platform compatibility and local two to three second updates via Thread, while Z-Wave options have largely disappeared from this category. Smart plug monitors use either shunt resistors or Hall effect sensors to measure current, and protocol choice directly affects update frequency—Wi-Fi plugs refresh every one to two seconds while Zigbee plugs typically update every five to ten seconds through your hub. Practical automations like "notify me when laundry is done" depend on consistent power reporting; Wi-Fi plugs that lose connection can silently fail, leaving your automation broken without obvious errors. Read the full article: https://mysmarthomesetup.com/what-is-real-time-energy-monitoring-in-smart-homes
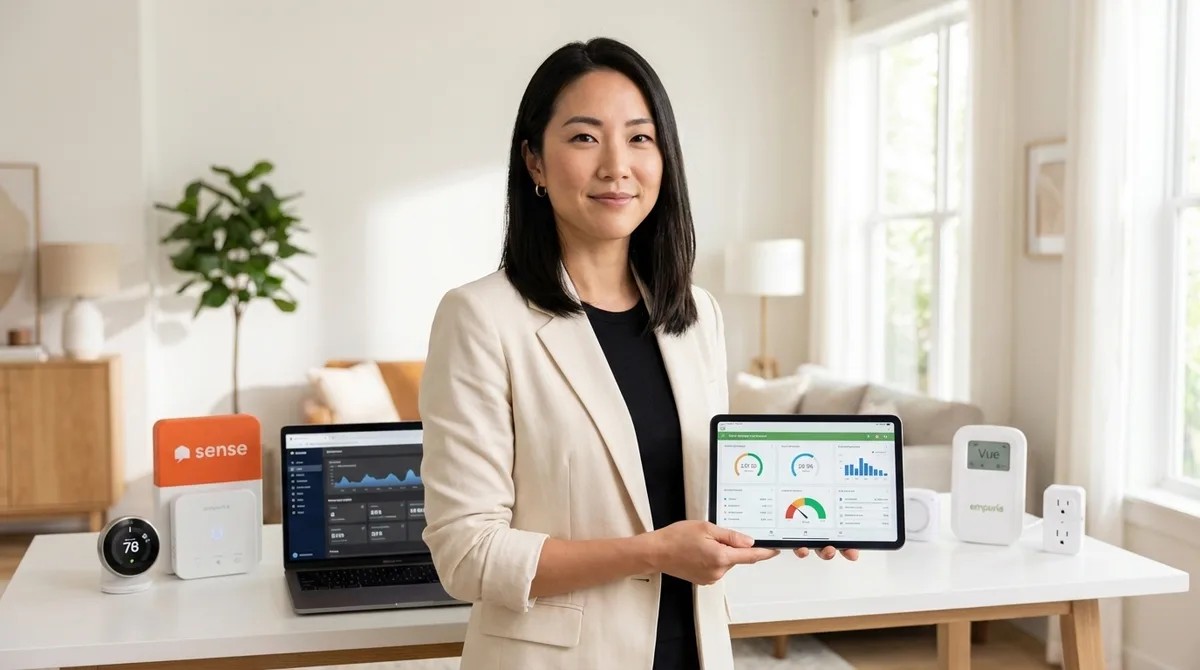
Sense vs Emporia Vue Energy Monitor: Which Is Better for Smart Homes?
When you're trying to build a smart home that feels invisible, the last thing you want is bulky tech cluttering your utility spaces. This episode dives into two leading whole-home energy monitors—Sense and Emporia Vue—to determine which one delivers meaningful data while disrupting your home's aesthetics the least. Host Keiko Tanaka breaks down protocol compatibility, installation footprints, device detection approaches, and the often-overlooked issue of cloud dependency that could turn your investment into expensive wall art if a company shuts down. Emporia Vue has a smaller physical footprint (3.5" x 5" hub) and disappears more easily behind panels, while Sense's larger 5" x 7" enclosure is harder to conceal in homes where electrical panels are visible in hallways or mudrooms. Sense offers native HomeKit integration and AI-powered automatic device detection that identifies 20+ appliances over time, whereas Emporia Vue skips HomeKit entirely and requires manual circuit mapping—but allows unlimited individual circuit tracking. Neither monitor supports Zigbee, Z-Wave, Thread, or Matter, meaning they can't directly trigger mesh-network devices and remain locked into Wi-Fi-only communication with full cloud dependency. Both systems stop working if your internet goes down, and if either manufacturer discontinues cloud support, the hardware becomes non-functional—a real concern for long-term smart home investments. For spaces where no visible panel modification is acceptable, smart plugs with built-in energy metering (like Aqara Smart Plug T2 or Zooz ZEN15) offer an invisible alternative that feeds data to a concealed hub without touching your electrical panel. Complex automations on Emporia Vue require external platforms like Home Assistant, while Sense provides native IFTTT and webhook support with limited conditional triggers out of the box. Read the full article: https://mysmarthomesetup.com/sense-vs-emporia-vue-energy-monitor
Best Smart Plugs for Energy Monitoring Under $50
That desk lamp you leave plugged in might be costing you more while it's off than when it's actually on. In this episode, Keiko Tanaka breaks down how smart plugs with energy monitoring can expose the hidden phantom loads silently inflating your electricity bill—and which models under $50 actually deliver useful data versus vague estimates. Whether you're troubleshooting a mysteriously high utility bill, building out a home automation system, or just curious why your guest room seems to drain power, this guide walks you through protocols, form factors, and the automation features that separate genuinely helpful plugs from glorified on/off switches. Wi-Fi plugs offer hub-free convenience but add router congestion and slower response times (200–800ms latency), while Zigbee plugs form self-healing mesh networks with 50–150ms response times—though they require a compatible hub and lock you into that ecosystem. Matter 1.4 promises cross-platform control across Apple Home, Google Home, and Alexa simultaneously, but as of early 2026, energy monitoring support remains inconsistent—verify your specific controller actually exposes power consumption data before buying. Real-time wattage updates every 1–5 seconds are essential for identifying phantom loads and testing whether devices truly power down; budget plugs that update only every 10–30 minutes are nearly useless for troubleshooting. Physical bulk matters more than specs suggest—energy monitoring plugs often extend 4+ inches from the wall, which can prevent furniture from sitting flush or block adjacent outlets entirely in older homes with tight spacing. The most powerful automation triggers on consumption thresholds rather than simple schedules: notifications when your washer cycle completes (wattage drops below 10W), automatic shutoffs when phantom draw exceeds limits for consecutive nights, or dimming non-essential lights when total consumption spikes. Top picks include TP-Link Kasa EP25 with Matter for future-proof cross-platform homes, Emporia Smart Plug for granular per-outlet tracking, Sonoff S31 Zigbee for mesh reliability in hidden installations, and Meross MSS315 for budget-friendly real-time monitoring. Read the full article: https://mysmarthomesetup.com/best-smart-plugs-for-energy-monitoring-under-50
Smart Thermostats vs Smart AC Controllers: Which Saves More Energy?
Thinking you need the priciest smart device to cut your energy bill? That assumption could actually cost you more. This episode breaks down the real-world differences between smart thermostats and smart AC controllers—two solutions that seem interchangeable but work with completely different HVAC systems. Whether you're running central air, window units, or mini-splits, Marcus Chen draws on dozens of installations to explain which technology delivers genuine savings for your specific setup. Smart AC controllers can save 10–15% more energy than smart thermostats when retrofitting window or mini-split units, but that higher percentage often applies to a smaller portion of your total cooling load. Smart thermostats deliver 15–23% savings on heating and cooling by managing multi-zone temperature control, adaptive learning based on your home's thermal mass, and humidity-aware cooling cycles. The 25–35% savings advertised for smart AC controllers sounds impressive, but if you're only controlling a bedroom window unit, that might translate to less than 4% of your actual monthly bill. Occupancy detection makes a major difference: smart thermostats with Zigbee or Thread sensors track multiple rooms with 200–500ms latency, while Wi-Fi AC controllers rely on slower geofencing with 1–3 second response times. Installation complexity varies dramatically—smart thermostats require C-wire connections or adapters and replace existing equipment, while smart AC controllers use IR blasters with no wiring changes needed. If your home uses multiple mini-splits throughout, combining several smart AC controllers can actually outperform a single central smart thermostat for whole-home efficiency. Read the full article: https://mysmarthomesetup.com/smart-thermostats-vs-smart-ac-controllers
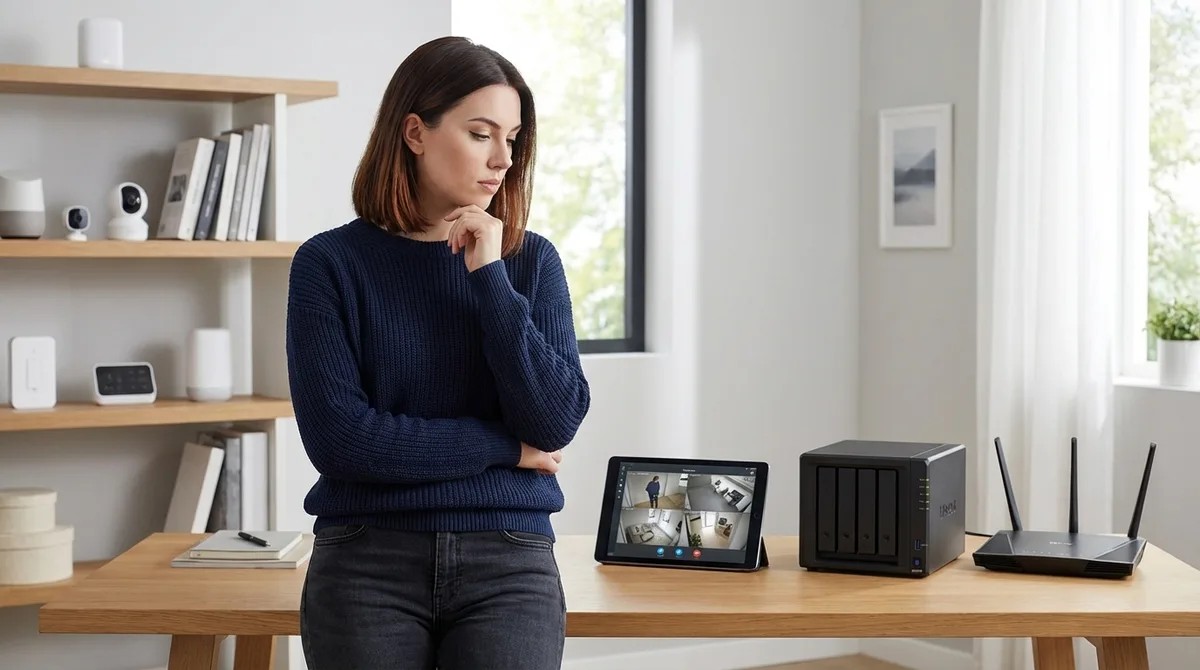
Local Storage vs Cloud Storage for No-Subscription Security: Complete Breakdown
Your security camera captures a critical moment—but where does that footage actually go, and will it still be there when you need it most? This episode dives deep into the fundamental choice facing anyone building a subscription-free home security system: keeping your video on local storage you control versus trusting it to cloud servers that charge monthly fees. Chelsea Miller breaks down the real-world costs, technical requirements, and failure points of each approach, helping you understand exactly what happens to your footage during internet outages, power failures, and even when companies decide to shut down their services. Cloud storage costs add up dramatically over time—a single camera can cost between $180 and $1,800 over five years just for the privilege of accessing your own footage, while local storage eliminates these recurring fees entirely. SD card reliability matters more than most people realize; consumer-grade cards fail after 10,000 to 100,000 write cycles, while high-endurance surveillance cards can handle two to five years of continuous recording before giving out. Network bandwidth becomes a critical bottleneck with NAS setups—1080p streams require 2-4 Mbps per camera while 4K demands 8-15 Mbps, so multiply by your camera count to check if your network can actually handle the load. Not all "local storage capable" cameras support RTSP streaming, which is essential for NAS compatibility, so checking specs before purchasing prevents expensive compatibility headaches. Power-over-Ethernet NVR systems eliminate Wi-Fi reliability issues by running a single cable that both powers the camera and carries the video stream, creating a more robust setup than wireless alternatives. Local storage latency is remarkably fast at 0-200 milliseconds from motion detection to recording start, with no internet dependency, meaning your system keeps working even when your ISP goes down. Read the full article: https://mysmarthomesetup.com/local-storage-vs-cloud-storage-for-no-subscription-security
How to Choose Security Systems With No Monthly Fee: Protocol and Hub Guide
You've invested in cameras and sensors, but are you still trapped behind a monthly paywall just to access your own footage? This episode breaks down the architecture behind truly subscription-free security systems—the protocols, hubs, and local storage solutions that let you build a setup that records locally, responds instantly, and integrates seamlessly into your home. Whether you're weighing Wi-Fi cameras against Zigbee sensors or trying to understand where Matter 1.4 fits into the picture, Keiko Tanaka walks you through the decision framework that separates effortless security from laggy, alert-spamming frustration. Wi-Fi cameras offer simple setup but introduce latency (800ms to 2 seconds for live feeds), saturate bandwidth, and leave your entire security layer vulnerable if your router fails—Zigbee and Z-Wave sensors respond in 100 to 300 milliseconds locally. Z-Wave operates on sub-1 gigahertz frequencies, meaning less interference and better wall penetration than Zigbee's crowded 2.4 gigahertz spectrum—a crucial consideration for multi-floor homes with sensors scattered throughout. Hub investment of $100 to $200 for platforms like Hubitat Elevation or Home Assistant consolidates automation logic across devices and eliminates the app fragmentation that comes with Wi-Fi-only systems. Matter 1.4 now includes camera support, but as of 2026, most compatible models from Arlo, Ring, and Eve still lack local recording without subscriptions—compatibility claims require careful vetting. Local storage options range from 32-256GB microSD cards per camera to network-attached storage (NAS) devices, giving you complete control over footage retention without cloud dependencies. Thread-based mesh networking requires a border router (second-generation Apple HomePod, Google Nest Hub, or dedicated Nanoleaf router) but enables low-power devices to communicate without proprietary bridges. Read the full article: https://mysmarthomesetup.com/how-to-choose-security-systems-with-no-monthly-fee

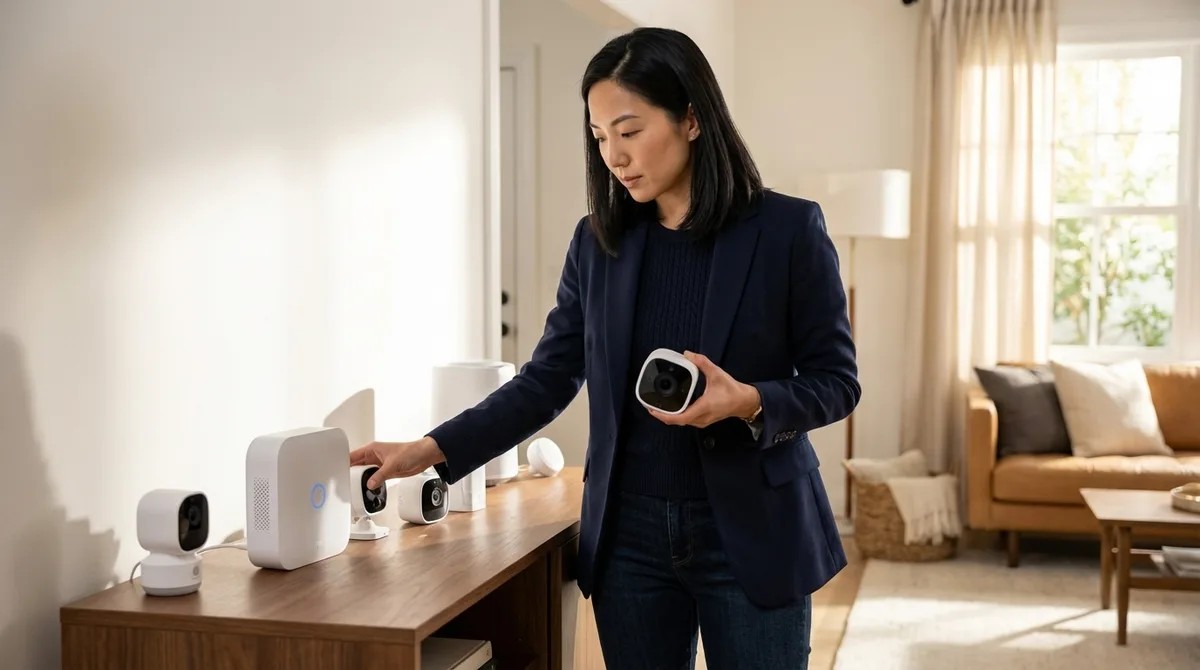
Arlo Camera Without Subscription vs Ring Without Subscription: Which Works Better?
You paid good money for a security camera, but without a monthly subscription, will it actually do its job? In this episode, we break down what really happens when you strip away the recurring fees from Arlo and Ring—two of the most popular camera brands on the market. If you're trying to build a home security setup that doesn't nickel-and-dime you every month, this comparison reveals which system handles subscription-free use more gracefully and which compromises you'll need to accept along the way. Ring edges ahead for subscription-free use thanks to unlimited live view, a five-second pre-roll buffer on battery models, and local recording that continues working even when your internet drops. Arlo cameras without a subscription become live-view-only devices—you'll get motion alerts but no recorded footage unless you purchase the separate SmartHub for around $200. Neither system offers smart AI detection (people, packages, vehicles) without paying monthly, leaving you with basic motion-only alerts that can't distinguish between a delivery driver and a blowing tree branch. Both cameras rely exclusively on Wi-Fi with no support for Zigbee, Z-Wave, Thread, or Matter, making them awkward fits for multi-protocol smart home ecosystems built around local control. Ring's offline resilience is a critical advantage—cameras with local storage keep recording during internet outages and sync footage when connectivity returns, while Arlo cameras become completely non-functional without cloud access. Arlo limits live view sessions to ten minutes with no pre-roll buffer, meaning if someone triggered motion and walked away before you opened the app, you've missed them entirely. Read the full article: https://mysmarthomesetup.com/arlo-camera-without-subscription-vs-ring-without-subscription

Best Smart Home Energy Monitors for Matter and Zigbee Systems
Your utility bill keeps climbing, but you have no idea which device is quietly draining power while you sleep. In this episode, Marcus Chen breaks down how to choose an energy monitor that actually integrates with your Matter or Zigbee smart home setup—and explains why measuring at the right level of granularity is the difference between vague data and actionable insights. Whether you're trying to catch a rogue pool pump or automate EV charging around peak rates, this guide covers the protocols, products, and automation logic that will help you finally understand where your electricity is going. Native Matter devices with Thread report power changes in 200–500 milliseconds, while Wi-Fi devices bridged to Matter can take 1–2 seconds due to cloud round-trips—a critical difference for automations that need to prevent breaker trips. Zigbee and Thread devices continue working locally when your internet goes down, unlike Wi-Fi monitors dependent on cloud APIs that can break your automations during outages or maintenance windows. Circuit-level monitoring is where you actually find energy hogs; whole-home monitors only show aggregate usage and can't distinguish between your fridge and water heater without additional current transformers on individual breakers. Advertised accuracy of ±2–5% applies to ideal conditions with resistive loads—expect ±8% or worse on motor-driven appliances like washing machines and HVAC compressors. The Shelly Pro 3EM reports at one-second intervals via CoAP or MQTT but defaults to sixty-second intervals over Matter, which catches new users off-guard when automations respond slower than expected. For plug-level monitoring in Zigbee systems, the Aqara Smart Plug T2 offers superior response time and automation reliability compared to most competitors in its price range. Read the full article: https://mysmarthomesetup.com/best-smart-home-energy-monitors-for-matter-and-zigbee-systems
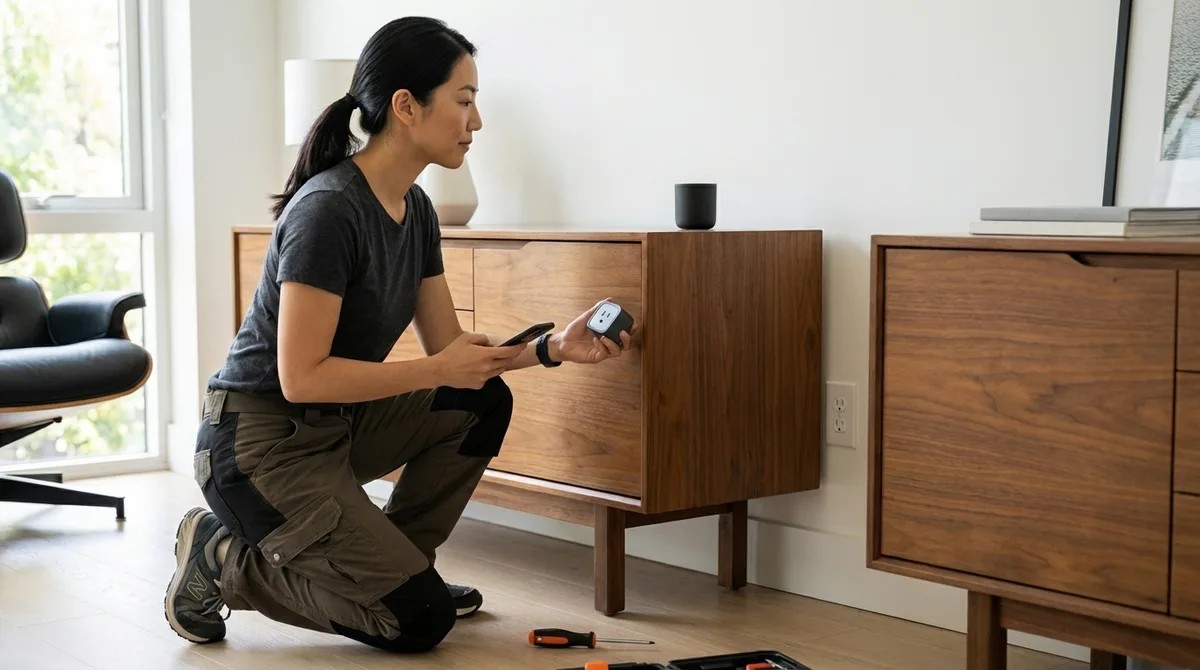
How to Install Hidden Smart Plugs Behind Furniture and Appliances
Smart home automation doesn't have to mean visible gadgets and tangled cables cluttering every corner of your space. In this episode, Keiko Tanaka walks through the complete process of installing smart plugs behind furniture, inside cabinets, and within appliances so your automation becomes invisible. Whether you're tired of glowing plugs ruining your carefully designed rooms or you want lamps and media consoles that respond intelligently without any visible tech, this guide covers the strategic placement, protocol selection, and installation techniques to make it happen. Different smart plug protocols serve different purposes: Matter and Thread offer cross-platform compatibility, Zigbee and Z-Wave plugs extend your mesh network as repeaters, while Wi-Fi plugs work standalone but can introduce 2–5 seconds of latency compared to under one second for mesh protocols. You need a minimum of 2–3 inches of clearance behind furniture for proper airflow around concealed smart plugs—skipping this step creates potential fire hazards. The best automation candidates aren't everything that can be automated, but what should be: floor lamps triggered by occupancy, media consoles that shut down after two hours of no motion, and seasonal lighting tied to sunset times. Documenting each plug's location and intended automation in a simple diagram prevents the common frustration of having five identically named devices with no idea which controls what. Not all smart plugs work for hidden installations—compact, low-profile designs that protrude less than two inches from the outlet are essential, while bulky models with external antennas can create connectivity issues or heat problems in enclosed spaces. If you're planning hidden motion sensors alongside your plugs, map both simultaneously so sensors can trigger the automated plugs you're installing. Read the full article: https://mysmarthomesetup.com/how-to-install-hidden-smart-plugs-behind-furniture-and-appliances
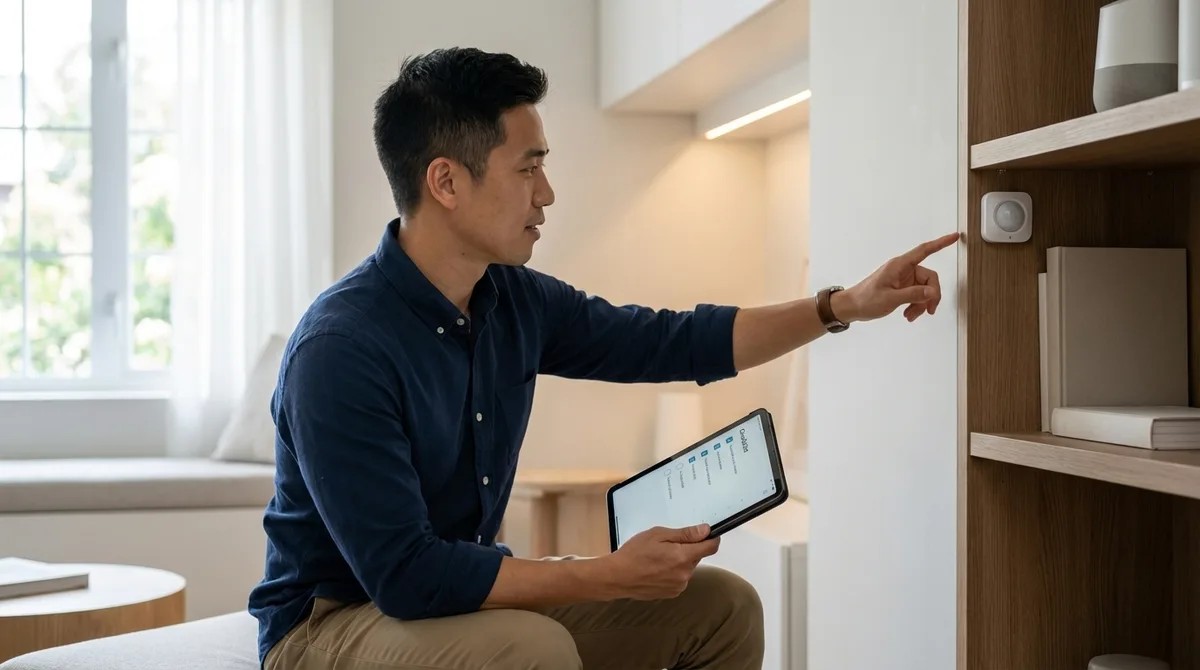
Discreet Smart Home Automation Checklist: Protocol Requirements & Device Placement
You've carefully hidden motion sensors behind picture frames and tucked your smart home hub into a closet for that clean, invisible aesthetic—only to watch half your automations fail two weeks later. This episode tackles the frustrating reality that not all wireless protocols handle concealed placement equally, and poor hub positioning can turn your sleek setup into a troubleshooting nightmare. Marcus Chen breaks down exactly which protocols maintain signal strength behind walls and inside furniture, where to position your hub for reliable mesh performance, and the planning steps that separate seamless hidden automation from constant connectivity drops. Whether you're building a new smart home or retrofitting an existing one, this guide ensures your devices stay invisible and actually keep working. Thread-enabled Matter devices and Zigbee 3.0 handle hidden placement best because they create self-healing mesh networks that route around obstacles—concealing mains-powered devices can actually extend your network rather than weaken it. Z-Wave's lower frequency (908 MHz in the US) penetrates walls and furniture better than 2.4 GHz protocols, requiring fewer repeaters for hidden installations—roughly one every 50-60 feet compared to Zigbee's 30-40 feet. Wi-Fi devices struggle most with concealed placement, especially behind metal surfaces or inside electrical boxes; if you must hide them, ensure line-of-sight to your access point even when visually obscured. Hub placement should prioritize central positioning over aesthetics—hiding your hub in a basement corner or metal utility closet creates single-point-of-failure scenarios that doom your entire setup. Zigbee hubs generate significant heat, so hiding them inside furniture without at least two inches of clearance on all sides can cause thermal throttling and mysterious connection drops. For Matter over Thread setups, your Thread border router needs reliable power and strong Ethernet or Wi-Fi backhaul—tucking it behind furniture on spotty Wi-Fi undermines your entire network's remote access capability. Read the full article: https://mysmarthomesetup.com/discreet-smart-home-automation-checklist

How to Hide Smart Home Devices Without Blocking Wireless Signals
Your smart home works perfectly—until you try to make it look presentable. The moment you tuck sensors behind frames, slide hubs into cabinets, or bury smart plugs behind furniture, automations start failing and devices drop offline. This episode breaks down exactly why concealment kills connectivity and how to hide your tech without destroying your mesh network. Whether you're dealing with Zigbee, Z-Wave, Thread, or Wi-Fi devices, you'll learn the specific materials, placement strategies, and testing methods that separate a reliable hidden setup from one that constantly drops commands. Your mesh network's repeater nodes are the worst candidates for aggressive concealment—hiding a single smart plug behind a metal appliance can collapse an entire branch of your network and take multiple sensors offline within 36 hours. Material choice matters dramatically: fabric and wood cause minimal signal loss (1–5 dB), while even thin aluminum foil can attenuate 2.4 GHz signals by 20–40 dB, effectively killing device communication entirely. Before hiding anything, map your existing mesh topology through your hub's diagnostic tools to identify which mains-powered devices are actively routing traffic for battery-powered sensors. Response time baselines vary by protocol—Zigbee should hit 100–300 milliseconds, Z-Wave runs 150–400 milliseconds, and Thread with a local Matter controller achieves 50–200 milliseconds. Test these before and after concealment. Signal strength (RSSI) readings between -40 and -70 dBm indicate healthy Zigbee connections, while anything below -80 dBm signals trouble—sometimes moving a device just eight inches can restore full connectivity. Set up automated monitoring that alerts you when any device hasn't reported in over 10 minutes, catching marginal connections before they fail completely during real-world use. Read the full article: https://mysmarthomesetup.com/how-to-hide-smart-home-devices-without-blocking-wireless-signals

Understanding Concealed Smart Home Hubs: Z-Wave, Zigbee & Matter Compatibility
If you've built a privacy-conscious smart home but your hub sits on a shelf broadcasting your tech setup to every visitor, you're undermining your own operational security. This episode tackles a challenge most smart home guides ignore: how to hide your hub without killing wireless performance or mesh reliability. Chelsea Miller draws on three years of testing concealed configurations to explain which protocols actually tolerate being tucked inside cabinets, behind TVs, or within furniture—and which ones will punish you with dropped signals and frustrated troubleshooting sessions. Zigbee and Thread protocols handle concealment better than Z-Wave because their mesh architectures let nearby router devices compensate for a hidden coordinator's reduced range—as long as you maintain 3–4 router devices within 20–25 feet of the hub. Concealment materials matter more than you'd think: wood adds 3–8 dB of signal attenuation, drywall adds 5–12 dB depending on moisture content, and metal surfaces can cut 10–20 dB—potentially halving your effective range. Older Z-Wave 700-series hubs need more central, open placement because their mesh topology relies heavily on consistent signal strength from the controller itself, making concealment riskier. Matter border routers vary dramatically in concealment tolerance depending on whether they're managing Thread networks (mesh-friendly) or bridging Wi-Fi devices (placement-critical). Hiding your hub offers a genuine privacy advantage: a visible hub signals to visitors and potential intruders that you're running automation with cameras and sensors, while concealment keeps your security posture ambiguous. Real-world latency impact is minimal for most uses—expect 12–18 milliseconds of additional delay with cabinet concealment, which won't affect lighting or sensors but may matter for rapid sequential automation triggers. Read the full article: https://mysmarthomesetup.com/understanding-concealed-smart-home-hubs

Hidden Smart Home Installation Checklist: Everything You Need Before You Buy
That "just works" promise on your next smart device is hiding infrastructure requirements, protocol conflicts, and privacy vulnerabilities that manufacturers would rather you never discover. In this episode, Chelsea Miller breaks down the technical checklist you need to complete before purchasing any smart home device—covering network architecture, protocol compatibility, and the specific hardware requirements that determine whether your automation runs locally or becomes another surveillance endpoint. Whether you're building a privacy-first setup or just tired of ecosystem lock-in traps, this guide reveals what breaks smart homes before they even get started. Your router likely can't isolate IoT devices from your personal network—most consumer routers lack VLAN support, and without it, a compromised smart bulb could access your NAS or other sensitive devices. A single "local" Z-Wave hub attempted 847 connections to analytics domains in 24 hours; without DNS-level blocking through Pi-hole or AdGuard Home, local control claims are essentially marketing fiction. Zigbee and Wi-Fi both operate on 2.4 GHz and can interfere catastrophically—if your router auto-selects Wi-Fi channel 6, your Zigbee network could experience 40–60% packet loss, causing retransmission storms during video calls. Matter 1.4 devices won't fully work with older Matter 1.0 or 1.1 hubs, and most 2024 hubs require firmware updates that manufacturers aren't clearly advertising. Z-Wave devices are region-locked by radio frequency (US at 908.4 MHz, EU at different frequencies), meaning importing devices from another region will result in complete incompatibility. Commercial remote access routes your commands through manufacturer servers with 150–400ms latency and creates single points of failure during cloud outages; a self-hosted VPN keeps local automations truly local. Read the full article: https://mysmarthomesetup.com/hidden-smart-home-installation-checklist

What Are Covert Smart Home Sensors? Types, Protocols & Use Cases Explained
Ever wonder what's silently monitoring your home from inside walls, furniture, and ceiling cavities? This episode pulls back the curtain on covert smart home sensors—the hidden devices designed to disappear into your living space while tracking motion, temperature, door contacts, and more. Chelsea Miller shares findings from three years of hands-on testing, revealing which sensors work offline and which ones are quietly uploading your behavioral data to the cloud. If you're building a discreet smart home setup or concerned about privacy, this breakdown of protocols, detection mechanisms, and real-world use cases will change how you approach hidden automation. Covert sensors use the same protocols as visible ones—Zigbee, Z-Wave, Thread, Matter, Wi-Fi—but their miniaturized form factors often sacrifice onboard processing power, making them more cloud-dependent by design. In a 2024 audit of 23 "discreet" sensors, 19 transmitted data to manufacturer servers even when local-only mode was supposedly enabled, with the smallest devices being the worst privacy offenders. Z-Wave's sub-gigahertz frequency penetrates walls better than Zigbee's 2.4 gigahertz signal, making it more reliable for sensors hidden inside metal junction boxes or dense building materials. Thread sensors offer superior sleep efficiency compared to Z-Wave, which extends battery life—a critical advantage for covert installations where accessing the sensor for battery swaps is difficult. Wi-Fi sensors drain batteries in weeks, making them impractical for hidden setups unless they're hardwired to a power source. Covert PIR motion sensors recessed into ceilings typically have narrower detection angles (around 87 degrees versus 110 degrees for bulky models), which affects placement strategy for hallways and open rooms. Read the full article: https://mysmarthomesetup.com/what-are-covert-smart-home-sensors-types-protocols-use-cases-explained
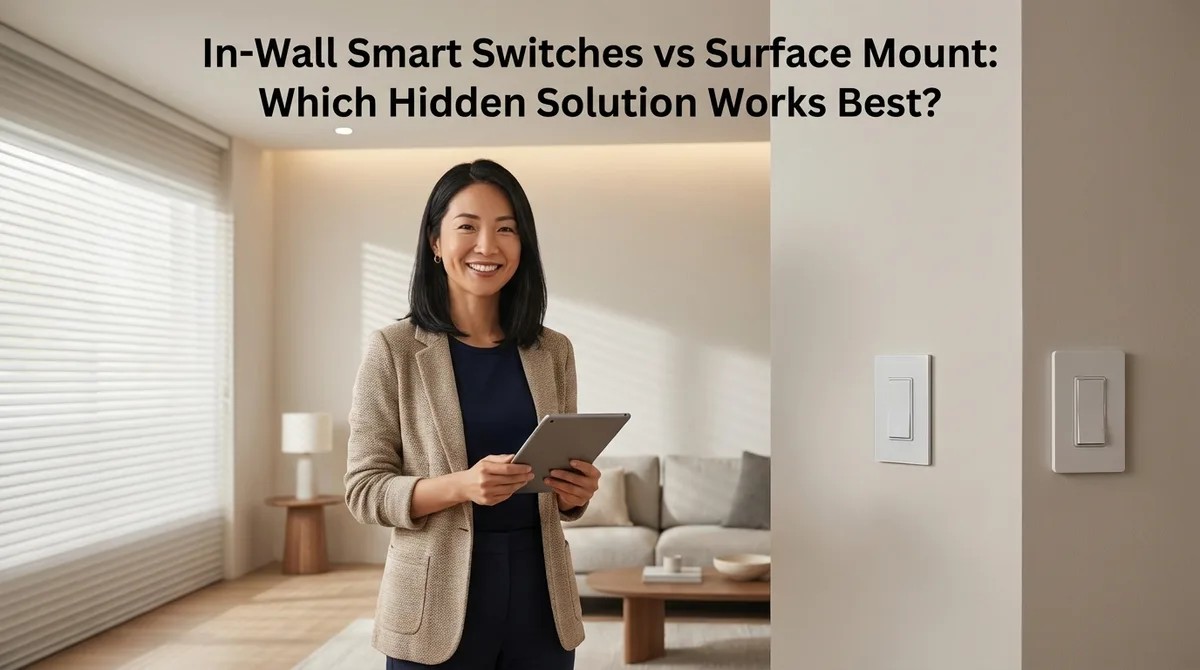
In-Wall Smart Switches vs Surface Mount: Which Hidden Solution Works Best?
Ever walked into a beautifully designed room and felt something was just slightly off? That glossy plastic button stuck to the wall or the mismatched switch plate might be the culprit. In this episode, Keiko Tanaka dives into one of the most overlooked decisions in smart home design: whether to install switches inside your walls or mount them on the surface. If you're torn between seamless aesthetics and installation simplicity, this breakdown of protocols, costs, reliability, and the daily visual experience will help you make the right call for your space. In-wall smart switches require a neutral wire in most cases, and homes built before the 1980s often lack this third wire—forcing you into expensive rewiring, specialty switches like Lutron Caseta, or surface-mount alternatives altogether. Surface-mount switches install in seconds with adhesive or minimal screws, but they protrude 3–15mm from your wall and can visually disrupt clean lines, especially in raking afternoon light. Protocol choice matters more than you'd think: in-wall switches typically use Zigbee or Z-Wave requiring a hub, while surface-mount options increasingly favor Thread for self-healing mesh networks without hub dependency. Wi-Fi-based in-wall switches can flood your network—fifteen switches transmitting status updates may degrade video call quality and overall network performance. Cost differences are dramatic: in-wall switches run $150–400 total including professional installation, while surface-mount devices cost $25–70 with no installation expense. Reliability trade-offs cut both ways—in-wall switches are hardwired with no battery anxiety and offer manual fallback via physical paddles, but surface-mount batteries need replacement every 12–24 months and adhesive can fail in humid environments. Read the full article: https://mysmarthomesetup.com/in-wall-smart-switches-vs-surface-mount

Best Disguised Smart Speakers Under $150 (Zigbee & Thread Compatible)
Smart speakers don't have to scream "tech gadget" the moment someone walks into your home. In this episode, Marcus Chen breaks down eight disguised smart speakers under $150 that vanish into your décor while delivering the Zigbee, Thread, and Matter compatibility your automation network demands. If you've been hunting for voice control and mesh network integration without sacrificing your interior design aesthetic, this guide answers exactly how to get both—complete with real-world latency tests and specific hub requirements for each device. The IKEA Symfonisk Picture Frame runs Matter 1.4 over Thread and acts as a border router, strengthening your mesh network for nearby sensors while looking like standard wall art—though you'll need custom matting since the 12x16-inch frame doesn't match standard photo print sizes. Zigbee 3.0 speakers like the LIFX Beacon Table Lamp draw only 3W at idle compared to 8-12W for typical Wi-Fi speakers, making a measurable difference when you're running multiple units across your home. Combined automation commands (like triggering both lighting and audio) run 120-320ms faster when routed through a single Zigbee message versus separate Wi-Fi protocols for each action. The Lenovo Smart Clock Essential doubles as a Zigbee router supporting up to 32 child devices, letting you extend mesh coverage into bedrooms without adding dedicated repeaters. Matter 1.4 compatibility eliminates protocol bridging headaches—devices work natively with Apple Home, Google Home, Amazon Alexa, and Samsung SmartThings without cloud roundtrips slowing down your automations. Every speaker tested includes meaningful fallback behavior: local control via physical buttons or last-set states when your hub or internet goes offline, so you're never left with completely bricked devices. Read the full article: https://mysmarthomesetup.com/best-disguised-smart-speakers-under-150-zigbee-thread-compatible

Hidden Motion Sensors vs Visible Motion Sensors: Which Is Better for Matter Networks?
You've spent months perfecting your living room's clean aesthetic, only to have a white plastic motion sensor dome ruin the view from every angle. But is hiding your sensors worth the trade-offs in your Matter smart home? This episode dives deep into the hidden versus visible motion sensor debate, comparing both approaches across installation complexity, Matter protocol reliability, automation responsiveness, and long-term maintenance. Whether you prioritize seamless design or easy troubleshooting, Keiko Tanaka breaks down exactly what each choice means for your smart home ecosystem. Thread-based hidden sensors maintain excellent mesh reliability through drywall and wood, while Wi-Fi models suffer 15–30% signal degradation when concealed behind building materials. Installation time differs dramatically: hidden sensors require 2–4 hours per unit for retrofit projects involving wall cutting and wire fishing, while visible sensors mount in 5–10 minutes with adhesive or a single screw. Visible Thread sensors achieve 99%+ trigger accuracy with unobstructed antenna placement, compared to 98%+ for properly positioned hidden Thread models and lower rates for Wi-Fi variants. Battery replacement reveals the biggest maintenance gap—hidden sensors can take 20+ minutes and may require drywall patching, while visible sensors offer 60-second battery swaps through pop-off covers. Hidden sensors preserve the illusion that your space is naturally responsive rather than monitored by gadgets, which matters most in design-focused homes with natural materials and curated aesthetics. Visible sensors offer one unique advantage: their prominence acts as a deterrent in security-focused installations, signaling active monitoring to potential intruders despite the aesthetic cost. Read the full article: https://mysmarthomesetup.com/hidden-motion-sensors-vs-visible-motion-sensors

Hidden Motion Sensors vs Visible Motion Sensors: Which Is Better for Matter Networks?
Should your motion sensors disappear into your walls or sit out in plain sight? In this episode, you'll learn how hidden and visible motion sensors compare across aesthetics, Matter protocol reliability, installation complexity, and long-term maintenance. We break down which approach makes sense for design-conscious homes versus pragmatic setups that prioritize easy troubleshooting. • Thread-based hidden sensors maintain reliable mesh connectivity through drywall and wood with less than five percent signal loss, while Wi-Fi models can suffer fifteen to thirty percent degradation when concealed. • Installing recessed ceiling sensors takes two to four hours per unit and costs eighty to one hundred fifty dollars professionally, compared to five to ten minutes and no additional labor for visible adhesive-mounted sensors. • Visible sensors allow sixty-second battery replacements and instant LED status checks, while hidden sensors require ladder access, trim ring removal, and twenty-plus minutes per service event. • Mixing hidden and visible sensors in the same Matter network causes no protocol conflicts, but maintaining consistent wireless technology across all sensors prevents timing inconsistencies in whole-home automations. • Hidden sensors preserve architectural integrity in design-focused homes planning long-term occupancy, while visible sensors suit renters, frequent redecorators, and anyone who values iterative placement refinement. Links to any products or resources mentioned in this episode can be found at https://mysmarthomesetup.com/hidden-motion-sensors-vs-visible-motion-sensors.

Best Hidden Security Cameras for Smart Homes in 2026
If you want your home to feel secure without looking like a surveillance compound, this episode is for you. Keiko Tanaka draws on years of integrating concealed cameras into residential smart homes across the Pacific Northwest to explain what actually makes a hidden security camera worth installing in 2026. She breaks down the technical requirements, protocol compatibility, storage decisions, and automation potential that separate genuinely invisible cameras from devices that just claim to be discreet. The most effective hidden cameras don't disguise themselves as everyday objects like smoke detectors—they integrate into existing architectural elements like picture frame moldings or speaker ventilation grilles, disappearing into your space rather than adding suspicious new objects. Physical dimensions matter far more than marketing suggests; cameras requiring large cutouts or modifications often create installation headaches like exposed wiring, patched holes, or awkward furniture placement that undermine the whole point of concealment. Matter 1.4 and Thread compatibility have become baseline requirements for hidden cameras in mature smart home ecosystems, enabling cross-platform automations where motion detection can trigger lights, verify door locks, and shift thermostat modes without proprietary bridges fragmenting your system. Thread-based cameras offer 50–150 millisecond response times compared to Wi-Fi's 200–800 milliseconds, but require a Thread Border Router like an Apple HomePod mini or Google Nest Hub for setup. The best 2026 hidden cameras offer dual-path storage—continuous local recording with cloud uploads triggered only by specific events—preserving your autonomy while providing selective backup for critical moments without monthly fees eating into your budget. True smart home integration requires cameras that expose granular conditional triggers, letting you build automations based on person detection in specific zones during specific hours rather than just generic motion alerts. Read the full article: https://mysmarthomesetup.com/best-hidden-security-cameras-for-smart-homes-in-2026
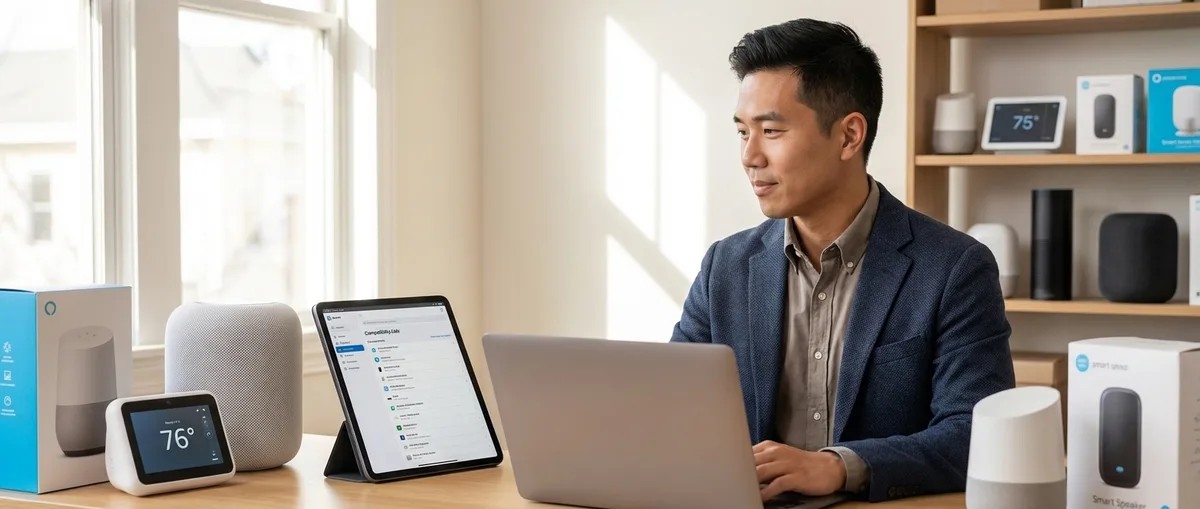
Matter 1.4 Compatibility Checklist: Verify Device Support Across Ecosystems
You scan the QR code on your new Matter 1.4 certified smart plug, and nothing happens. Your hub claims it's incompatible, even though both devices proudly display the Matter logo. In this episode, smart home installer Marcus Chen breaks down exactly why "Matter certified" doesn't guarantee compatibility and shares the verification checklist he uses on every professional installation. Whether you're expanding an existing setup, mixing devices from different manufacturers, or trying to figure out why pairing keeps failing, this episode gives you the specific checks to run before you buy. A hub labeled "Matter compatible" may only support Matter 1.0 or 1.1, meaning it won't recognize newer device types introduced in 1.4 like robot vacuums, energy management devices, and enhanced sensors—always verify the actual firmware version in your hub's settings. Thread-based Matter devices require your hub to function as a Thread Border Router, and many older smart displays that support Matter over Wi-Fi lack the Thread radio entirely, making pairing impossible. Matter relies on IPv6 for local device communication, so if your router has IPv6 disabled or your ISP doesn't provide it, you'll need to enable IPv6 over IPv4 tunneling before Matter devices will work properly. Your controller app matters as much as your hub hardware—even if your hub firmware supports Matter 1.4, the app (Apple Home, Google Home, Alexa, SmartThings) must also have updated its Matter implementation to access new device categories. Multi-admin support lets one device work across multiple ecosystems simultaneously, but feature parity isn't guaranteed—an energy monitoring plug might show full data in Google Home while appearing as a basic on/off switch in Apple Home. Some newer Wi-Fi Matter devices require Wi-Fi 6 (802.11ax) for proper performance, and pairing failures or reliability issues often trace back to routers running only Wi-Fi 5. Read the full article: https://mysmarthomesetup.com/matter-1-4-compatibility-checklist

Matter 1.4 Hub Requirements Explained: Border Routers, Bridges, and Controllers
Ever notice how a single unresponsive light or a delayed automation can disrupt the entire flow of your smart home? Those small frustrations often trace back to infrastructure choices you didn't realize you were making. This episode breaks down the three critical components behind Matter 1.4—border routers, bridges, and controllers—and explains how each one determines whether your automations feel seamless or frustrating. Whether you're building a Thread-based sensor network or integrating legacy Zigbee devices, understanding these requirements helps you avoid redundant hubs and dropped commands. Thread-based Matter devices require a border router (like a HomePod mini or certain Nest/Echo speakers) to translate between the mesh network and your home's IP network—without one, Thread devices simply can't communicate with controllers. Multiple border routers create redundancy; if one loses power or fails, the Thread mesh automatically reroutes through another, which is essential for homes where automation controls critical functions like entryway lighting. Controllers don't have to be dedicated hubs—a smartphone can act as one temporarily, but automations require something always powered and connected, making smart speakers or concealed devices like a Mac mini running Home Assistant ideal for clutter-free setups. Bridges like the Philips Hue Bridge let existing Zigbee or Z-Wave devices participate in Matter ecosystems, but they introduce 100–300 milliseconds of additional latency and create a single point of failure for all connected legacy devices. Matter 1.4 compatibility isn't automatic or retroactive—older controllers may need firmware updates, and not all bridges support the new standard yet, so verifying explicit compatibility before assuming seamless integration is critical. For design-focused installations, infrastructure can disappear: in-wall switches with built-in Thread radios serve as both endpoints and border routers, eliminating the visual clutter of stacked hubs in utility closets. Read the full article: https://mysmarthomesetup.com/matter-1-4-hub-requirements-explained

How to Migrate Your Smart Home to Matter 1.4 Without Breaking Automations
Smart home enthusiasts have been promised seamless interoperability for years, and Matter 1.4 finally delivers—but only if you migrate correctly. In this episode, Keiko Tanaka draws on a decade of smart home design experience to walk you through the exact process of upgrading your network without destroying the automations that make your home feel intelligent. Whether you're running Apple Home, Google Home, Amazon Alexa, or Home Assistant, this guide covers the preparation, sequencing, and troubleshooting you need to preserve those morning routines and sensor responses that currently work invisibly. A careless migration can break every automation in your home in a single afternoon—the key is documenting device dependencies and cross-protocol chains before touching anything, including which sensors trigger which responses and their expected latency. Not all "Matter compatible" devices actually support Matter 1.4; you must verify specific model numbers in the Connectivity Standards Alliance database rather than trusting marketing claims, since older 1.0 or 1.2 implementations lack critical features. Firmware updates should happen before migration begins, and Thread-based devices require an active Thread border router to update—meaning you may need to establish your Thread network first if you're moving from Zigbee. Export automation rules from every platform with timestamps to create restoration points; Apple Home allows shortcut exports, Home Assistant uses YAML files, but Google Home unfortunately requires manual documentation. Expect to invest four to six hours over a weekend, with intermediate technical comfort required—you'll be working with hub settings, backup files, conditional logic, and commissioning apps on iOS 17+ or Android 13+. Your existing automation chains likely span multiple protocols without you realizing it—a single bedroom lighting scene might depend on a Zigbee contact sensor, Z-Wave motion detector, and Wi-Fi bulbs all working together, and these must be carefully reconstructed in Matter 1.4. Read the full article: https://mysmarthomesetup.com/how-to-migrate-your-smart-home-to-matter-1-4-without-breaking-automations
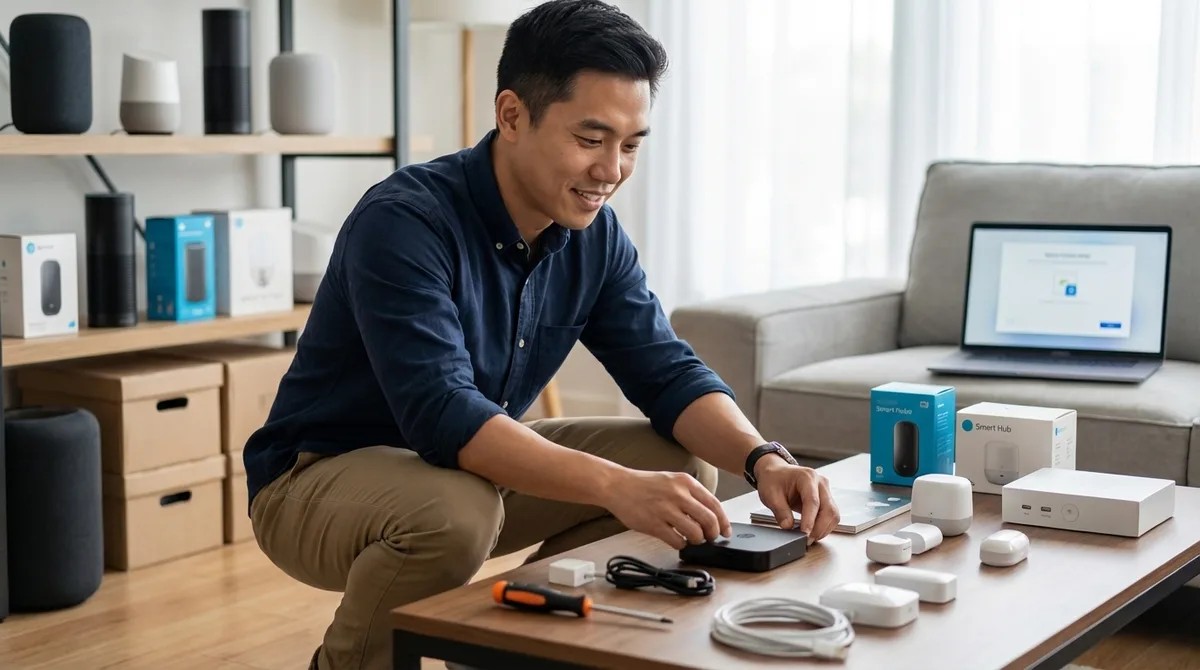
Matter 1.4 Device Setup Checklist: Everything You Need Before Installing
Ever wonder why some people breeze through smart home installations while others spend hours troubleshooting mysterious connection drops? The difference almost always comes down to preparation. In this episode, Marcus Chen shares the exact checklist he's developed from walking dozens of homeowners through their first Matter 1.4 setups—covering everything from router firmware requirements to controller compatibility to the network settings that silently break your automations. If you're planning to install Matter devices and want to avoid midnight router reboots, this one's for you. Your router needs IPv6 support with firmware from 2024 or later—routers from 2022 or earlier often cause intermittent device drops even when IPv6 is technically enabled, and outdated firmware is the most common culprit behind phantom connectivity issues. Keep both 2.4GHz and 5GHz bands active without aggressive band steering, since most Matter sensors and battery-powered devices require 2.4GHz for adequate range despite it being considered "old technology." Assign a static IP to your primary Matter controller (HomePod, Nest Hub, or Echo) to prevent automations from mysteriously breaking after router reboots when the controller's address changes. If you've created VLANs or separate IoT networks for security, verify bidirectional communication between your controller and devices—firewalls that allow outbound traffic but block inbound responses will let everything appear connected while no commands actually work. Counterintuitively, you should disable port forwarding for Matter ports 5540 and 5541—unlike older protocols, Matter handles remote access through your ecosystem's cloud service, and manual port forwarding creates routing conflicts that prevent local communication. Not all Matter-compatible devices can control a Matter network; Apple HomePod and Apple TV 4K function as both controllers and Thread border routers, while Google Nest Hubs support Matter 1.4 but lack Thread border router functionality. Read the full article: https://mysmarthomesetup.com/matter-1-4-device-setup-checklist

Matter 1.4 vs Thread: Which Smart Home Protocol Is Better?
If you've ever wondered why your "smart" home still feels frustratingly dumb, you're probably confused about the difference between Matter and Thread—and you're not alone. In this episode, Marcus Chen breaks down the critical distinction that most people get wrong: Matter and Thread aren't competing standards at all. One is the language your devices speak, the other is the road they travel. Understanding this relationship before you buy another gadget could save you from a drawer full of expensive mistakes. Matter is an application layer protocol that defines what devices can do together, while Thread is a network transport protocol that determines how they communicate—they're designed to work together, not compete. Not all Matter devices use Thread, and not all Thread devices support Matter. Some older Thread products from brands like Eve and Nanoleaf don't support Matter at all, which is where buying confusion often starts. Thread offers significantly lower latency (50–150 milliseconds) compared to Matter's typical 200–500 milliseconds, making it faster than both Zigbee and Z-Wave for local mesh communication. Your Matter controller—whether it's a HomePod mini, Google Nest Hub, or Amazon Echo 4th gen—handles all automation logic. If that controller loses power, your automations stop working even though devices still respond to manual control. Matter 1.4 doesn't replace your existing Zigbee or Z-Wave devices. Your Philips Hue bulbs still need their bridge; Matter just lets that bridge communicate with multiple ecosystems simultaneously. To run Thread-based Matter devices, you need three things: a Matter controller, a Thread Border Router (often the same device), and devices specifically certified for Matter 1.4—always verify certification before purchasing. Read the full article: https://mysmarthomesetup.com/matter-1-4-vs-thread
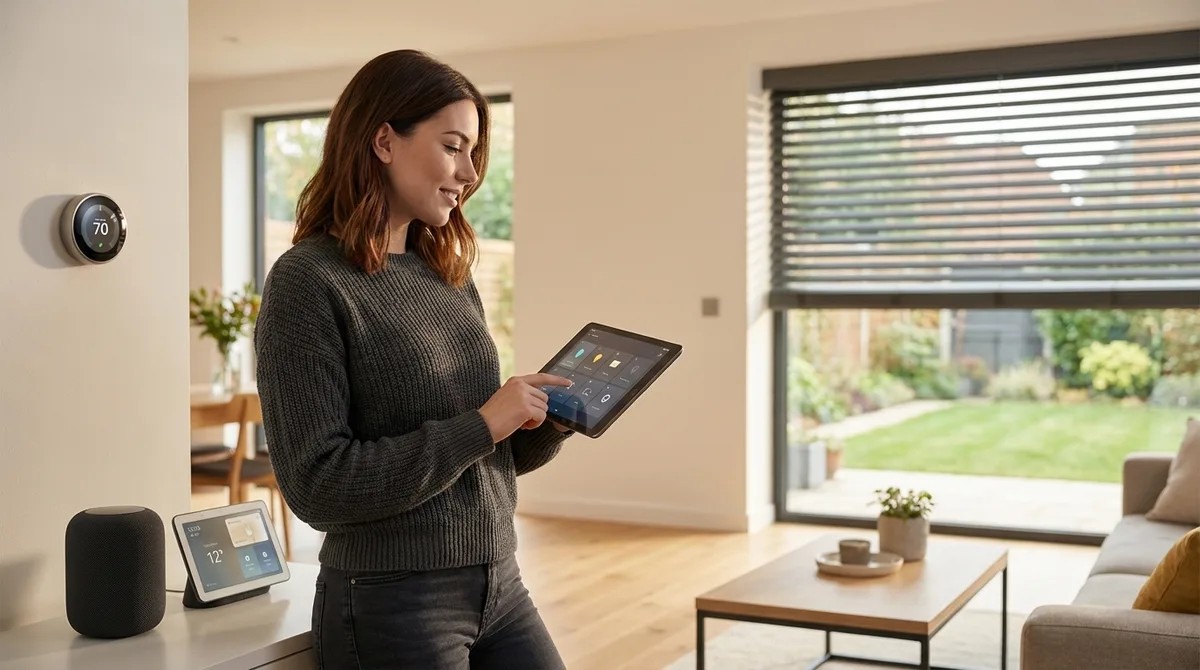
Best Matter 1.4 Compatible Smart Home Devices for 2026
You've done the research, bought the "local control" devices, and built what you thought was a privacy-respecting smart home—only to discover your gadgets are still quietly phoning home. In this episode, Chelsea Miller shares the results of four months of rigorous testing on Matter 1.4 devices, including 30-day air-gapped network trials and packet captures that reveal which products actually deliver on their local control promises. If you're serious about building a smart home that doesn't depend on cloud servers or leak your data to manufacturers, this breakdown will show you exactly what to look for and which devices passed the strictest privacy tests. True local operation means testing actual packet behavior, not trusting marketing claims—run devices on an air-gapped network and verify automations still work when your internet connection drops. Firmware updates are a hidden vulnerability; many manufacturers force cloud authentication for updates even when devices operate locally day-to-day, effectively building in a kill switch for privacy-focused setups. Running Wireshark captures during device setup reveals critical red flags like persistent cloud connections, excessive data transmission, and DNS queries to manufacturer servers that shouldn't exist on truly local devices. Thread-based devices offer better resilience than Wi-Fi-only Matter devices because they create mesh networks that route around failures, but you should test border router fallback behavior explicitly since migration delays can range from 2 to 45 seconds. Manufacturers like Eve Systems and Aqara stand out for transparency, offering direct firmware downloads and local update mechanisms without cloud handshakes. Generic IoT privacy policies don't cut it anymore—look for manufacturers that publish Matter-specific documentation explaining exactly what data leaves your network and why. Read the full article: https://mysmarthomesetup.com/best-matter-1-4-compatible-smart-home-devices-for-2026