
Beyond the Garden Basics Podcast
182 episodes — Page 1 of 4
More Heat-Beating Garden Tips
Controlling Starthistle, Summer's Most Evil Weed*
Your Garden vs. Summer Heatwaves
Other Vegetables That Love the Heat
A Deep Dive Into Citrus Containers
Your 7 Favorite Beyond the Garden Basics Newsletter Editions
The No-Turn, Easy Compost Pile
Is This the Longest Lasting Cut Flower? Perhaps. But, Beware.
All About Basil
Growing Sweet Potatoes
Mycorrhizal Activity and Your Plants' Health
The 2026 Tomato Preview Show!

Growing Citrus Trees in a Non-Citrus Environment
This is a free preview of a paid episode. To hear more, visit gardenbasics.substack.comFarmer Fred interviews horticulturist and commercial citrus grower Lance Walheim about the history and cultivation of citrus fruits, covering varieties, growing tips, pest challenges, and the joys of homegrown citrus.
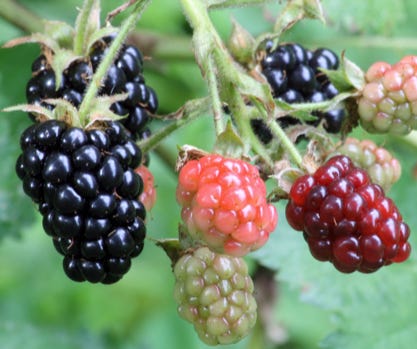
Tips For Growing Blackberries
This is a free preview of a paid episode. To hear more, visit gardenbasics.substack.comIf you’re looking for a superfood to grow, it’s hard to beat blackberries. They can be grown in just about every state in the United States. They’re highly adaptable, and they thrive in USDA zones from 4 all the way up through 10. Here in California, in USDA zone 9, they do quite well. They grow nearly anywhere that has enough sun.Today, we talk with Master Gardener and berry expert Jeff Smoker, who has tips for growing blackberries.Blackberries are considered a superfood.According to North Carolina State University, a superfood is so-called because it has a high ratio of nutrients to calories, and that is a perfect description of a blackberry.According to North Carolina State University, blackberries are low in fat and sodium. They make a very heart-healthy snack. They’re loaded with fiber, 7.6 grams per 100 per cup. Only 62 calories per cup. Carbohydrates, 13 or 14 grams. Less than 7 grams of sugar. Less than 1 gram of fat. And they even has 2 grams of protein. Plus, they are loaded with vitamin C, manganese, vitamin K, vitamin E, potassium. They’re high in antioxidants, which reduce free radicals, combat oxidative stress, and may protect against cancer, heart disease, and cognitive decline.

How Safe is Rain Barrel Water? When to Plant Warm Season Vegetables and Flowers.
This is a free preview of a paid episode. To hear more, visit gardenbasics.substack.com We talk about water safety and rain barrels with Sacramento County Master Gardener and vegetable expert Gail Pothour who swears up and down on her stack of Ruth Stout gardening books that she would NEVER drink water from a rain barrel…nor would she water her edible plants with it.What’s a gardener to do?
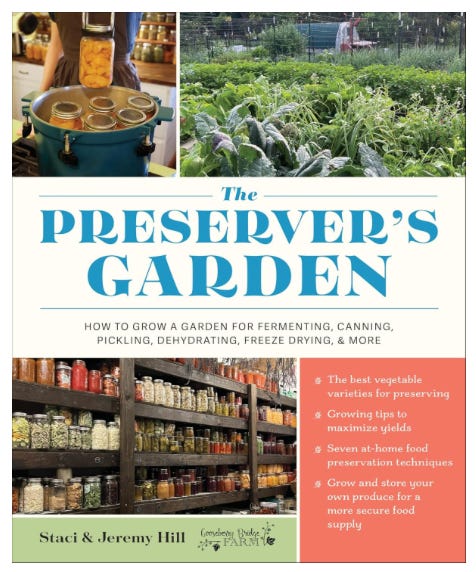
The Preserver's Garden
This is a free preview of a paid episode. To hear more, visit gardenbasics.substack.comIn this podcast episode, I speak with Staci and Jeremy Hill, authors of "The Preserver's Garden," at their 11-acre farm Gooseberry Bridge in the Ozark Mountains. We explore their transition from urban life to sustainable farming, emphasizing self-sufficiency and healthy eating through preserving homegrown food.
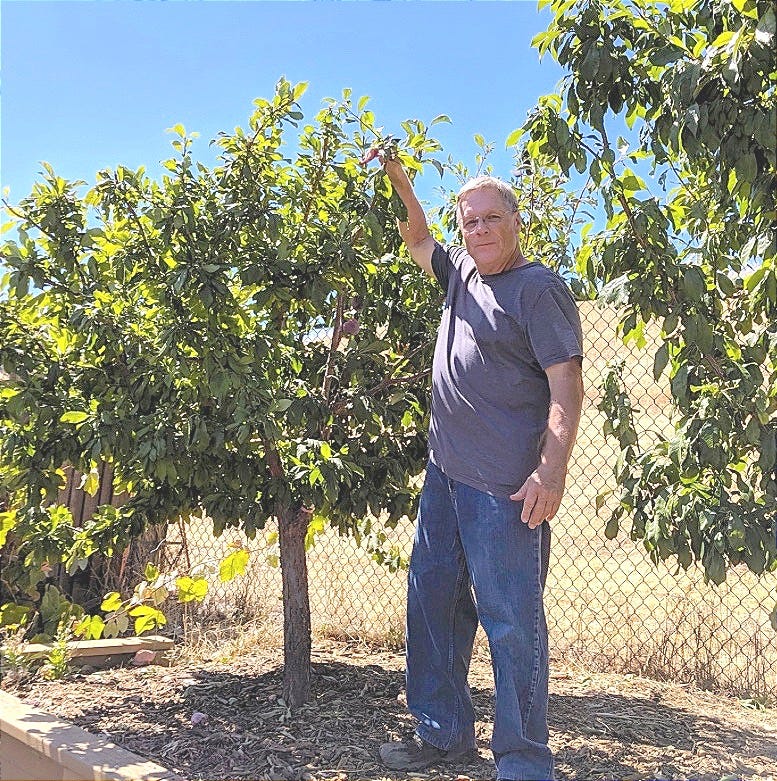
What is Backyard Orchard Culture?
This is a free preview of a paid episode. To hear more, visit gardenbasics.substack.comWhat is Backyard Orchard Culture? According to Dave Wilson Nursery, the goal of Backyard Orchard Culture is the prolonged harvest of tree-ripe fruit from a small space. This means planting close together several fruit varieties that ripen at different times and keeping the trees small by summer pruning.According to today’s podcast guest, Ed Laivo, the backyard garden is not a place for a commercial orchard, where all the fruit and nut trees are planted 20 feet apart and get 20-30 feet tall. For thirty years, Ed has championed the idea that the backyard gardener needs only to grow enough fruit to feed the family, as safely and economically as possible.

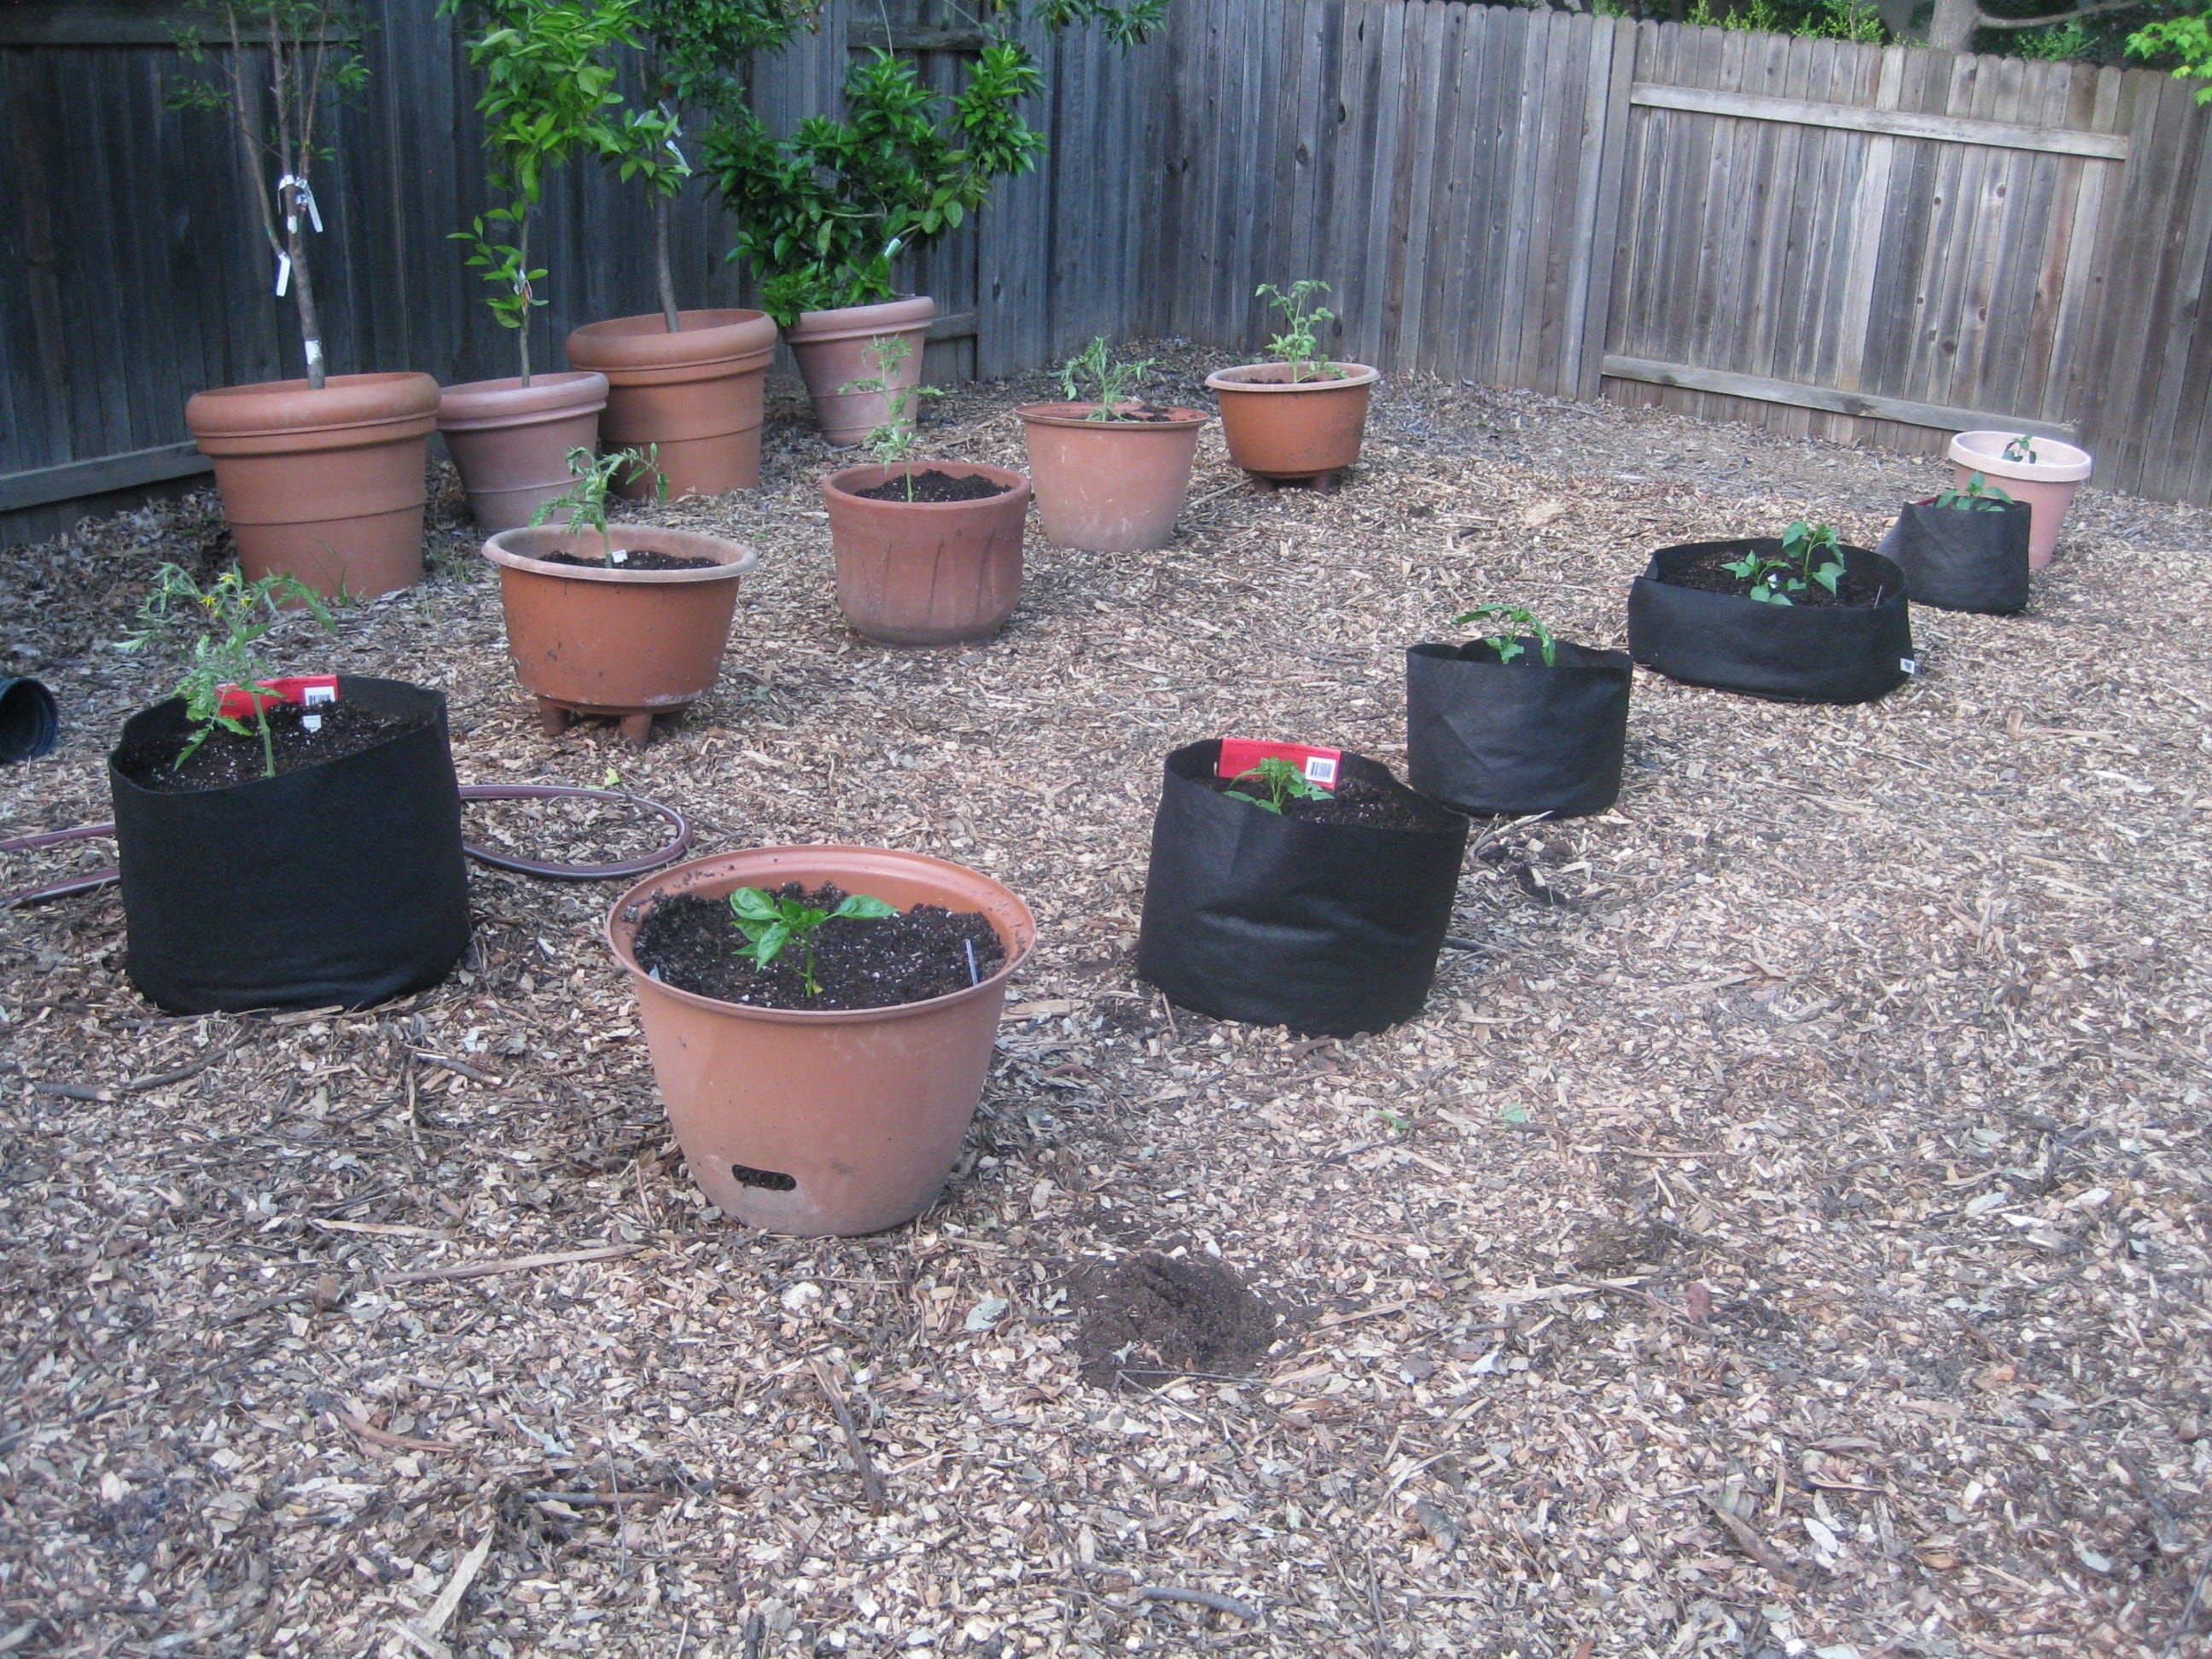
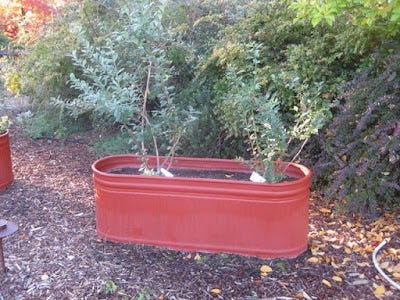
Stock Tank Gardening
This is a free preview of a paid episode. To hear more, visit gardenbasics.substack.comSome passersby or visitors might think you have a yard full of shiny coffins in your front or backyard. OK, using large steel cattle watering troughs as gardening containers might not appeal to those who heed form and design before function. But that staple of rural areas for supplying water to horses, cattle, and sheep is also damn practical for the gardener looking to remain more upright while working with food and flower crops. Opting for watering troughs as large garden containers also helps avoid vexing in-ground soil issues such as perpetually soggy clay soil, rocks, thin soil, as well as soil that might be rife with pests (hello, gophers!) and soil-borne diseases such as verticillium wilt, nematodes, fusarium and more. Besides, you can mute the “coffin comments” by prettying them up…with the right paint.In today’s newsletter podcast, we talk with Sacramento County Master Gardener Gail Pothour about using steel watering troughs as large containers for food and flowers. Not only does she have them in her own yard, she and her fellow Master Gardeners at the vegetable section of the Fair Oaks Horticulture Center in Sacramento County, California are showing visitors their value for growing vegetables, annuals, and perennials.Beyond the paywall in both the podcast and newsletter today, we discuss the benefits and drawbacks of using regular steel and galvanized steel as containers for edible crops. One of the big drawbacks to galvanized steel: the chances of zinc leaching into the soil and into the roots of your plants…and then into you. We will look at the available scientific literature (and there’s not much, really) that discusses the dangers of using a container made from galvanized steel.Also, we will delve into the important topic of how to have easier drainage from containers to avoid standing water. And, from “The Road to Hell is Paved with Good Intentions” Department: what some gardeners do, thinking they are helping the water draining situation, when in reality, they may be creating more problems, causing water to collect in the containers, leading to possible root rot. And, of course, paid subscribers get a transcript of the podcast, corrected by an actual human!Paid subscribers are about to find out if their galvanized stock tanks serving as raised vegetable garden beds are slowly killing them. Don’t be left out!
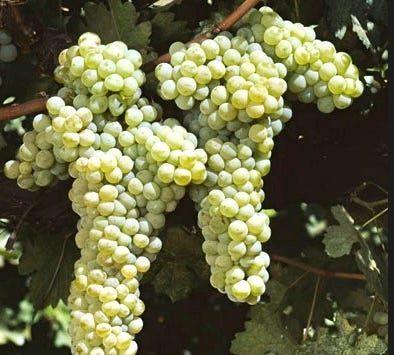
All About Grapes
This is a free preview of a paid episode. To hear more, visit gardenbasics.substack.comToday’s podcast here on Beyond the Garden Basics is all about grapes. We have two interviews with two Sacramento County UC Master Gardeners, who specialize in grape selection, planting, trellising, feeding, watering, protecting, and harvesting both wine grapes and table grapes. You’re going to discover the best disease and heat resistant varieties, the best tasting grape varieties, and detailed information about pruning both table grapes and wine grapes.And if ever there was a podcast that screamed for pictures, charts, graphics, and more. It’s this one. To the rescue is the original newsletter that contains this podcast, Beyond the Garden Basics, which you can find with an easy search or just to Substack dot com. In the newsletter, we’ll have more explanations about what we talk about in the podcast, including diagrams explaining the various pruning techniques for grapes, best performing grape varieties, and links to grape growing advice from universities throughout the country.
First Food Garden? New Garden? We Have Tips.
Please share this with any of your friends or family embarking into the exciting world of backyard gardening, especially starting a food garden!America’s Favorite Retired College Horticultural Professor, Debbie Flower, and I explored these “lessons learned the hard way” (aka “Garden Wisdom”) back in 2022. This is a public episode. If you'd like to discuss this with other subscribers or get access to bonus episodes, visit gardenbasics.substack.com/subscribe
All About Blueberries
This is a free preview of a paid episode. To hear more, visit gardenbasics.substack.comBlueberries Grow Well in ContainersAt our former residence, the blueberry harvest from our six plants was outstanding; there was plenty for us, as well as the birds (note: add netting). The six southern highbush varieties that we planted there included Sharp Blue, Jubilee, South Moon, Blue Ray, Sunshine Blue and Misty. That was about 10 years ago.
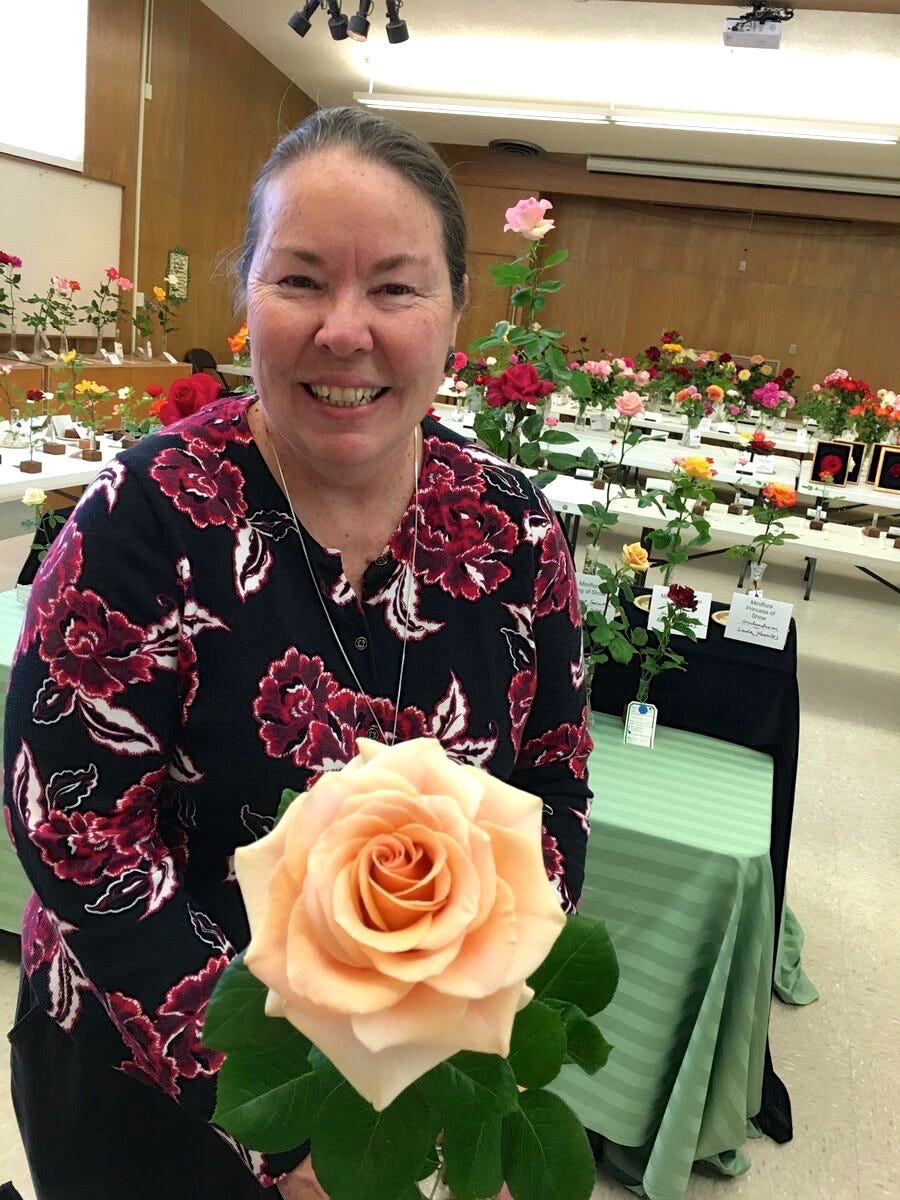
New Roses for 2026
This is a free preview of a paid episode. To hear more, visit gardenbasics.substack.comIn today’s newsletter podcast, Master Rosarian Debbie Arrington waxes rhapsodic about the new rose varieties that will be at nurseries in 2026. In USDA Zone 9, those roses may already be available locally. If not, they’re usually available from rose catalogs. For paid subscribers, Debbie talks about 12 new rose varieties (it’s 6 varieties for free subscribers). Paid subscribers also have access here to the transcript of the podcast, which features pictures of all the roses as well as links to where you can find them online.After the paywall (in the middle of the transcript, below), there are pictures and chat about 6 more new roses for 2026; and, Debbie has tips for bringing cut roses into the house, preserving their aromatic nature. Plus, tips for what to look for when shopping for roses.Here’s the transcript of our conversation about 2026 roses with Debbie Arrington of the Sacramento Rose Society, along with pictures and links:==========Farmer Fred: I was looking up the term “shovel prune”, trying to find out its origin. If you’re a gardener, you may be familiar with the term shovel prune. It basically means to remove a plant, in a polite way. And the first time I heard it, it was from a rosarian. In fact, the only people I know who use the term shovel prune are rosarians. And so I figured, well, it must have some sort of rose background. But unfortunately, I hit too many dead ends. But I will just assume that shovel pruning is a Rosarian term, because you need to make room for all the new roses that are coming out right now. It’s a great habit to get into. (FREDNOTE: This article is not quite the dead end for a definition for “shovel pruning”… and it’s entertaining!)Rosarians love new roses. They love to try new roses. They love to smell them, as well. And one Rosarian has a nice bully pulpit here in the Sacramento area.Debbie Arrington is a master rosarian with the Sacramento Rose Society. She knows her roses. She and Kathy Morrison publish, every day of the year, the Sacramento Digs Gardening newsletter that’s sent to your email inbox, if you’re a subscriber (it’s free). There’s a lot of good information in that. Even if you don’t live in Sacramento, you could open a free subscription to the Sacramento Digs Gardening newsletter and get all sorts of good gardening information.For instance, in a recent newsletter, she talked about the new roses for 2026. This is similar to what automotive magazines publish for car enthusiasts every fall. Automotive fans love to see the new cars when they come out in the fall. Well, Rosarians are like that in January, which makes January the time for shovel pruning. Because you have to plant something else, something new, perhaps. So we’re going to find out what’s new for 2026. What has got the Rosarians a-flutter?Let’s sell some roses here. Debbie Arrington, have you purchased any of these roses that we’re going to talk about?Debbie Arrington: Not yet, but they are on my list. I have to figure out how much room I have to get some roses in. And you’re right about shovel pruning. It is the pruning of last resort when you’ve done everything you can to that rose and it still isn’t performing. It either has to move or has to go. And that’s how you do it, is you dig it out. As some Rosarians say, the way to make sure a rose has a better season is to just show it the shovel and somehow they’ll wake up and have a lot more growth that year.(FREDNOTE: perhaps a more genteel expression than “shovel pruning” when approaching an offending rose is “shovel ready”.)What happens is that over the years, a rosebush can lose its vitality and just start not performing as well as it should. And by losing its vitality, it atrophies. It gets less juice out to the end of its canes. It stops putting out new canes. And if it doesn’t put out new canes, then it will stop putting out roses. And a rosebush that doesn’t bloom is just a pile of thorns. So it’s time to move on to something else. And fortunately, there are still rose hybridizers and rose breeders and rose nurseries and people that are willing to grow new roses and introduce them. And the roses that we are getting now are brand new roses of 2026. We’re actually go back to 2016 or earlier when these roses were originally bred because it takes about 10 years for a rose to come to market after they first discover that seedling. So these roses have been in the works for a long time, but they all represent trends that have been going for most of this new century.Farmer Fred: What are the common threads on the popular new roses? What are rose growers looking for?Debbie Arrington: It’s like they say, everything old is new again. People want roses that smell like roses. They want roses that look like roses. And they want roses that have all those good traits, but in a very easy care format that doesn’t need spraying. In fact, doesn’t need much care at all. And r

How to Protect Your Fruit Trees When a Frost or Freeze is Forecast
This is a free preview of a paid episode. To hear more, visit gardenbasics.substack.comWe are entering the shivering season for the Central Valley, Bay Area and low foothills of California, along with other mild winter states, especially those that grow citrus. Late November through mid-February is the most critical time here for protecting frost-susceptible plants.This is especially true for citrus tree owners, who are anxiously keeping an eye out on the upcoming weather f…
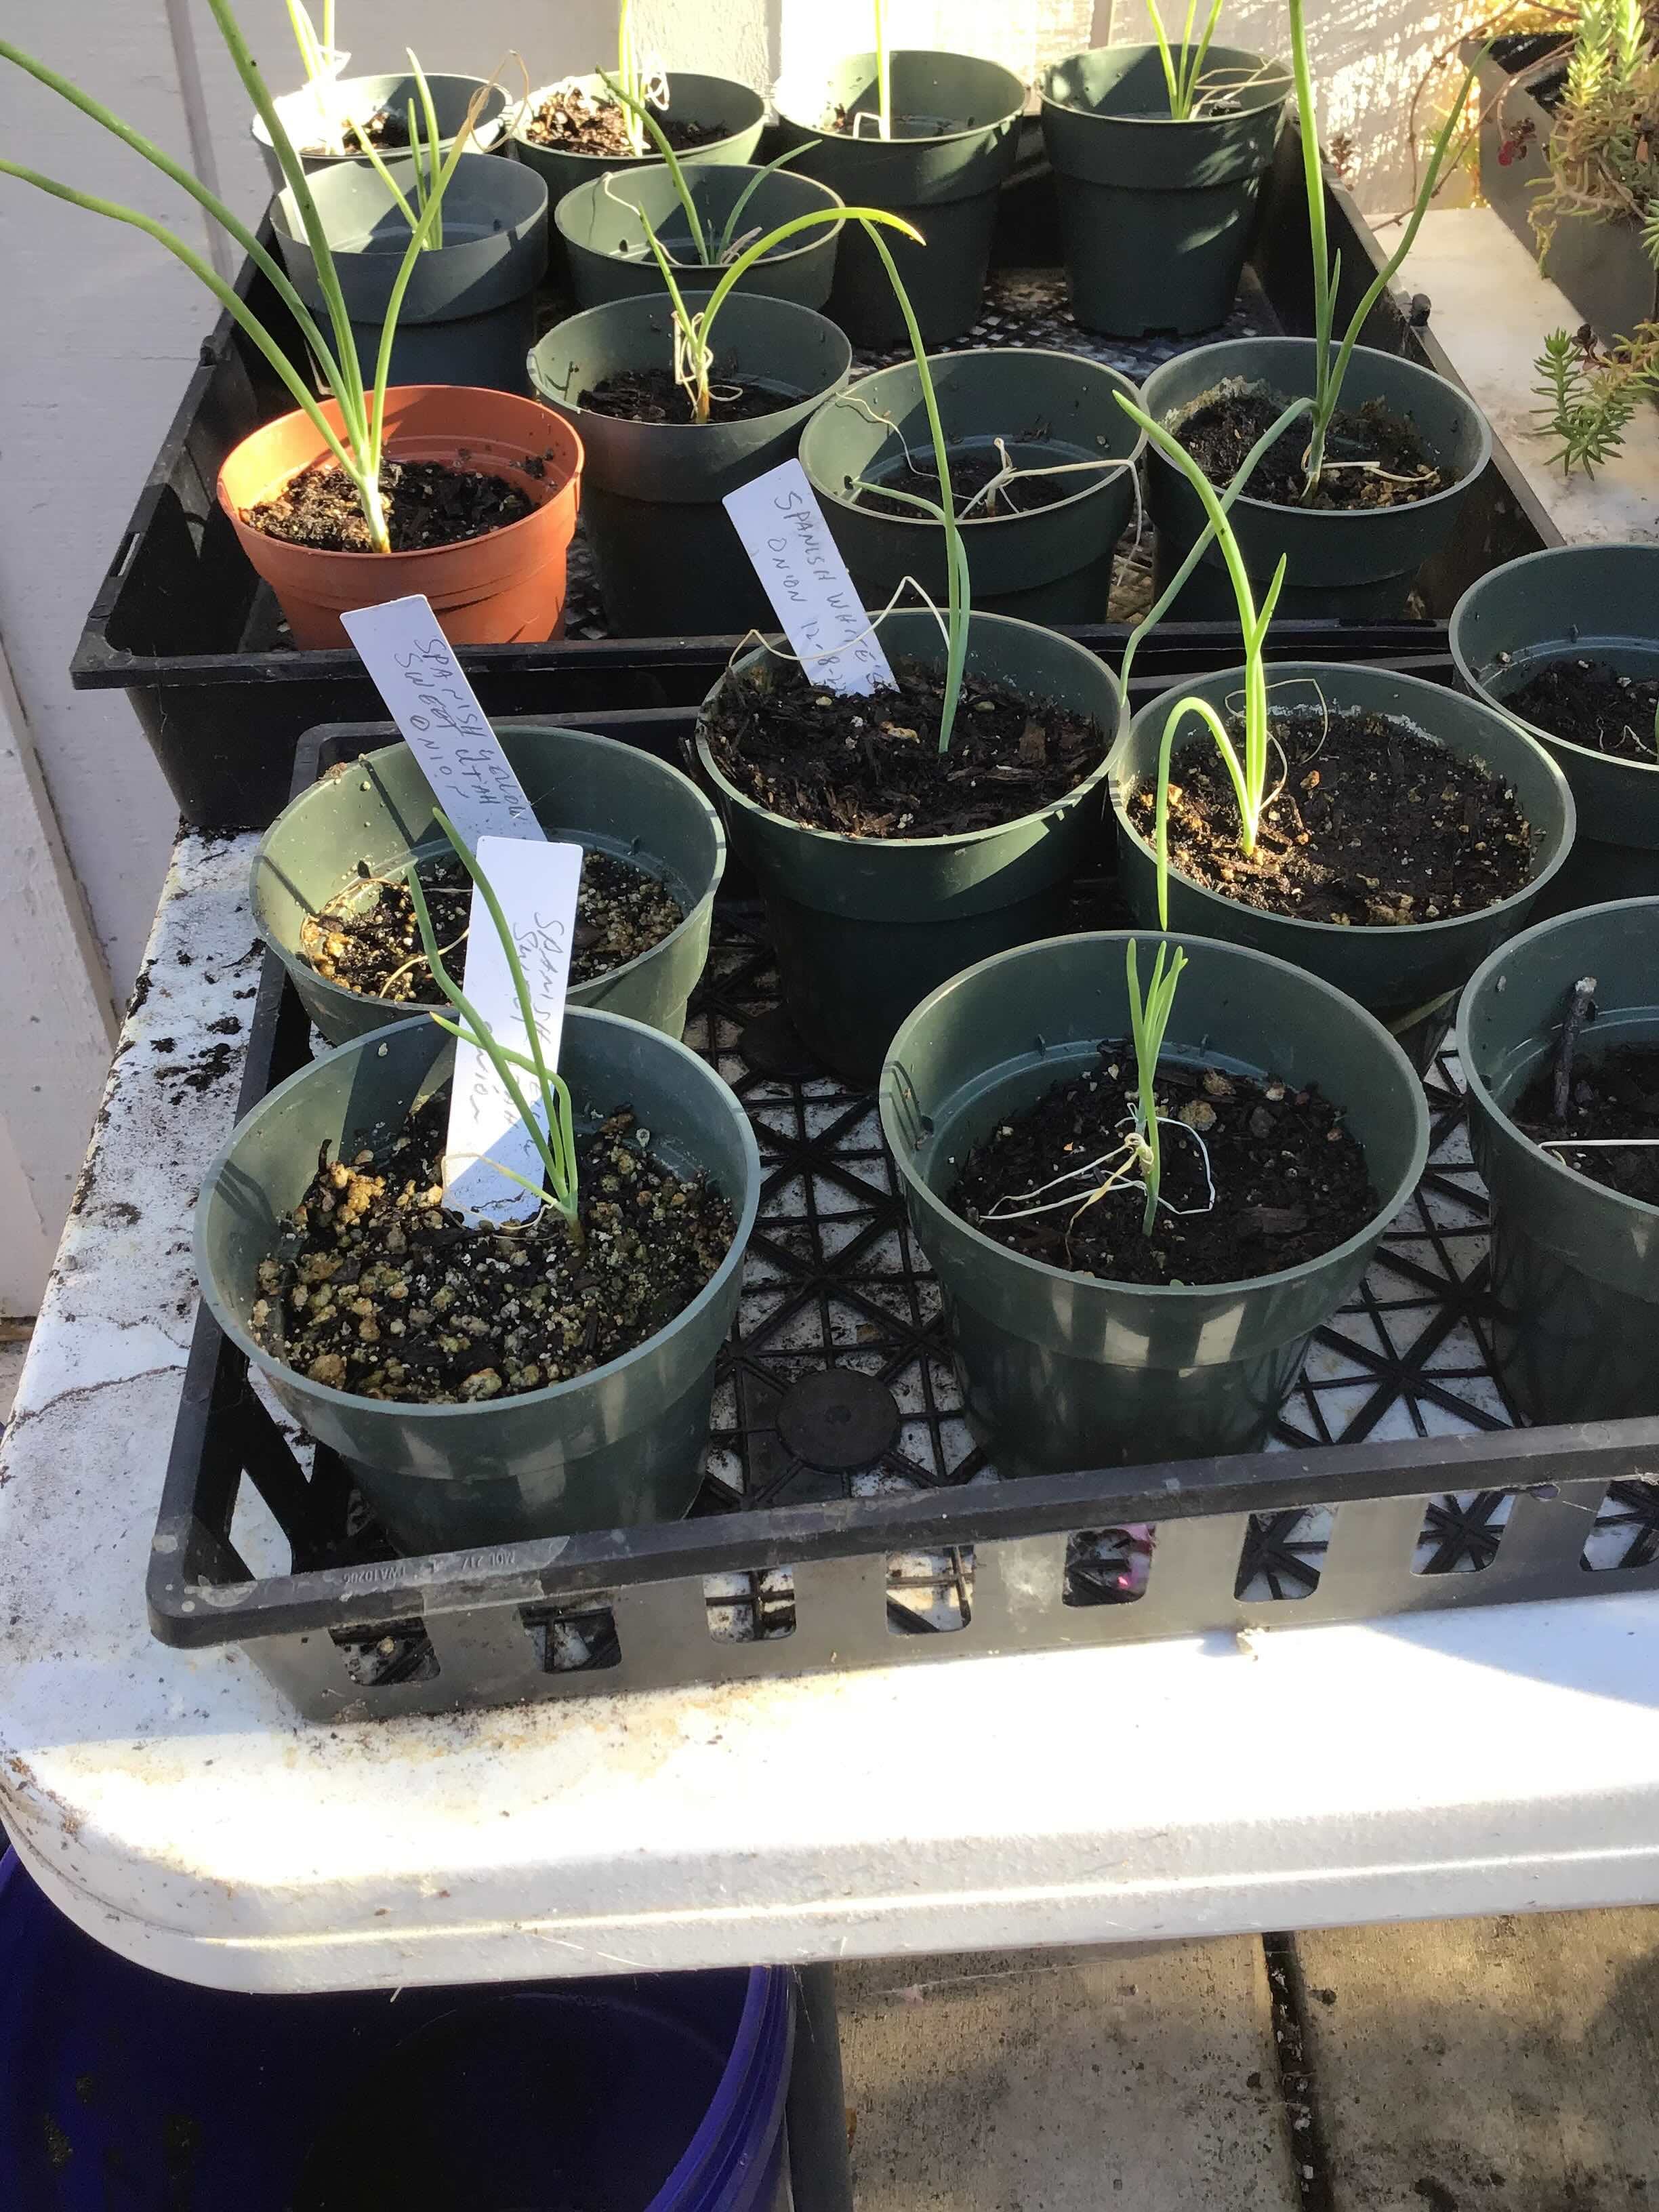
Onions Can Bring Tears to Your Eyes...
Growing onions can be confusing and try your patience, as listening to the above podcast will demonstrate. As our resident vegetable expert, Master Gardener Gail Pothour, knows first hand, growing green onions is a snap. But bulbing onions? Gail has more or less given up on trying to grow bulbing onions.If you listened to the podcast before you started reading this, it should be pointed out that the bulbing onion trial conducted at the Fair Oaks Horticulture Center more than 10 years ago that Gail mentions had some drawbacks, including starting from seed (which requires a lot of patience and the results can be widely variable), and, they were all started at the same time - in August - and not transplanted into the raised beds until November. That’s three months that it took for those onion seeds to produce seedlings to get to a transplantable size, about the thickness of a pencil. This is a public episode. If you'd like to discuss this with other subscribers or get access to bonus episodes, visit gardenbasics.substack.com/subscribe
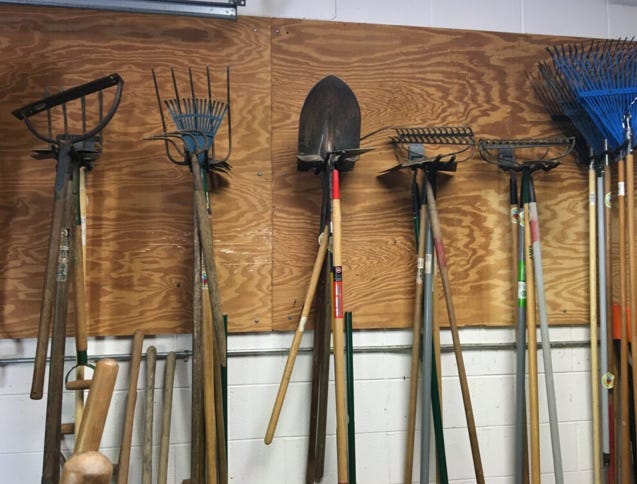
Tool Care Tips for Rainy Days (or Any Day)
This is a free preview of a paid episode. To hear more, visit gardenbasics.substack.comIf you spend good money on good-quality hand pruners that have replaceable parts, they can last for decades IF you take care of them: cleaning, oiling, and sharpening after every use. My Felco #2 hand pruners have been alive, well, and cutting since the 1990’s.So, how do you sharpen the blades of pruning tools? Sacramento County Master Gardener Bill Black offers step by step instructions in today’s newsletter podcast. His tips are available for all subscribers. And, he has a how-to-sharpen video.Also in today’s newsletter podcast (available for paid subscribers), Debbie Flower - America’s Favorite Retired College Horticulture Professor - and I do a deep dive into garden tool care and selection, including the must-have tools that should be part of every gardener’s arsenal for backyard fun.
January is Seed Starting Time For Many Vegetables (Resending)
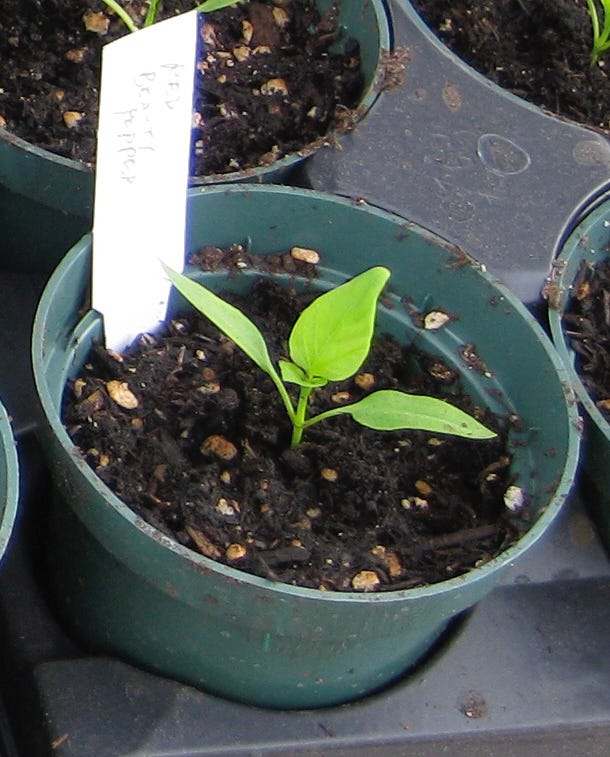
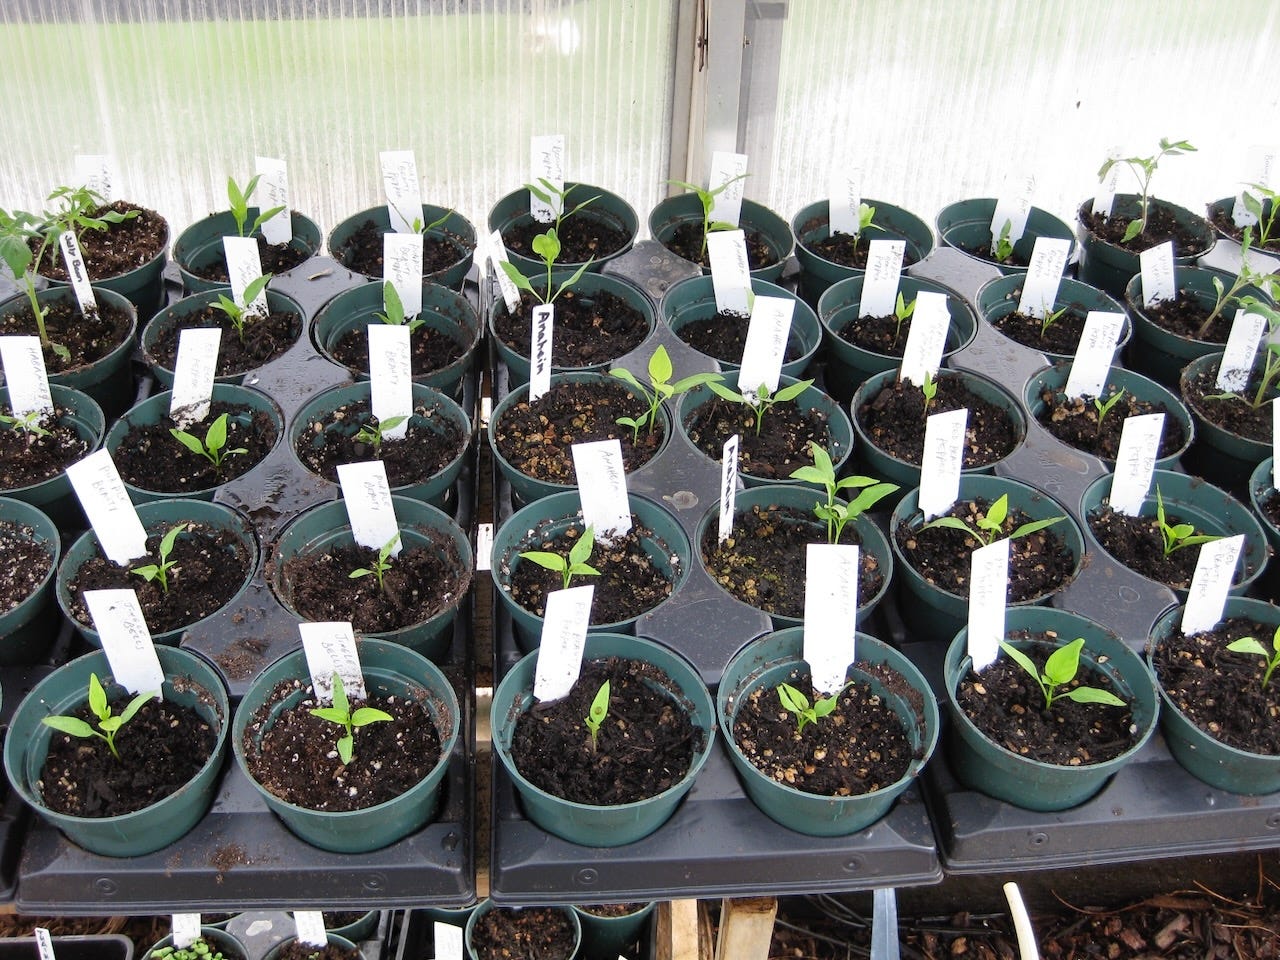
(Note: this post was sent early this morning, but only a few people received it. I’m not sure what the problem is at Substack, but I’m sending it again. Hope you get to read and listen to it!)Don’t give up on certain seed varieties that seem to really take their time, germinating and growing indoors. Among the warm season vegetables that are frustratingly slow to germinate are onions, peppers, parsley, basil, and dill. To make the wait even more maddening, it can take 8 to 12 weeks for certain vegetables to grow before they can be transplanted in the garden, including onions, parsley, eggplant and celery. Add to that the seeds of flowering plants that take awhile (8 to 12 weeks, or more) to germinate and grow to a transplantable size: snapdragons, begonias, vinca, lisianthus, strawflower, impatiens, statice, geraniums, petunias, rudbeckia and coleus.No wonder we talk about Seed Starting Tips in early January!In today’s newsletter podcast, America’s Favorite Retired College Horticulture Professor, Debbie Flower, offers five great hints on starting seeds of vegetables and flowers, including peppers:• How soaking pepper seeds in hydrogen peroxide can speed up germination; and, how seeds germinate. • Why seeds don’t need fertilizer.• How to know when to transplant those seedlings into larger containers. • Why seedlings need a light period and a dark period each day.• The importance of air movement and the development of reaction wood* for the young seedlings.Slow-to-germinate pepper seeds can take up to three weeks to show their first set of true leaves. And, several other vegetables, especially some herbs, take weeks to sprout. Among them are celery, parsley, rosemary, asparagus, lavender, artichoke, What you’ll need for successful seed germination and growth, according to Debbie:• Small, clean seed trays or containers with drain holes.• A soilless seed starting mix. (We offer up several homemade recipes, too)• The benefit of soaking pepper seeds for a few minutes in hydrogen peroxide.• Bottom heat via a propagation mat.• Consistent moisture.• Lights, once the seedlings appear.• Air movement.• Transplanting those seedlings into bigger containers once roots pop out of the bottom.Debbie Flower is a horticultural treasure. Just one listen to what she has to say isn’t enough. She is offering up so many great tips for gardeners in our “scenic bypasses”, that it really pays to either listen a couple of times or read the entire transcript (below, for paid subscribers). I am amazed at all I am learning from her; and, I’m listening to what she has to say at least four times (the original interview, two editing sessions, proofing the final) and polishing the transcript. And reading and editing that transcript, although last on the list, reveals more great gardening information that I had missed before.We also discussed the importance of gentle watering of seedling trays, so as not to dislodge the seeds (Debbie’s favorite is the Dramm 1000 shower nozzle). We have different ideas about the best sort of gentle watering equipment to use. A list and links of all the seed starting implements that we discussed, including watering equipment, is here**:Grow lightsDramm Water Breaker nozzlePump Pressure Water SprayerMulti Head hose-end sprayer with Mist settingSeed Starting trays, kitsIndoor GreenhousesOutdoor GreenhousesSeed Starting Mix* The phrase, “reaction wood”, awakens the thirteen year-old boy in me. I wonder how many giggling scientists it took to come up with the explanation of the importance of air movement in the development of reaction wood among young plants. According to this scholarly presentation, the answer would be: 10.** Most, if not all, of those germination product links lead to Amazon, mainly so you can see what they look like and a few details about them. I do not receive any remuneration from Amazon for these mentions or purchases (not allowed by Substack). Buy them from whoever you want. Shop around online or at actual stores. There are probably better prices out there than what the Amazon robots are showing you.Beyond The Garden Basics is a reader-supported publication. To receive complete posts, access to past newsletter editions, and help support my work, consider becoming a paid subscriber.GERMINATION REQUIREMENTS FOR VEGETABLE AND HERB SEEDSSource: Germination Requirements for Annuals and Vegetables (Iowa St. Univ.)(By the way, check out that site for a list of flower seed starting tips!)Germination Temperature (°F) : The ideal air temperature for germination.Light conditions during germination are critical for many annual flowers and vegetables. The seeds of some plant species require light for germination, and others require darkness.L = Require Light for Germination. After sowing these seeds, lightly press them into the germination medium, but do not cover them.D = Require Darkness for Germination. Cover the seed with the germination medium (usually 1/4 to 1/2 inch - precise depth outlined on the
January is Seed Starting Time For Many Vegetables
Don’t give up on certain seed varieties that seem to really take their time, germinating and growing indoors. Among the warm season vegetables that are frustratingly slow to germinate are onions, peppers, parsley, basil, and dill. To make the wait even more maddening, it can take 8 to 12 weeks for certain vegetables to grow before they can be transplanted in the garden, including onions, parsley, eggplant and celery. Add to that the seeds of flowering plants that take awhile (8 to 12 weeks, or more) to germinate and grow to a transplantable size: snapdragons, begonias, vinca, lisianthus, strawflower, impatiens, statice, geraniums, petunias, rudbeckia and coleus.No wonder we talk about Seed Starting Tips in early January!In today’s newsletter podcast, America’s Favorite Retired College Horticulture Professor, Debbie Flower, offers five great hints on starting seeds of vegetables and flowers, including peppers:• How soaking pepper seeds in hydrogen peroxide can speed up germination; and, how seeds germinate. • Why seeds don’t need fertilizer.• How to know when to transplant those seedlings into larger containers. • Why seedlings need a light period and a dark period each day.• The importance of air movement and the development of reaction wood* for the young seedlings.Slow-to-germinate pepper seeds can take up to three weeks to show their first set of true leaves. And, several other vegetables, especially some herbs, take weeks to sprout. Among them are celery, parsley, rosemary, asparagus, lavender, artichoke, What you’ll need for successful seed germination and growth, according to Debbie:• Small, clean seed trays or containers with drain holes.• A soilless seed starting mix. (We offer up several homemade recipes, too)• The benefit of soaking pepper seeds for a few minutes in hydrogen peroxide.• Bottom heat via a propagation mat.• Consistent moisture.• Lights, once the seedlings appear.• Air movement.• Transplanting those seedlings into bigger containers once roots pop out of the bottom.Debbie Flower is a horticultural treasure. Just one listen to what she has to say isn’t enough. She is offering up so many great tips for gardeners in our “scenic bypasses”, that it really pays to either listen a couple of times or read the entire transcript (below, for paid subscribers). I am amazed at all I am learning from her; and, I’m listening to what she has to say at least four times (the original interview, two editing sessions, proofing the final) and polishing the transcript. And reading and editing that transcript, although last on the list, reveals more great gardening information that I had missed before.We also discussed the importance of gentle watering of seedling trays, so as not to dislodge the seeds (Debbie’s favorite is the Dramm 1000 shower nozzle). We have different ideas about the best sort of gentle watering equipment to use. A list and links of all the seed starting implements that we discussed, including watering equipment, is here**:Grow lightsDramm Water Breaker nozzlePump Pressure Water SprayerMulti Head hose-end sprayer with Mist settingSeed Starting trays, kitsIndoor GreenhousesOutdoor GreenhousesSeed Starting Mix* The phrase, “reaction wood”, awakens the thirteen year-old boy in me. I wonder how many giggling scientists it took to come up with the explanation of the importance of air movement in the development of reaction wood among young plants. According to this scholarly presentation, the answer would be: 10.** Most, if not all, of those germination product links lead to Amazon, mainly so you can see what they look like and a few details about them. I do not receive any remuneration from Amazon for these mentions or purchases (not allowed by Substack). Buy them from whoever you want. Shop around online or at actual stores. There are probably better prices out there than what the Amazon robots are showing you.Beyond the paywall:• A second podcast interview, also featuring Debbie Flower, who explains how you can tell if those old seeds that you have are worth planting (or not). • A nifty vegetable chart from Iowa State University listing the ideal germination temperature range, the light requirements for newly planted seeds, days to germination, and the number of weeks it takes to go from sowing the seed to outdoor planting for 17 varieties of veggies and herbs.• A transcript of today’s podcast interviews.• And my Vegetable Planting Calendar for Northern and Central California.Beyond The Garden Basics is a reader-supported publication. To receive complete posts, access to past newsletter editions, and help support my work, consider becoming a paid subscriber.GERMINATION REQUIREMENTS FOR VEGETABLE AND HERB SEEDSSource: Germination Requirements for Annuals and Vegetables (Iowa St. Univ.)(By the way, check out that site for a list of flower seed starting tips!)Germination Temperature (°F) : The ideal air temperature for germination.Light conditions during germination are critical for many annu

Winter Garden Cleanup Tips
If you think mulch is beautiful, too, become a subscriber! This is a public episode. If you'd like to discuss this with other subscribers or get access to bonus episodes, visit gardenbasics.substack.com/subscribe

How to Plant a Fruit Tree
This is a free preview of a paid episode. To hear more, visit gardenbasics.substack.comIt seemed like a simple enough garden question to answer. The writer of the email, Steve, said: “I have never cared for a young peach tree or any other variety so I don’t know what to do since I got it in the ground. Now what?” Steve included a picture of the tree, which you can see here.America’s favorite retired college horticulture professor, Debbie Flower, and I ended up having more questions and comments after closely studying the picture. The end result? An episode mostly dedicated to how to plant a fruit tree to insure success. This was originally recorded for the Garden Basics podcast in July of 2020, thus the reference to a hot summer and the muffled sounds of us talking with mandatory masks on.Paid subscribers get full access to all newsletters and podcasts, and we’re having a holiday sale!TRANSCRIPT Q&A: How to Plant and Care for a Young Fruit TreeFarmer Fred Let’s delve into the mailbag, more mail coming into Fred at farmerfred.com here on the garden basics podcast. And we bring in Debbie Flower, retired horticultural professor at many universities and colleges, and she owns a peach tree too. So this is right up her alley. Steve writes in and says, “I have never cared for a young peach tree or any other variety. So I don’t know what to do now that I got it in the ground and mulched. I was given good info and how to put it in the ground. And I believe I was successful. But now what? The tree came in a typical pot with all its roots and dirt, I’m watching online videos, and it’s left me unsure of what to do and when.” Well, Steve was very kind to send along a picture of his new peach tree that he just planted. It’s a little difficult to say how tall the tree is currently, but it looks like…well, let’s just play, ‘what’s wrong with this picture’, Debbie? What’s wrong with Steve’s picture of his peach tree? I see several issues there.Staking Techniques for Young TreesDebbie FlowerWell, the first thing that jumps out at me is that the stake is taller than the peach tree. We only want to stake a tree, even a newly planted one, if it is unable to stand up on its own. If it is unable to stand up on its own, then we want to tie it. It’s hard to tell, but it looks like it could be tied at two locations. Not sure if that lower one is really there.Farmer FredI think that’s a big branch down there.Debbie Flower Okay. Oh, yes. So we only want to tie it as low as we can, to make it stand up straight. He has it tied nearly at the top of the tree.Farmer Fred That’s a very good point you’re making there is that when you’re staking a tree, you want the tie to be at that point where the tree would actually bend. So what you do, you run your hand up the trunk of the tree and at that point where you can get the tree to stand up, that’s where you would tie the top loop.Debbie Flower Exactly, but he can’t tell if it’s going to fall over because if you look right down at the bottom, it is still attached to the nursery stakes. Nursery stakes are used to get that initial upright growth out of the stem, but it prevents the tree stem, fruit tree or otherwise from moving in the wind and from developing strength. And so you need to take it off . I think of it as trees in bondage. When they’re tied this close to the stake, it’s very useful in the nursery, employees can pick up the tree and move it and throw it in a truck and take it out of the truck and the upright part of the tree stays stable, but it is not what we want for the ultimate life of the tree. We want that trunk to strengthen. In order to do that the trunk has to move in the wind just like we have to use our muscles in order for them to strengthen. That trunk has to move in the wind to strengthen, so take it off of that nursery stake and take it off of the very tall stake and see what happens and it is very likely to fall over, not right onto the soil; if it falls over and hits the soil you dig it out and take it back to the nursery. That means there’s a root problem. Somewhere along the length of that tree, that trunk will curve and the top of the trunk of the tree will bend down toward the earth. And that’s when you do what you said, which is run your hand up from the bottom of the tree and at some point the top of the tree will zing back up in the air. That’s the point at which you want to attach the trunk of the peach tree to the stake. Preferably you have two stakes, one on either side of the trunk and you want them a distance from the trunk of the tree, maybe a foot. The reason for that is you don’t want the tree when it is moving in the wind to rub against those stakes and you don’t want them any taller than you need them to be. So the height of the stake would be just maybe five inches above that, about the height of your hand on that trunk. Maybe it’s three inches, just a few inches above, so that you have room to tie. You’re going to tie the trunk to both stakes at abo

2025 Tomato Review Show...And More!
This is a free preview of a paid episode. To hear more, visit gardenbasics.substack.comHoliday Special! For the rest of December 2025, get an annual subscription to the Beyond the Garden Basics newsletter and podcast for 40% off the regular price. Just $30 a year!In this episode, Farmer Fred connects with Don Shor of Redwood Barn Nursery to reflect on the 2025 tomato growing season, sharing their experiences and insights while evaluating the performance of various tomato varieties. Farmer Fred ranks his 2025 tomato season as one of his worst, only second to the scorching summer of 2022, yet he notes that the overall weather conditions this year were quite favorable.Don shares insights from his own experience, noting that several of his trusted varieties, such as Rugby and Bodacious, underperformed this year, likely due to the dry start to the season affecting irrigation practices. They delve into critical topics such as soil moisture levels and root development, emphasizing the importance of watering practices in achieving healthy tomato yields.As the conversation progresses, they discuss the other plants in their gardens, including peppers, onions, edible pumpkin seeds (Pepitas), and cucumbers. Don highlights the successful lemon cucumber, which flourished without issues of mildew, noting the significant yields from this variety. They also explore the common pitfalls of cucumber cultivation and the importance of managing watering strategies to ensure plants remain productive through the growing season.From irrigation practices to soil health and the excitement of trying new varieties, this episode offers an engaging and informative wrap-up of the tomato growing season. Farmer Fred and Don conclude with hopeful notes for the next planting season, reinforcing the lessons learned and anticipating the joys of gardening and fresh produce in the coming year. And as always, a transcript of the podcast is attached for paid subscribers.2025 Tomato Review Show…and More! TRANSCRIPTFarmer Fred:[0:00] So how was your 2025 tomato year? Well, you get to hear my sob story, and you can hear about all the successes from Don Shor of Redwood Barn Nursery in Davis, California, for the next few minutes. And we’ll talk about other plants as well that did well or didn’t do well in the way of peppers and cucumbers. And who knows which way the conversation will go, but we’ll certainly cover tomatoes. I have to rank the 2025 tomato growing season in my own yard as the second worst ever. Don, you may remember the first worst, which was that summer two or three years ago when in September it got up to, what, 115 degrees?Don Shor:[0:40] Yes, two days at 116, two at 110, and three at 106 over here in the Davis area. That was quite epic in September 2022. We’ll talk about that one for a long time to come. Yeah, it did impact yields late in the season, that’s for sure.================CHEF’S CHOICE ORANGE TOMATOFarmer Fred:[0:54] And this year, the weather here in Northern California was excellent. It didn’t get too hot for too long. I’m sure it got over 100, but not by much. And there weren’t extended days of over 100 degrees. It was a very, very nice summer. But I see in my notes here, the first full size tomato I took out of production was on September 27th, the Chef’s Choice Orange Tomato. I harvested 30 ripe tomatoes, but it was the end of production, and I needed the space anyway. But let me tell you about one success, though, and it’s a thing that you told me about to do, and it really works. One of the tomatoes I planted this past year was the Bush Early Girl, that I grew in a container, and I started it (from seed in the greenhouse in early February) and planted it outside on April 6th. And it produced early and often, come June. And by the end of July, it was done for, but it gave me those early tomatoes. And I think that’s a great idea to get an early ripening tomato off to a good start in an area that has warm soil to begin with, like a large container, like a half barrel, and just enjoy your harvest until the big boys come home to roost later on in the summer. But yeah, I’ll give the Bush Early Girl an A for its production. And Chef’s Choice Orange, well, I think that’s going to get an F since it came out in September. Sorry about that.Don Shor:[2:23] It’s not an F. Wait, wait, wait. It gets a C. You took it out after harvesting 30 tomatoes.RUGBY TOMATOFarmer Fred:[2:26] All right. Yeah, I know. Okay, I’ll change that to a C because it did produce some very beautiful Chef’s Choice Orange tomatoes throughout the season. And they were very tasty. And we ended up making some relish with it. So it’s very pretty, too. One of the surprise failures in my yard this year was the Rugby, which up until this year has been doing great. But it went kaput as far as production goes on October the 8th.Don Shor:[2:55] And generally, it’s a good, generally a good late producer for us. I had good results with Rugby, but it was middle of the pack
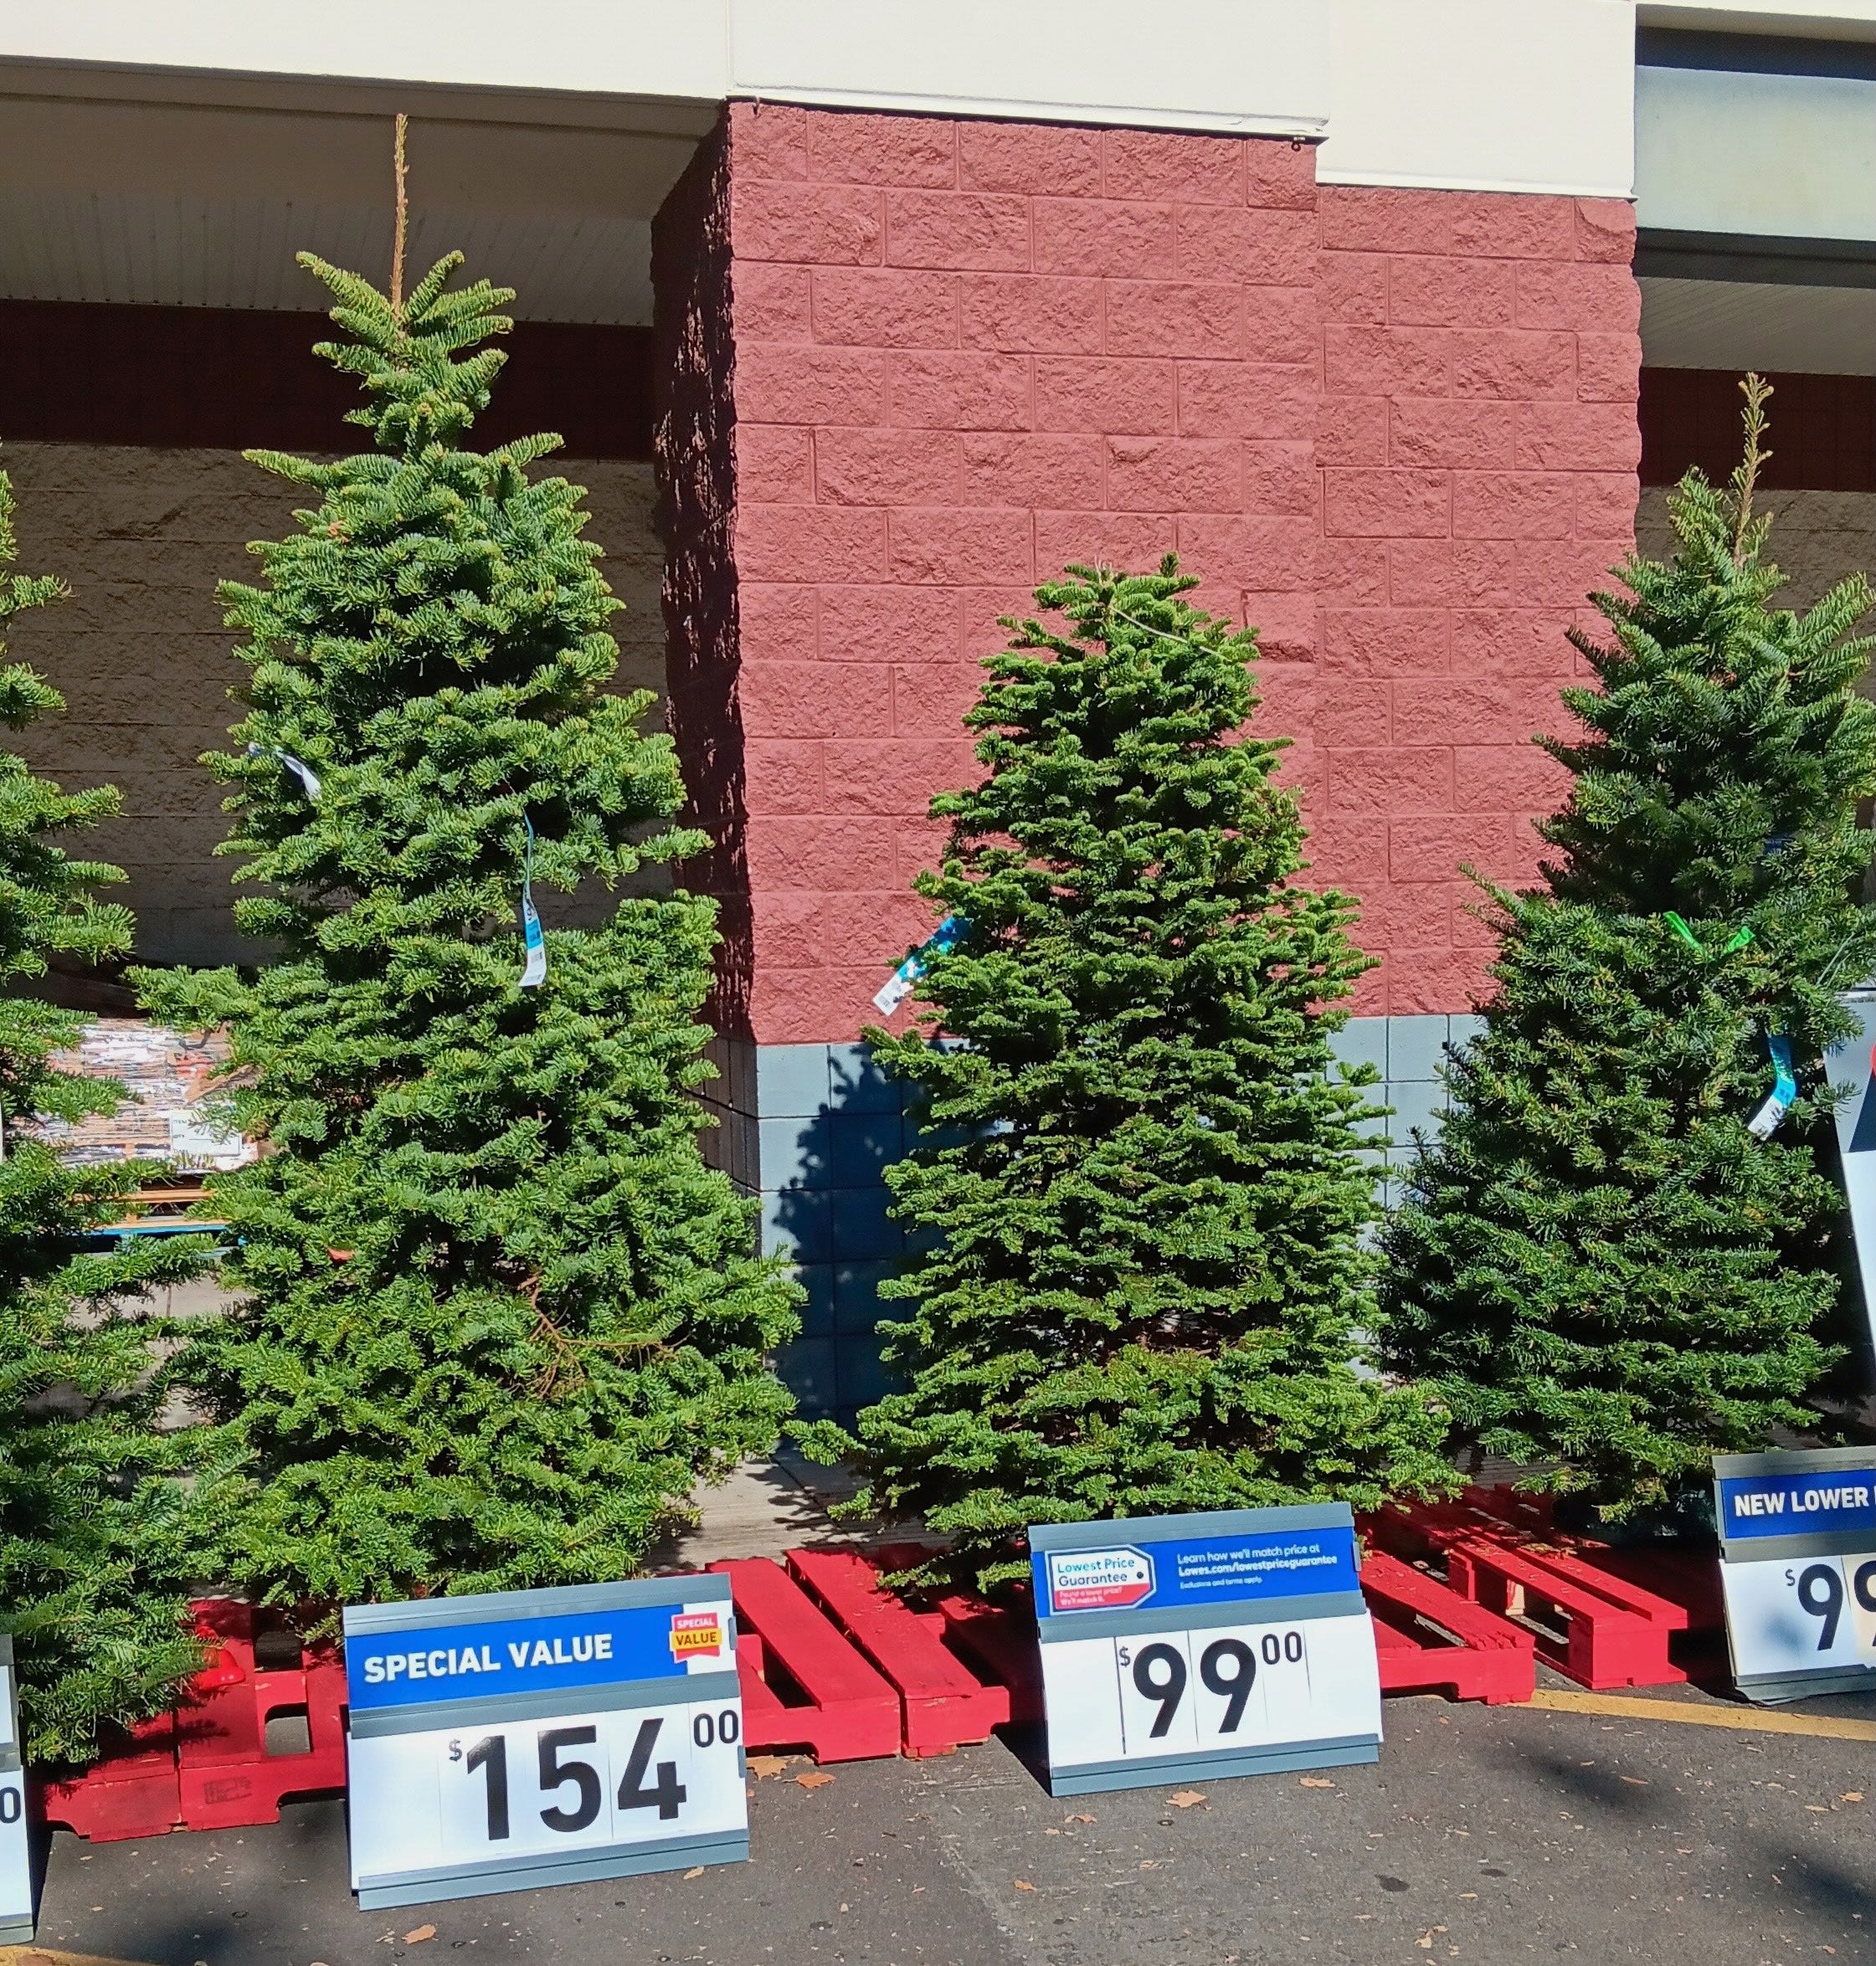
Cut Christmas Tree Care Tips
Thanks for reading Beyond The Garden Basics! This post is public so feel free to share it.Visiting a choose-and-cut Christmas tree farm or any of the corner lots or nurseries filled with already chopped cedars, pines and firs this weekend, in search of the perfect holiday tree? Here are some tips from the Michigan State University Cooperative Extension Departments of Horticulture and Forestry to keep your December living room centerpiece intact through the holidays:• You may cringe at this first tip, but it is one of the most important if you plan to keep the tree in the house for longer than two weeks: Keep the tree in a cool, sheltered location until a few days before Christmas, such as an unheated garage or carport. Otherwise, the warm, dry air of your living room or den can hasten needle drop. Storing it in an environment that more resembles a forest as long as possible will keep the branches more pliable. Take off a half inch to an inch from the base of the tree and keep it in a large bucket of water.• Before bringing the tree indoors, shake it vigorously to dislodge any loose needles or hitchhiking bugs. Check for ants, too.• Before you set up your Christmas tree, make a fresh, straight cut across the base of the tree and place the tree in a stand that holds a gallon of water or more. The end should be re-cut each day before it is placed in the stand. Make a straight cut across the trunk, removing a half inch or more from the bottom.• Cut Christmas trees will absorb a surprising amount of water, particularly during the first week. As a rule, for each inch of stem diameter the tree will need a quart of water per day.• Beware of stands that are too small for the tree. Try to find a tree stand with adequate water-holding capacity for your tree, between one and two gallons. The water capacity listed on a stand’s label or box can be misleading. Usually, they list the capacity of the reservoir when the stand is empty, but you also need to allow for water that will be displaced when the tree trunk is put in the stand.• Keep the tree away from dry, blowing heat. Position the tree away from direct sunlight, fireplaces, heaters, and other heat sources to prevent it from drying out.• Use LED lights. LED lights are cooler to the touch and less likely to dry out the needles.• Turn off the lights when you’re not there. Unplug the lights before you leave the house or go to bed.• Check your tree stand daily to make sure the container has enough water. Refill it often to make sure the water does not fall below the level of the trunk bottom.• What about additives to the water to make the Christmas tree last longer? Based on university studies in Washington and North Carolina, plain water is best. Some home concoctions such as bleach and aspirin cause heavy needle loss and should be avoided. Clean water and plenty of it is the only essential ingredient for success.Tips for a Living Christmas TreeIf chosen wisely and treated correctly, a living Christmas tree can thrive in your yard for generations. The main thing to remember when choosing a living Christmas tree: pick a variety that will flourish in your area.As with everything to do with gardening, all Christmas conifers are localized. Choose one from a reputable local nursery or home center. They will have the best selections for your area. Usually.Among the conifers available at nurseries that will do well outdoors in most areas of USDA Zone 9 after their indoor holiday use:• Italian Stone Pine. A good choice for the interior valleys of USDA Zone 9. Can take heat and drought when established. Has a moderate rate of growth to 60 feet. • Aleppo, Mondell or Afghan Pine. Also called Pinus eldarica or Pinus halepensis. These evergreens can take sun and wind. As an added bonus for those who own acreage, these pines are good for windbreaks and erosion control. Rapid growers, these pines with gray-green needles can get to 30 to 60 feet tall with a 20 to 30 foot spread. They aren’t that thirsty, either; a deep, twice a month watering is all they require during the summer.• Colorado Blue Spruce. Can take sun, shade and cold, but is susceptible to spider mites. Likes most soils, as long as they’re well-drained. This tree with the bluish needles is a slow grower that will eventually get 60 to 80 feet tall with a 40 to 50 foot spread.• Deodar Cedar. A tree that actually prefers clay soil, as long as there’s no standing water. This evergreen can take sun, wind and heat. It’s a rapid grower that will reach 50-80 feet with a 40-foot spread. Aptly known as, “The California Christmas Tree”.• Incense Cedar. Not a true cedar (Calocedrus decurrens), but this California native tree will truly perform well in many USDA 9 yards. Although a slow grower at first, the incense cedar can get 80 feet tall, with a 15 foot spread at the base. It can take hot summers and poor soil, and doesn’t require a lot of water. It’‘s best characteristic: the wonderful aroma on a hot summer day.• Coast Redwood.
2026 All America Selections Plant Winners
This is a free preview of a paid episode. To hear more, visit gardenbasics.substack.comIn this week’s podcast, Diane Blazek, Executive Director of All America Selections (AAS), tells us about the upcoming 2026 gardening season’s latest award-winning plants. We highlight standout varieties like the Bada Bing tomato, Treviso basil, Majesty purple pole bean, and RubyBor kale, each recognized for their adaptability and exceptional qualities. Diane also introduces the Butter Lamp winter squash and Sun Globe coreopsis for ornamental gardens, and shares tips on plant care and spacing. Visit aaswinners.com for a complete list of top varieties and inspiration for your 2026 garden!Beyond The Garden Basics is a reader-supported publication. To receive new posts, get access to the entire newsletter library, listen to complete podcasts, and support my work, consider becoming a paid subscriber. Thank you.For those of us who prefer to read instead of listen, here’s the human-corrected transcript of today’s podcast (with pictures):Farmer Fred:[0:00] So by now, you’re probably looking at gardening catalogs, or scrolling online, trying to figure out what are you going to plant in 2026 among vegetables or flowers. One good place to start is with All America Selections to figure out… what are the winners? What are the good ones? All America Selections is an independent nonprofit organization that tests new, never before sold varieties for the home gardener. There’s a whole season of anonymous trialing that goes on by volunteer horticultural professionals, and only the top garden performers are giving the AAS winner award designation for their superior performance. And all the AAS proceeds go into conducting the trials and promoting AAS winners, both old and new. And there’s a lot of old AAS winners. This is an organization that goes back decades. Here to tell us more is Diane Blazek, the executive director of All America Selections. And golly, it’s getting close to 100 years of AAS winners, Diane.Diane Blazek:[1:05] Yes, it is. We were founded in 1932, so it’s not too much longer. We’ll be celebrating our century.Farmer Fred:[1:13] And it has expanded, I guess, to include a lot of other types of winners, like regional winners and gold medal winners.Diane Blazek:[1:21] Yes. So when the organization was founded, everything was grown from seed and it really was just annuals and edibles. So what we’ve done now is not only expanded from seed, but we also include vegetatively propagated annuals and perennials. And we also now have regional winners, as you mentioned. And what that means is if we get an entry in and it has some very specific regional benefits, when we look at the scores, we notice that it didn’t do well all over North America, but it did well in the Southeast or the Northeast or the Southwest. And that’s how we determine regional winners.Farmer Fred:[2:01] And you also have a category called gold medal winners, but there aren’t too many of those, are there?Diane Blazek:[2:08] No, no. There were way back in the beginnings in the 1930s and 40s, because that was considered, it had to be a breeding breakthrough, like just light years ahead of everything else that was being trialed or the comparisons. So we had quite a few in the beginning, and then we went through a lull. There was about 15 years we didn’t have any gold medal winners. And then just recently, we’ve started to have a few more, and we do have two to talk about today. So I will wait until we introduce those. Yes, there are two in this batch of AAS winners.========================BADA BING TOMATOFarmer Fred:[2:44] All right. Well, let’s get started then. Let’s talk about vegetables first. Now, of course, my priority this time of year is looking for interesting tomato varieties to try. I always try a couple of new ones as well as some old proven varieties that usually get repeat performances in my yard. And you do have a tomato in the 2026 vegetable winners list called the Bada Bing.Diane Blazek:[3:13] Yes, the tomato, Bada Bing. So it is a large cherry tomato. So we just put that notation in there in case people look at it and go, well, this is like a cocktail tomato. It’s kind of in between a cherry and a cocktail size. The main thing is it’s disease-resistant, but I don’t want to disregard the taste, the texture, the fact that it’s very, very crack-resistant, nice and juicy like you would expect from a cherry tomato. So we keep calling it the more bang-for-the-buck tomato.Farmer Fred:[3:49] It looks like, because it has an overall height of just 40 inches, with a large container, you could grow the Bada-Bing tomato.Diane Blazek:[3:57] Yes, you could. We did not trial it in containers, but you definitely could. In fact, just this morning, I placed an order for a trade show. I’m going to the summer and we always want to show our new winners. So I went ahead and ordered it in a either a 14 or 16 inch container. So hopefully it will be fine for that size plant.F
Rain-Draining Strategies for Your Yard and Garden
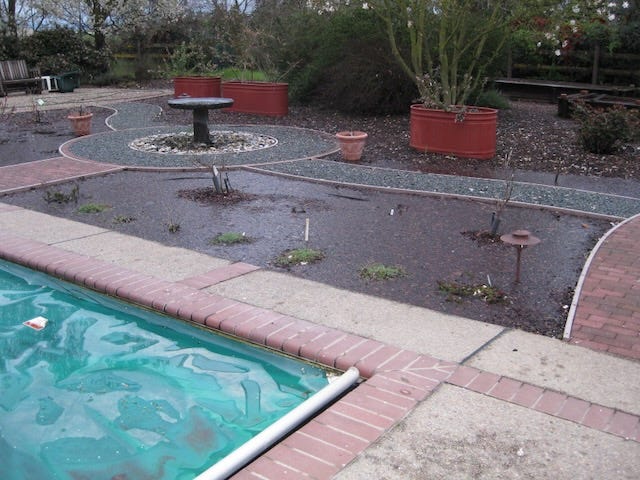
Today’s Podcast: Debbie Flower and I tackle the problem of a slow draining lawn. There are lots of strategies for improving a soggy lawn!Where does the water go?”That’s a question I frequently ask myself while bicycling throughout the region, staring at rain-soaked suburban yards. This is also a question homeowners should ask themselves before, during, and after the rainy season.One of the best pieces of advice I can offer any new homeowner: before you spend any time and money on landscaping projects or a garden, live with the existing property for a year. This allows you to take monthly pictures of the area where you want a future garden, perennials, shrubs and trees.When we moved to our new home nine years ago, that’s what we did before we embarked on a totally redesigned landscape. Taking a series of pictures on a regular basis on sunny days, especially at different times of the day (9am, 1pm, 5pm), will remind you how much shade your future plants will be dealing with, and you can plant accordingly.A plant labeled for “full sun” will need at least six hours (preferably eight hours) of direct sun a day. “Part Sun/Part Shade” plants, 4-6 hours of sun per day. “Shade” should be reserved for those plants that get little direct sun (less than four hours) and preferably dappled sun, such as protection from an overhanging deciduous tree.However, the more important reason to live with that new yard for a year before embarking on outdoor landscaping projects: figure out where water goes, both after regular irrigation and after rainstorms. In our case, we discovered that few of the yard sprinklers worked fully or accurately, and that a heavy downpour of rain ends up in the garage. And the basement would flood.As a result, the price of our landscape rehab zoomed upward, to include a complete drip irrigation system for both the front yard and backyard, as well as an underground hard pipe drain system to move roof gutter water away from the house and garage to another part of the yard. Home and Garden Pests That Sing in the RainThe other problem with wet weather: some home and garden pests love it when it’s wet; and others will seek refuge in drier quarters, such as in your home.The authors of the University of California Ag and Natural Resources publication, “Pests in the Urban Landscape,” offer some “Wet Weather Do’s and Don’ts” to ward off problems:• Check for snails and slugs. They like it moist and will sing in the rain. Unfortunately, their singing sounds a lot like, “chomp, chomp, chomp.” These garden leaf and flower munchers don’t like it too wet. They may be easily found headed for dry land – sidewalks and driveways – during a deluge. Find them under loose boards, as well. That’s the time for hand-picking or stomping them. Chemical controls for these mollusk family members are ineffective in the rain.• Remove weeds and unwanted plants. When the ground is wet, pulling them out goes much more quickly. Among the winter weeds spreading here right now are oxalis, nutsedge and groundsel. You may have other cool season weedy invaders in your yard.• Dump standing water. This wet winter is already favoring a big mosquito season ahead. Deprive breeding mosquitoes of water-nesting sites such as flowerpot saucers, wheelbarrows, buckets, clogged storm drains, and roof gutters.• Check for ants, cockroaches, and earwigs. These pests may invite themselves into your home when flooding or heavy rains make the outdoors unappealing to them. Seal any cracks or openings in your home. Outdoors, check the perimeter of your home as well as around doors and windows for insect entryways. Weather stripping, door sweeps, and traps placed beneath eave-protected walkways can help keep them outside. Indoors, keep food tightly sealed and the counters clean, especially near electrical outlets that might provide an entryway.• Remove yard mushrooms. Mild temperatures and wet soil are a combination that mushrooms and other fruiting bodies of fungi love. The good news is they are not harmful to your lawn and garden. The bad news? They can be poisonous to children and pets, when consumed. Rake them up.• Don’t apply outdoor fertilizer or pesticides now. Both are easily susceptible to being washed off the soil or plants and into our waterways. Wait for several days of dry weather before applying any sprays, dusts, liquids, or granules.• Avoid pruning plants unless it is to remove broken or damaged branches. Rainfall and open wounds in the winter on plants is a recipe for spreading diseases. Apricots, cherries, and olives should never be pruned during cool, wet, conditions, advises UCANR.• A common site on sidewalks after a rainstorm are worms, struggling to get out of the wet soil and onto dry land. If you have easy draining soil, you may see their mounds in lawns and gardens as they come up temporarily for air. Those mounds are a great fertilizer: worm castings. Just knock them down with your foot or a rake to feed the soil.• Tread lightly throug

2026 Garden Seed Price Sticker Shock Is Arriving
This is a free preview of a paid episode. To hear more, visit gardenbasics.substack.comIn today’s newsletter podcast, we chat with Renee Shepherd of Renee’s Garden seed company about the worldwide journey of garden seeds, rising seed prices, and seed availability for 2026. We explore factors influencing market changes, including tariffs and supply chain issues.The discussion highlights the logistics of seed packaging and the importance of quality standards. She also differentiate between hybrids, heirlooms, and open-pollinated varieties, along with the complexities of seed saving. As we wrap up, Renee ends on an uplifting note, celebrating the joy of gardening and encouraging listeners to explore the diverse seeds available while enjoying their growing experiences.2026 Seed Prices Go UpThe good news: the 2026 seed catalogs are beginning to arrive! The bad news: you’ll be paying more for garden seeds.Just as the Halloween decorations are packed away at stores on the morning of November 1, the Christmas lights, trees, and wreaths start jamming the aisles. Don’t fret about Thanksgiving, though: there are usually a few shelves dedicated to inflatable front yard turkeys, and an end cap with flour, sugar, pumpkin pie filling, and canned cranberries to honor the Thanksgiving cook.And it seems that garden seed catalogs are arriving sooner than ever, with the first one hitting our mailbox this year in the second week of November.As you’re ogling the colorful, new hybrid seed and plant introductions for 2026 in those catalogs, your hair might turn a bit gray(er) when you glance at the prices for mail order seed packets (plus shipping). Yep, they’re up. So are the prices of the 2026 seed packets on racks at your local nursery and home centers. The discerning gardener will also note that those 2026 packets, although physically the same size as in years past, may contain fewer seeds.That discerning gardener may also need to brush up on their eighth grade math. Those seed packets can be measured in a number of ways, including ounces (rare these days), grams (getting fewer), milligrams (more common), and the most mind-bending of all, fractions of an ounce (1/64th of ounce! really?). Unfortunately, fewer seed varieties are sold by the actual number of seeds in the packet. And, for a good reason: not all seeds of one variety are necessarily the same size or weight. Still, for the backyard gardener, knowing the number of seeds you’re working with seems like a more common sense approach.So, let’s update our garden math book for when you’re comparison shopping:1 ounce = 28 grams1 gram = 1000 milligrams (mg)1/64th of an ounce = 443 mg1/16th of an ounce = 1.7 gramsHow much are prices going up? In the 2024 edition of one garden catalog company, the price for 1/64th of an ounce of Shishito pepper seeds sold for $5.55. In the 2026 catalog, that price - for the same weight - jumped to $6.55, an 18% jump.A flower example: “Golden Yellow” zinnia, in 2024, was $3.75 for 1/32nd of an ounce (that’s 886 mg, for those of you at home keeping score). In 2026, that same zinnia variety is selling for $4.15 for 1/32 of an ounce, about a 10% increase in price.Why, you ask? The cost of everything is up. Add to that, tariffs. Add to that, shipping charges. Who among us have purchased a seed packet of a coveted vegetable or flower variety, and ended up paying more than the packet price in shipping and handling charges? ✋✋✋An understanding of the seed market is necessary, and after you read what’s below, you will quickly come to the conclusion: those seeds you’re taking out of the packet could have originated from any number of countries.One seed company executive, Andrea Tursini, the CEO of High Mowing Organic Seeds, explained the price jump in the 2026 edition of their catalog:“Last spring, when new tariffs were announced by the Trump administration, we shared the confusion and frustration of many consumers and small businesses. We also promised you transparency as we figured out what this meant for our independent seed company. This past summer, we began seeing the first of those tariff charges rolling in, and as a result, you’ll notice some price increases in our 2026 catalog.First, an important note about the global nature of the organic seed industry. At High Mowing, we’ve scoured the world in search of partners who share our values and commitment to organics. These relationships - and the seeds that come from them - allow us to continuously update our collection, offering improved varieties that meet the needs of our growers. These global relationships and not easily replaced.A reminder that tariffs are fees that American companies pay when importing goods; they are not paid by the exporting company. For example, when we buy tomato seeds from the Netherlands, we pay a 15% tariff. When we import broccoli seeds from Switzerland, we pay a 39% tariffs.Tariffs can be hard to track, showing up on carrier bills long after receiving the seed. This ha

Home Weather Station Setup Tips
Today’s Podcast We interview climate scientist Daniel Swain, who, besides being a University of California Ag and Natural Resources employee at the California Institute for Water Resources, is well known on social media. Swain runs the Weather West website as well as his frequent presentations talking about extreme weather conditions in California and the west on YouTube, Bluesky, and other social media outlets.TIPS FOR SETTING UP A HOME WEATHER STATIONOne common topic when two gardeners meet: the weather. Gardeners are usually grousing about some aspect of whatever is happening with the current weather: the heat vs. their tomatoes; the threat of frost to their citrus or succulent plants; gusty springtime northerly winds drying out the soil prematurely; and let’s not forget comparing plant damage due to a freak hailstorm.Many gardeners are amateur meteorologists, with a yard full of devices that measure the air temperature, the rainfall, the humidity, the wind, and more. According to University of California Ag and Natural Resources climate scientist Daniel Swain, more care is needed as to where you place those weather sensors. After all, that thermometer that’s hanging outside your kitchen window may be reading much warmer than what is happening in your garden.“There are genuine microclimates that can vary over that distance. If the thermometer is attached to your house, it might be warmer,” says Swain, who runs the informative Weather West YouTube page and on other social media outlets. “Presumably if it’s a cold night, you have the heater on inside. Some of that’s going to bleed outside a little bit near your house. If you have it hanging on a wall or an eave somewhere, it is going to exert perhaps a bit of a warming effect. And irrigation can affect the reading. Most people who are farmers or gardeners know that once you put water in the soil, once you put water on the plants, you kind of dampen the range of temperatures that you’re going to experience. By having moisture in some places more than others, you’re also going to actively, in some cases, create a temperature differential that’s different than where you might be measuring at your house or out on the driveway.”Swain says more thought needs to go in to where you place that thermometer sensor for the most accurate readings for the plants of greatest concern.“You’re measuring, technically, the temperature of a small increment of air immediately surrounding that thermometer device,” says Swain. “Imagine two different scenarios, the same parcel of land, the same home, and two thermometers within, five feet of each other. There’s not really a meaningful meteorological difference between the temperature across those five feet under normal circumstances. The numbers should be the same. But imagine that one of those thermometers is just sitting out there in direct sunlight. Maybe you’ve mounted it on a pole above a dirt field or over a concrete or asphalt driveway. That thermometer is going to read some awfully high values in the daytime and potentially some awfully low values in the nighttime. And that’s because you have the sun directly shining on the thermometer, heating the thermometer itself because of the sunlight is landing on the device itself. That thermometer is going to read a very high value. On a hot day, you might even get a value of 120 degrees on that thermometer. But as we define the surface temperature, the temperature at two meter height, so right around the top of my head, since I’m a little over six feet tall, that’s kind of a standard meteorological temperature measurement that’s used not just in science, but also for practical purposes and in agriculture and any number of applied purposes, that temperature is actually supposed to be a shade temperature. What you’re measuring is something different than the number that you’re comparing to everyone else’s numbers. When you go to the National Weather Service website and get a temperature forecast or you look at observations from official weather service certified meteorological stations, the temperatures you’re seeing are taken at the six-foot height in the shade.”Beyond The Garden Basics is a reader-supported publication. Some editions are free, some have a paywall. Your paid subscription helps keep the good gardening information coming your way. Thank You!TRANSCRIPT: Home Weather Station Setup Tips with Daniel SwainFarmer Fred:If you’re a longtime gardener, you just might be a weather nerd. You may want to know what’s happening, especially around your garden area and greenhouse, about many things, such as what’s the high temperature? What’s the low temperature? What about humidity, wind, soil temperature, rainfall, evapotranspiration rate?Plus, there’s chill hours, growing degree days, heat index, UV radiation, and a lot more that can be affecting you and your plants. And your meteorological equipment right now may be as simple as a thermometer hanging outside your kitchen window,

Trees vs Storms, Expanded
This is a free preview of a paid episode. To hear more, visit gardenbasics.substack.comToday’s newsletter podcast features an arborist discussing ways you can spot when your trees may be in danger of falling, especially in a wet, windy winter (recorded as the California drought was ending). Also: Consulting Arborist Michael Santos tells us about online resources for homeowners to get more information about the trees in their yard.More information about what was discussed in the podcast can be found at the University of California Ag and Natural Resources publication, “Inspect Your Landscape Trees for Hazards”.How to (Possibly) Thwart Tree Damage Before a StormDuring or after a particularly violent fall or winter wind/rain/snow storm, TV news crews usually rush to the most photogenic damage during these rare occasions: downed trees, usually leaning against a house or crushing a car.Without the correct care of the trees on your property, winter storms and trees will not get along. Most susceptible are the trees that keep their leaves year round, including broadleaf evergreens, such as eucalyptus and camphor. Add the conifer family to that list: pines, firs, redwoods and cedars. All that mass of greenery acts as a sail in a heavy wind, bending trees at ridiculous angles. Another cause of winter tree failure is crown rot, which despite its name, refers to the deterioration of the root system near the base of the tree. Combine that with a couple of inches of rain onto already saturated soils, and you have tree roots heaving towards the surface, leading to pictures, such as the one above, popping up on the TV news.If this is the view from your window, the day after a major rain and wind storm is not necessarily the best day for the homeowner to tackle the hazardous task of cleaning up the remnants of trees, shrubs and other plants that took a beating. If wind and rain is still in the forecast, the prevalence of slippery conditions and the chance of more falling debris should limit your cleaning chores to dragging broken branches away from the scene of the crime. It is not a good day to be climbing ladders or scrambling into trees while balancing a chain saw. Leave that to the professionals.Signs of Potential Tree FailureArborists offer this good piece of advice for those surveying the fallen aftermath of a major storm: Limb failure is largely a product of poor tree maintenance over time. Take care of your trees, or they may take care of themselves in ways you won’t appreciate. According to the University of California publication, “Inspect Your Landscape Trees for Hazards”, a nice day in autumn (or winter, spring or summer, for that matter) is the time to take an inventory of any possible future tree damage before you, your house or your car becomes the next victim of a falling tree or branch.Leaning Trees: Are your trees not as upright as the result of recent heavy winds? Can you see newly upheaved roots or soil around those trees? Then, immediate action is required: call in a professional, certified, bonded and insured arborist to do an onsite inspection and offer a solution (find one near you at treesaregood.org). Newly leaning trees are an imminent hazard. If you have a tree that has leaned for a number of years, that tree can still be a hazard during wet, windy weather. Taking periodic photographs can help you determine if a greater lean is developing.Multiple Trunked Trees: This co-dominant condition can result in breakage of major tree parts during storms. Usually, these trunks are weakly attached. Inspect the point where the two trunks meet; if you see splitting beginning, call in an arborist.Weakly Attached Branches: Trees with many branches arising from the same point on the trunk are prone to breaking during wind storms. Prune out any split branches. Thin out multiple branches.Hanging or Broken Branches: If you see storm damaged branches hanging from the tree, remove them as soon as possible. This includes removing any completely broken branches that may be resting elsewhere in the tree’s canopy.Cracks in Trunks and Branches: Measure the depth of any cracks with a ruler. If those cracks are more than three inches deep, call in an arborist to determine the best course of action.Dead Branches/Trees: Branches or entire trees that have completely died are very likely to come tumbling down in a storm. Dead branches are most noticeable in the summer when the tree is in full leaf.Cavities and Decay: Large, open pockets where branches meet the trunk, or at the base of the trunk, can mean big trouble. The presence of mushrooms on the bark or on exposed roots may indicate wood decay. Call in an arborist.Beyond The Garden Basics is a reader-supported publication. To receive new posts and support my work, consider becoming a free or paid subscriber.The Arbor Day Foundation website has this guide to proper pruning techniques.Also: Tips for Hiring an Arborist. Beyond the Paywall:• Tree Pruning Advice• The Three-Cut
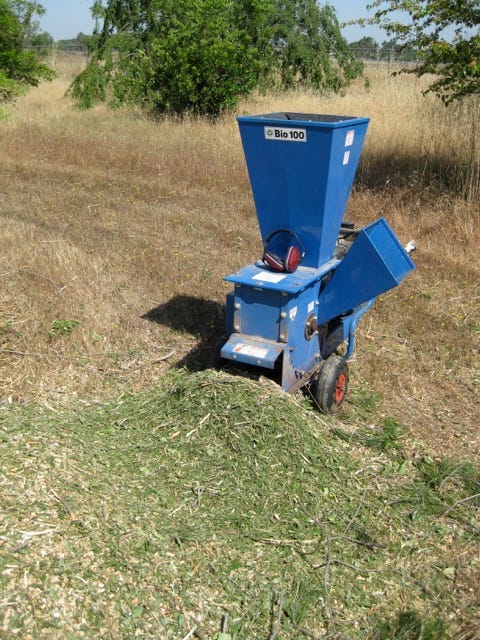
Why There Should be a Chipper Shredder in your Garden
This is a free preview of a paid episode. To hear more, visit gardenbasics.substack.comAre you thinking about buying a rototiller? How about instead purchasing a chipper/shredder? Now, that’s a machine that’s going to make easy work of chopping up your garden clippings including tree limbs. it’s going to make it into the greatest mulch you could possibly own. The latest research shows that rototilling your soil actually damages soil structure and doesn’t do anything good for the soil biology. On the other hand, the end result of using a chipper/shredder is going to provide you with a quality of mulch that we like to call, “gardeners’ gold”.Northern California Organic Gardening Consultant Steve Zien has some rather strong thoughts on this subject. Go back and listen to his comments back in Episode 89 of the Garden Basics podcast, from 2021.Thinking that perhaps his opinions may have mellowed on the chipper-shredder vs rototiller choice over the last four years, I recently asked for his thoughts. Nope. No change. Here’s what he had to say (in bullets):Chipper shredderPros:• Eliminates or dramatically reduces green waste• Helps eliminate the need for a rototiller• Provides material for mulch or compost• When shreddings are applied to soil surface:• Feeds soil biology – resulting in improvements in:• Soil structure (pore space diversity)• Improve movement in soil by water, air, roots, soil biology• Soil water holding capacity (drought resistance)• Nutrient holding capacity• Biological diversity of soil microbes• Greater variety of nutrients, vitamins etc. available to plants• Improves pest resistance• Plant health improves (drought resistance, pest resistance)• Nutrient availability to plants improve• Availability of natural growth hormones, vitamins improves• Nutrient content of vegetables improves• Sequesters carbon – contributes to the reversal of climate change• Weed management benefits• Mulch created by chipper/shredder moderates soil temperatures• Erosion protection (mulch slows the force of falling rain)• Mulch created by chipper/shredder repels some pestsCons:• Expensive• Hard work. And, when done, you then have to apply the mulch to soil surface• Don’t chip diseased materialRototiller:Pros:• Get to smell actinomycetes• Mental connection to past horticultural practices (although no longer recommended)• Creates fine seedbed – but soil quickly becomes compacted making it difficult for sprouts to developCons:• It’s hard work• Expensive• Destroys soil structure• Compacts soil (reducing aeration, drainage, limit root development)• Fine clays quickly fill in pore spaces• Increases runoff – transporting soil, nutrients and pesticides into our waterways• Kills beneficial soil biology• Makes it harder for your plants to grow• Harder to obtain water, nutrients, growth hormones, vitamins• Increases pest susceptibility due in part to:• Reduced crop health• Pest management provided by soil biology• Reduces nutrient content of food crops• Results in the need for additional irrigation, fertilization, pesticides• Mother Nature’s natural rototillers (earthworms) are killed by the blades.• Creates biological imbalance - abundance of bacteria vs. fungi (raises pH)• Loss in biological diversity in the soil• Reduction of soil health (results in reduction of plant health)• Reduces ability of soil to function• Releases greenhouse gasses (CO2) to atmosphere – contributing to global climate change• Reduces organic matter content• Reduces soils water holding capacity – need to irrigate more/more runoff….• Makes plants more susceptible to drought• Reduces food for soil biology• Reduces soil productivity• Reduces soil cover• People feel they need to till every spring because previous tillage created a compacted, dead soil below• Brings up weed seeds so they can germinateObviously, Steve has a bleak future as a salesman at Troy-Bilt.What About Electric Chipper/Shredders?For that, we turn to Debbie Flower, who owns an electric chipper-shredder, the 15 amp Sun Joe. Her review:My chipper is a Sun Joe 15 amp Electric Wood Chipper/Shredder plug-in, model #CJ602E. I have had the pleasure of using it a few times. It is a compact, easy to store machine. The 6” wheels and light weight make it easy to move around the yard.Debbie has a lot more thoughts about her electric chipper shredder, including the downsides of electric. Listen to today’s newsletter podcast to find out more.My thoughts about electric-chipper shredders are closely aligned with Brad Gay’s opinion (paid subscribers will hear his comments in the podcast). Reviewers of this electric chipper shredder say they have issues including the shredding problems mentioned by Debbie, and the overheating problem she mentioned. As Brad said, it’s cheaper to replace a belt on a gas chipper/shredder when the machine gets overwhelmed to the point of freezing up with material jammed in the hopper, than it is to replace a burned out electric motor. And make sure you plug the unit into a 20 amp
Ants!
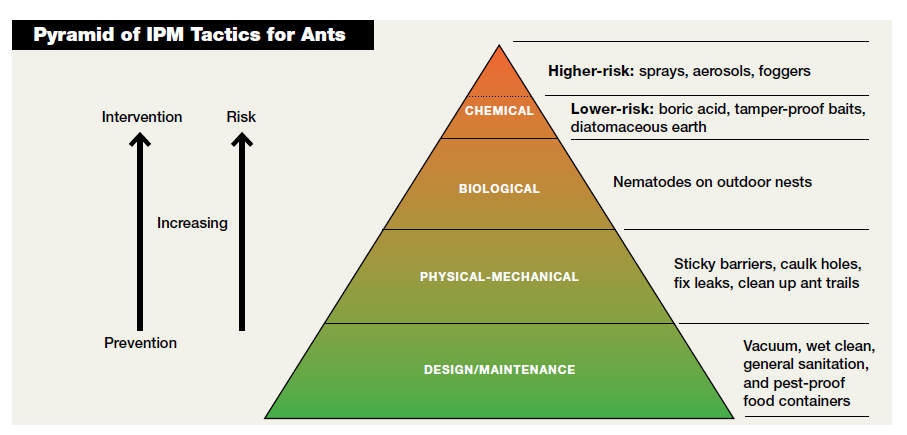
This is a free preview of a paid episode. To hear more, visit gardenbasics.substack.comWhen it gets hot, the ants start marching indoors. When it rains, in come the ants. Too cold? The ants know where its nice and cozy: your kitchen, bathroom and pet food bowls. Outdoors, pet food and garbage cans are also ant attractants. Argentine ants, those busy little black ants, are in march formation year round.In years past, we would reach for the spray can and douse those little scavengers. But not anymore. Many of those spray pesticides are only effective with direct contact on the ants. And the stronger sprays, with residual action to thwart the next wave of ants, is potentially harmful to you, your kids, your pets.So, here is what we are doing now: following the recommendations of the UC Davis Integrated Pest Management Project for Ant Control.That includes:• Determine what the ants are attracted to and remove the food source• Vacuum trails, wipe them with soapy water, or spray with window cleaner• Locate entry points and caulk openings or plug with petroleum jelly• Put out bait stations with liquid ant bait or apply gel bait at entry points• Baits take time to work so continue to clean up trails• Indoor sprays are not usually necessary.• Avoid products packaged as granules that contain the active ingredients cyfluthrin or permethrin. Although these products may be mistaken for baits, they are actually contact insecticides that rapidly kill foragers and do not control the colony.Before wiping up (or wiping out) the little critters, follow their trail. Note their entry point into the house. Seal it up. We have found ants entering the house in a variety of small avenues: beneath moulding, cracks in the window frame, behind electrical outlet plates...and one of the ants’ favorite entries: that large holes beneath the sink where the pipes enter the house.According to the UC IPM page on ant control, “If ants can be thoroughly washed away and excluded from an area, an insecticide is probably not necessary. Vacuuming up ant trails or sponging or mopping them with soapy water may be as effective as an insecticide spray in temporarily removing foraging ants in a building because it removes the ant’s scent trail, especially if thorough cleaning is done at the entry points. Some soap products such as window cleaners can kill ants on contact but leave no residual toxicity. Certain plant-based oils are also applied for this purpose, but their odor can be offensive.”Coming Up After the Paywall• Highly effective liquid boric acid products for ant control.• How to control ants in a raised garden bed.• Debbie Flower’s home recipe for ant control• How outdoor ants are ecologically beneficial.
"How Am I Going to Feed My Family?"
One of my frequent bicycling routes takes me by a local food bank. Over the years as I pedal by in the morning, I’ve seen the line of cars increase while waiting for the 10 am food bank opening. Lines of a half block or more were common during the age of Covid (2021-2022).Lately, the line of cars has not only increased in length, it’s now 2 lanes of traffic stretching down the road waiting for a bag or two of food. Fortunately, the road widens out as it approaches the food bank, and the employees there have adopted the Dutch Brothers Coffee / In-and-Out Hamburger traffic facilitating tactic of walking the lines of cars, and getting the information they need (I’m still trying to figure out what Dutch Brothers is putting in their $6+ coffee drinks that brings in such a large crowd. Is it the sugar?).The number of households living paycheck to paycheck has risen dramatically - up to two-thirds of all households in the U.S. living on the edge - according to one report. There’s more hurt on the way because of recent job losses due to AI, governmental shutdown of services, increased food costs due to tariffs, housing costs, and all the other reasons that you don’t want to be reading about in a gardening column.GARDENERS CAN HELPStill, gardeners can help out their neighbors by donating their excess backyard produce - vegetables and fruit - to a nearby food bank or food pantry. For example, right now in late October, here in USDA Zone 9 (and I know I am not alone in this bounty), there’s a lot of sweet peppers waiting to be harvested - definitely more than we can eat or process into relish. And what are those bright orange orbs staring at me from that tree outside my window? Oh yeah, Fuyu persimmons, also more than we can eat or dehydrate, that will be ready to harvest in a week or two. Definitely, these are the prime mid-Autumn candidates for transporting to the local food bank. Coming up in winter, it will be the cornucopia of citrus - oranges, mandarins, lemons - that will be heading to the food bank, along with fresh greens.Don’t know where you’re nearest food bank is located? Go to AmpleHarvest.org, and find the food banks in your area. It’s quick, easy, and as far as I can tell in my own area, accurate. Your local food bank would probably welcome your donation of healthy, homegrown food (always check first).In this week’s newsletter podcast (above), Gary Oppenheimer, the founder of AmpleHarvest.org, talks about the need for more, fresh, wholesome foods getting into the hands (and mouths) of those who can’t afford to eat healthy, but want to. Give it a listen, or read the transcript, below. Thanks.There’s no paywall on today’s newsletter/podcast episode, because that would be counterproductive to helping get your excess garden harvest to the hungry. Still, thank you for your paid subscription to Beyond the Garden Basics!TRANSCRIPT Interview with Gary Oppenheimer of AmpleHarvest.org (recorded in 2020)Farmer Fred:[0:00] Every day in every corner of the United States, children and adults are worrying about finding enough food to put on the dinner table while thousands of pounds of food are being thrown away from backyard gardens, from small farms. Millions of Americans are unable to get enough fresh food to maintain proper health. The United States has a malnourished population that needs more than processed foods in order to thrive. So many incredible food banks, pantries, and other hunger organizations are working tirelessly to alleviate hunger in our communities, but they consistently lack in donations of fresh produce. Luckily, you can help. By making regular donations of unused fresh produce to your local food pantry, you can be a part of the solution to increase the health of people in your neighborhood. And you can donate food that you grow or food that you buy. It’s easy.Farmer Fred:[0:55] The trick is finding the food pantry nearest you, and you can do that through an incredible site called AmpleHarvest.org. We’re talking with Gary Oppenheimer. He’s with AmpleHarvest.org. He’s the founder. It’s a unique nationwide resource that is eliminating the waste of food, the outcome being a reduction in hunger and malnutrition, along with an improved environment. There’s something like 42 million Americans who grow food in home gardens, community gardens, and their small farmers as well, who could easily donate their excess harvest to one of over 8,600 registered local food pantries spread across all 50 states. And Gary, I want to tell you, first of all, about my experience with your website, ampleharvest.org. There is a page there where you can go and find the food pantry nearest you. And I set a search of 15-mile radius around my house. And up popped, I’m counting, 14 food pantries I never knew existed, including one that is within walking distance. And it’s amazing how easy it could be for people who have an excess of tomatoes or squash or peppers or melons or fruit, where to take it to and how convenient that
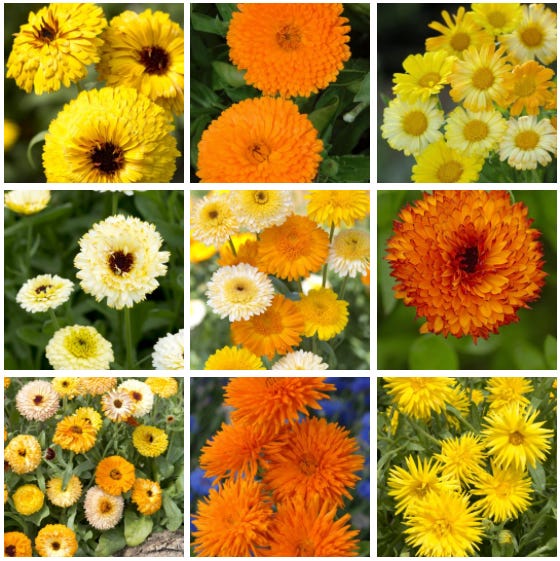
2025 Plant of the Year - Calendulas
This is a free preview of a paid episode. To hear more, visit gardenbasics.substack.comIn the warm winter areas of the country, the calendula is the go-to source of bright garden color on those cold, cloudy, foggy days. In cooler growing zones, the calendula is a blooming staple during the summer. In the podcast (above), we explore the enchanting world of calendulas with Diane Blazek, the executive director of the National Garden Bureau, as we celebrate 2025 as the Year of the Calendula. We discuss their historical significance, medicinal properties, and culinary uses, while clarifying the confusion surrounding their classification as pot marigolds. Diane shares practical gardening tips for successfully growing calendulas, including seed sowing strategies for different climates and the benefits of dense planting for attracting pollinators. We emphasize the ease of growing these flowers, making them ideal for novice gardeners and families. The episode also highlights the best sources for high-quality calendula seeds.According to the National Garden Bureau:* Calendulas need at least 6 hours of daily sunshine to witness its radiant blooms unfurl.* Finding the Perfect Soil: Well-draining soil is key. While Calendula isn’t fussy about soil type, it prefers a slightly acidic to neutral pH. (6 to 7 pH)* Planting for Success: In colder areas of the country (USDA Zones 3-7) sow seeds directly outdoors, in spring, about an inch deep, after the last frost. In the warmer zones (7-10), plant them in early autumn. Space them 12-18 inches apart for ample room to flourish.* The Secret to Continuous Blooms: Regularly remove spent flowers (deadheading) to encourage new growth. This keeps your plant looking tidy and stimulates more blooms.* Natural Pest Control: Calendula is naturally resistant to pests, but keep an eye out for occasional visitors like aphids or caterpillars.* Garden Harmony: Calendulas act as a natural pest deterrent, attracting beneficial insects to your garden because of their easy to reach flower parts.* Harvesting Your Bounty: Pick Calendula flowers when fully open, preferably in the morning for the most concentrated oils. Dry them for later use in teas, salves, or potpourri.* Edible Delight: Surprise your palate! Calendula flowers are edible with a subtle peppery flavor, adding a vibrant touch to salads, soups, and stews.* DIY Potpourri: Dried Calendula blossoms infuse your space with a beautiful fragrance.* Soothing Salves: Calendula’s calming properties make it a popular ingredient in homemade salves.Calendula’s easy to reach flower parts attract pollinators like bees and butterflies, and pest predators such as ladybugs, lacewings, and hoverflies. These insects help control pests like aphids, whiteflies, and caterpillars.By attracting ladybugs, lacewings, and hoverflies, calendula helps control pest populations naturally. Acting like a trap crop, calendulas can attract pests like aphids, which then attract the beneficial predators.Beyond The Garden Basics is a reader-supported publication. To receive complete new posts and podcasts, and have access to the entire catalog of over 200 Beyond the Garden Basics newsletters, consider becoming a paid subscriber.Coming up after the paywall:Calendulas undergo “nyctinasty” every day, a visible change in the plant. We explain what that is in the newsletter and why it is so important for the calendula’s survival.Despite winning competitions internationally, why have there been no calendula winners in All-America Selections trials in its 90+ year history?The popular calendula varieties in California and USDA Zone 9.The popular calendula varieties in the midwest and east.And, the complete transcript of the Calendula podcast, which includes links and videos for more information!
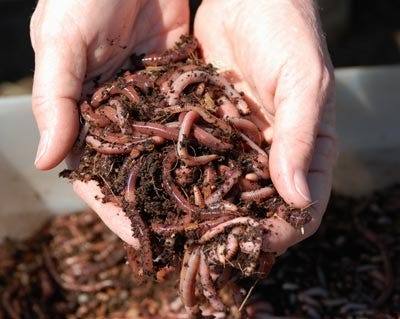
Grow Better Soil (and Plants) with Worm Castings
This is a free preview of a paid episode. To hear more, visit gardenbasics.substack.comIf you have a worm bin, and are harvesting the worm castings (yes, it’s worm poop), and you’re spreading those castings around your outdoor and indoor plants, you are helping to create some powerful soil, teeming with microbiology, that will supercharge your plants. According to Cal Recycle, the process of vermicomposting, which uses worms to break down organic material such as food scraps, will turn them into a nutrient-rich soil amendment that can nourish your house plants or garden.Some wormy facts:* Worms break food waste into compost faster, over 8-12 weeks. Traditional composting, on the other hand takes 6-9 months.* You can worm compost in your apartment or house, even under your kitchen sink. You can also vermicompost at school or the office.* Worms like to feed on food waste.* Worms break down food scraps efficiently.* Worms eat over half their body weight a day.* Worm manure contains beneficial microbes and nutrients for plants.What will worms eat?Worms eat a variety of organics, such as:* Paper.* Manure.* Fruit.* Vegetable.* Grains.* Coffee Grounds.* Ground Yard Wastes.Do not feed worms:* Meat.* Dairy.* Oily food.* Citrus scraps (toxic to worms).What Do Poop-Happy Worms Need?* Moist, organic bedding as damp as a wrung-out sponge, in a location that has a temperature range of 55-77 degrees F.* Darkness – they are sensitive to light.* Because they have no teeth, add 1 Tbs of grit, such as clean soil, sand, rock dust or oyster flour in bedding to help the worms grind the food.* Clean soil, sand, rock dust, or oyster flour with no foreign organisms.From the Fresno County Master Gardener publication, “About Worm Castings”:Castings contain rich microbiological colonies that help fight soil-borne plant diseases and repel insects.Worm castings are water-soluble allowing plants to quickly and easily absorb essential nutrients and trace minerals. When the manure passes through the worms digestive tract, it forms a coating around the grain which allows for the nutrients to “time release” into the soil. Nutrients are readily available to plant material over a greater length of time and will not burn even the most delicate plants.Analysis of earthworm castings reveals that they are rich in iron, sulfur, calcium, nitrogen, phosphorus and potassium (NPK rating: 5.5.3). They are much richer in nutrients than bulk compost, therefore application rates are much lower. Improved Growth: Extensive University testing has been performed by Ohio State, Cornell University, UC Davis and the Australian SIRO to prove the worth of worm castings. The tests have shown improved flower size, bloom quantity, quality and color. Fruit and vegetable tests have resulted in yield improvements from 57% to over 200% as well as improvement in taste and appearance.Worm Castings Are Great For Your Garden!Nutrient-rich soil: Worm castings, or vermicast, are rich in water-soluble nutrients like nitrogen, phosphorus, and potassium, as well as micronutrients like iron, zinc, and magnesium. These nutrients are in a highly bioavailable form that plants can readily absorb, boosting their growth.* Improved soil structure: Worm castings improve the physical structure of the soil, increasing its ability to retain moisture and improving aeration, which is crucial for root development.* Beneficial microorganisms: The castings contain beneficial bacteria and enzymes that help develop a strong immune system in plants, making them more resistant to pests and diseases.For a deeper dive into the benefits of worm castings, check out this excerpt about vermicomposting in the publication, “Microbes at Work”.After the paywall break:Are commercially bagged earthworm castings as good as homegrown or worm farm-purchased castings? In the podcast (above), America’s Favorite Retired Horticulture Professor, Debbie Flower, and Sacramento-based organic soils expert, Steve Zien, tackle that question (that portion only available to paid subscribers of the Beyond the Garden Basics) .Plus, after the paywall break, a complete transcript of today’s podcast!
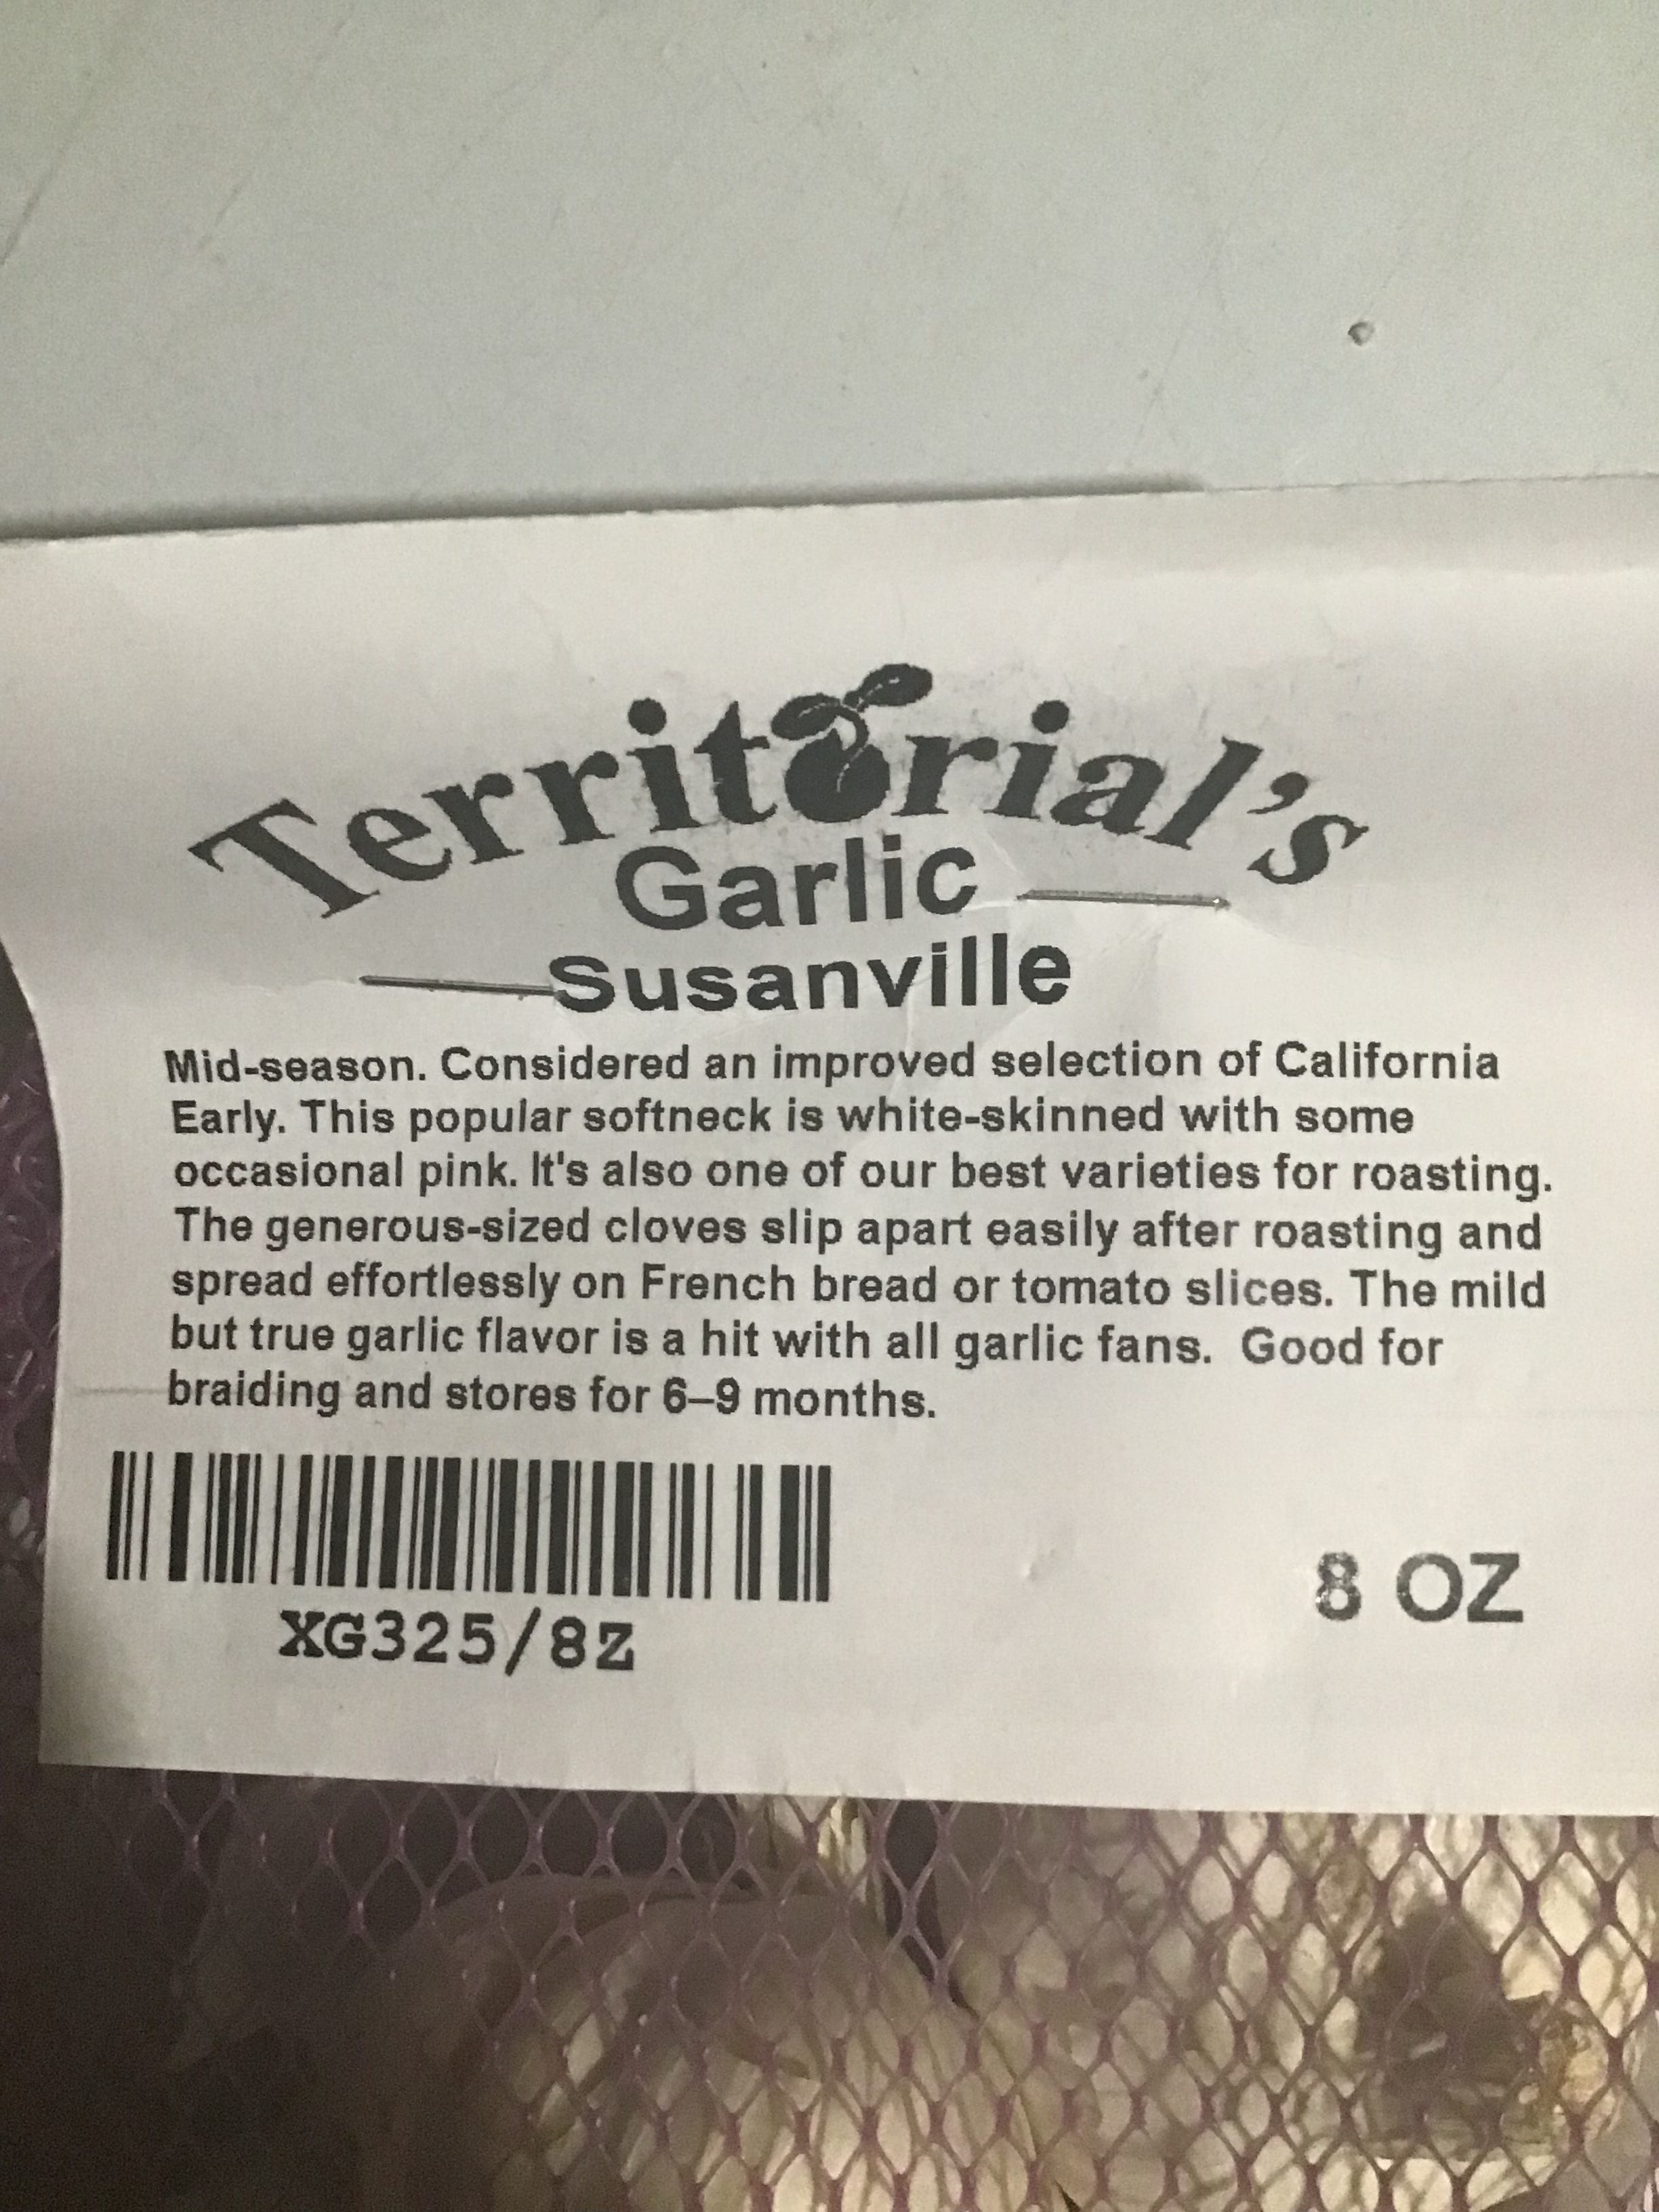
Garlic Planting Time is Here!
This is a free preview of a paid episode. To hear more, visit gardenbasics.substack.comI spent the weekend in a garlic frame of mind. I’ve been working one 4x8’ garden bed, harvesting the pumpkins, removing the vines, reworking the soil with worm castings and compost, and planting the garlic that just arrived last Friday from Territorial Seed Company.By the way, kudos to Territorial for all the information contained about the garlic varieties they sent that’s included on the label, which also has planting instructions. It is a handy label you can save to remind you of what varieties you planted come harvest time next spring, or take pictures of it for your garden diary. (By the way, they didn’t pay me to say that or plug them. I’m just happy with the service and the quality of the garlic that arrived.)I chose this year to plant Susanville and Silver White for their long storage capabilities. In the podcast, you’ll hear me and Debbie Flower discussing our garlic planting tips from October of 2023, mentioning several other varieties. In the newsletter below, even more varieties are mentioned. There’s a lot to choose from! The beauty of being a gardener…growing what you truly enjoy.Beyond The Garden Basics is a reader-supported publication. To receive complete posts, with access to the newsletter archives, and support my work promoting research-based gardening, please consider becoming a paid subscriber.Want to grow garlic?In milder climates (where the ground doesn’t freeze), now is the time to visit your favorite nursery, garden center or garden catalog company to choose the garlic varieties you want. Note I said, “varieties.” Grocery store garlic is primarily one or two varieties. Around here, it is usually California Early or California Late. And these two softneck, Artichoke varieties of garlic do grow well in USDA Zone 9. They take our late spring heat, are very productive, and can be stored (in a cool, dark room, in netted bags) for up to ten months. However, if you want a variety that has a deeper, full-bodied flavor, choose a hardneck variety, such as one of the Rocambole varieties, many of which do well in colder climates, where garlic is best planted two to four weeks before the ground freezes. In the past, I have had good luck with Killarney Red and German Red. Purple Stripe varieties are also quite flavorful, especially when used in baked dishes. Chesnok Red and FerganskiJ are two Purple Stripes that have done well here. Storage life for these varieties is much shorter, usually four to six months. The longest storing varieties – up to a year – are the Silverskins and Creoles, which include two of my favorites: Nootka Rose and Burgundy. Increasing in popularity because of their large size and tangy flavors are the Porcelain garlics, especially “Music”, with cloves as large as a Brazil nut.A well-stocked garden center or independent nursery may have a better supply right now than many garlic catalogs, which sell out of their stock quickly. For more information about garlic – including longer definitions than what is supplied here – check out online garlic company Filaree Farm in Washington State (filareefarm.com). Their site can answer many of your garlic questions. A very good book on the subject is “Growing Great Garlic” by Ron Engeland. A harder to find, out-of-print book, “The Complete Book of Garlic” by Ted Jordan, is a prized ($$$) reference for garlic aficionados (I think, if you shop around, you can find the book a lot cheaper than what it’s selling for on Amazon).University of California Cooperative Extension Master Gardener Advisor Emeritus Michelle Le Strange offers these garlic growing tips:* Below the paywall: A complete transcription of the newsletter podcast, plus:* How to choose and plant a clove a garlic.* How to tell when (and how) to harvest garlic.* Plus: A tasty, slow cooker recipe that uses a lot of garlic!

Understanding a Soil Report
This is a free preview of a paid episode. To hear more, visit gardenbasics.substack.comFirst of all, if you manage to get through this rather brain-taxing, soil-based, newsletter edition, you deserve a little love. How about 20% off a new paid subscription?Before diving into the deep end of how to read a soil report, check out this Overview on Soil Tests from the Alameda Co. (CA) Master Gardeners. It might help make the rest of this more comprehensible.Getting a soil test done is a great idea for your gardenAccording to the Alameda County (CA) Master Gardeners, a soil test:* Provides detailed information about the nutrient content of the soil, enabling gardeners to apply the correct type and amount of fertilizer.* Knowing the soil’s pH level, which affects nutrient availability, allows gardeners to adjust it to the optimal range for their plants.* Tests can reveal the presence of harmful contaminants like lead or other heavy metals, ensuring the safety of your garden produce.* By applying only the necessary fertilizers and amendments, gardeners can save money and prevent environmental pollution.* Understanding soil health helps in making informed decisions, leading to better plant growth and yield.* If you’ve exhausted your attempts to amend soil with compost, a soil test can provide more detailed information to remedy the problem.However, if you listen to today’s newsletter podcast, you’ll find out that understanding that detailed information can be a problem on its own. Here is a soil test from a commercial, Ag-based soil analysis company, that was submitted by a harried backyard gardener, who wants to know what it all means:Commercial Soil Test Results for a Homeowner’s Garden (2 pages)Even University-conducted homeowner soil tests have a degree of difficulty (but at least they provide links at the end for more information).Soil Test Results for a Backyard Landscape from UMass/Amherst (Pgs 1 & 2)Have your eyes glazed over yet? Listen to today’s podcast at the top of this newsletter with America’s Favorite Retired College Horticulture Professor, Debbie Flower, to help wash the glaze out of your eyes.Coming up after the paywall break:A transcript of today’s podcast, including helpful charts, graphs, and links for more information to help relieve your brain fog regarding soil tests. Plus, a partial list of universities that offer home garden soil testing at reasonable prices.Paid subscribers get access to the entire library of previous Beyond the Garden Basics newsletters and podcasts, of which there are now over 200 editions/And, you’ll get to hear today’s complete podcast!
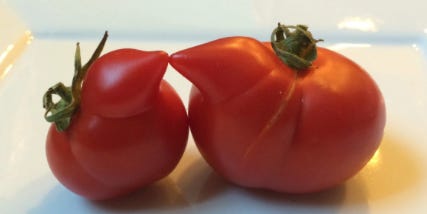
What Causes Odd-Looking Vegetables?
This is a free preview of a paid episode. To hear more, visit gardenbasics.substack.comThis journey into the odd and slightly obscene world of misshapen vegetables was inspired by Sacramento County Master Gardener Peter Horton, who wrote this article for the October 2025 Sacramento Co. Master Gardener newsletter.The article made me harken back to the days of the popularity of Richard Nixon lookalike vegetables, odd-shaped tomatoes, peppers, eggplants, and squash that had appendages - that to some - resembled the former President in profile. Eggplants, in particular, seem to favor this aberration, according to Facebook and Google AI:“Commenters who see Nixon in eggplants often cite specific aspects of his facial features that irregularly shaped eggplants can evoke:* Prominent nose: Nixon was known for his prominent, sometimes described as “ski slope,” nose. Certain eggplants can have a rounded, bulbous end that people interpret as a large nose.* Distinctive jowls: Nixon had sagging jowls, particularly later in his career. The shape of some eggplants, with a wider base and some lumps or folds, can be reminiscent of this feature.* Overall shape: A purplish, somewhat lumpy or distorted eggplant can vaguely suggest a human face, and for some, the specific characteristics align with the common caricature of Richard Nixon.This phenomenon is an example of pareidolia, where the human brain perceives familiar patterns, such as faces, in random or ambiguous stimuli.”At the very least, today’s newsletter has introduced you to a new word, “pareidolia”. The term, according to the National Institute of Health, originally implied the observer may be a bit touched in the head:“The term was coined by German psychiatrist Klaus Conrad in 1958 and comes from the Greek words “para” (beside or beyond) and “eidos” (form or shape). He used it to describe the initial stages of schizophrenia, though it is now understood as a normal cognitive function.”Are gardeners a bit touched in the head?If you see two baby chicks kissing in this photo, the only thing that will save you from a life of depravity and isolation is a paid subscription to the Beyond the Garden Basics Newsletter!After the paywall:More deformed vegetables!A transcript of our chat with Gail Pothour, who explains more about locules, and why they happen (hint: IT’S ALL YOUR FAULT). And, she answers the question: are those appendages edible?
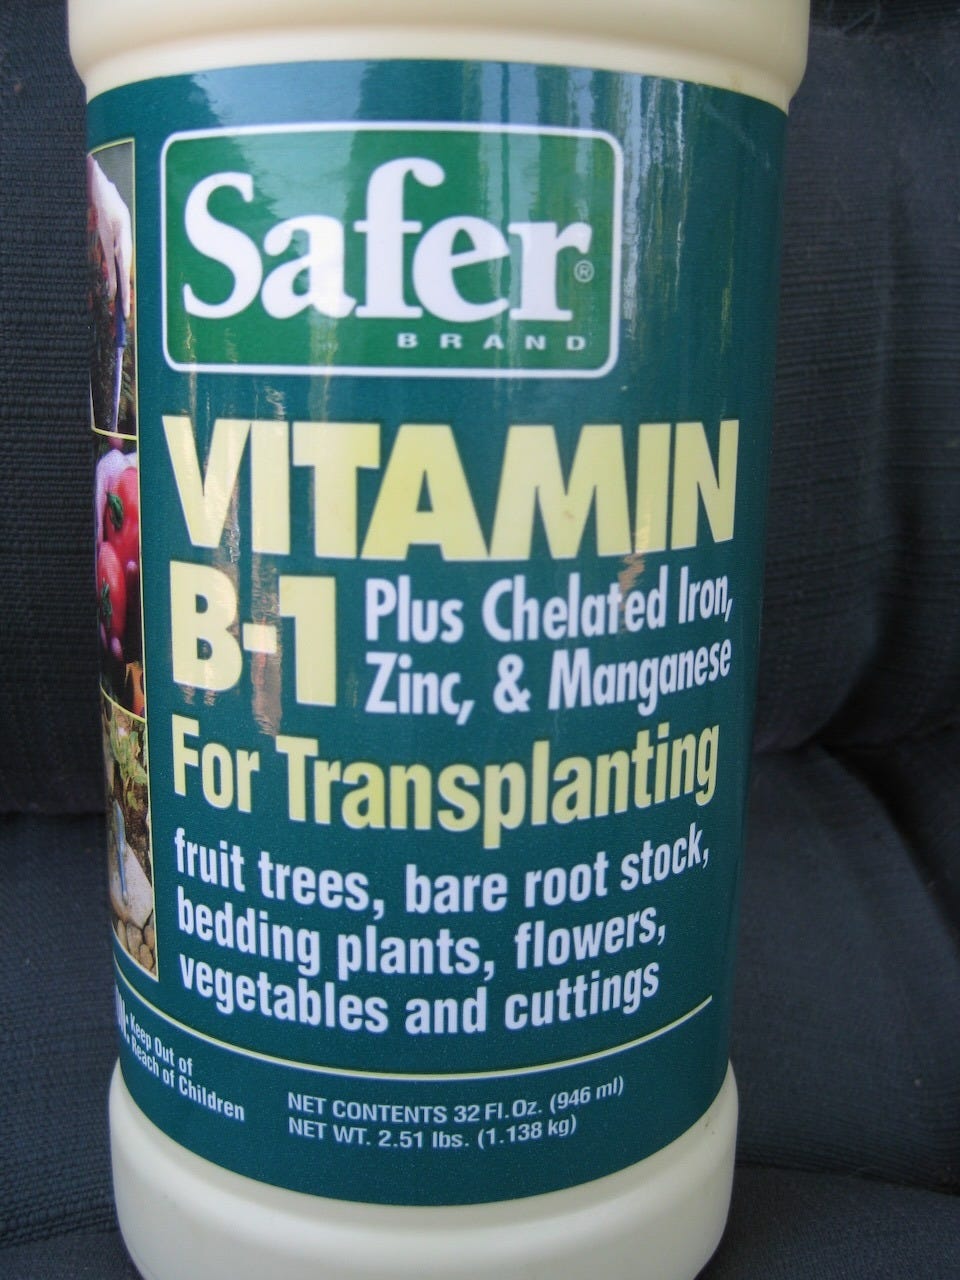
Can Vitamin B1 Help New Garden Transplants?
Beyond The Garden Basics with Farmer Fred is a reader-supported publication. To receive the complete posts, have access to over 200 previous editions, and help keep the good gardening information coming your way, please become a paid subscriber.Early fall is for planting, as we are fond of saying. The days are cooler, and the soil is still warm. Those are ideal conditions for a healthy start of new cool season annuals, perennials, trees, and shrubs.If you’re at the nursery this weekend checking out the latest in plants for your yard, you might just take a stroll down the garden chemical aisle. You may notice, on the shelf, a product of dubious value: Vitamin B-1. A typical label on such a bottle will tout its benefits for transplanting fruit trees, bare rootstock, flowers, vegetables and cuttings.Gardeners, their parents and their grandparents have heard this refrain at nurseries for decades: “Get a bottle of B-1, it will help reduce transplant shock for that new plant you are buying.”The truth, though, is the same as it has been for nearly 90 years: it isn’t the Vitamin B-1 (thiamine hydrochloride) in the bottle that reduces transplant shock.First a definition of “transplant shock” from Purdue University: “Transplant shock is a term that refers to a number of stresses occurring in recently transplanted trees and shrubs. It involves failure of the plant to root well, consequently the plant becomes poorly established in the landscape. New transplants do not have extensive root systems, and they are frequently stressed by lack of sufficient water. Plants suffering from water stress may be more susceptible to injury from other causes such as the weather, insects, or disease. When several stresses are being experienced, the plant may no longer be able to function properly.”And right there you have the answer to effectively reduce transplant shock: water correctly.Thiamine exists in nature, produced for plants via leaves and sunlight. Plants, as well as soil microbes, create their own Vitamin B1. Thiamine is a cofactor (molecule that binds to an enzyme to help/allow it to function) important in the construction and break down of carbohydrates for growth or energy storage/release.In the 1930’s, thiamine was shown to increase root development in plant tissue cultures - in the lab - especially in the dark. But those results couldn’t be replicated consistently in the field.Research at the University of California has shown that the addition of Vitamin B-1 to a plant doesn’t make any difference at all.Garden author Robert Kourik reported on his website: “The sun set on this persistent myth many years ago. Sunset Magazine reported in 1984 of studies which disproved the value of a vitamin B1 drench at transplant. Yet this horticultural “snake oil” still clutters many retail nursery shelves.What does work in that bottle prominently labeled “B-1”: the other ingredients - usually micronutrients or auxins - might make a difference in roots and growth of new plants.Back in the 1940’s, naturally occurring plant growth regulators, known as auxins, were isolated and tested. Auxins were found to stimulate cell elongation in roots and stem tissue. Bingo!Around that time, a commercial product, Transplantone, was developed that contained auxins and thiamine. Later research showed that it was certain auxins, not the thiamine, that encouraged roots.But the die was cast: gardeners got into the habit of getting vitamins for their plants.What does stimulate root growth? A rooting hormone containing auxins such as Indole Butyric Acid, Naphthylacetic acid or Paclobutryzol.Below the paywall: What’s inside a bottle of Superthrive? More information, including a transcript of today’s newsletter podcast, including more myth busting information about pot shards, landscape fabric, wood chips, and why you don’t want to pull out big weeds! Remember: subscribers also have access to the entire back catalog of Beyond the Garden Basics newsletters and podcasts. $5 a month or $50 a year. If you learned something, tip me! Thanks.One surprise that popped up in my research: the much-ridiculed Superthrive contains auxins...as well as, of course, Vitamin B-1. Anyone who has tried to pore through the densely hyperbolic endorsements on a Superthrive label looking for the ingredients, well...good luck.However, I did find the ingredients on a 20 year-old, unused bottle of Superthrive sitting in my greenhouse. Is it the same formulation today? I don’t know. But seeing how they haven’t apparently changed the outside of the bottle much over the years, I have a feeling the insides are still the same.The debate about the benefits of adding thiamine or other additives (including Superthrive) to plants still rage, with proponents citing research supporting their viewpoint.Bottom line: The benefits of root formation contained in a bottle of Vitamin B-1 or any other additive product are the auxins, if any, that are included. Small amounts of nitrogen can also encourage
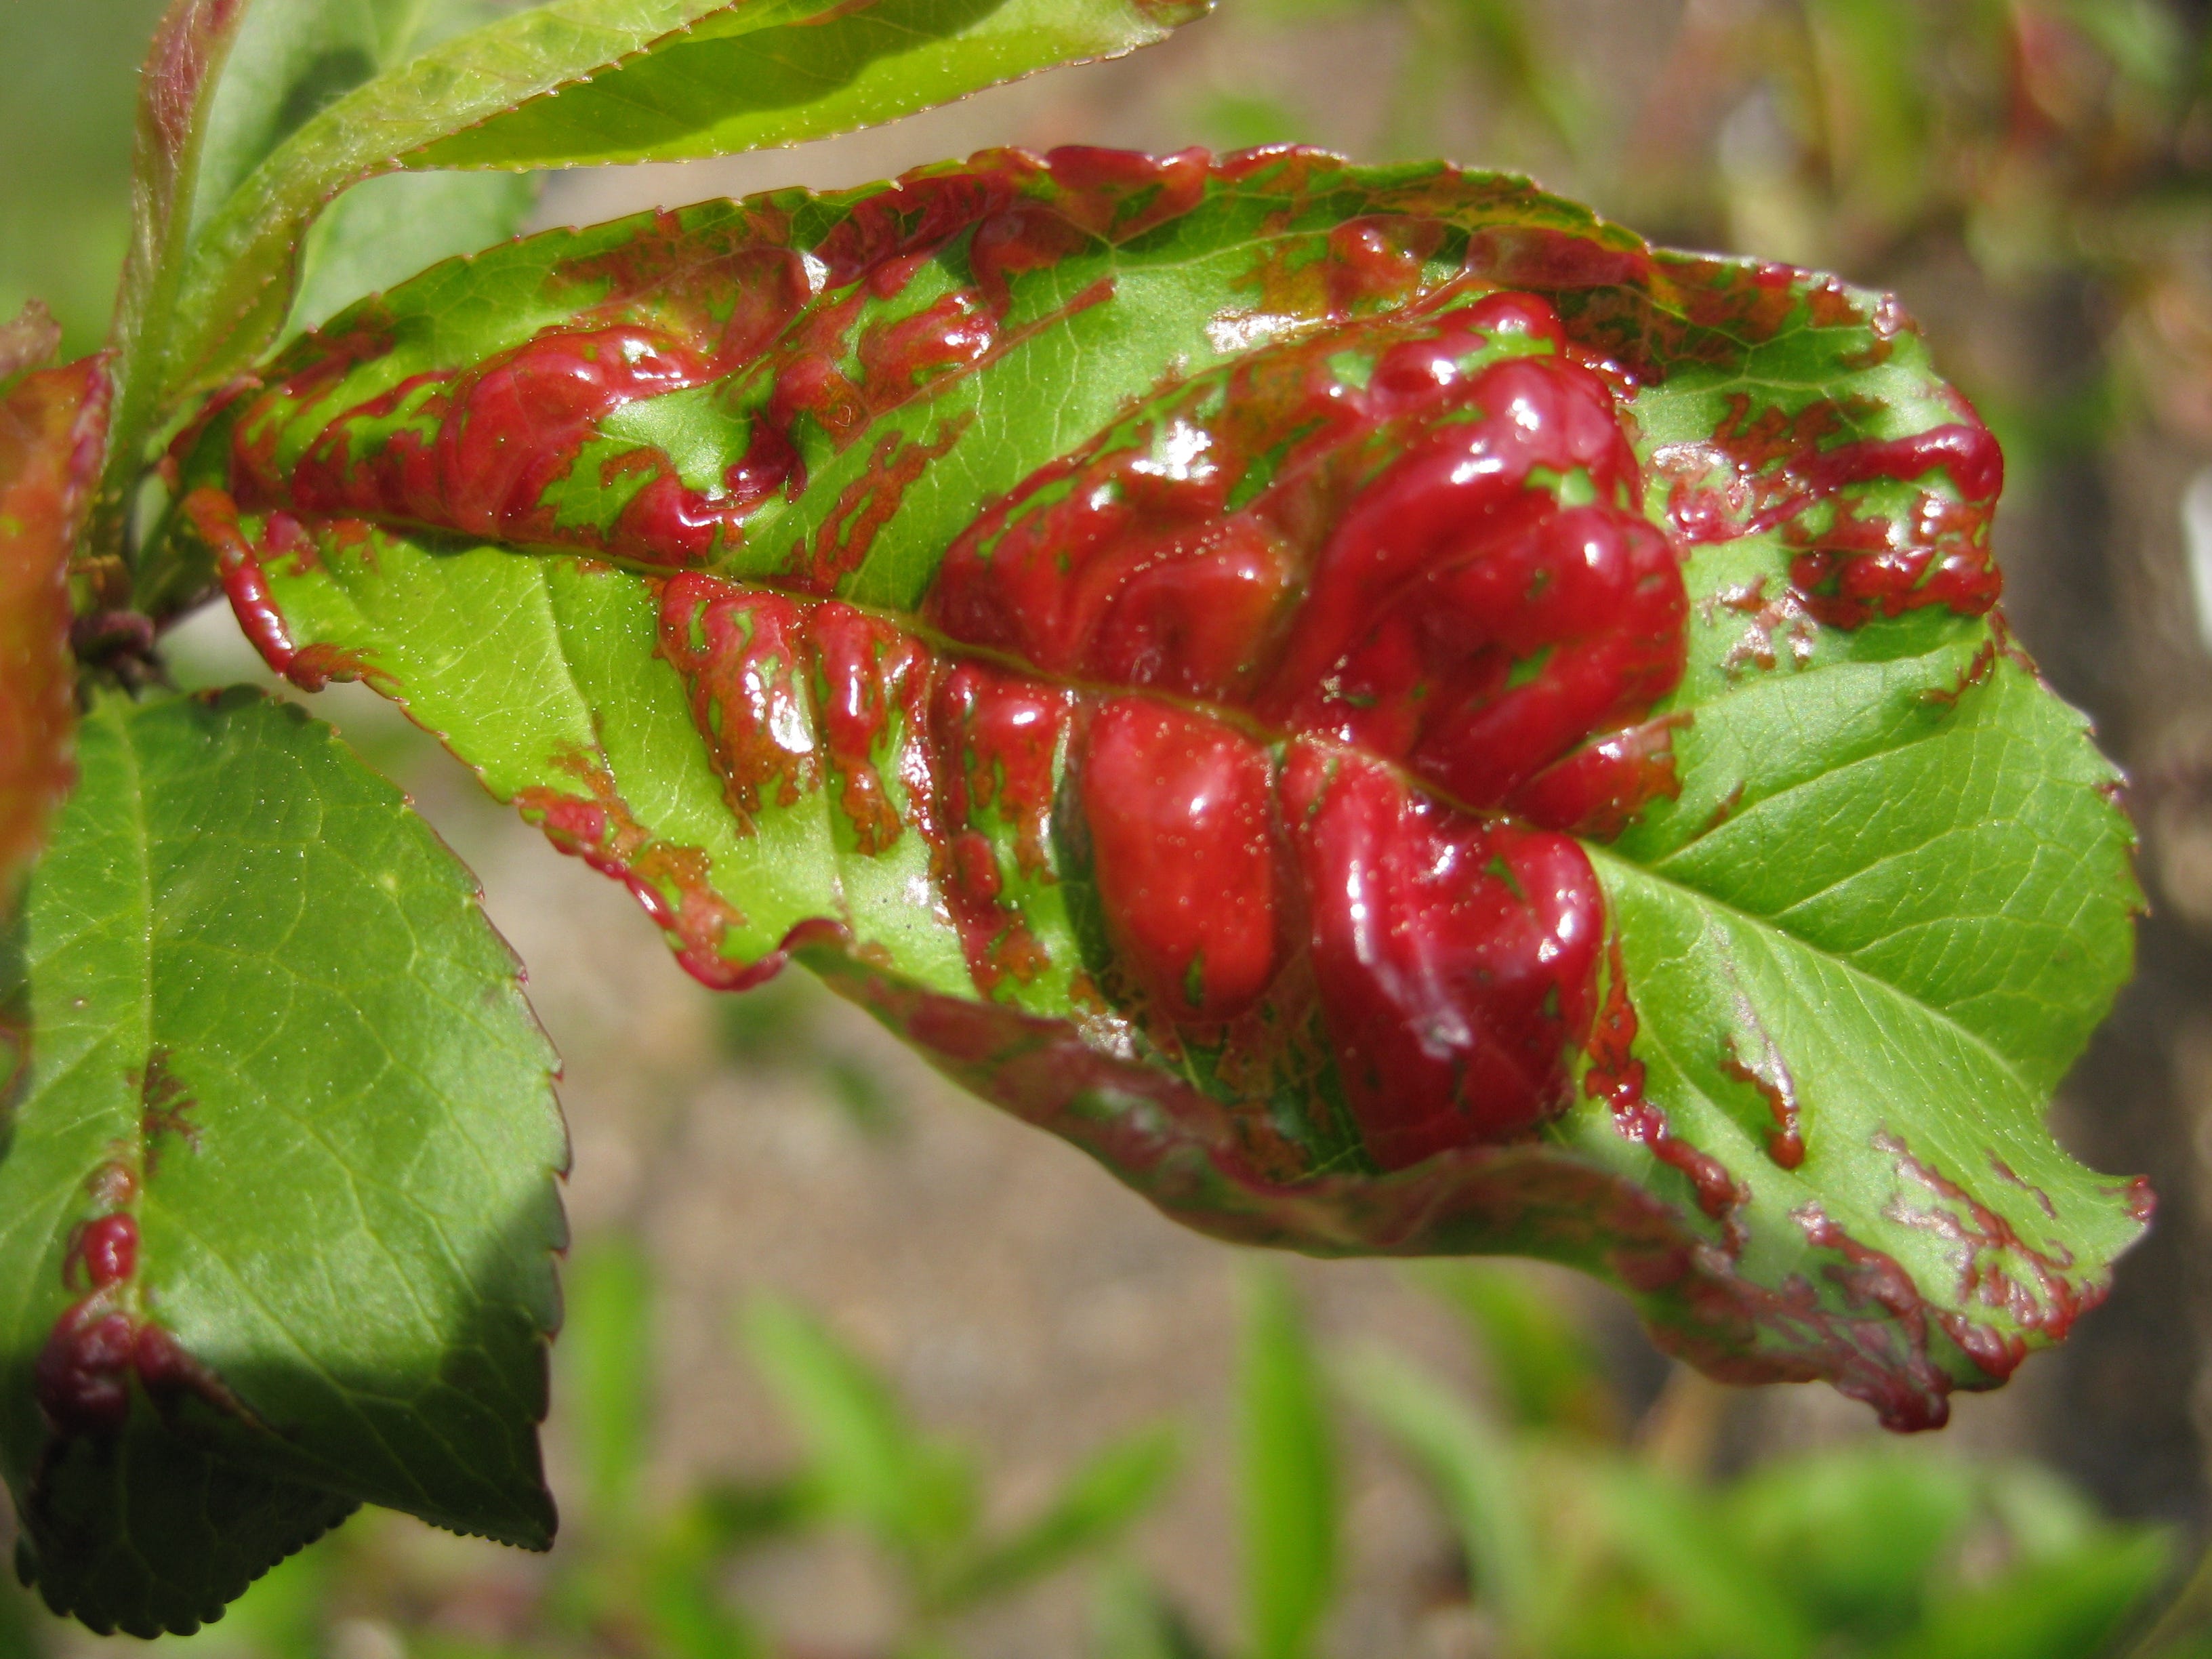
The Disease Triangle
This is a free preview of a paid episode. To hear more, visit gardenbasics.substack.comBack in elementary school in Southern California, there once was a visit from a local firefighter who had Smokey the Bear in tow with him (I felt sorry for whoever was in that outfit. It was a hot day). Because, as Smokey would remind us daily on TV public service announcements, “Remember, Only You Can Prevent Forest Fires.” The purpose was to explain to us fifth graders the fire triangle: that you need three elements to start a fire: fuel, oxygen, and heat. So, douse that campfire with water (to take away the oxygen), and separate the remains (the fuel) from each other (to lessen the heat), and don’t play with matches, kids.Turns out, the same sort of triangle can help you figure out how to control plant diseases in the garden. Debbie Flower, America’s Favorite Retired College Horticulture Professor, calls it “The Disease Triangle”. Debbie says, “If you know this, you can control diseases without chemicals.”She explains that intriguing statement in today’s newsletter podcast, above. For those of you who prefer to use your eyes, here’s the transcript, which includes links to more information about certain statements, and maybe a country song, too:With the closing of the Garden Basics with Farmer Fred podcast, the Beyond The Garden Basics newsletter/podcast is the new flagship publication for good gardening information. To receive new posts and support my work, consider becoming a paid subscriber. And for those who already paid, thank you!

Grow A Yardful of Phytonutrients
Today’s newsletter and podcast originally appeared here back in September of 2022, and it was one of the most popular posts here in the Beyond the Garden Basics newsletter. Eating healthy food - and the healthiest food you can eat is the food you grow yourself - is a perennial concern. So, for those of you who didn’t hear or read this three years ago - or would like a refresher course - here it is again. Remember, paid subscribers have access to all the previous Beyond the Garden Basics newsletter editions… a very good reason to pony up a few dollars a month for a subscription!Beyond The Garden Basics with Farmer Fred is a reader-supported publication. To receive new posts and support my work, consider becoming paid subscriber.In today’s newsletter podcast, we continue our chat with Dr. Laura Varich, from FreshPhysician.com , a conversation that we began on Episode 228 of the Garden Basics with Farmer Fred podcast. Dr. Varich is a former pediatric radiologist who is now focused on what’s really the cause of so many of the diseases in our society: poor eating habits. Specifically, we are missing a critical element in our diet: phytonutrients. We’re eating too much of colorfully-packaged, highly-processed factory food and not enough fresh from-the-garden (or farmer’s market) colorful food.The result: rampant increases, across all ages, of heart disease, diabetes, high blood pressure, cancer, and other ailments.In both podcasts, she encourages getting out into the yard and growing fresh fruits and vegetables, which is also great exercise. The healthiest food you can eat is the food you grow yourself…and then consume it, fresh. Or, at least, make regular runs to the farmer’s market in your area.What are phytonutrients?Dr. Varich explains that in the podcasts. And, here’s the word from Harvard University:Phytonutrients: Paint your plate with the colors of the rainbowDid you know that adding color to your meals will help you live a longer, healthier life? Colorful fruits and vegetables can paint a beautiful picture of health because they contain phytonutrients, compounds that give plants their rich colors as well as their distinctive tastes and aromas. Phytonutrients also strengthen a plant’s immune system. They protect the plant from threats in their natural environment such as disease and excessive sun.When humans eat plant foods, phytonutrients protect us from chronic diseases. Phytonutrients have potent anti-cancer and anti-heart disease effects. And epidemiological research suggests that food patterns that include fruits and vegetables are associated with a reduced risk of many chronic diseases, including cardiovascular disease, and may be protective against certain types of cancers.The American Cancer Society recommends 2 1/2 cups per day of fruits and vegetables. The most recent US Dietary Guidelines recommend consuming even more: 2 1/2 cups of vegetables and 2 cups of fruit, based on a 2,000-calorie diet.To get started, try to include as many plant-based colors in your meals and snacks as possible. Each color provides various health benefits and no one color is superior to another, which is why a balance of all colors is most important. Getting the most phytonutrients also means eating the colorful skins, the richest sources of the phytonutrients, along with the paler flesh. Try to avoid peeling foods like apples, peaches and eggplant, lest you lose their most concentrated source of beneficial chemicals.Following is a rundown of fruits and vegetables sorted by color, along with the phytonutrients they contain, and which foods you’ll find them in.Red: Rich in the carotenoid lycopene, a potent scavenger of gene-damaging free radicals that seems to protect against prostate cancer as well as heart and lung disease.Found in: strawberries, cranberries, raspberries, tomatoes, cherries, apples, beets, watermelon, red grapes, red peppers, red onions.Orange and yellow: Provide beta cryptothanxin, which supports intracellular communication and may help prevent heart disease.Found in: carrots, sweet potatoes, yellow peppers, oranges, bananas, pineapple, tangerines, mango, pumpkin, apricots, winter squash (butternut, acorn), peaches, cantaloupe, cornGreen: These foods are rich in cancer-blocking chemicals like sulforaphane, isocyanate, and indoles, which inhibit the action of carcinogens (cancer-causing compounds).Found in: spinach, avocados, asparagus, artichokes, broccoli, alfalfa sprouts, kale, cabbage, Brussels sprouts, kiwi fruit, collard greens, green tea, green herbs (mint, rosemary, sage, thyme, and basil)Blue and purple: Have powerful antioxidants called anthocyanins believed to delay cellular aging and help the heart by blocking the formation of blood clots.Found in: blueberries, blackberries, elderberries, Concord grapes, raisins, eggplant, plums, figs, prunes, lavender, purple cabbageWhite and brown: The onion family contains allicin, which has anti-tumor properties. Other foods in this group contain antio
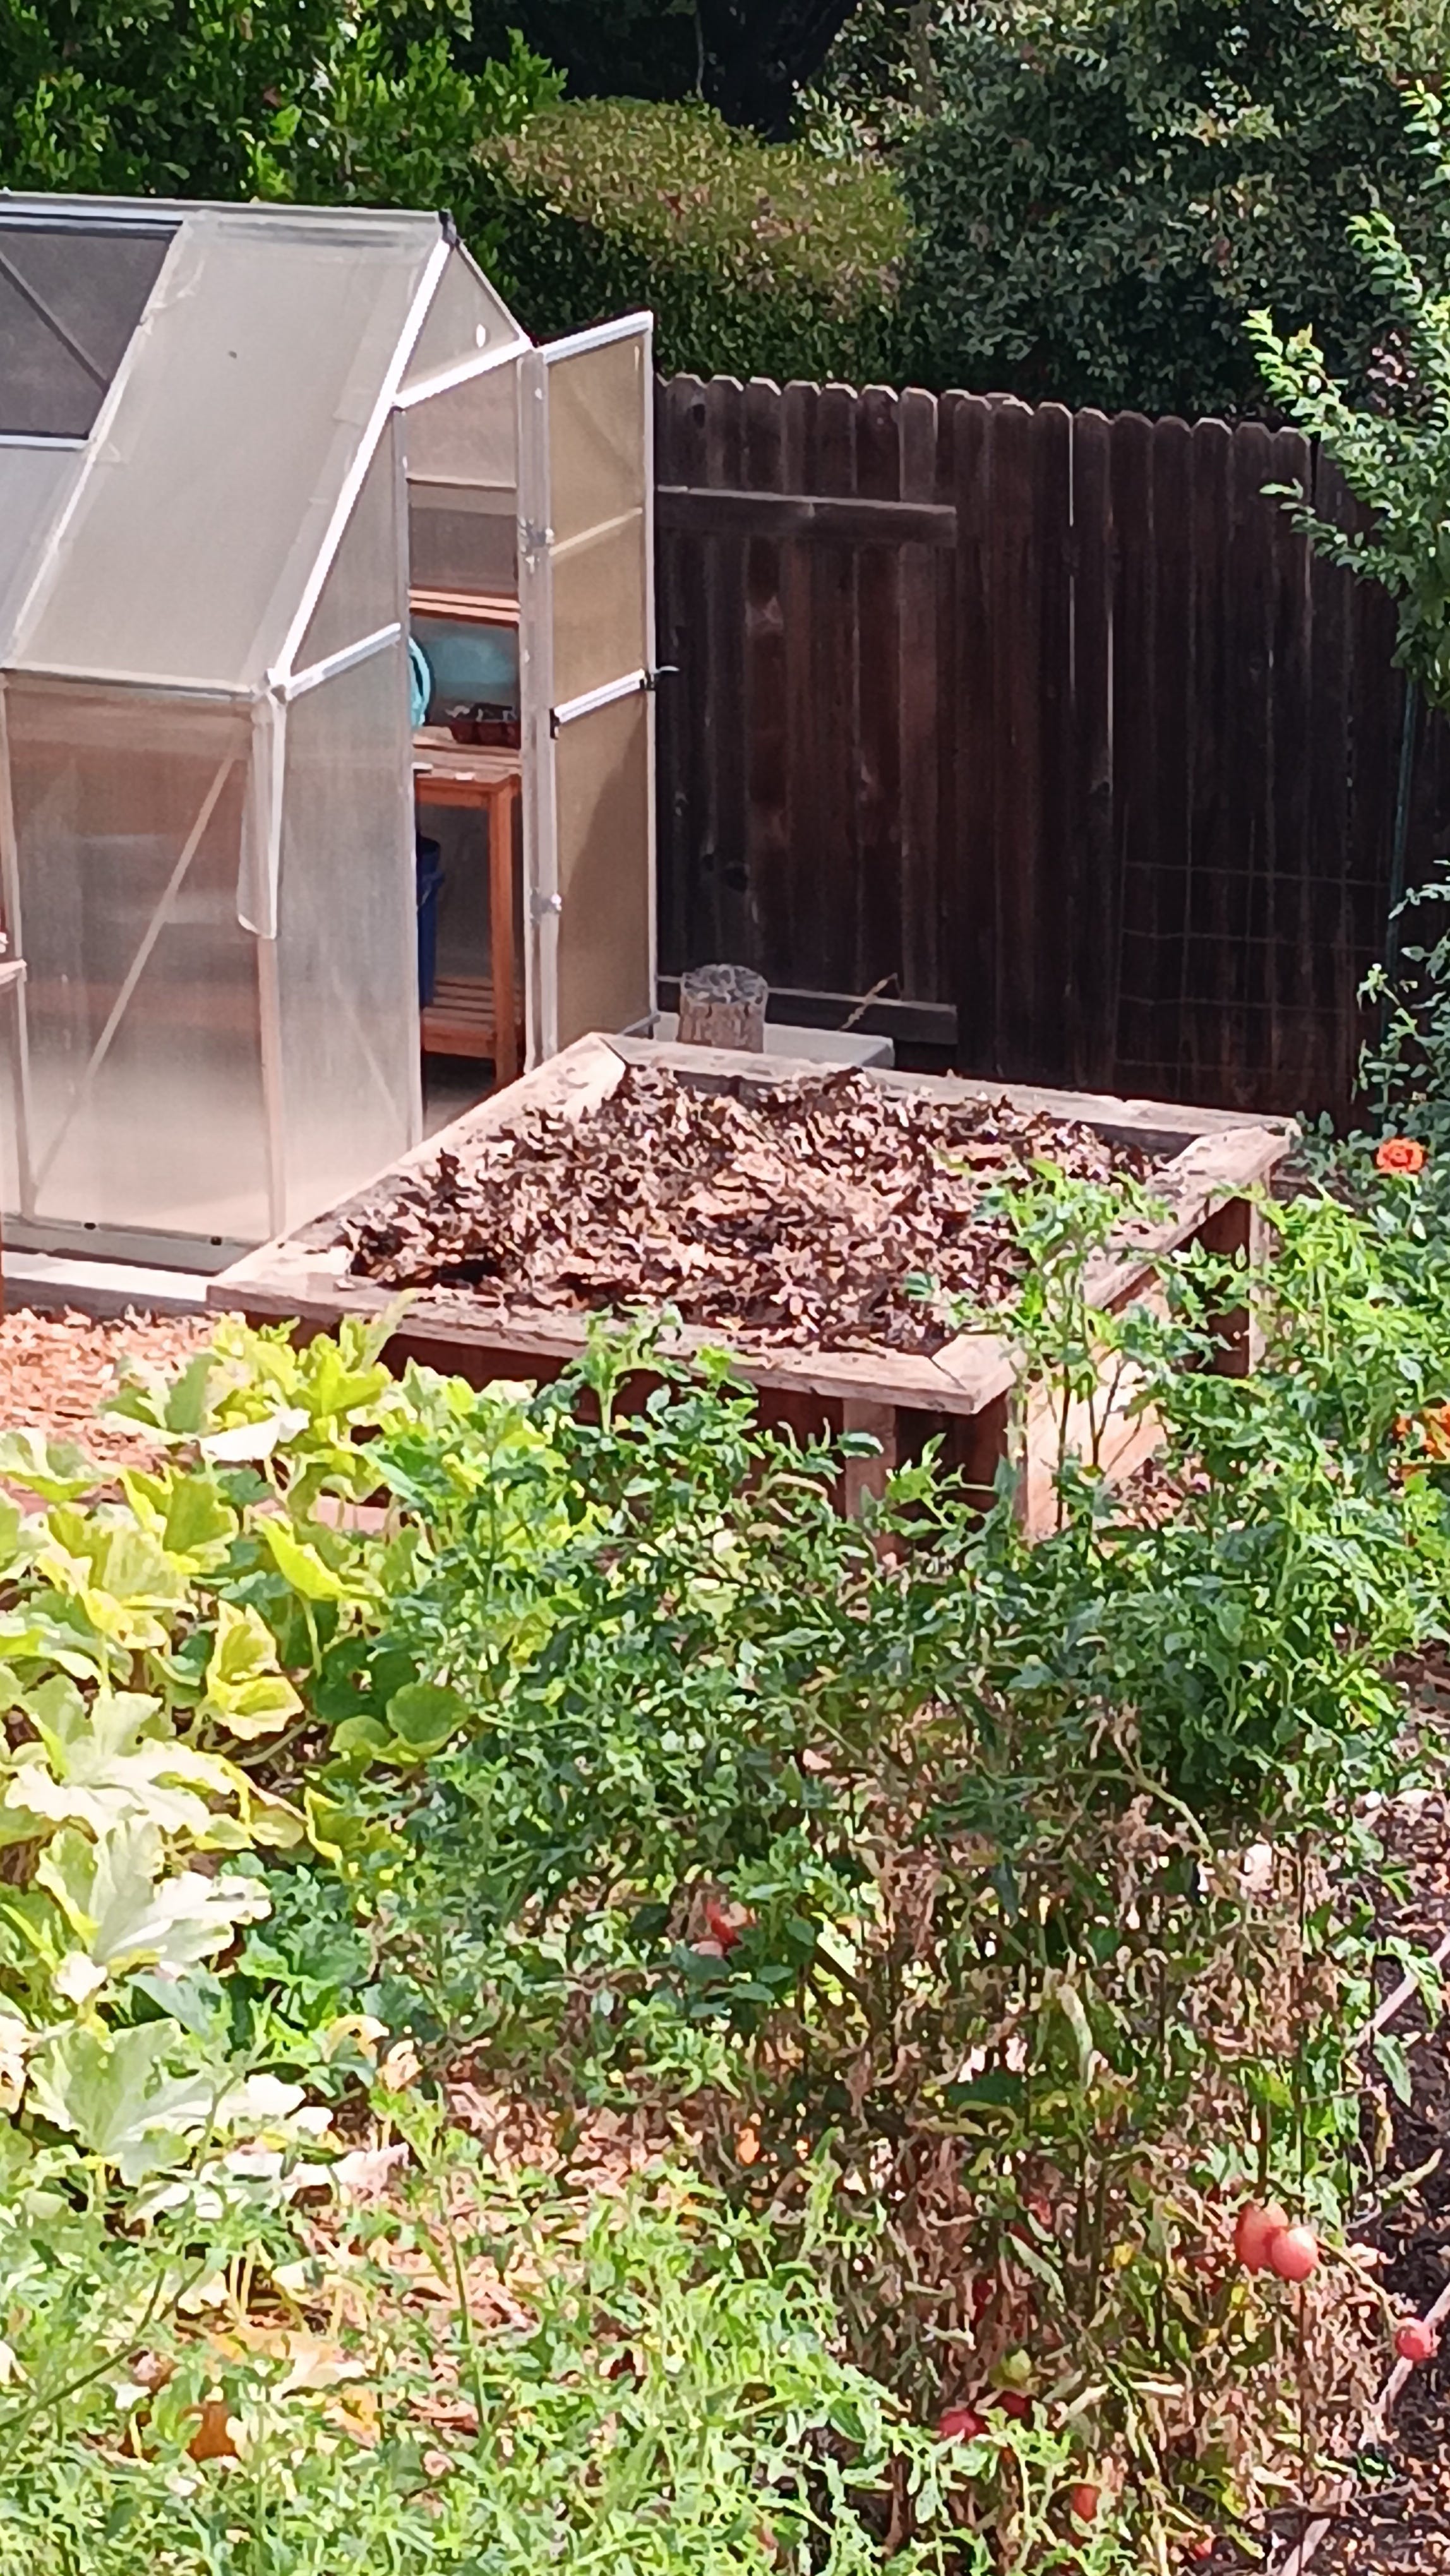
Feed Your Soil, Cool Season Edition
We are transitioning from the summer gardening season to cool season vegetables and flowers. However, maybe you don’t want to put in cool season crops. A word to the wise: don’t leave your fading summer garden lingering (or drooping) in the garden; doing that invites insect and disease pests to overwinter in that standing debris. In its place, there are some inexpensive and easy things you can do that will not only minimize pest problems for the following year, but also feed your soil and make it even better for next year.In today’s newsletter podcast, soils expert Steve Zien explores how cultivating an environment that nurtures soil biology lays the groundwork for vibrant plants.Among the topics in the podcast:0:05 Goodbye, tomatoes, squash and peppers0:53 Feeding the Living Soil3:56 What’s Missing from the Soil?4:58 Understanding N-P-K6:52 The Importance of pH8:33 Adjusting Soil pH9:25 Benefits of Mulching10:23 Managing Soil Moisture14:01 Fall Planting and Soil CareTips for a Healthier SoilThe University of Minnesota Extension has six tips for a healthier soil:• Get a soil test done to find out what nutrients your garden soil is missing. Some universities offer low-cost soil tests, including U. Mass/Amherst, Colorado State, Texas A&M, and Utah State.• Mix in organic matter. This could include fallen leaves, roots, and general plant litter.• Incorporate compost and worm castings to compacted soil to increase air, water holding capacity, and nutrients for plants.• Protect topsoil with mulch, leaves, or cover crops.• Don’t use chemicals unless there’s no alternative.• If possible, rotate crops.Soil pedologist Steve Zien concurs, saying if people want inexpensive, easy ways to improve their soil during the winter, and they don’t want to grow cool season cover crops, two easy tasks can greatly improve your soiI: cut off your summer crops at the soil level, but leave the root system in place. Then, cover that soil with several inches (six to ten inches) of mowed-over or chopped-up leaves that are beginning to fall from the trees.“Doing that is absolutely wonderful for your garden soil,” says Zien, who is based in Sacramento County. “It regulates the soil temperature, keeping it warmer. The fact that the leaves are ground up makes it easier for the worms that are in your soil to come up and feed, aerating your soil and taking that organic matter down into the soil. So, you will get nutrients moving down into the soil, increasing the nutrient value, and you will get more soil biology. And the more soil biology you have, the more diversity, the more numbers of beneficial microorganisms, the healthier your soil will be and the healthier your crops will be. That increase of beneficial soil biology will naturally combat pest problems.”Zien goes on to say that the root mass remaining in the garden will improve the soil, as well. “The roots will decompose quickly,” says Zien. “The biology will basically reduce them to nothing. And there will be large pore spaces where those roots were. When you irrigate, the water will go down very nicely, which is important, especially if you have a clay soil.”This breaking down process of the roots will happen quicker if you already have healthy soil, teeming with microbes. What can gardeners do to begin that process?“Leaving crop residue and leaf mulch on the soil surface will still be worthwhile,” explains Zien. “The mulch and the underground crop residue protect the soil from nature’s forces of wind and water, reducing erosion and the impact of raindrops on bare soil. When a raindrop hits bare soil it loosens the sand, silt and clay particles. That moves them around in a way that results in the creation of a hard crust that seals off the soil. Topping the soil with crop residue and mulch instead will conserve moisture, reduce the need for irrigation, prevent weed growth and will insulate the root zone from heat and cold, creating a more favorable environment for the development of beneficial soil biology.”Zien warns that part of building healthy soil may require a change in some of your gardening habits.“One must also realize that the good soil organisms are destroyed by synthetic fertilizers and pesticides, therefore their use must be eliminated or at least minimized,” says Zien.“The sooner you adopt these practices, the faster you will create a healthy soil food web with good soil structure and an abundance of organic matter capable of producing the garden and landscape of your dreams.”Beyond The Garden Basics with Farmer Fred is a reader-supported publication. To receive complete posts and support my work, consider becoming a paid subscriber.Here’s the complete transcript of the conversation with soil pedologist Steve Zien in today’s podcast (above):Farmer Fred:[0:00] Well, it’s the change of seasons, kind of, and you might be ripping out your summer vegetable garden. Goodbye, tomatoes, squash and peppers. Hello, broccoli, cauliflower, peas and whatever. But before you add your

Who's Eating the Tomatoes?
Don from Indiana has a late summer visitor to his tomato plants. He is not pleased:“I flicked 10 of these “bad boys” off one of my tomato plants last night. Ten!I look at this plant every day. I water it every day. I pick and eat tomatoes off it every day. Every day!How did so many appear seemingly overnight?I believe it is a Tobacco Hornworm caterpillar (Manduca sexta).There were actually 11 of them on the plant, but I left the one that had been parasitized. That’s the one with what looks to be little pieces of rice sticking out of its back.I’ve heard you and Debbie Flower talk about this for years, but never witnessed it myself until yesterday.Thanks for the heads up!!”Doug from Sacramento chimes in:"As a first time tomato grower, I have two plants in pots (Patio & Bush Better Boy), and four in the ground (Roma, Sun Gold, Lemon Boy, & Black Krim). Something was eating the young tomatoes in the pots. Upon closer inspection I found three juicy, green caterpillars around the plants. I did some research and they seem to be tomato hornworm (Manduca quinquemaculata) - a common pest and best controlled by hand picking and dumping in soapy water, or allowing the beneficial wasps to do the job.Any other suggestions controlling these tomato eaters?"Doug, one option might be to stick that critter in the envelope that he’s resting on, and mail it to someone you don’t like. However, the envelope may require extra postage. Beyond The Garden Basics with Farmer Fred is a reader-supported publication. To receive new posts and support my work, consider becoming a free or paid subscriber.Either Tobacco or Tomato Hornworms will enjoy your September tomatoes. According to North Carolina St. University:Tomato and tobacco hornworms are closely related species that cause similar damage to the same host plants. Both are equivalent in size and appearance. Tomato hornworms are the larval stage of the fivespotted hawkmoth (Manduca quinquemaculata) and tobacco hornworms are the larval stage of the Carolina sphinx moth (Manduca sexta). Tomato and tobacco hornworms can both be found attacking host plants.Host plants of both species include members of the Solanaceae family such as tomato, pepper, potato, eggplant, along with various nightshade flowering plants. Additionally, tobacco is also targeted by tobacco hornworm.This time of year, many backyard gardeners, in addition to Don and Doug, are glaring at their partially eaten tomato plants, and muttering under their breath, "Just where do these blankety-blank tomato worms come from?" Contrary to a popular urban legend, the larvae of the tomato hornworm do not lurk inside tomato seeds, a diabolical plot between seed growers and chemical manufacturers to increase profits. Nor are the worms drawn by the scent of your tomato plants from deep within your garden soil, emerging forth to wreak havoc.The tomato and tobacco hornworm begin their life cycle as a small, singular, light green egg, about the size of a thick pinhead, laid in late spring and early summer on the underside of a tomato leaf. That egg got there courtesy of a flying culprit, the sphinx moth. Both the tomato hornworm sphinx moth and the tobacco hornworm sphinx moth have similar features: about a four-inch-wide wingspan, gray body, brown wing streaks as well as yellow and white body markings.The egg laid by the sphinx moth hatches within a week, and the emerging hornworm (technically, a caterpillar) begins eating. And eating. And growing. A full-grown hornworm, satiated by its tomato plant diet (supplemented with whatever else is handy, including potatoes, eggplants and peppers) can get up to four inches long.If you miss catching the tomato hornworms, these critters will descend into the soil at the end of the season, wrapping themselves into a cocoon: Disking or rototilling after harvest destroys their pupae in the soil and prevents the adult moths from developing and emerging from the soil the following spring. Again. Hand snipping the tomato worms with scissors or pruners can be a satisfying evening chore. The trick, as seasoned gardeners know, is trying to find the hornworms in the first place. Tracing their black, pellet-shaped excrement from the ground back up the plant usually yields successful results. The best time to find them is in the cool of the morning or evening. Another popular tomato worm hangout: the tender, new growth at the top and sides of tomato plants. If you prefer to douse tomato hornworms in chemicals, use one registered for use on this pest. Soaps and oils might slow them down but won’t kill them. What does work are stomach poisons that contain a bacterial insecticide, such as Bacillus thuringiensis (Bt) or spinosad. They can be applied directly to the offending hornworms. However, this works best while the worms are still small. The bigger ones are more problematic, but there may be help already at work in your yard.Encouraging birds to hang around your property is a good strategy. They enjoy these
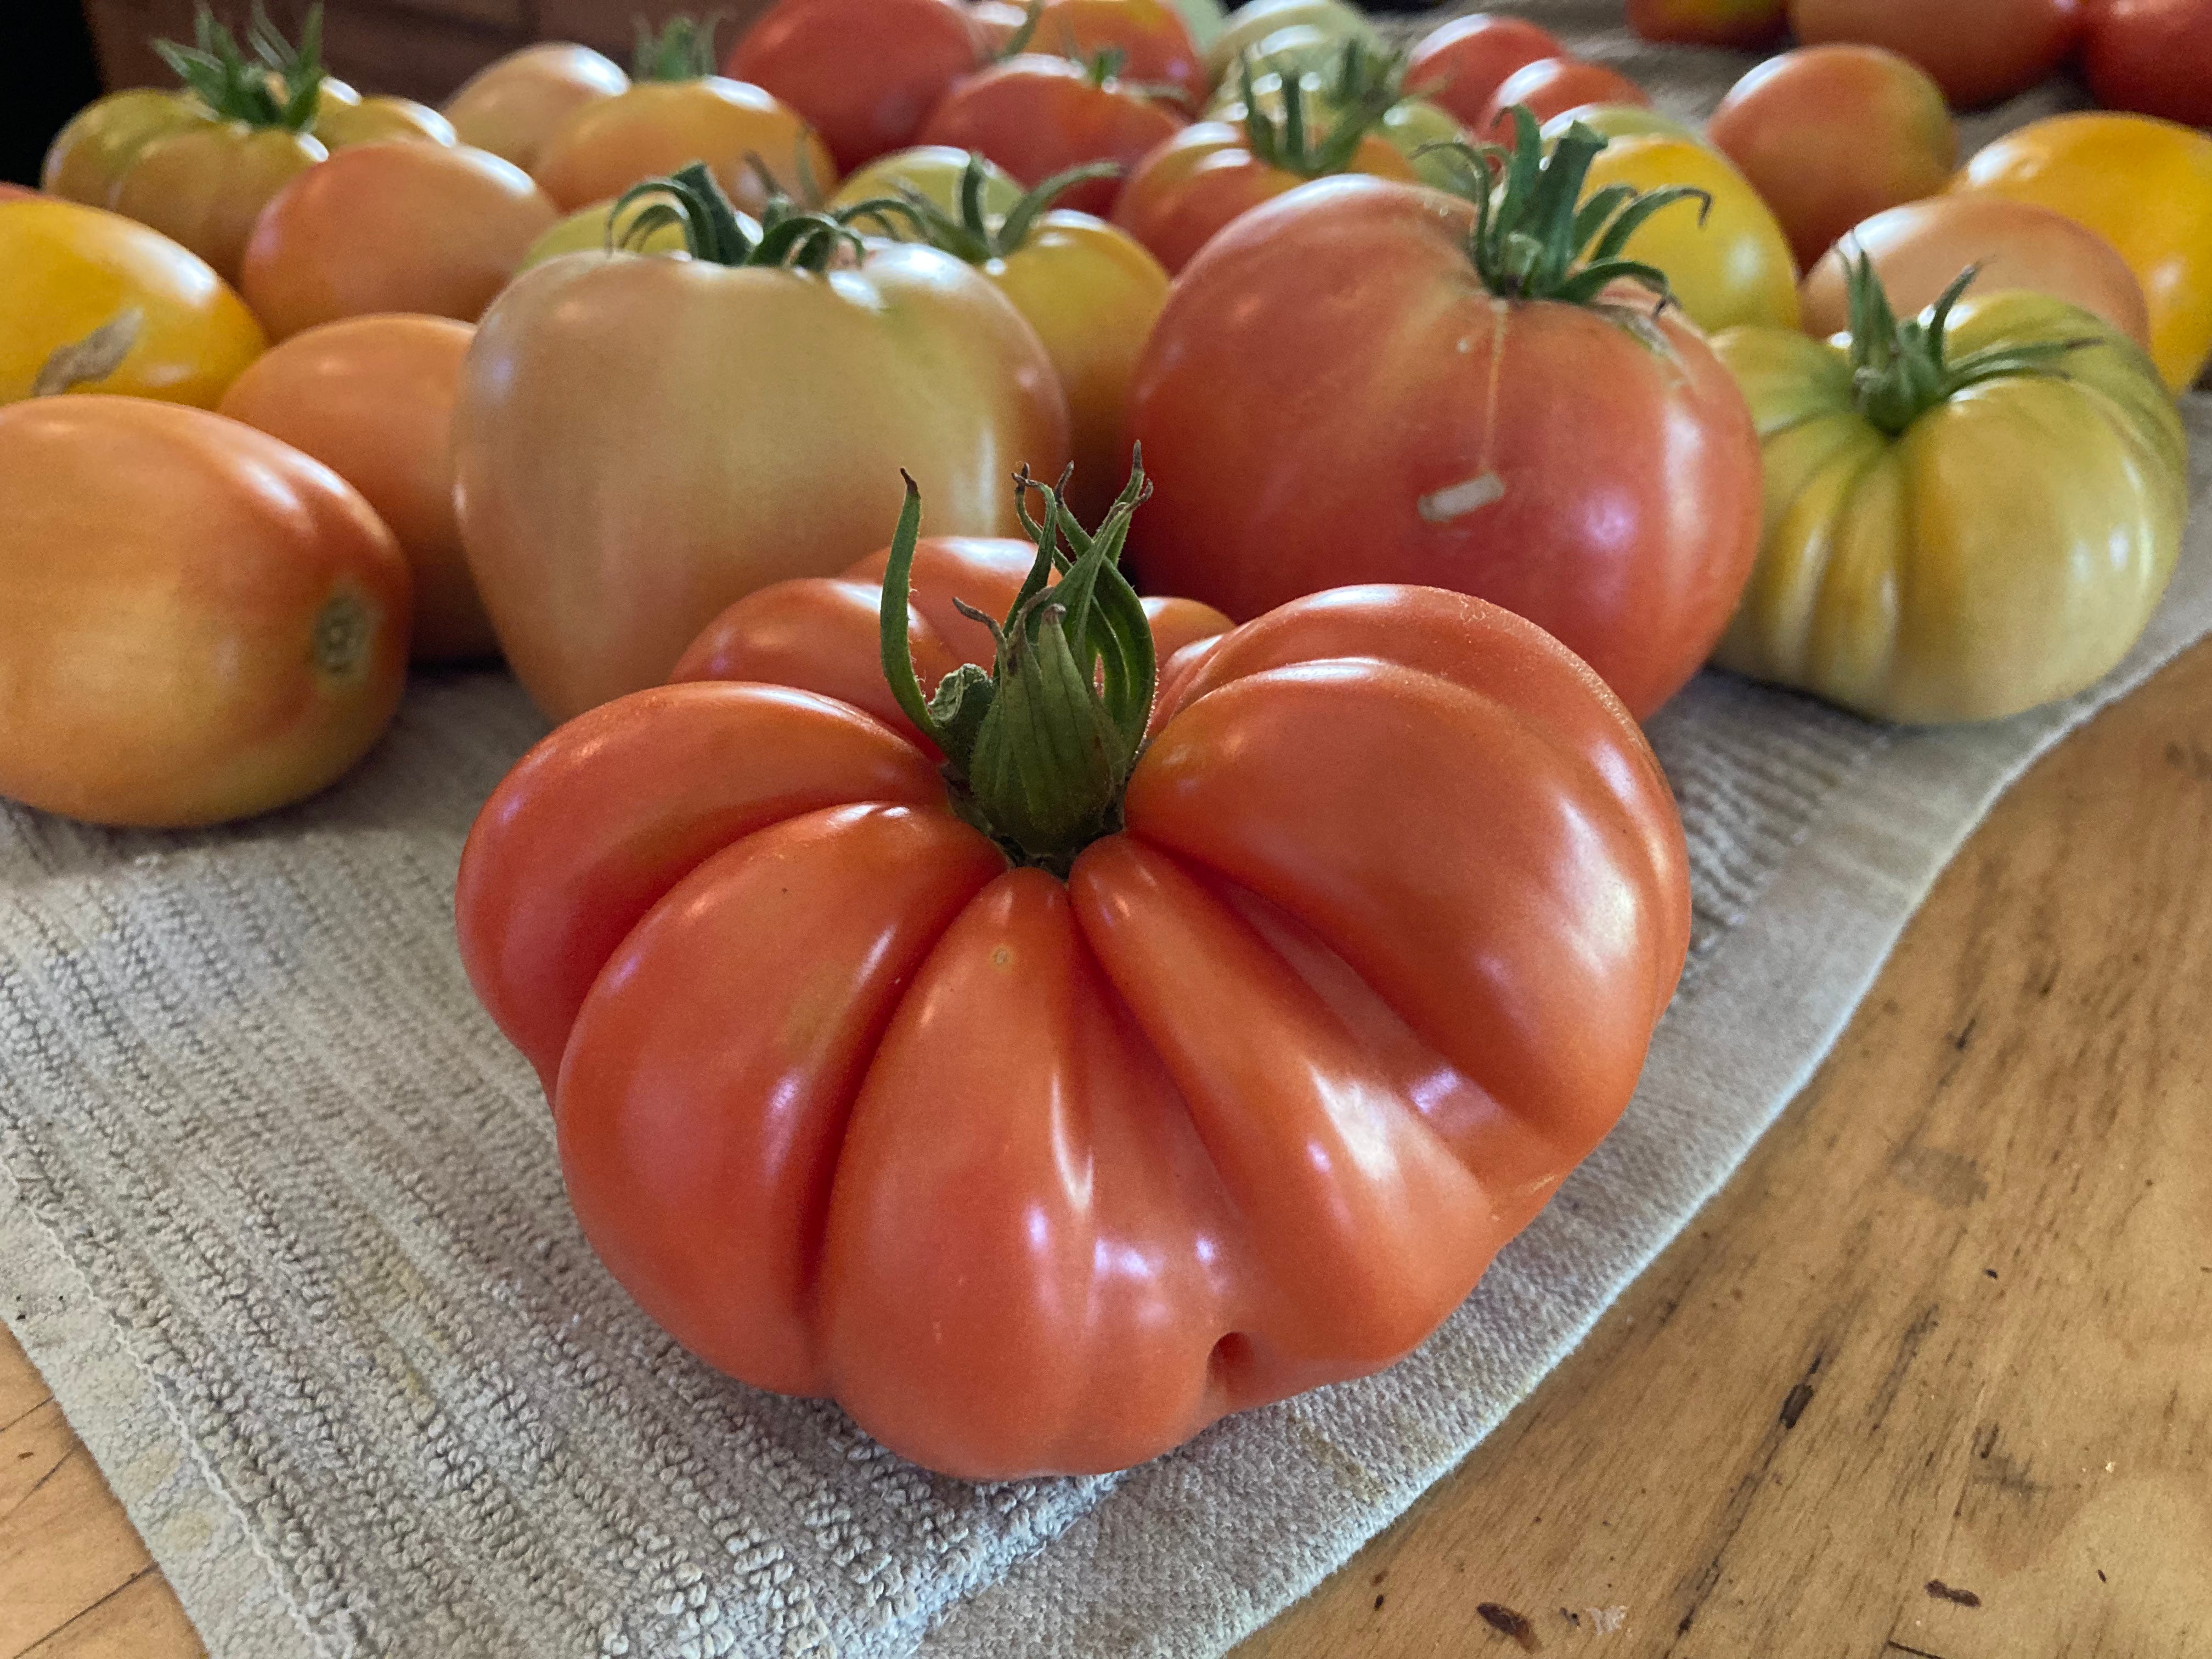
More Tips for a Successful Garden
While editing Episode 406 of the Garden Basics with Farmer Fred podcast (out now), I was taking copious notes, about all the great garden tips Don Shor and I discussed in an episode that was ostensibly a chat about growing tomatoes this summer (we both like Cupid, despite its propensity to sprawl). In fact, it was the most notes I have ever taken for any episode. Were you taking notes, too, while listening? If so, I hope you weren’t driving. But I’ll make it easier for you: check out the transcript of today’s episode, especially the more accurate transcripts that you’ll find at our website, gardenbasics.net, or at our podcast uploader, Buzzsprout, and discover your own “Aha!” garden moments.TIP #1: START WITH EVENLY MOIST SOILWe have discussed this several times on the podcast. First, with America’s Favorite Retired College Horticulture Professor, Debbie Flower, when talking about reusing old potting soil for container planting, in Episode 172 in the Garden Basics podcast. Debbie stressed the importance of getting the soil thoroughly moistened before planting:Farmer FredDebbie, it's that time of year or and people are going to go out to get plants, or they're going to get seed. And they may be buying soil. But before they buy soil, they may take a look around their yard and they see all these pots with no plants in them, but they're full of soil. There might be nurseries that might say, "Oh, you don't want to use that. You need to buy our new soil." But that old soil that you have, I guess it really depends what's in it and what it is, and what it needs. Right? And can it be reused?Debbie FlowerYes, I reuse potting soil all the time, I have many instances where I look around and there are pots with dead things in them. As I said to my cousin, I still kill plants, I just know how to do the autopsy. I typically know or have an idea of what killed them as well. I take out the what is left of the plant, there's often a decent root system, I'll bang it around on my potting bench and get off as much of the container media as I can from those roots. And notice I say container media. This is not field soil. I use kitty litter boxes that I bought specifically for the purpose of mixing media. And I dump it in there, mix it up with whatever else I have and reuse it. I very often add a rock component to that reusable media and some new bagged container media. Container media is not soil, it is organic matter. Plus some typically rock components. Peat Moss, coir or compost are usually the organic matter. And then the rock components are perlite, vermiculite, pumice, sand, something like that. And it's often one part of the organic matter to two parts of the sand component. And the reason for that is that over time the organic component breaks down. And as it breaks down, the particles get smaller. And the space between the particles where the air and water hang out in a container gets smaller and the plant starts to suffer. So a plant has died in the container media. It's been in there some period of time and a container, the organic component of that container media has broken down. So the pore spaces, the open spaces between the components of container media have gotten too small, or they've definitely gotten smaller, they may have gotten too small for roots to actively live in there. So I want to fix that. That's one thing I want to fix, is particle size. So I do that by adding some new media from a bag and usually more rock components. Mix them together, get the texture I do very much by feel and I don't have recipes, and then I'll reuse them. I will never reuse media to start seeds in. To start seeds, you want things sterile. You want the pots to be absolutely clean and you want the media to be unused. So I'm not using it for that. But I will move my houseplants up to a bigger size or my seedlings that I started in six packs all the way up to four inch pots, something like that, using this reused media. The other thing that I need to worry about with the media is the salt component. Salt is fertilizer. Fertilizer has to be in the salt form for the plant to be able to take it up. It has to be able to dissolve in water and move to the plants roots and enter the plants roots. And so that's the salt form. And if there's too much of that in there, the pH of the soil will go up, so the soil will be too alkaline. When that happens, then nutrients that are in the soil become unavailable to the plant. The easiest way to do that is just flush the the media with freshwater for several minutes and allow it to come out through the drain holes of the pot. But yes, I absolutely reuse media frequently.Farmer Fred To your last point there. One thing I do is, I get myself a five gallon bucket. And I will take that old container mix and put it in the bucket because usually peat moss is part of that. It is hard to rewet. So I put it in a bucket with no drain holes, I will put that soil mix and then fill the bucket with water and then