
Beyond the Garden Basics Podcast
176 episodes — Page 4 of 4

African Keyhole Gardens
The conversation started innocently enough. Penny Pawl, Napa County (CA) Master Gardener, was chatting with me about soldier flies: ominous-looking, wasp-like creatures who, along with their grubby larvae, might be populating your worm bin or composting bin. You can listen to what she had to say about that in Episode 214 of the Garden Basics with Farmer Fred podcast.Or, read a previous edition (July 1, 2022) of the “Beyond Garden Basics” newsletter where we talked in depth with Sacramento County Master Gardener Susan Muckey about her take on soldier flies.My chat with Pawl then veered into the worm bins that she uses on her property. The collection, she said, included four African Keyhole Gardens, with worm bins. What??? My ears perked up. And we were off to the races!Penny Pawl is certainly a very inquisitive gardener. When she heard about the African Keyhole gardening method, she had to try it for herself. And as you heard in today’s newsletter podcast, hers are a roaring success. So much so, she now teaches classes in African Keyhole Gardens in Napa County.So, what is the history of African Keyhole gardens? Pawl explained them in a column for the Napa County Master Gardeners, entitled “African Keyhole Garden - Great Garden Idea.”“A so-called keyhole garden bed has a dead end opposite the opening. At the dead end is a compost bin. More than 20,000 of these have been built in Africa.The Texas Master Gardener Association has held a number of workshops to promote this type of garden. There are also standardized plans. Their version is a six-foot-wide garden bed with a twelve-inch-wide bin made of chicken wire in the middle. The gardener fills the bin with compostable material such as moistened newsprint, cardboard, dead plants, kitchen waste and red wiggler worms, the same components of a worm bed. The concept is that the worms will gradually decompose the material and their castings will nourish the soil and plants around the bin.For mine, I decided to use an old garbage can with holes drilled in it. The garbage-can lid keeps out pests and any creature looking for a warm nest. I created the planting bed with building blocks set three high and cemented in place. Alas, I had a big problem with gophers, and I needed to win that battle. So this fall, when it was time to rework the soil, I put a layer of hardware cloth on the bottom. The hardware cloth helps to keep the gophers out. It won't last forever, but it will foil the varmints for a few years. Then a mixture of clean cardboard and soil was placed over the hardware cloth. Since the bed was already in a square keyhole shape, I added the garbage can and put soil around it to hold it in place. I fill this garbage can with the same things I put in my worm compost beds, including red wiggler worms. I have been watering it and feeding it for a few weeks to try to get it working. Eventually, the liquid and castings from the worms and other insects will work its way into the new bed areas and fertilize the soil from below rather than from on top.” Hunt County (TX) Master Gardener John Sanger explained more about the nuts and bolts of building an African Keyhole Garden for gardeners in hot, dry climates in the Hunt County Master Gardener Newsletter, “On the Grow”:“The keyhole garden was developed in sub-Saharan Africa to help people grow food in hot, dry conditions – much like we have here in Texas during the Summer months. It is very efficient at holding moisture and retaining nutrients. The keyhole garden is essentially a round raised bed garden built on a compost pile with a central compost basket. The keyhole is a small aisle on one side of the circular garden that enables the gardener to reach the compost basket to add to it or turn it. It also brings the gardener closer to the center of the bed to reach plants more easily. Keyhole gardens get their name from the appearance of the garden as viewed from above.The keyhole garden can be made of anything that can contain the soil. The ideal size for maintaining moisture is about 6 feet in diameter. I like the garden walls to be about two feet tall, as I like to tend the garden from a standing position. People use wood beams, cinder blocks, stacked stones, fencing material, even wine bottles and concrete for their garden walls.To build the garden, lay out a 6-foot diameter circle on the ground. Keep in mind that if you plan to angle your materials inward for strength, you may want to start with a wider base to allow for that angle so that the top of your garden is about 6 feet across. The central compost basket can be a 1-foot diameter cylinder of hardware cloth that will extend about one foot above the final soil level. On my gardens, a 48” wide roll of hardware cloth was the perfect height. Secure the basket with wire and cover the exterior with weed block, burlap, or other permeable fabric. Lay out where you want your keyhole and move your garden wall materials to create an aisle that will allow you to stand ne

What to Do With All Those Berries?
Back in Episode 212 of the Garden Basics with Farmer Fred podcast, we chatted with Sacramento County (CA) Master Gardener Pam Bone - an expert caneberry grower - about summertime problems with backyard blackberries, raspberries, boysenberries and other caneberries. The question arose: “So Pam, what do you do with all those berries?” She marched us into her kitchen to show us a freezer filled with jam, especially the jars and jars of her specialty, raspberry jam. She shared her favorite recipes and tips here, in the newsletter podcast. Below are the details of three of her favorite recipes using homegrown berries. Best of all, Pam says these are all easy to make.Pam is justifiably proud of the popularity of her raspberry freezer jam. “I’m known far and wide for my raspberry freezer jam,” she told us. “People are always begging for it.” The popularity could be due to its simplicity. She says: “It’s just fresh fruit and sugar.” And if you listened to the above podcast, she freely admits it’s a recipe straight from the box of Sure Jell:======================================================Pam also freezes raspberries whole, for two of her other favorite concoctions, one of which is a raspberry Jello recipe, named after a long time friend and day care provider, Alba:====================================================The final recipe Pam shares with us is one that can utilize all the berries in the garden, Berry Crisp.Thank you for listening to the Garden Basics with Farmer Fred podcast! It’s available wherever you get your podcasts. Please share it with your garden friends.As an Amazon Associate, I earn from qualifying purchases from some of the underlined links in the newsletter. This is how I am trying to keep this a free newsletter. And as long as you buy whatever you want from Amazon using any of those links to get into the Amazon site, I get a few pennies. Thank you.Thanks for Subscribing and Spreading the Word About the Beyond the Basics: The Garden Basics with Farmer Fred newsletter, I appreciate your support. Fred Hoffman is also a University of California Cooperative Extension Master Gardener in Sacramento County. This is a public episode. If you'd like to discuss this with other subscribers or get access to bonus episodes, visit gardenbasics.substack.com/subscribe
Garden Shows for the Nose
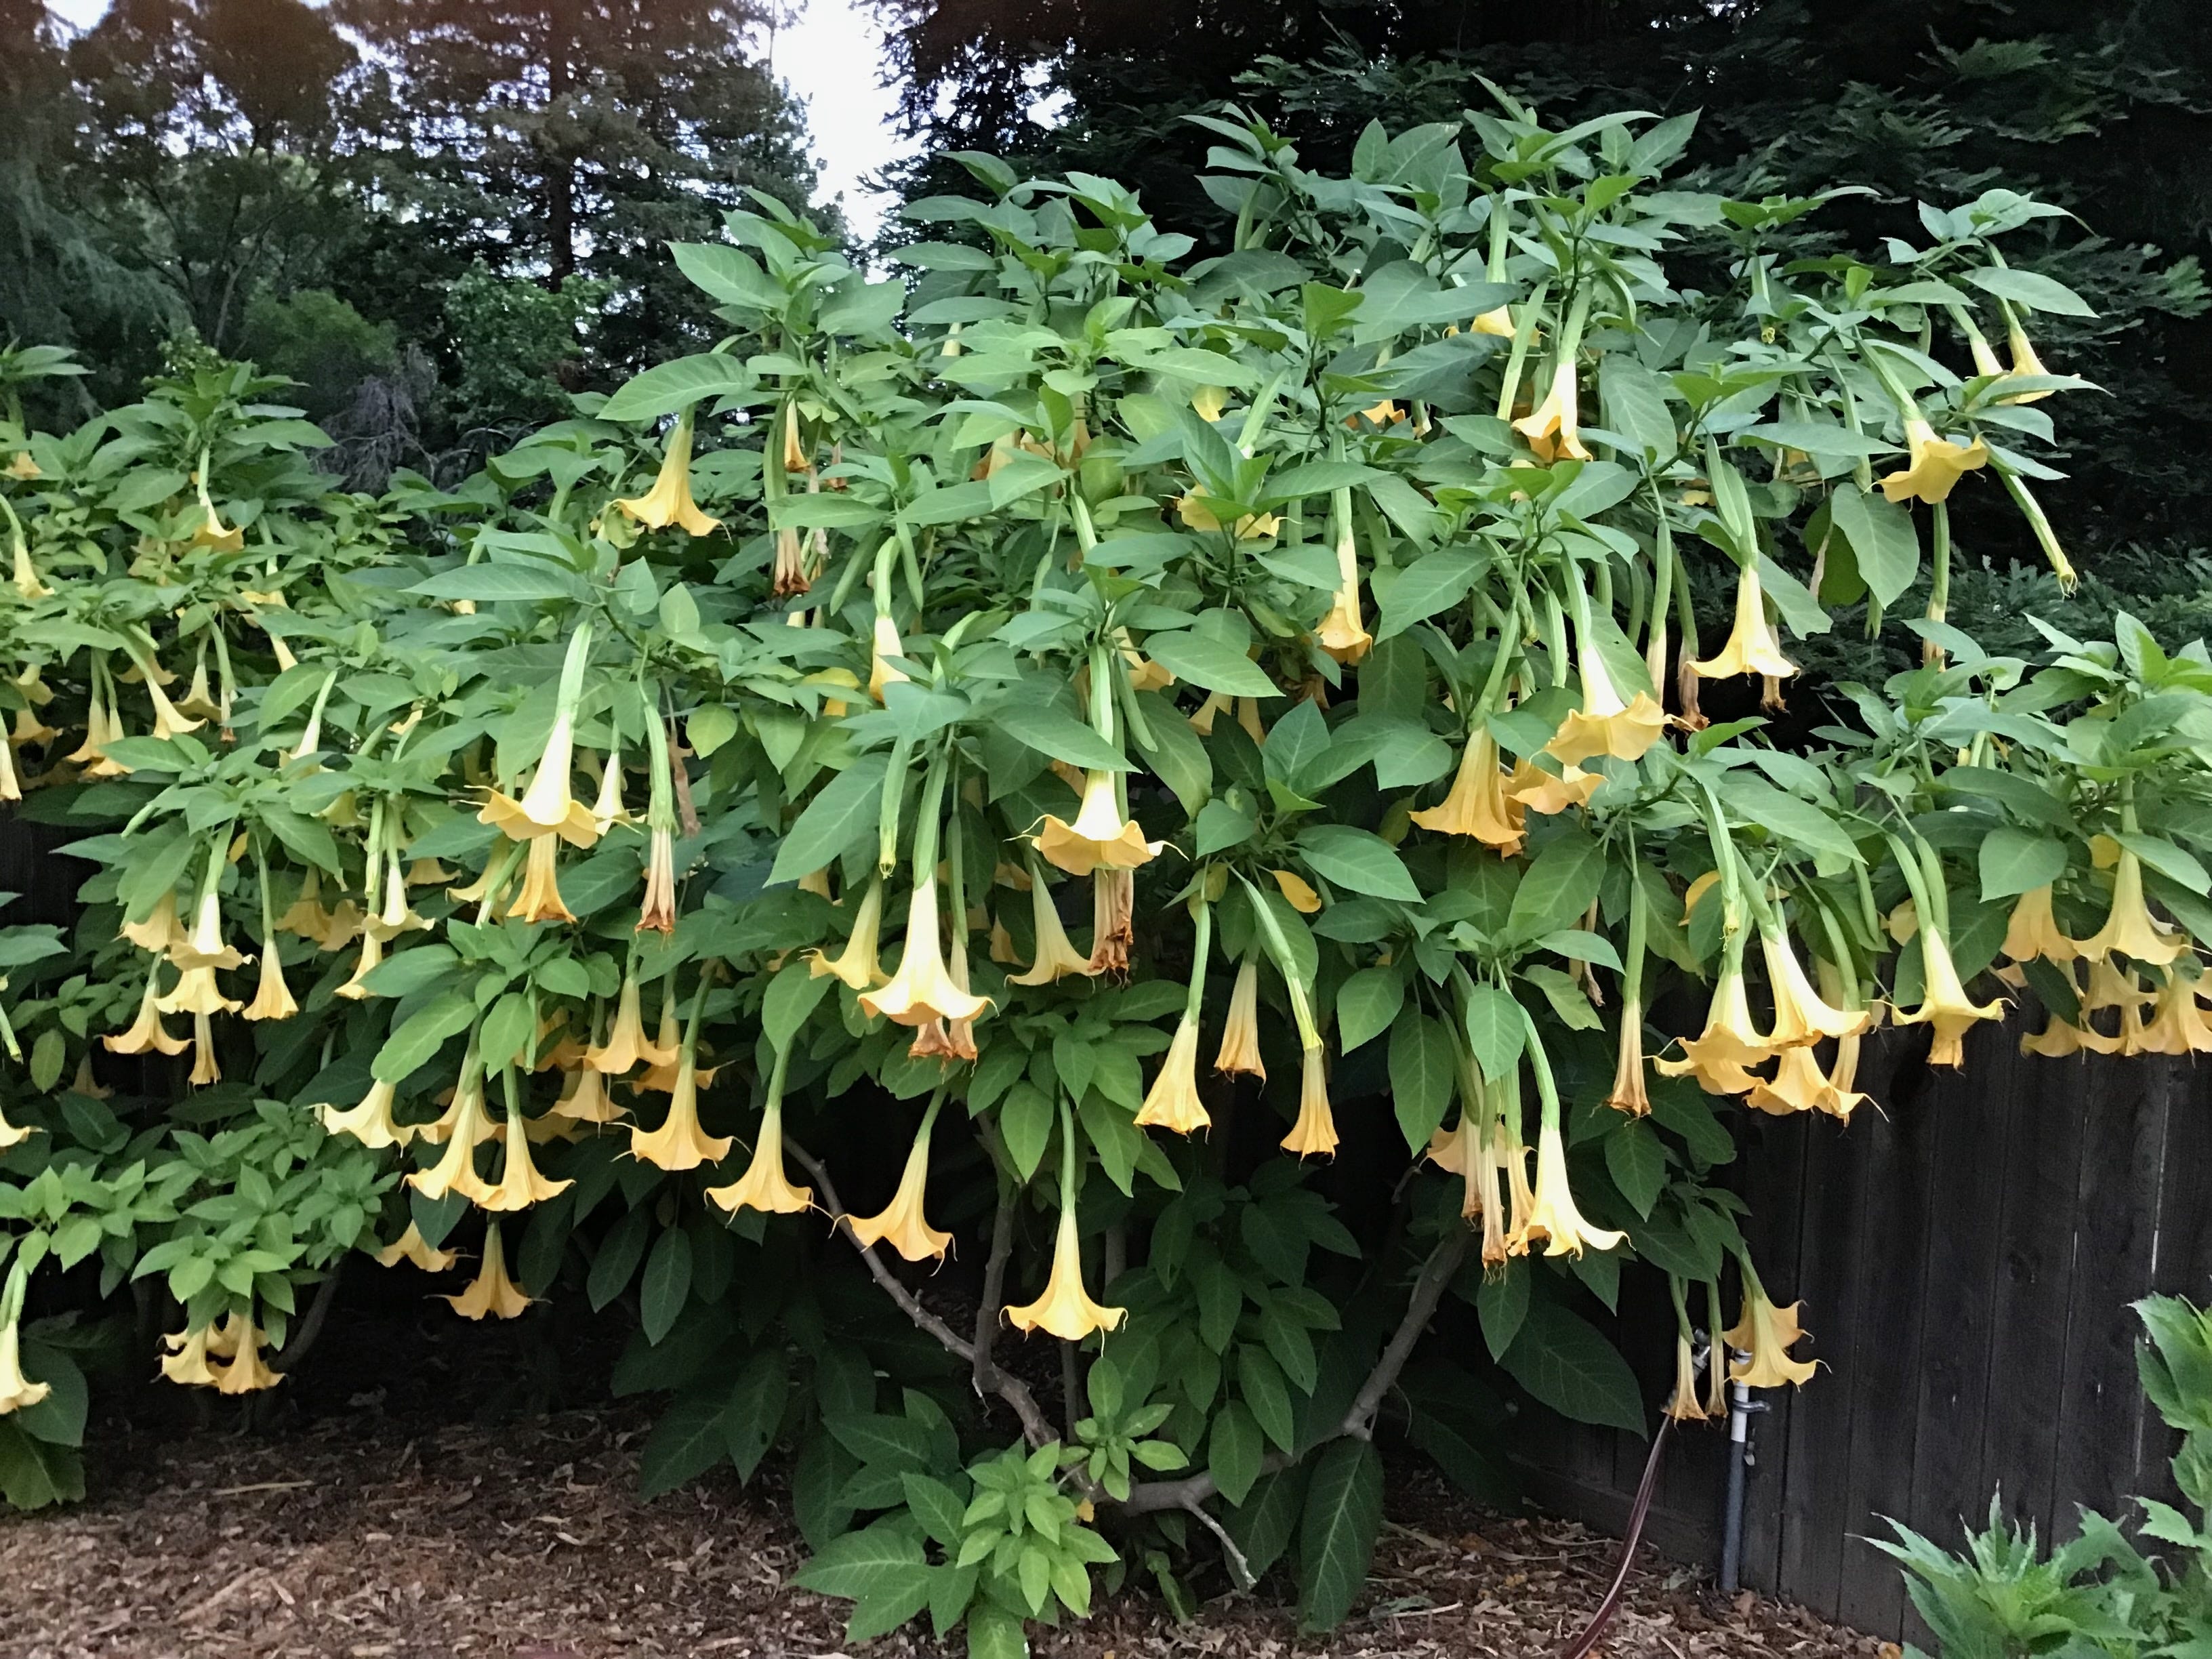
GARDEN SHOWS FOR THE NOSELooking for a garden show for your nose? There are a wide variety of fragrant plants that do well in various USDA zones, providing olfactory pleasure at various times of the year. Besides such sensory stalwarts as gardenias and roses, there are many other aromatic perennials and shrubs that can add a welcome scent to your evening stroll through the yard.• Brugmansia versicolor ‘Charles Grimaldi’ (pictured above, USDA Zones 9, 10). Also known as “Angel’s Trumpet”, this is a fast-growing, flowering shrub that can get 10 feet tall in two or three years. The show-stopper part of this plant is the nearly non-stop bloom in mild areas. This Brugmansia features huge (over a foot long), yellow, trumpet-shaped flowers. An added bonus in late spring and early summer is the warm evening aroma of those blooms, when the air is still: a perfume-like scent that hits your nose as soon as you step into the yard. It does best with some afternoon shade and regular watering. A word of warning about this plant: all parts are considered poisonous, so it may not be right for the gardener living with indiscriminate munchers, either pets or children. However, there are plenty of other plants available that give off a warm-weather show for the nose in the evening:• Nocturnal daylilies (Hemerocallis). Most USDA zones. Nocturnal daylily flowers open late in the afternoon and stay open throughout the evening until the morning. Many named hybrids are available, including the fragrant Arctic Ruffles, Nathan Carroll, Full Moon Rising and Winds of Tide.• Tuberose (Polianthes tuberosa). Most USDA Zones. The blooms of this perennial tuber, a native of Mexico, will fill your backyard with a heady scent during summer evenings. The grass-like leaves can get to three feet tall, with white, tubular flowers clustered at the top. A good choice for containers, the tuberose needs regular water to look its best. If your winter temperatures stay above 20 degrees, the rhizomes can stay in the ground all year. Otherwise, lift and store in a protected area.• Flowering Tobacco (Nicotiana sylvestris). Most USDA zones. The fragrant, tubular flowers of this tender perennial (usually planted as an annual) are attractive to hummingbirds and butterflies. The plant itself gets about four to five feet tall and two feet wide. Another flowering tobacco variety with great nighttime aroma is the ‘Grandiflora’ (Nicotiana alata).• Four O' Clocks (Mirabilis jalapa). (Most USDA zones; treat as an annual in colder regions.) This tuberous rooted perennial grows quickly to three feet high and wide, with trumpet-like flowers in white, red or yellow that open at about the time you get home from work. Although the top will die back from a freeze, it will usually sprout the following spring.• Star Jasmine (Trachelospermum jasminoides). (USDA zones 7-10) A popular evergreen twining vine. It is most noted for the fragrance of its small, white flowers this time of year. Can be used against a trellis, or as a spreading ground cover. Does well with afternoon shade and regular water. • Moonflower (Ipomoea alba). (USDA zones 9-10, treat as a summer annual elsewhere). A relative of the morning glory, the moonflower is a perennial vine that shoots up 20 feet or more in one season, perfect for a fence or trellis. The six-inch white flowers are quite fragrant, and open in the evenings or cloudy days. • White Evening Primrose (Oenothera caespitosa). (Most USDA zones). Grows about a foot tall and wide. This perennial has fragrant, three-inch white flowers that put on their profuse blooming show during summer evenings.Other fragrant shrubs for daytime aroma• Banana shrub (Magnolia figo, formerly Michelia figo). (USDA Zones 8-10). This evergreen shrub has small, yet very fragrant pink/cream flowers during April and May. The late afternoon aroma may remind you of Juicy Fruit gum. Grows slowly to 8 feet. Prefers partial shade.• Sweet olive (Osmanthus fragrans). (USDA zones 8-10). The scent of the flowers of this 10-foot tall evergreen shrub in spring and early summer will conjure up images of apricots. Heavy bloom in late spring through early summer, but will bloom sporadically throughout the year in mild winter areas.• Sweetbox (Sarcococca ruscifolia). (USDA zones 8-10). An evergreen shrub for shady areas, sweetbox is at its most fragrant during late winter and early spring.• Winter Daphne (Daphne odora). (USDA zones 8-10). This evergreen shrub solves two vexing garden problems: a plant that thrives in full shade (part shade in cooler areas); and, produces fragrant blooms in December and January. One of the best for New Year’s aroma, it can be a fussy plant, it needs good drainage, and it does better with less water during dry periods. Just give it enough to keep from wilting. And good luck.• Wintersweet (Chimonanthus praecox). (USDA Zones 8-9) This rangy (10-15 feet high) shrub produces spice-like yellow flowers before it leafs out each winter. It prefers the colder are

Why You Don't Want To Use Fertilizer or Rooting Hormones When Planting Trees and Shrubs
In this podcast, retired college horticulture professor Debbie Flower explains about the use of rooting hormones and fertilizers for newly-installed plants. You’ll find out:How rooting hormones work.How auxins (the rooting stimulant in root hormones) can either inhibit or promote growth.Why you don’t want to use rooting hormones on an established plant or transplant.Why you want to cut the roots of a tree or shrub before planting.Why you don’t want to add fertilizer at planting time.The benefits of “paper hats” on new plantings.And if you are using kelp or seaweed products as a root stimulator, you’d be better off spending your money on water and mulch. According to the Washington State University study, “The Efficacy and Environmental Consequences of Kelp-Based Garden Products” :“• There is no documented benefit to applying plant hormones to newly planted or established plants in gardens and landscapes. Hormones are produced naturally by the plant and transported to the tissues that require them. The two most important additions new transplants require are water and mulch.• Good quality research on kelp- containing biostimulants has been performed by several researchers in different climatic regions using different species of woody plants in natural settings. None of them reported success:• Roots of newly planted trees treated with biostimulants showed no improved growth compared to control trees. (Barnes and Percival 2006; Gilman 2004; Popenoe et al. 2017).• The best performing trees and shrubs were those that were irrigated frequently for 38 weeks post installation (Gilman 2004) or received a simple topdressing of pine bark mulch immediately after planting (Figure 3; Abbey and Rathier 2005).* Trees treated with biostimulants and assessed two years after planting were not significantly different than those receiving only water (Kelting et al. 1998).* No biostimulant was able to confer increased protection to shrubs and trees against drought or salt damage compared to plants treated with water (Banks and Percival 2014).* Researchers who tested biostimulants that were reported by local growers to be highly effective could find no evidence to support that belief (Popenoe et al. 2017). In fact, some of the products were worse than the controls. “ Click Here for the Farmer Fred Smart Pot Discount!Here’s a transcript of today’s newsletter podcast:Farmer Fred 0:00Ray sent us an email, to Fred at farmerfred.com. He says, "I recently bought some fruit trees, and the label mentioned using a rooting stimulant for transplanting. In further research I found that certain root stimulants are illegal in California. Do you know why?" I bet it's because there's something else in that stimulant, Ray. The stimulants themselves may not be the problem. But with more information on that, we bring in America's favorite retired college horticultural Professor, Debbie Flower, who is probably going to snuff your dreams, right?Debbie Flower 0:35Root stimulants typically contain, not all of them, but typically contain synthetic auxin. Auxin is a plant hormone, it's produced by the plants, produced in the buds, which is why you don't always want to remove the buds at the tip of the stem. It's produced in the buds and it controls the growth of the plant. At certain concentrations, synthetic hormones will prevent growth. At other concentrations, it will promote growth. When it's applied externally to roots, it has different and fewer effects on the plant. It's not stimulating root growth per se. It's actually subduing above ground growth in favor of the roots growing.Farmer Fred 1:15Yeah, that sounds like the purpose of phosphorus.Debbie Flower 1:18Well, no. The auxin stimulators, IBA and NAA, are two of the auxin stimulants. If you put it on a broken stem or root, and there will be broken roots on a transplant, then it can be absorbed into the vascular system and do its job at the right concentration, stimulating cell growth. And so there is some of that going on. And that's why they're used in cuttings. But when you're just buying an already rooted plant, a healthy plant, applying the stimulant to the roots doesn't directly cause them to grow better. So that's one thing. Another is that root stimulants often contain fertilizer. And the ones that I found that were illegal in California, they don't say illegal, they just say 'Not for use in California", or, "Not registered for use in California". They have fertilizer in them, nitrogen, phosphorus and potassium. And excess fertilizer is a pollutant. It's the reason we get overgrowth of algae in streams and rivers. That overgrowth kills the life, the animal life, fish, frogs, whatever, in the water body, and we upset the ecosystem. And so the stimulants in California that have the fertilizer in them are not labeled for use in California. Growth regulators, which root stimulants are, are lumped in with pesticides as far as licensing is concerned. So they have to first be licensed by the US
What's That Critter in My Compost & Worm Bins?
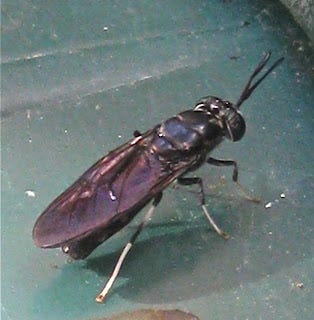
In Episode 206 of the Garden Basics with Farmer Fred podcast, we did a deep dive into worm bins (Oops. That sounds like a new, bad reality sports competition TV program). Sacramento County Master Gardener Susan Muckey told us everything we need to know to start vermicomposting, the end result being raising worms to create excellent quality compost for your garden. One thing she warned us about is mentioned in the short podcast segment, above. And it may be a critter that might have initially shocked you when you opened up your worm bin or turned your compost pile: the soldier fly.The adults look like inch-long black wasps and do a fair share of loud buzzing when disturbed. But the soldier fly is harmless...to you. They do not bite, they only live a couple of days, usually die soon after having sex and laying eggs on the tops of partially composted kitchen scraps. Some critters have a nice life.The soldier fly larvae - the maggots - are also about an inch long, gray-white, and segmented. When exposed to light, they will scurry deeper into the compost bin, where they are voracious feeders on decaying, nitrogen-rich foods.Those maggots are very good decomposers of organic material, helping along the process in your compost bin. According to Oregon State University, the soldier fly also inoculates the compost with beneficial bacteria from other sources. Because they are such efficient feeders of manures, their presence can limit the growth of nuisance fly species in that same manure pile.Soldier flies can be found throughout the U.S., wherever there is moist, rotting food. Depending on the composting system, soldier flies and their larvae may be either good guys... or a major detriment. In a regular composting bin, the soldier fly larvae are a welcome addition, speeding along the decomposition. Soldier flies do such a good job digesting your garbage, there are websites that will be glad to show you how to build a system to raise soldier flies.It is their appetite that is a double edged sword for home composters, especially vermicomposters.In a vermicomposting system - a worm bin such as the Can O' Worms - soldier fly larvae are competing with the worms for food. Plus, they consume so much material, they generate a lot of heat. And in the summer, that may be more heat than your composting worms would be willing to tolerate. Temperatures over 90 degrees will bring worm work to a near halt in a worm bin, or worse, unless you work to keep them cooler.For worm aficianados, several university studies offer these tips if you want to remove the soldier flies and their larvae from your vermicomposting system and attempt to keep them out:• Make sure you have enough leaves, dry grass, shredded paper and other organic "brown" material in the pile to cover the nitrogen food sources by at least two to four inches. • Be sure to bury food scraps deeply in the pile and cover them well. • Put window screen over any holes in the bin and glue it down with a waterproof caulking (like an exterior household caulk) on the inside of the bin to help exclude the flies in their egg laying stage.• Birds love soldier fly larvae so you can remove them and feed them to chickens. Or just toss them on the ground and other birds may find them.Or, remove the maggots and put them into another compost bin or pile. Of my composting systems, my favorite is the Tumbleweed, which produces usable compost quicker than the Can O' Worms...but the Can O' Worms is more fun! Even with the maggots. If you can’t find the Tumbleweed, there are plenty of other tumbling compost bins. And if the Can O’ Worms is unavailable, there are lots of stacking worm tray vermicomposting systems, too.More information about small scale vermicomposting from the University of Hawaii .A good book about vermicomposting: "Worms Eat My Garbage" by Mary Appelhof.And if you want to get into the business of raising soldier flies to control manure piles in stalls, coops, barns and corrals, (or as chicken or tropical fish feed or exotic animal feed) you’ll need to feed the young maggots. And yes, someone (the University of Georgia) actually studied what’s the best food for soldier fly larvae. Here’s that study. One interesting factoid from that study: one of the food recipes used in their experiments was developed by Purina (insert your “Chow” joke here).More reading about Soldier Flies:Black Soldier Flies: Mostly BeneficialBlack Soldier Fly Larvae in Worm BinsThe Good SoldierFinally, don’t confuse the Soldier Fly with the Soldier Beetle.The soldier beetle is a garden good guy. The adult (pictured above) feeds mostly on nectar and pollen (hence, a pollinator), but some adult species also enjoy aphids and other plant sucking insects. But, its larvae (pictured below), which can spend three years in the soil or organic litter, feed on, according to North Carolina State University, “caterpillars and other hapless insects they encounter as they crawl about.”Thank you for listening to the Garde
Backyard Chicken Egg Care Tips
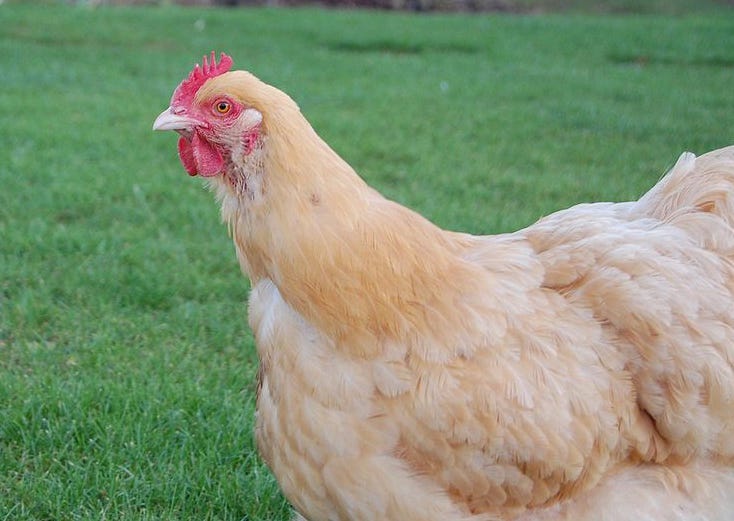
On today’s newsletter podcast segment, Cherie Sintes-Glover, Urban Chicken Consultant and proprietor of the website ChickensForEggs.com, has egg care tips for backyard chicken flock hobbyists: should eggs be stored in the refrigerator or on the kitchen counter (it depends)? Should you wash the eggs, and what temperature should that water be? (It’s important!). Which eggs make the best hard boiled eggs? How can you determine if an egg is past its prime? How many eggs will a hen lay in its lifetime? How do you get your chickens to lay more eggs in the winter? And why you don’t want a heat lamp near your chickens.More chicken care tips, including how to take care of your backyard flock during a summer heatwave, on the Get Growing with Farmer Fred podcast, Episode 204 .Also on Episode 204 of the Garden Basics podcast: why you might want this chicken breed as part of your flock:For those who would rather read than listen, here is the transcript of the full conversation about backyard chicken care with Cherie Sintes-Glover on Episode 204 of the Garden Basics podcast. It includes information about thwarting avian flu, dietary supplements to use (and the ones to avoid) for your chickens in heat waves, and how chickens adjust their body temperature in the heat. You’ll still have to listen to the egg tips presented in the podcast at the top of the page. No transcript for that.From Episode 204 of the Garden Basics with Farmer Fred podcast:Farmer FredIf you've been in a supermarket lately, you may have seen the prices of eggs you may have seen the prices of chickens, maybe some of you are thinking maybe it's time we get ourselves a chicken and have our own eggs. Well before you do that you want to hear what my next guest has to say. Cherie Sintes-Glover is an urban chicken consultant. She is a certified poultry health inspector as well, and runs a wonderful website, chickensforeggs.com. Plus she does seminars as well Zoom classes. Cherie, the rising prices of eggs and chicken. This isn't because of the war in Ukraine? I think it's the avian flu, isn't it?Cherie Sintes-Glover That's a great question. I think it's a little bit of everything right? It's anytime there's an opportunity for prices to go up. They seem to be going up. But yeah, chicken, gosh, chicken eggs are going for? I think I've seen them as high as six or $7 a dozen in some stores. And it depends on which ones you get. If you get the quote unquote, “organic farm fresh raised eggs” versus the regular, just old-fashioned white ones from Costco. But yeah, the prices have just been skyrocketing.Farmer Fred I have not seen $2 a dozen eggs in quite a while now.Cherie Sintes-Glover No, no. And even the people on your average farm that are selling eggs at a roadside stand, they're raising their prices as well. I think it's because chicken feed costs have gone up a little bit. But anytime there's a rise, we have to kind of keep up with that. And right now, because of that, more people are actually thinking about raising their own chickens. And especially with the uncertainty for a long time, we weren't sure what would be available in the stores or what would be running low. There's still times when I go into Costco and there's no paper towels. So people are trying to think outside of the box or maybe in the box if they haven't already taken that dive into backyard chicken-keeping, like during COVID times. Now they're really considering it, because of the expense and the cost. They want a backup plan. Farmer Fred And one nice thing too, when you raise your own chickens, is the quality of the eggs. They're colorful, they have a nice, deep, rich yellow yolk, and they're much more tasty than what you're gonna find at a grocery store.Cherie Sintes-Glover They're very different. In fact, people are often just kind of shocked and surprised at how flavorful their eggs are. The ones that they have in their own backyard. Chickens that they've raised themselves compared to the ones that they can buy in the supermarket. And the reason for that is just really comes down to that chicken’s diet. So backyard chicken keepers, their flocks are typically searching around in the backyard for bugs and all those wonderful grass weed nuggets out there that they can grab. So because of that they're nutritionally increasing their diet with all of those great nutrients. And that's what makes that yolk just a bit more orange. But what's funny too, is that sometimes even the breeds will make a little bit of a difference. And there is for instance, in our laying flock that we have, I’ll crack open three or four different types of eggs and each of those yolks will be a different color. So it lets me know who's maybe foraging more than the others, perhaps.Farmer Fred Let's talk a little bit about avian flu. It is decimating flocks throughout the country. I know up in the northwest and back east, something like 35 million chickens have been culled, which, by the way is a euphemism, because of th

Don't Let Drip Irrigation Become "Drip Irritation"
In this Newsletter podcast, Drip Irrigation expert and garden book author Robert Kourik troubleshoots the most common drip irrigation issues for home gardeners. Drip Irrigation: How Long Do I Water? 90% of all plant problems are water related, either too much or too little. Compounding the problem: gardeners who are operating a drip irrigation system but using a sprinkler mentality. Talking to gardeners, after describing a plant problem, will be asked: "How are you watering that plant?" More often than not, if the answer is, "drip irrigation", they will follow that with, "And I run it for five minutes a day, everyday."And therein lies the problem. A drip irrigation system puts out water much slower than a sprinkler system, usually a gallon or two an hour versus a sprinkler system's output of a gallon or two A MINUTE. In five minutes, a 1 gallon per hour (gph) drip emitter will put out about 10 ounces of water...slightly more than a cupful. Not only will that pittance of water not saturate the width of the plant's root zone (which can extend beyond the canopy of the plant), it won't penetrate more than an inch or two. And then not stay there very long. What happens to a plant with a shallow watering program? The roots stay very near the surface, where they are more subject to drying out quickly. This boom and bust cycle stresses the plant, opening up the possibility of disease and insect invasions. With a drip irrigation system, don't think "minutes". Think: "hours". And water deeply, but infrequently (once or twice a week). However, that instruction can be and should be modified based on the type of soil you have. If you’re doing in-ground planting and have heavy clay soil, you may be able to get away with that formula.Irrigating a raised bed, where the imported soil amendments may be lighter and fluffier, with a greater sand content, more frequent irrigations with drip will be necessary. More horizontal tubing will be necessary as well, perhaps 8-10 inches separating the lines of half-inch tubing. In sandier soil, the water footprint is much more narrow than in clay soil.Listen to Robert Kourik, author of the book, Drip Irrigation for Every Landscape and All Climates. In the podcast at the top of this edition of the Beyond the Garden Basics newsletter, he talks about watering with a drip system, a little bit, every day. HOWEVER…he also mentions that his preseason watering regimen includes saturating the entire soil mass in his raised bed, and then only adding enough water each day to make up for any loss. You can try this at home, but…don’t try this at home unless you are dedicated to the craft of measuring your soil moisture in the root zone on a regular basis in your raised beds. Your goal is to apply enough water to penetrate the soil to a depth of at least 6 inches, preferably more. The day after you water, either dig down 8 inches by hand or with a soil sampling tube; or, stick a moisture meter down to that depth to determine if the soil is moist (not dry, and not soggy). Battery-operated soil moisture meters tend to have a longer life.In our raised bed vegetable garden, the summer watering regimen is with an inline drip irrigation system (1 gph emitters along the line, with emitters spaced 12" apart) which is run twice a week, six hours at a time. Your weather, soil type, slope and crops may need a slightly different watering schedule. In our 4'x8' raised beds, five inline emitter lines run the length of each bed. The lines are spaced about 9" apart. The big reason why I can get away with a once or twice a week application of water via drip irrigation: the soil is amended each growing season, covered with a half inch of worm castings, a couple of inches of fine compost, and finally three to four inches of shredded oak leaves as the top mulch. No digging is necessary (digging and tilling destroys soil structure and the necessary air pockets). The end result of doing this after a few years: soil that retains moisture better, longer. And, more beneficial microbial activity, as well as more worms (worms are good).Consider using microsprinklers or sprayers to thoroughly wet the root area for trees and shrubs. These put out more water, usually between 8 and 20 gallons per hour. We have these on our shrubs and fruit trees, and during the summer will run them for about an hour, once or twice a week, depending on how hot it is. The other part of the drip irrigation equation that a lot of gardeners miss: not enough emitters for the plant. Placing one emitter next to a new tree or shrub is not enough. Remember, plant roots tend to grow out horizontally. Emitters should be spaced evenly around the tree or shrub, in a spiraled circle, halfway between the trunk and the outer canopy of the newly installed plant. The spacing between the emitters will depend on your soil type: for sandy soils, use a 12" spacing; for heavy clay, 18-24" spacing. Add emitters towards the outer canopy of the plant as the plant grows.• So
Weed Killers: Read The Fine Print
It's a common site this time of year: gardeners with sprayers in hand (or on their back), applying weedkiller to the unwanted greenery that has popped up around their desirable plants. Winter - USDA Zones 8 and 9 - would seem to be a better time to do this: cool-season weeds are easier to control when they are small and actively growing; around valuable deciduous plants, there is less danger of the spray accidentally hitting the leaves (there aren't any); and, those new, green weeds are like a flashing freeway sign in a drab, brown landscape, screaming "Nyah, Nyah, Nyah!", taunting us into action.Below are some tips you may not be aware of, when using the most popular post-emergent weed killer, Roundup, as well as it's generic counterparts that also use glyphosate as the active ingredient. (Hint: compare prices!)The purpose of this posting is not to rail about the dangers to the environment after using glyphosate. Check out the Wikipedia entry for a fairly balanced report on what the scientific community is studying and debating about glyphosate, including this tidbit:"An in vitro study indicates that glyphosate formulations could harm earthworms and beneficial insects. However, the reported effect of glyphosate on earthworms has been criticized. The results conflict with results from field studies where no effects were noted for the number of nematodes, mites, or springtails after treatment with Roundup at 2 kilograms active ingredient per hectare. Glyphosate can negatively affect nitrogen-fixing bacteria, and increase the susceptibility of plants to disease. A 2005 study concluded that certain amphibians may be at risk from glyphosate use."Sure, you've read the instructions on how to mix it and how much to apply. And you know not to spray it on desirable foliage. The point here is to make you aware of some of the instructions on the label that you may have overlooked. Much of this information is taken straight from the 10-page instruction book that comes with Roundup Pro.Of course, Rule Number One always has been, and always will be: READ AND FOLLOW ALL LABEL DIRECTIONS. I know, I know...you started reading the first sentence, and by the time you got to the fourth line, it was all, "blah, blah, blah". But note a couple of items in that paragraph. It doesn't specify to avoid spraying desirable leaves; it says to avoid "desirable vegetation". And sure enough, there are enough thin-skinned trees and shrubs out there through which that wandering mist can attach itself on a windy day. One of the most susceptible shrubs in the dormant season: your rose bushes. Sure, there are no leaves on them in winter (hopefully), but glyphosate can be absorbed through the thin bark of rose bush trunks, creating problems in the spring and summer for the new growth: This is what a rose looks like, months after the green stems were hit with errant glyphosate spray. At it isn't just a wintertime weed killer application that could hurt roses down the line. According to the UC Integrated Pest Management Program: "Glyphosate damage may appear at bud break the following spring after a summer or fall application that contacts leaves or stems; symptoms include a proliferation of small, whitish shoots and leaves."And how many times have you seen gardeners in a hurry, briskly walking down a row of plants, sprayer close to the ground, or spraying while driving their ATV, attempting to decimate a line of weeds at full speed? That increases the chance for spray drift.To it's credit, that product label repeats itself, in even clearer tones:Here's one that surprised me: How many times have you seen someone spraying weeds on a foggy or low overcast day? That's a temperature inversion! Don't spray on a foggy day, because, as the label says: "drift potential is high", due to the droplets remaining suspended in a concentrated cloud. Hmm, I guess you might be inhaling some of that on a foggy day...possibly?How about all those days when you see someone spraying a post-emergent weed killer on plants that are past their prime, already half-dead or totally dead? You're wasting your time and money, according to the label:Many gardeners know about using glyphosate as a stump killer of an unwanted woody tree or shrub. Make the cut, then immediately apply the glyphosate at a high rate of concentration. But wait a minute...what's going on underground? Possible intermingling of the roots of different plants.The good news here: plants of different genera (a eucalyptus and pistache, for example) tend not to graft their roots together. But if you are trying to get rid of one willow stump while saving another healthy, desirable willow nearby… well, you've been warned.The US Dept of Agriculture also offers advice on paying attention to other meteorological conditions when applying glyphosate: • Use when ambient air temperature is between 60 - 85 degrees F. (plants slow down their growth when it's too hot or too cold; glyphosate works best on actively growing pl

Crop Rotation and the Pizza Pie Garden
In this interview with America’s Favorite Retired College Horticulture Professor, Debbie Flower, we discuss how to stave off plant diseases and insect pests by rotating your crops. And heck, if you’re gonna rotate, it might as well resemble a wheel, right? This interview originally aired in Episode 114 of the Garden Basics with Farmer Fred podcast.I have little or no artistic sense whatsoever, especially in the garden. I tend to plant in rows, in rectangular raised beds, all designed for function, not form. With raised boxes, it's easier to rotate the vegetables each year. But only IF you can remember what was planted where, the year before. A circle garden, on the other hand, might be easier to rotate crops than a scattershot series of raised, rectangular beds.The benefits to crop rotatation? Many of the plants that are in the same "family group" have diseases in common. Many of these diseases are difficult, or impossible, to control using chemicals. For example, don't plant tomatoes in the spot where you had potatoes last year, and vice versa. That could spread late blight disease. The best solution for disease control is crop rotation. Of course, choosing resistant varieties of vegetables can help thwart diseases. For example, tomatoes with a "V" "F" and/or "N" after their names indicates resistance to verticillium wilt, fusarium wilt and nematodes. However, most heirloom varieties of vegetables offer little or no disease resistance...another good argument for crop rotation. For heirlooms, choose those varieties that are meant to grow in the area you live. And, it helps to spread an inch or two of compost over all your garden beds before you plant each year.Another advantage of having a series of garden beds in the same area: each crop can be irrigated according to its specific needs. For example, as onions and garlic mature in May, watering should be reduced. But that is also the time that summer crops such as tomato and pepper plants need regular watering. An automatic drip irrigation system, with individual lines for each bed, can customize the amount of water for each bed. In my dream circular garden, the valves can be centrally located in the “hub area” - Where all the beds come together -for ease of operation. Individual drip lines then would run to each bed, where on-off valves can be located for each bed.Another reason for crop rotation: to replenish nutrients to the soil. Many vegetables tend to be heavy nitrogen users. Giving your soil an "off-year" every few years by planting cover crops allows it a chance to reduce pest populations while building up valuable soil nutrients, as well as beneficial fungi and bacteria. Annual cover crops that do well in USDA Zone 9 for the warm weather seasons: buckwheat, cowpeas, soybeans and black eye peas. For the cool weather seasons in USDA Zone 9: bell or fava beans, winter peas, vetch, clover. All of these can add more nitrogen to the soil.An excellent online reference for cover crops: the Peaceful Valley Farm Supply Catalog. That publication also points out several other benefits to crop rotation:• Increases organic matter• Increases earthworms and beneficial microorganisms • Stabilizes soil to prevent erosion • Brings deep-rooted minerals to the surface• Provides habitat, nectar, and pollen for beneficial insects while choking out weeds• Improves water, root and air penetration of soil • Increases the soil’s moisture-holding capacity • Breaks up subsoil and plow-soles • Provides aesthetic value and color (artistic!)Which brings us back to my original quandary...how to remember exactly what was planted where, each year. Garden gnomes (cleverly disguised as possums) steal the signs; leaving crop remnants in each bed could add to pest and disease problems; writing down the location of crops each year would work...if you remember to go back in the house to check your garden notebook before starting the task of planting each year (ha!). One solution that may work is a circular garden, consisting of six raised beds formed to look like spokes emanating from a hub, like a bicycle wheel, for example. Perhaps a pizza garden would be a more appropriate name for this wheel of edibles. There are definite benefits to having a garden in the shape of a circle: a central water source in the middle of the circle, perhaps a small tool shed in that hub area, and compacted walkways three or four feet wide (big enough for a wheelbarrow) to avoid stepping on the garden soil or squeezing between the sides of the raised beds. Make those pathways wider if you want to drive a small tractor with a bucket up those pathways. And, you’ll need room in the middle to turn around or navigate your way out. So, that middle circle at the hub - which would hold water valves, a faucet, small tool shed, a recirculating bird bath (Hey! Let me dream, will you?), and room to navigate your little orange Kubota around - might need a diameter of 12-15 feet. The length of each slice of this pizza gard

Plants To Attract Beneficial Insects, Pt. 2
In today’s “Beyond Basics” podcast segment of the newsletter, “Sustainable Food Gardens” author Robert Kourik discusses tips for attracting beneficial insects to your yard. Hear the entire interview in Episode 191 of the Garden Basics with Farmer Fred podcast.In last week’s newsletter, we discussed three of the best beneficial insects to have in your garden: lacewings, ladybugs, and hoverflies. Today, we cover several more garden good guys worth putting to work in your yard to subdue the pests, and the “Welcome Mat” plants they need for extra food and shelter.Soldier Beetles (leather-winged beetles)Like many of the beneficials, it is the larval stage of soldier beetles that do most of the munching on the bad bugs. Whereas the adult soldier beetles feed mostly on the pollen and nectar of flowers - as well as the occasional aphid, insect eggs and larvae - young soldier beetles can be found under the bark of the plant or in soil or litter. There, they feed primarily on the eggs and larvae of beetles, butterflies, moths and other insects.Plants That Attract Soldier Beetles* Celosia Cockscomb* Coreopsis* Daucus carota Queen Anne’s Lace* Echinacea purpurea Purple Coneflower* Pycnanthemum Mountain Mint* Rosa Roses* Solidago GoldenrodPARASITIC MINI-WASPS Mini-wasps are parasites of a variety of insects. They do not sting! The stingers have been adapted to allow the females to lay their eggs in the bodies of insect pests. The eggs then hatch, and the young feed on the pests from the inside, killing them. After they have killed the pests, they leave hollow “mummies.” Braconid WaspsBraconid wasps feed on moth, beetle and fly larvae, moth eggs, various insect pupae and adults. If you see lots of white capsules on the backs of a caterpillar, these are the braconid cocoons. Leave the dying caterpillar alone! Ichneumonid wasps control moth, butterfly, beetle and fly larvae and pupae. Trichogramma wasps lay their own eggs in moth eggs (hungry caterpillars-to-be), killing them and turning them black.Plants that attract parasitic mini-wasps: •Achillea filipendulina Fern-leaf yarrow •Achillea millefolium Common yarrow •Allium tanguticum Lavender globe lily •Anethum graveolens Dill •Anthemis tinctoria Golden marguerite •Astrantia major Masterwort •Callirhoe involucrata Purple poppy mallow •Carum carvi Caraway •Coriandrum sativum Coriander •Cosmos bipinnatus Cosmos white sensation •Daucus carota Queen Anne’s lace •Foeniculum vulgare Fennel •Limonium latifolium Statice •Linaria vulgaris Butter and eggs •Lobelia erinus Edging lobelia •Lobularia maritima Sweet alyssum - white •Melissa officinalis Lemon balm •Mentha pulegium Pennyroyal •Petroselinum crispum Parsley •Potentilla recta ‘warrenii’ Sulfur cinquefoil •Potentilla villosa Alpine cinquefoil •Sedum kamtschaticum Orange stonecrop •Sweet alyssum - white•Tagetes tenuifolia Marigold ‘lemon gem’ •Tanacetum vulgare Tansy •Thymus serpylum coccineus Crimson thyme •Zinnia elegans Zinnia - 'liliput' TACHINID FLIES Parasites of caterpillars (corn earworm, imported cabbage worm, cabbage loopers, cutworms, armyworms), stink bugs, squash bug nymphs, beetle and fly larvae, some true bugs, and beetles. Adults are 1/3 to 1/2 inch long. White eggs are deposited on foliage or on the body of the host. Larvae are internal parasites, feeding within the body of the host, sucking its body fluids to the point that the pest dies. Plants that attract tachinid flies: •Anthemis tinctoria Golden marguerite •Eriogonum fasciculatum California Buckwheat •Melissa officinalis Lemon balm •Mentha pulegium Pennyroyal •Petroselinum crispum Parsley •Phacelia tanacetifolia Phacelia •Tanacetum vulgare Tansy •Thymus serpyllum coccineus Crimson thymeMINUTE PIRATE BUGS (Orius spp.) True to their name, minute pirate bugs are tiny (1/20 inch long) bugs that feed on almost any small insect or mite, including thrips, aphids, mites, scales, whiteflies and soft-bodied arthropods, but are particularly attracted to thrips in spring. DAMSEL BUGS (Nabis spp.) Damsel bugs feed on aphids, leafhoppers, plant bugs, and small caterpillars. They are usually dull brown and resemble other plant bugs that are pests. Their heads are usually longer and narrower then most plant feeding species (the better to eat with!).BIG EYED BUGS (Geocoris spp.) Big eyed bugs are small (1/4 inch long), grayish-beige, oval shaped) bugs with large eyes that feed on many small insects (e.g., leaf hoppers, spider mites), insect eggs, and mites, as both nymphs and adults. Eggs are football shaped, whitish-gray with red spots. Plants that attract minute pirate bugs, damsel bugs and big eyed bugs: •Carum carvi Caraway •Cosmos bipinnatus Cosmos “white sensation” •Foeniculum vulgare Fennel •Medicago sativa Alfalfa •Mentha spicata Spearmint •Solidago virgaurea Peter Pan goldenrod •Tagetes tenuifolia Marigold “lemon gem”Thank you also for listening to the Garden Basics with Farmer Fred podcast. It’s available wherever you get your podcasts. Please share it with your gardenin

The Truth About Compost Tea
In today’s Beyond the Basics podcast (above), we talk with Ralph Morini, Virginia Cooperative Extension Master Gardener and researcher about his compost tea article for the Piedmont Master Gardener’s newsletter, The Garden Shed. The March 2019 article is entitled, “The Truth About Compost Tea: Making It, Using It, and What To Expect From It”. Read it for yourself for even more information about the Compost Tea-making process.In that article, Morini delved into the online compost tea rabbit hole, which is comprised of the deep warrens of compost tea opinion, experience, sales attempts, and a smattering of actual well-researched studies. As you can surmise from our conversation in today’s newsletter podcast, Morini came away from his deep dive with more questions than answers. Which harkens back to Farmer Fred Garden Rule #8: “If It Works for You, Fine. But Keep an Open Mind.” Morini concludes his article with nine sources of reputable information, source material you may want to check out for yourself.The genesis for our thorough discussion regarding the “truth vs. myth” aspects of compost tea use sprung from a comment Steve Zien, an organic gardening professional, made about using compost tea back in Episode 188. He loves it. Especially using worm castings as the basis of your compost tea. I’ve know Steve for 40 years. I know that he is usually ahead of the curve when it comes to implementing his earth-friendly garden practices. I also know that the rest of us usually catch up with him and buy into his train of thought about a decade later. It turns out, he’s usually right.Here are the Cliff Notes version of our discussion with Ralph Morini. Points about compost tea that you should consider before you apply it around or on top of your plants:How the Compost Tea is MadeRalph Morini:“Compost tea is a solution made from compost and clean water* combined in a bucket or some sort of a container. We recommend that the solution be aerated. As Steve mentioned, the best way to do that is with an aquarium pump. Let it run for one to two days. The typical aquarium aeration system includes a pump that sits outside the aquarium and then basically a couple of diffusers, the air from the pump will go into an inlet on what's called a stone and it becomes diffused at the output side of the stone and blows bubbles into the water.”*Ah yes, the water quality. Garbage in, garbage out. That might have been the problem for some of the studies of compost tea. Your water may kill the beneficial bacteria and fungi that you are attempting to add to the soil. More on that below.What is the Active Ingredient in Compost Tea?Ralph Morini:“What it does is it allows the microbes in the compost to multiply many, many times over so that you have an extremely microbe rich solution, a solution that advocates claim can be used for anything from fertilization - which I'm not buying - to enriching the microbe content in the soil, which is what Steve referred to. And if you have enough organic matter in the soil to feed them, it can release a lot of the nutrients that matter is holding in the soil. Some people use it as a foliar spray, which, if you have the right type of microbes in the solution, can help to prevent disease by out competing; or, the good guys somehow overtake the bad guys and reduce disease damage on your plants. Or you can use it to stoke up your compost pile. If you want to get some more microbial activity going in your compost pile, for instance. It can be sprayed on the lawn or on the ground directly. My own view of it is that the amount of compost is typically about one or one and a half cups of compost per gallon of water. So I think people who claim a lot of nutrients in it are overstating the case. There can't be that much nutrients. On the other hand, microbial content is where it could conceivably have some benefit both on releasing nutrients and soil. If the soil has enough organic material for them to feast on for a while*, or potentially doesn't have the right microbes in it. It might help disease prevention on plants.”*Pouring compost tea on poor soil, bereft of microbial activity, may be a waste of compost tea. The soil needs to have certain healthy qualities to assimilate the addition of more microbes.It’s All About the Water QualityRalph Morini:“You want to make sure your water is potable starting off. You can't have any chlorine or chloramine in it. The reason they're in the water supply is to kill bacteria, and fungi. If you put chlorinated water in your bucket before you put your compost in and you bubble it for a day or so, you get rid of the chlorine; it should be okay. Chloramine is longer lasting and you can't just get rid of it by aerating or boiling. You really have to extract that from the water by using a charcoal filter. There are some materials that are used in aquariums that will help you if you mix it with the water. It changes the chemical composition of chloramine and it will leave the water by a
Why Do Pepper Flowers Fall Off?
In this past week’s two episodes of the “Garden Basics with Farmer Fred” podcast, we covered several timely topics in Episodes 188 and 189 including:Episode 188:• Tips for Controlling Bermudagrass (Note: the word is “control”, not “eradicate”). Bermudagrass is forever.• How plants communicate to get nutrition and ward off pests. (Steve Zien of Living Resources Co. spends a lot of time with his ear to the ground. Maybe he’s fallen and can’t get back up? Anyway, he says plant roots sweat a lot.)• The (Alleged) Benefits of Compost Tea. Not that I doubt the enthusiasm of Steve Zien - also known as Sacramento’s Organic Advocate - for advocating the use of compost tea for improving soil biology, but next week in this space we will talk with a researcher from the University of Virginia Cooperative Extension who has studied the pros and cons of compost tea. It may come down to the quality of the water that you use to brew the compost tea.• Thin your vegetable seedlings! Thin your flower seedlings! THIN THE FRUIT ON YOUR DECIDUOUS FRUIT TREES! (lessons learned the hard way)Episode 189:• Stop Tomato Blossom End Rot Before It Starts (Tips to reduce the incidence of this disorder in your tomato and pepper plants. Yes, peppers get blossom end rot, too.)• Grow Your Soil via the “Clip and Flip” and “Chop and Drop” mulching methods. The author of the book, Grow Your Soil, Diane Miessler, also refers in our chat to bermudagrass, calling it “the spawn of Satan”, so she’s OK in my book.So why, then, is the above podcast about pepper flowers? Because in many parts of the country this time of year, nurseries and garden centers have tomato and pepper plants, side by side. They wouldn’t be stocking peppers on their shelves unless it was the right time to plant them, right? right? Let’s put it this way: those pepper flowers are more susceptible to dropping off during typical late April-early May nighttime low temperatures. Don’t worry, you’ll get peppers. Eventually.We had to cut short last week’s display of Master Rosarian Charlotte Owendyk’s list of the Ten Most Fragrant Roses to grow (the Internet was running low on zeroes and ones). Here, then, is the balance of those shows for the nose, excerpted from the June 2021 Rose Reflections Newsletter of the Sacramento Rose Society and Sierra Foothills Rose Society. By the way, those two societies are having their spring rose show and sale, Saturday, April 30, 1-4:30 pm, at the Shepherd Garden and Art Center, 3330 McKinley Blvd. in Sacramento’s McKinley Park. Free admission, free parking. If you’re in the area, drop in and smell the roses. Sacramento Rose Society President Debbie Arrington wants to remind you, “after seeing the show, check out the McKinley Park Memorial Rose Garden, too.”DOUBLE DELIGHT & MR LINCOLN ARE FRAGRANCE WINNERSTwo roses stand out as the most loved fragrant rose. Query rose growers and you will find Mister Lincoln and Double Delight mentioned most often. Also, these roses are frequent winners of the “most fragrant rose” award at rose shows. However, both roses are problematic in relation to disease resistance.Hybridized in 1965, Mister Lincoln, a dark red hybrid tea, has an old fashioned, damask scent. Mr. Lincoln's blossoms are held on stiff, upright stems and will turn bluish as they age. The bushes can be expected to grow 4-5 feet tall and about 2 feet across. The lower couple of feet of the canes are usually leafless. It is susceptible to blackspot.Double Delight, hybridized in 1977, has flowers that are a rich, creamy white to pale pink center with deep, ruby edging. They have a bushy habit, growing to about 4-5 feet with a 2-3 foot spread. It has a sweet, spicy scent. It is also susceptible to mildew.Beverly – Perfectly formed high centered blooms with an intense fruity fragrance that has notes of citrus, peach, pear, and plum that mingle with base notes of patchouli and fresh myrtle that makes want to keep you nose in those beautiful blooms. Foliage is dark green with excellent disease resistance. The blooms open flat. This rose was the winner of the “Best Hybrid Tea” and “Most Fragrant Rose” awards at the 2013 Biltmore International Rose Trials.Falling in Love – lovely warm pink with white accents and reverse exhibition blooms with strong rose and fruit fragrance. This rose is a good bloomer and fairly quick repeat. The rose produces big, beautiful and nicely fragrant blooms that are long lasting cut flowers. Falling in Love is upright, has big stiff canes and is fairly angular with great looking foliage. However, watch out for those thorns -- Falling in Love is one of the thorniest roses currently on the market. It's a beautiful rose and great looking bush with outstanding foliage.Golden Celebration One of the largest-flowered English Roses, bears rich yellow blooms in the form of giant cups. They have a strong Tea fragrance, developing wonderfully combined notes of Sauternes wine and strawberry. It forms a large rounded shrub, with ample foliage – th

Top 10 Fragrant Roses (in the Podcast)
As we learned in Episode 186 in the Garden Basics with Farmer Fred podcast, the most fragrant roses make the best meal. Really. Well, maybe not a meal, more like an appetizer. Master Rosarian Debbie Arrington of the Sacramento Rose Society explained that rose petals are actually quite delicious, either served raw in a salad, used as a garnish, or steeped into a tea. Listen to her tips for choosing the right blooms for your rose tasting experience in Episode 186 of the Garden Basics podcast. One of her tips: fragrant roses tend to be the most tasty. Her most important tip: “Don’t eat rose flowers that have been sprayed with pesticides.” Listen to her suggestions for fast food floribundas in the current podcast (186).So, what are the most fragrant roses to choose for your dining experience? In this newsletter podcast, above, another Master Rosarian, Charlotte Owendyk of the Sierra Foothills Rose Society, offered her Top 10 roses that are a show for noses. And below, is part of Charlotte’s article for the Sacramento/Sierra Foothills Rose Society’s newsletter about fragrant roses. Clear your nose, let’s go!Fragrant Roses…A Few That I Grow by Charlotte Owendyk (excerpted from the June 2021 Rose Reflections Newsletter)Watch someone walk by roses displayed at a rose show. First, there'll be an exclamation over color or beauty, but, inevitably, the head will lean in towards the rose in order to sniff its scent and rise with either a smile or expression of disappointment.Yep, we all want fragrance in our roses. This usually is especially important if you only have space for a few roses in your garden.The aroma of roses is due to more than 300+ volatile chemical compounds. In addition, there are times when roses are more fragrant than other times. The best time to smell your roses is in the morning when the tem- perature is about 65 - 70 degrees (F). As the day gets warmer, the fragrance oils evaporate. Another factor in fragrance perception is the fact that no two noses are the same! When the hybrid tea rose became the rage earlier last century, breed- ers aimed for large, high-centered hybrid tea blooms as well as new and different colors. Cut-flower rose cultivars for florists were selected for long vase life,flower shape, and color. In both cases, fragrance was incidental.However, the old garden roses (OGRs) continued to sell because they were great garden plants and many of them have outstanding fragrance. In many cases, it was the fragrance that sold the rose. And many of these OGRs, unlike hybrid teas which bloom all season long, only bloom once a season.In 1985 a paradigm shift occurred; David Austin, a farmer in England, succeeded in breeding fragrant OGRs with repeat blooming roses to produce a whole new generation of fragrant repeat bloomers. Currently, David Austin Roses is a major hybridizer of repeat blooming roses that have fragrance and luscious bloom form. A typical example is Golden Celebration. Many members have a soft spot for these roses.Hybridizers in the last 10-20 years have been working to incorporate disease resistance into roses. (It takes a minimum of 10 years for a rose to come to market.) Many of recent roses introduced are disease resistant to most fungal diseases.Fragrance took a backseat to disease resistance. Now, breeders are more focused on including fragrance in roses. MORE RECENT FRAGRANT ROSESFirefighter – a dusky red velvet hybrid tea that is disease-resistant, with intense old rose fragrance. It is named in honor of the firefighters who lost their lives on 9/11/01. It is very productive, generating long straight stems which are almost thornless, and fragrant until it falls apart. Is an excellent cut flower. This rose grows tall.Francis Meilland This rose has amazing sweet strong fruit and citrus rose perfumed blooms on long stems. Also winner of many awards in America and internationally. It is also tested and proven highly resistant to blackspot in a variety of climates. The bush is covered with dark green glossy foliage. Francis Meilland stood out to me because it’s a heat lover, grows long cut-worthy stems, has massive blush to white blooms, some of the most fragrant blooms. Its form is actually more of an old fashioned type rose and not your average hybrid tea.Julia Child ‐ Just before our wonderful American icon left us, she selected this exceptional rose to bear her name. Julia loved the even butter gold color & the licorice candy fragrance. To top it off it has a perfectly rounded habit, super glossy leaves & great disease resistance. Consistent, hardy & floriferous in all climates. Very disease resistant. The blooms do fade a bit.Memorial Day Lovely orchid pink hybrid tea rose with enormous old-fashioned full 5-6" flowers (petals 50+) saturated with super-strong classic old rose fragrance. Long, almost thornless stems are lushly adorned with clean green leaves on a continual blooming plant. Just one flower perfumes an entire room. All-American Award winner. This is my

Different Mulches for Different Plants. Fruit Trees vs. Lawns
Some of the highlights of this week’s two podcasts on Garden Basics with Farmer Fred, Episodes 184 and 185, are featured in today’s “Beyond Basics” newsletter podcast. One of the highlights of Episode 184 was Raffaele DiLallo, author of “Houseplant Warrior”, venturing into his other horticultural passion in his yard in Cleveland, Ohio: getting tropical plants to survive and thrive…outdoors…in an area of the country where snow blowers are more in demand than a chipper/shredder. From Episode 185, Emily Murphy, author of “Grow Now”, talks about how to customize your garden mulching to match the needs of your particular plants. And to give you a hint about the thrust of her book, she casually tossed out the German word, “hegelkultur” in our podcast conversation…which is a raised bed building technique long utilized by those who practice permaculture. Not that there’s anything wrong with that.And, Master Gardener Pam Bone gives us lots of good reasons to NOT plant a fruit tree in the middle of the lawn. But she offers some tips on the precautions to take to do it successfully.Finding accurate, reputable information (and that’s the key) online is difficult on how to grow trees, especially fruit trees, in a lawn situation. However, the University of Wisconsin-Madison offers tips for commercial orchardists in the Midwest on the benefits and drawbacks of growing grass in the vicinity of fruit trees, in their publication: “Orchard-Floor Management For Fruit Trees”:That publication is also bullish on establishing “grass alleys”: strips of turf, 5-6 feet wide, between the rows of trees, as long as the turf strips are set back about three feet from the trees: “The grass alley provides a solid place for equipment travel, helps prevent soil erosion, and helps increase water infiltration. Sod also helps to maintain soil structure. …weed invasion can be minimized and sod establishment can be fairly quick.”Happy 10th Anniversary to Me! (How Gardening Has Helped Keep Me Alive, Courtesy of The Heart-Healthy GardenThe Heart Healthy Garden is a topic that is close to my heart, literally. After being diagnosed with four cholesterol-jammed heart arteries in March 2012, I underwent quadruple coronary artery bypass graft surgery on April 17, 2012. At the same time, I was told I had full-blown Type 2 Diabetes (A1C of 10.4). My general practitioner doctor (at the time) told me after the surgery, “You’re good for three to five years, tops.” I took that as a personal challenge.The surgery went well and the long road to healing from heart disease and diabetes began...including doctors' orders that a gardener does not want to hear: no lifting anything heavier than a gallon of milk for 3 months! Even more problematic for me: no bike riding for three months. After all, when surgeons slice open your sternum to work on your heart, it takes a long while for that bone to heal, despite being held together with wires.Thanks to regular exercise and a healthier diet, with a kickstart from low dosages of diabetes and heart medications, I lost over 60 pounds by February 2013, the replacement arteries (taken from the chest) that still service my heart were cholesterol-free, the blood sugar levels were back to near normal (A1C = 5.9), and I no longer needed to take any prescription medications for either of these ailments. With the doctors' blessings, of course. Today, I weigh the same as in 2013. And still ride my bike, over 100 miles a week. A big part of my success was due to the encouragement and diet tips I got from the nurses who ran the cardiac rehabilitation program at the hospital. They believed - as I did - that there was enough clinical evidence out there that eating right and regular exercise can reverse heart disease and diabetes.The “exercise” part of the recovery was not an issue. As an avid cyclist, I usually averaged 50 to 100 miles a week on the bike. Living at the time on 10 acres, I got a lot of weight-bearing exercise shoveling 10 cubic yard piles of mulch, and lugging it around in 8 cubic foot wheelbarrows throughout the property to keep my fruit and nut tree orchard fat and happy.The “Diet” part of the secret? Eat less sugar. Eat more fiber. That included growing, and eating, heart-healthy fruits and vegetables, loaded with fiber.Most people are familiar with fiber. Fiber is a component of all plant-based foods which cannot be absorbed or digested. It travels relatively intact through your body and out. This is the role of insoluble fiber, the roughage found in many fruits, vegetables and grains that passes through your digestive system and helps promote regularity. Fiber is also composed of soluble fiber, a type of fiber that dissolves in water to form a gel-like material. Studies at the Mayo Clinic and other institutions have shown that soluble fiber may help lower blood cholesterol levels by reducing low-density lipoprotein, or "bad," cholesterol levels. Soluble fiber may have other heart-health benefits, such as lowering bloo
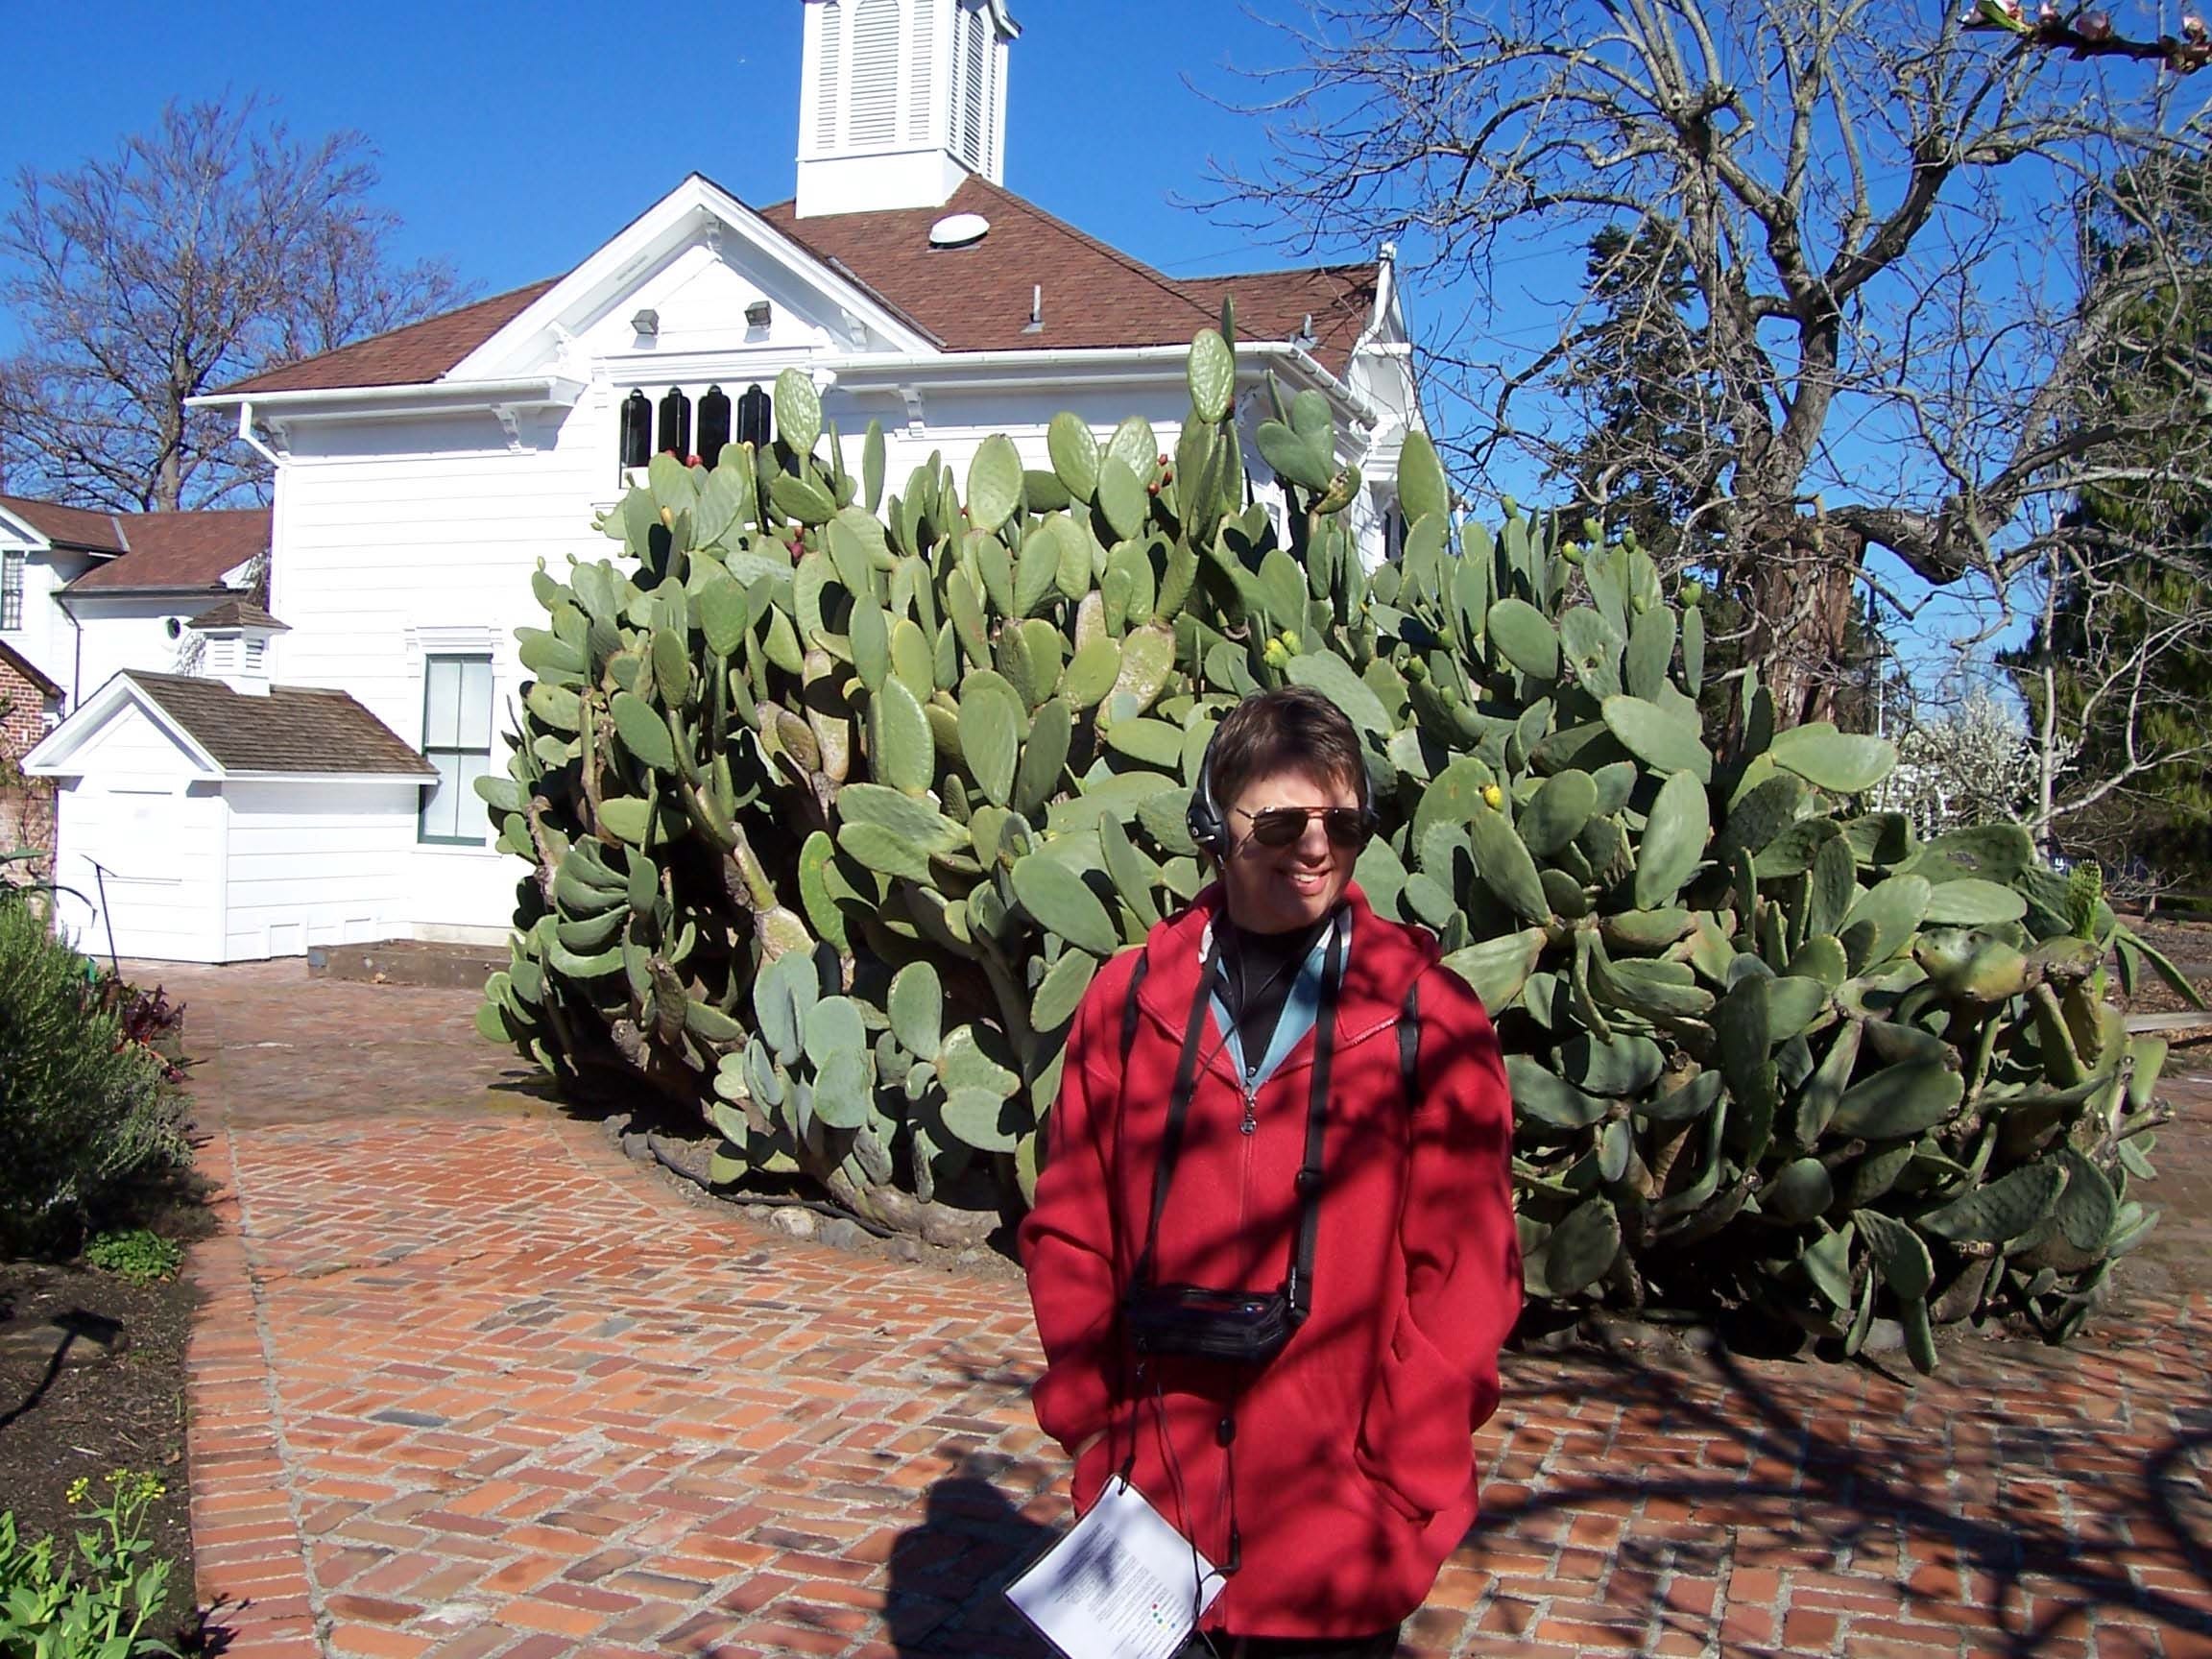
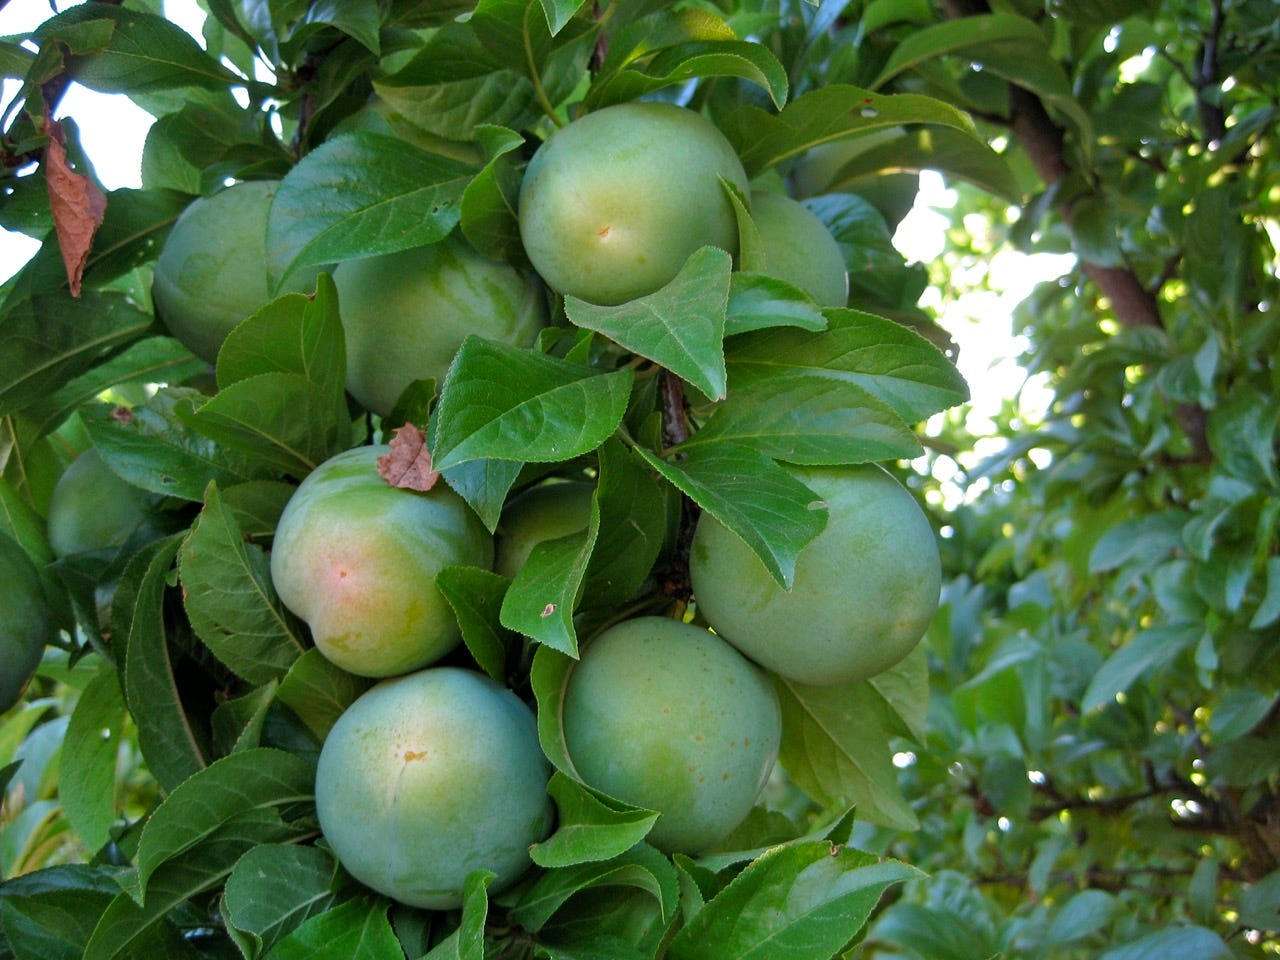
A Visit to the Luther Burbank Gardens
Above is an interview about the Luther Burbank Home and Gardens in Santa Rosa, California. Luther Burbank, of course, is probably America’s most famous botanist, horticulturist and pioneer in agricultural science. He is responsible for the development of over 800 varieties of plants in his 55 year career of plant hybridization, his most famous, possibly is the Burbank Russet potato, which is still available in supermarkets and restaurants every day. His biggest flower achievement? Probably the Shasta daisy. And his fruit tree introductions included the July Elberta peach, the Santa Rosa plum, the plum-apricot cross, the plum-cot, and the freestone peach, many of which are still in commerce. One of his most lucrative developments that you will hear about in this interview is the spineless cactus, which is valuable as cattle feed in drought-stricken areas.Yes, you’re going to learn a lot about Luther Burbank here. But also, listen carefully to the docent describing all of this during our visit to the Luther Burbank Home and Garden: Jack Hadley. I conducted this interview years ago, back in 2006. My method of operation for conducting many of these “on the road” garden interviews is fairly haphazard: driving to a destination, I’ll see something interesting along the way. I’ll pull over, get out my microphone and recorder, and grab the first person who knows something about wherever I am - and is willing to talk - and I then turn on the recorder. It was just my good fortune to be talking to Jack Hadley that day in 2006. Jack passed away in 2013. Jack, although very informative, didn’t talk about himself in our conversation. I wish he had. It was only after reading his obituary that I came to the realization that here was a person I wish I had known better. If you are in the habit of reading obituaries, you may occasionally have the same reaction: “Wow, what an interesting person who lead a vibrant life. I wish I knew them.”Give a listen to the interview, and then read this edition of the Garden Basics newsletter, or do both at the same time. We will tell Jack’s story in the newsletter, along with his invention of an item that may be in your garage or garden shed right now: the hand-held, Whirlybird-style fertilizer and seed spreader, which he developed as an employee of Ortho, the long-time garden chemical division of the Chevron corporation. I have a feeling that Luther Burbank and Jack Hadley would have been good friends.Here are some of Jack Hadley’s life achievements, as written about in his obituary from Legacy.com, published in the January 8, 2014 Santa Rosa Press Democrat:“Jack Hadley, a longtime Santa Rosa resident, beloved husband, father, U.S. Navy veteran and inventor of the "Whirlybird" hand-held fertilizer-spreader, passed away on Dec. 29, 2013. He was 88. The oldest of four boys, Jack was born in Martinez, CA on Dec. 15, 1925. He attended Nichols Elementary school and Mt. Diablo High School in Concord, where he excelled in football. He graduated in June 1944 and was drafted into the U.S. Navy. He was assigned to the USS Colorado BB45 battleship in Leyte Gulf, Philippines and was anchored in Okinawa when the atomic bombs were dropped on the Japanese cities of Hiroshima and Nagasaki in August 1945. They were assembling to invade Japan when World War II ended. He was discharged in June 1946 and attended Marin Junior College where he excelled in football as a half back and fullback. His hopes were fulfilled when he received a full football scholarship to Oregon State College (now OSU) where he studied agriculture. He hoped to run a cattle ranch. After redshirting in 1947, Jack suffered a severe dislocation of his shoulder in 1948 while playing linebacker, an injury that ended his football career. But he didn't slow down, riding bareback in the College Rodeo and winning first place in 1949. After graduation, Jack joined Chevron Chemical in 1951 as a livestock specialist. In 1952 he met and fell in love with Aneta Nygren, and three months later they were married. They had their daughter, Shellie, in 1953. Later Jack was in product development working his way up to Western Regional Manager. He worked for 36 years for Chevron Ortho Division where he invented the "Whirlybird," a hand-held fertilizer spreader. More than 100 million Whirlybird spreaders have been sold to date. Jack was known for his enthusiasm, can-do attitude and his positive and sincere outlook on life. He loved people, and they flourished when around him. While working for Ortho, Jack designed and built five homes on weekends. He was a powerhouse of creativity and energy. Jack retired in December 1986. After years of living in San Rafael, he and Aneta moved to Santa Rosa in 1987. Jack designed and built a beautiful dream home for them overlooking Sonoma Valley. Jack volunteered with "Ideas to Market" an inventors group, and later was recognized by the city for his work at Luther Burbank Home and Garden.”Some of the comments left by Jack’s

What's Your NQ*? (Nature Quotient)
That audio snippet (above) is from Episode 178 of the Garden Basics with Farmer Fred podcast, featuring author Emily Murphy, talking about her new book, “Grow Now-How We Can Save Our Health, Communities, and Planet, One Garden at a Time”. Go to Episode 178 to listen to the entire conversation. The audio sampler above touches on one section of her book, where she discusses the importance of knowing your “Nature Quotient.” As she puts it in her book:“Your nature quotient (NQ) is a measure of your understanding of the natural world, the dynamics at work within it, and your personal connectivity to nature. It involves skills such as observation, curiosity, mindfulness, and empathy and compassion.”But the podcast interview gave short attention to how to increase your NQ, in order to become a better gardener. Nor did it offer up the quiz that Emily presents in “Grow Now” on how to measure your NQ.Since the name of this digital typing allegedly contains the words, “Beyond Basics”, it seems appropriate that we present the quiz here, along with tips for increasing your NQ, which you can also find in the book, “Grow Now”:Measure Your “NQ” (Nature Quotient) (In the book, you can circle all the answers that apply to you. If you try that here, you’ll have permanent black circles on your phone or tablet. Just get the book.)• How much time, on average, do you spend outside each week? Two or more hours; one hour; less than one hour.• What are your touchpoints with nature? Houseplants; nearby park or open space; plants and trees in your yard or garden.• Which of the following have you done recently? Take a nature walk; stop when you hear the sound of a bird; notice a change in wind direction; look to the sun to figure out the time of day; notice a shift in the seasons; pick up litter; photograph flowers and plants.• How often do you feel burnt out and exhausted? Often; sometimes; never.• How comfortable are you without wifi, or going without your phone for periods of time? Love it; hate it; it doesn’t matter; a mix of all three.• Can you determine when the moon is full? Yes; no.• What do you think of bugs? Fascinating; frightening.• What are your feelings on dirt? Love it; hate it; neutral; not sure.• What do you do when you find spiderwebs outside? Leave them where you find them; Swipe them away.• How do you see yourself? As someone who can grow anything with a little bit of effort; as someone who is challenged by gardening and everything you try to grow withers.Unfortunately, for those of us who are results-oriented, this is a quiz without a score. As frequent guest (and retired college horticulture professor) Debbie Flower likes to remind us, “This information will not be on the Final.” So, just be honest with yourself, and perhaps take up some of Emily’s suggestions in her book for 15 easy ways to increase your NQ, with my additional thoughts in italics: 15 Easy Ways to Increase Your NQ* Keep a Bird book and binoculars by the window. (be sure to tell the neighbors you’re looking for birds, not hot tub parties)* Grow three new herbs in your kitchen or on your patio (gentle reminder: marijuana is not an herb. Besides, the teenagers next door have binoculars, too, and might covet your “herb garden”.)* Compost your kitchen scraps and yard waste. (And start a worm compost bin. They’re quiet and undemanding. They’re happy with your leftover, chopped up vegetables.)* Try growing - from a cutting - a plant that you pass on walks in your neighborhood. (Pro tip: for the sake of your health, ask before you snip. A good book on the topic is “Plant Propagation” by Alan Toogood)* Try propagating a favorite houseplant. (Again, the book “Plant Propagation” is a handy reference)* Try growing mushrooms in your cupboard or in a shady spot outside. (for advice on which mushrooms you find outdoors that are safe to eat, consult someone with extensive mud stains on their shirt and pants. They are probably members of a local mycological society, who spend their weekends crawling through forests, looking for mushrooms. And let them taste it first.)* Commit to using only organic fertilizers. (Pro Tip #2: building a healthy soil with consistent practices of mulching, composting, no-till, and cover cropping may reduce your fertilizer needs to near zero, especially on permanent plantings.)* Follow the sun by creating outdoor spaces to be either sun or shade, depending on the season. (Pro Tip #3: just moved to a new home? Plan before planting. And that could take a year. Track the moving shade in your yard with pictures for the first year in your new home. Once each month, on a sunny day, take a series of pictures at 9am, noon, 3pm and 6pm of the areas where you want to put a garden. Gauge from those pictures whether the area, on average, is full sun (6-8 hours or more per day), part sun (4-6 hours) or mostly shade (less than 4 hours). Plant accordingly. Fear not, you can still plant in year 1. Just use containers that you can move around easily to

Growing the Gumbo Garden
Professional chef and Sacramento County Master Gardener Andi Macdonald shares her California-style gumbo recipe in the brief chat at the top of this edition of the Garden Basics’ “Beyond Basics” newsletter. Mardi Gras season is also gumbo season in Lousiana. And we know a good thing when we taste it. Gumbo dishes have spread, and can be found served on a regular basis everywhere, including the dining rooms of Congress. What makes Andi’s gumbo recipe unique: it’s vegan. “Sacrilegious!”, you say, about a dish that goes back hundreds of years in Louisiana, a staple of an early American diet that features meat as the main attraction. To quote Wikipedia:“Gumbo is a heavily seasoned stew that combines several varieties of meat or seafood with a sauce or gravy. Any combination of meat or seafood can be used. Meat-based gumbo may consist of chicken, duck, squirrel, or rabbit, with oysters occasionally added. Seafood-based gumbo generally has shrimp, crab meat, and sometimes oysters. Andouille sausage is often added to both meat and seafood gumbos to provide "piquancy, substance, and an additional layer of flavor" to the dish. The key is to use a tender andouille so it does not become too chewy. Most varieties of gumbo are seasoned with onions, parsley, bell pepper, and celery. Tomatoes are sometimes used in seafood gumbo, but traditionally few other vegetables are included.”“I have been a vegan for the past 2-1/2 years,” explains Macdonald, who trained at Michelin-starred restaurant Chez Panisse in Berkeley, CA, where founder Alice Waters developed the concept of California Cuisine and promoted the farm-to-table movement. Macdonald goes on to say: “I work at creating upscale vegan cuisine. I believe that all food should be wonderful, and there's no reason vegan cuisine can't meet a high bar. I also don't believe that following a vegan diet should be a political statement. Humans have evolved to like certain tastes and textures and that can be achieved in vegan cooking.”Here’s the recipe: Vegan Gumbo YayaBy Andi MacDonald, Sacramento County Master Gardener / Professional ChefServes 8What makes gumbo so special is the roux, a cooked mixture of flour and fat that both thickens and flavors the stew. Depending on what it will be used for, roux can be white, blond, brown, or black. For this gumbo, the aim is a very dark red-brown roux, which takes patience and a good eye. One way to tell that you’ve reached perfection is that the roux will smell like popcorn.You can buy Creole seasoning from just about any grocery store or make your own. Making your own is pretty cheap and not difficult. There’s a recipe for a spice mix following the gumbo recipe.Textured vegetable protein (tvp) is a gluten-free soy product available in many grocery stores. It can also be ordered online.½ cup neutral oil, such as canola oil½ cup AP flour1 red bell pepper, diced1 green bell pepper, diced1 celery stalks, diced1 yellow onion, diced½ lb vegan Italian sausage, in ¼” slices1 tablespoon Cajun/Creole seasoning (or to taste)2 teaspoons Kosher salt (or to taste)½ teaspoon black pepper (or to taste)1 bay leaf1 teaspoon chili powder½ teaspoon dried oregano2 teaspoons minced garlic1 ½ cups textured vegetable protein, large chunks7 cups vegetable stock1 tablespoon filé powder mixed with water (optional, see comments in #7 below* Combine the peppers, celery, and onions into a bowl and set aside.* In a separate bowl combine textured vegetable protein with 1½ cups of warm water (or vegetable stock for more robust flavor). Cover and set aside.* Pay close attention – this next step is crucial! Heat the canola oil in a heavy saucepan. When it gets hot, add the flour gradually, while vigorously stirring with a wire whisk. Boil the mixture and whisk as it continues to boil. Keep stirring until the roux becomes a dark reddish brown color and smells like popcorn. Be careful not to splash yourself or touch the side of the pan with your arm. Be both attentive and brave – this procedure could take anywhere from 20 to 45 minutes. Do not ever, ever, ever walk off and leave it.* Pull the pan off the flame. Add half of the vegetable mixture, and with a long handled wooden spoon, stir for 1 minute. It will splatter and steam – so be careful!* Return to the flame. Add the remaining vegetable mixture and stir for an additional minute.* Gradually stir in the vegetable stock. Add the sausage, spices, herbs, garlic, and soaked textured vegetable protein. Bring to a boil, reduce heat, and simmer for 45 minutes, stirring occasionally.* Fifteen minutes before serving, check the gumbo. If it seems too thick, add more stock. If it seems thin, thicken with a filé slurry (filé powder mixed with enough water to form a pourable paste). Taste and add salt if desired.* Serve over rice and top with fried okra pieces. Some cooks add okra to the stew with the other vegetables. Personally, I find boiled okra too slimy. It’s best if it’s fried and sprinkled on top. Win-win for both camps!C
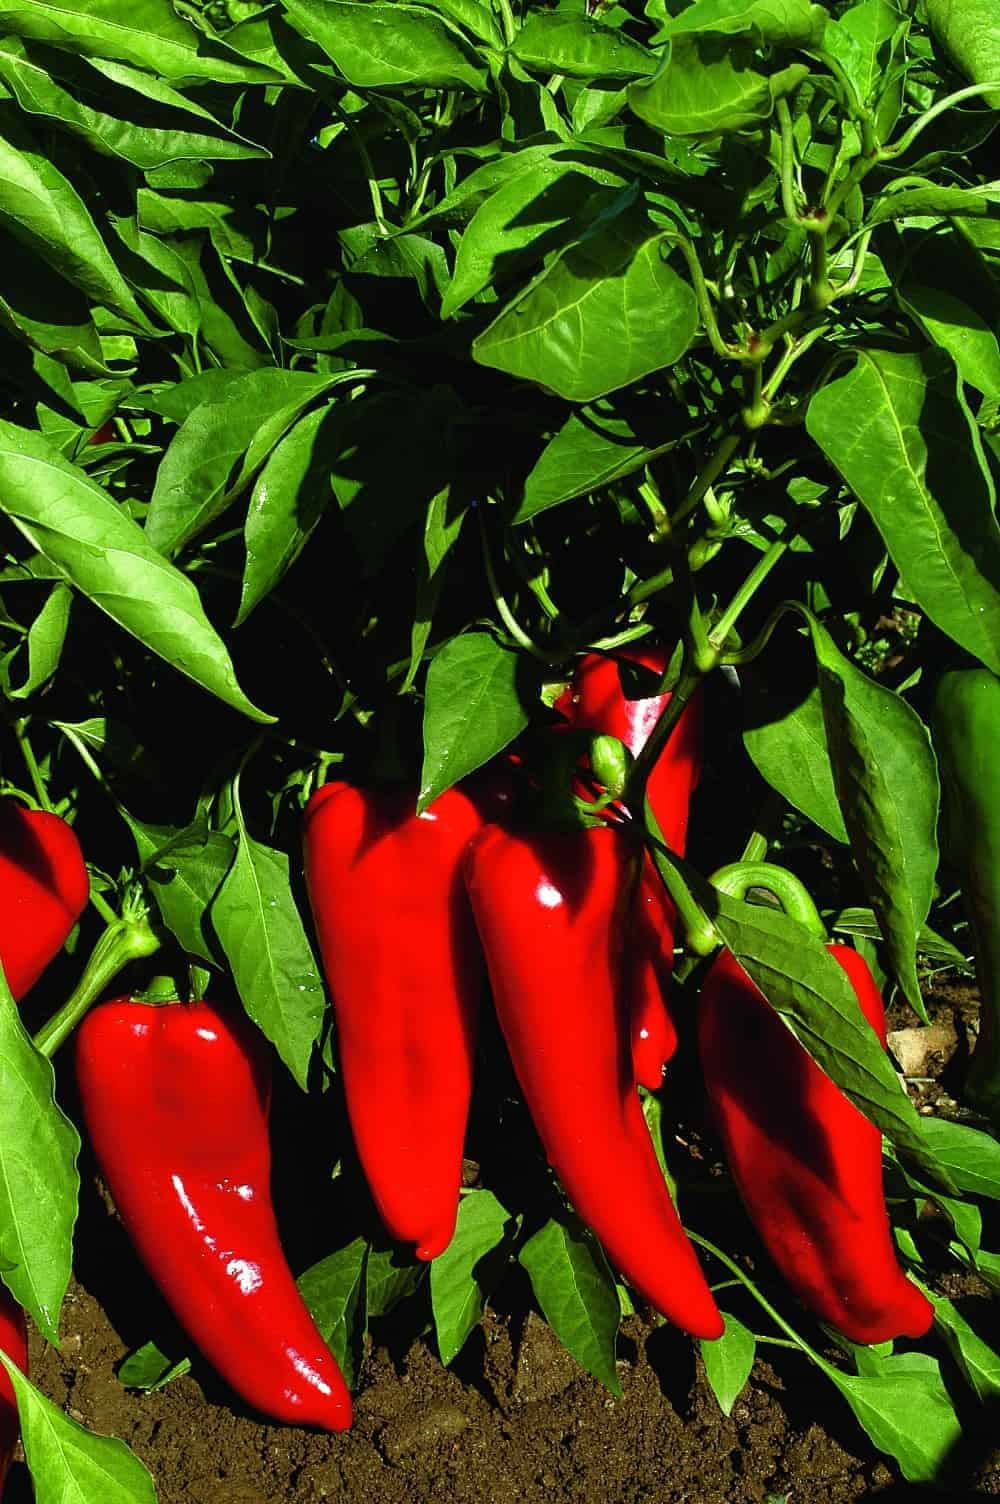
Peppers to Try in 2022
Looking for tried and true pepper varieties to grow this year? How about proven varieties of tomatoes, greens, squash, okra, melons, as well as pollinator-friendly flowering plants such as begonias and petunias? Give a listen to Episodes 168 and 169 of the Garden Basics with Farmer Fred podcast. In Episode 168, we chatted with Sacramento County Master Gardener and vegetable expert Gail Pothour. She and the other Master Gardeners there have been growing an array of All-America Selections winners for several years at the Fair Oaks Horticulture Center’s AAS Display Garden…along with some staff favorites. Not only are the vegetable varieties she mentions winners here in USDA Zone 9, but the majority of them are All-America Selections national winners, having proven their mettle in trial gardens from coast to coast.In Episode 169, Diane Blazek, the Executive Director of the All-America Selections organization, lengthens this “you oughta grow this!” list considerably. In all, between the two episodes, we chatted about 45 different varieties of vegetables worth trying…and, my condolences to you if you were trying to jot them all down while driving.Here, then, are the pepper varieties we mentioned, along with the usual effusive catalog descriptions, as well as personal thoughts on those varieties we mentioned that were not AAS Winners. All of the AAS winners mentioned can be found at all-americaselections.org . Due to space limitations in this newsletter, we’ll list the tomato varieties in next Friday’s Garden Basics “Beyond the Basics” newsletter. The following Friday (March 4) we’ll have the varieties of chard, lettuce, squash, eggplant, okra, melons and flowering plants that we talked about in those two podcasts.You will also see the notation, “F1”, after many of these hybrid varieties. No, they are not part of the international Formula One auto racing circuit (although “Pepper Quickfire” would be a good name for an accident-prone driver). According to the smarty pants experts who occupy the F1 Wikipedia entry, “…the term F1 hybrid (also known as filial 1 hybrid) is usually reserved for agricultural cultivars derived from two parent cultivars. These F1 hybrids are usually created by means of controlled pollination, sometimes by hand pollination.” PEPPERS TO TRY IN 2022Pepper Carmen F1 2006 AAS Edible Vegetable WinnerCarmen is an improved sweet pepper with an unusual shape. Most gardeners think of a bell shape when “sweet” peppers are mentioned. Not so anymore. Carmen is an Italian bull’s horn type which refers to its elongated shape, about 6 inches long. The medium thick flesh is the sweetest when it is ripe red, but Carmen peppers are sweet even when immature or green. One of the improved traits is the earliness to ripe red. Gardeners can look for red peppers about 75 days after transplanting into warm garden soil. The other improved traits are sweet flavor and high yield. Carmen proved to be widely adaptable, flowering and setting fruit over a wide temperature range. Like all peppers, Carmen will produce the highest number of peppers when grown in full sun and given proper nutrients and water. Carmen plants are productive with an upright, medium height of 28 to 30 inches. This plant size is perfectly adaptable to larger patio containers.https://all-americaselections.org/product/pepper-carmen/Cornito Giallo F1 2016 AAS Edible – Vegetable Winner“DOUBLE YUM” was one judge’s response to the AAS Winner Cornito Giallo F1 pepper, “The flavor on this one is totally a winner!” Starting as small green fruits, this AAS Winner develops into bright yellow jewels with a delicious sweet and fruity flavor. The peppers themselves are plentiful and durable, yet easy to eat fresh. Being an early bloomer, you will be able to enjoy these peppers throughout the growing season and well into the fall. Plant Cornito Giallo F1 in your garden this year and you can join our judges in exclaiming “YUM!”https://all-americaselections.org/product/pepper-cornito-giallo/Dragonfly F1 Sweet Pepper 2022 AAS Edible-Vegetable WinnerDragonfly pepper plants produce beautiful purple peppers that have thick, sweet walls, unlike the thin papery walls of other purples on the market. Similar to the beloved dragonfly that flits around your garden, this pepper transforms itself from a green pepper into a purple fruit that is as delicious at the green stage of maturity as it is when fully purple and mature. Overall, it’s a much better purple color than comparison varieties, with above average, robust pepper flavor. Fruits are held high on the plant, keeping them from the soil. The 4-lobed fruits do not fade, and if left on the vine, turn a beautiful, bright red color.https://all-americaselections.org/product/pepper-dragonfly/Escamillo F1 Pepper 2016 AAS Edible – Vegetable WinnerA wonderful sweet taste on a golden yellow pepper, the Escamillo F1 pepper is an early bearing pepper plant with a compact habit makes it an ideal choice for any home garden. Gardeners
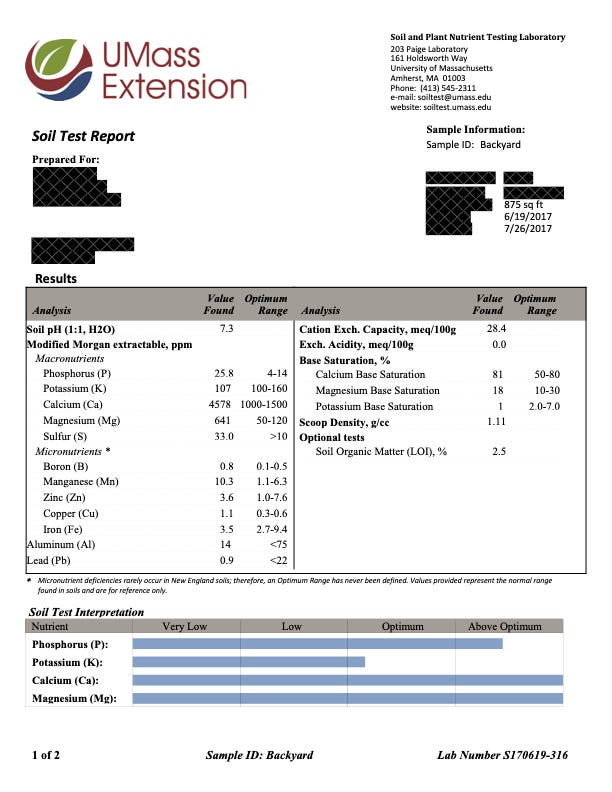
Should You Add Bagged Soil To Your Garden?
As you can hear in the podcast above, adding bagged soil products to your garden might cause problems with your plants, due to impeded water movement. What to do? Debbie Flower, our favorite retired college horticultural professor, says to stick to the native soil. But, she does offer tips on how you can use bagged soil in your garden. Give a listen. And if you want to hear the whole conversation, head to Episode 166 of the Garden Basics podcast, released Tuesday, February 8. Also in that episode: thwarting weeds around rosebushes, without resorting to chemical weed killers. But if you do choose to use them, how to do it safely.Also in this edition of the Garden Basics “Beyond Basics” Newsletter:• Do you need to fertilize cool season flowers and vegetables?• What Your Yellowing Citrus Leaves Are Trying to Tell You• When is a rock mulch on top of your soil most appropriate?• A Deep Dive into How Water Flows Through Soil• Soil Testing: Do It Yourself, or Send It OutDo You Need to Fertilize Your Cool Season Annual Vegetables and Flowers?Maybe. Maybe not. It depends. Listen to the entire conversation in Episode 167 of the Garden Basics with Farmer Fred podcast. Here’s a transcription of the salient points from the podcast to that question:Fred: Do you need to fertilize cool season annuals?Debbie: "Need" is a strong word. And it would apply to fertilizing anything, really. Plants make their own food and they use nutrients that they get through the environment and absorbed through their roots to make that food. The time to fertilize is when they show you that they don't have enough of those nutrients. And that is when they have very small new leaves and they're losing all of their older leaves down at the bottom or closer to the trunk or they're all turning yellow, that would be a nitrogen deficiency. Or when you're seeing different streaks of yellow, let's say, in the leaves. That could be a micronutrient deficiency, the plants should be flowering, producing flower buds and opening them and it's not or the plant should be producing fruit and the fruit should be expanding. And it's not. Those are deficiency symptoms. And that's when you apply nutrition, which is in the form of fertilizer in the cool season. All those processes are very slow in the plant. And if you have soil that has been mulched with organic matter for a long time, long enough that the organic matter has started to break down and release nutrients to the soil, you typically will not need to fertilize the winter annuals.Fred: That makes a lot of sense too. Because mulch is a slow release fertilizer as it breaks down. It's feeding the soil and if you've had that mulch for a long time, like you say, then your plants are slow. Slowly, slowly being fed. And I think we all prefer to be fed, slowly slowly.Debbie: It's painful to eat too much at one sitting. Yeah, exactly. And a plant can show that symptom as well. They can burn when you give them too much fertilizer. Yes, cool season annuals need nutrition, because they're alive and they're flowering or fruiting or whatever it is you you have them for, even just growing them for their showy green parts. But do we need to add fertilizer only if we see deficiency symptoms.Fred: And it can't hurt to do a soil test. Debbie: Absolutely. Find out exactly what it needs. Fred: And you can buy soil tests that do more than just measure pH, which the less expensive soil test kits do. A step up are the test kits that also measure nitrogen, phosphorus and potassium. But you can go beyond that and buy more expensive soil test kits to check for micronutrient deficiencies.More info about soil test kits included at the end of this newsletter.=============================Online Soil Test ServicesIf you don’t want to play kitchen counter chemist with the soil, you may be fortunate enough to live in an area where your county or state ag departments may help you out in that regard. Check with your local Cooperative Extension office to see if soil testing for homeowners is still part of their services. Unfortunately, in many states, including California, that service is no longer offered by Cooperative Extension. There are private companies that do offer soil testing, but they can be pricey and they may be more geared to agricultural soil testing. However, at least two universities do offer soil testing for home gardeners throughout the U.S. at reasonable prices:University of Massachusetts/AmherstColorado State UniversityClick on those links for more information. This soil test was conducted by UMass/Amherst. The test results also include in additional pages information about how to correct any soil abnormalities.What are Your Yellowing Citrus Leaves Trying to Tell You?Why do citrus tree leaves (the leaves of oranges, limes, lemons, mandarins, avocados, pummelos, grapefruit and others) turn yellow? There are many possible reasons, especially as winter transitions into spring. Generally speaking, each problem has some tell-t
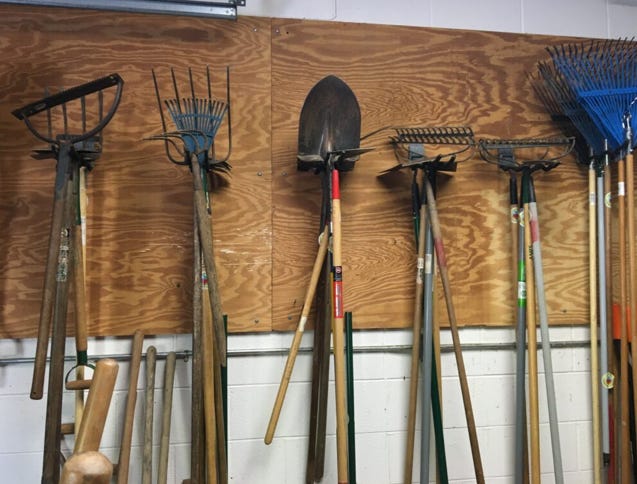
Tips for Garden Tool Selection & Care
Above: In today’s Garden Basics “Beyond Basics” Newsletter podcast: Brad Gay of JB’s Power Equipment in Davis, CA explains what to look for when choosing garden pruners. And, Debbie Flower has a garden tool storage tip you may not be aware of: your garage floor could rust your shovels! Here’s a hint on what to do:We are back to two Garden Basics with Farmer Fred podcasts a week as we start Season 3 (plus Friday’s newsletter podcast). On Tuesday’s Episode 164, we talked with Matthew Ampersand of Find Out Farms and Community Fruit in Sacramento about the best tools to own to pick fruit. Debbie Flower and I chat about the importance of winter cleanup in your garden, to help stave off the pests this spring and summer.In Friday’s Episode 165, Debbie and I do a deep dive into garden tool care and selection, including the must-have tools that should be part of every gardener’s arsenal of backyard fun.In Episode 164, Matthew Ampersand mentioned his favorite snips for removing citrus and apples from trees, while retaining a bit of the stem on the fruit (we talk about why that’s important). He said his go-to small pruners resemble dog toenail clippers. They fit easily into the front pocket of overalls, tend to stay sharp, and yes, professional orchardists and farm workers do use them.It’s Citrus Harvest Season in USDA Zone 9. But Who’s Going to Pick all That Fruit?Matthew also told us about his volunteer group, Community Fruit, that gathers unused backyard fruit around Sacramento and distributes the fruit to the needy. Considering that nearly one-third of all the food grown in the U.S. is never eaten, with most of it ending up in a landfill, this is a project that should be emulated throughout the United States.One way you can help reduce the amount of wasted food in this country is to store it properly when you bring it inside, so it lasts longer in your kitchen. The UC Davis Post Harvest Technology Department has produced a handy sheet for hanging on the inside of one of your kitchen cabinet doors: “Storing Fresh Fruits and Vegetables for Better Taste.” Also in Episode 164, Debbie Flower told us about the importance of winter cleanup in the garden, how removing fallen fruit, leaves, branches and any fruit hanging dead in the trees could stave off many insects, diseases and weed seeds that could survive the winter in that debris, and spring to life…in spring. If you have backyard apple or pear trees, this is especially effective at controlling codling moth, and its wormy larvae that will be burrowing in and out of your apples and pears when the weather warms. So, if you have areas of your garden that look like this:Take action now before the codling moth comes out of hibernation in late winter and early spring.Anvil versus Bypass? It’s No Contest When Choosing Hand PrunersEpisode 165, “Garden Tool Care and Selection”, presented a wide-ranging lesson from our favorite schoolmarm, Debbie Flower, on choosing the right tools and caring for them properly. We discussed the importance of caring for wooden handled tools, which involves sandpaper, boiled linseed oil and some old rags or towels. But we both drew a blank when talking about care tips for fiberglass handles on shovels and other large garden tools. One website did offer this, however:“Fortunately, fiberglass handles require very little in the way of maintenance. All you really need to do is give them a good wash down to remove any dirt or grime. However, now is a good time to give each handle a thorough examination. Fiberglass can be damaged by the sun and if you apply to much stress it will crack. Catching any signs of damage early can save someone from getting seriously hurt if a handle should happen to break under a load. Remember to store your tools with fiberglass handles out of the sun.”However, if you want the real lowdown on fiberglass handles, eavesdrop on some fire fighters. You might hear comments like this:“We have some very old fiberglass handles here, once or twice a year they get TLC in the form of a wipe down with fine grit sandpaper to remove those pesky little splinters, some steel wool on the heads, and a little Rustoleum paint, good as new! Newer stuff comes with a plastic overlay which protects both you and the fiberglass. And be sure to wear gloves, always always always, even when cleaning up. You think fiberglass splinters are a pain? While cleaning up after a fire I found out the hard way that window glass splinters are much worse.”And it’s kind of hard to be discussing garden tools without it devolving into the pros and cons of anvil versus bypass pruners. Basically, it’s this:If you listened to this newsletter’s podcast at the top of the page, you also got the opinion of Brad Gay of JB’s Power Equipment in Davis, CA. Just say Yes! to bypass pruners.Meanwhile, back at Episode 165, I gave my secret for cleaning my shovels and cutting equipment of hard to remove mud: a barbecue grill brush, that lives in the garden tool shed. Besides the cl
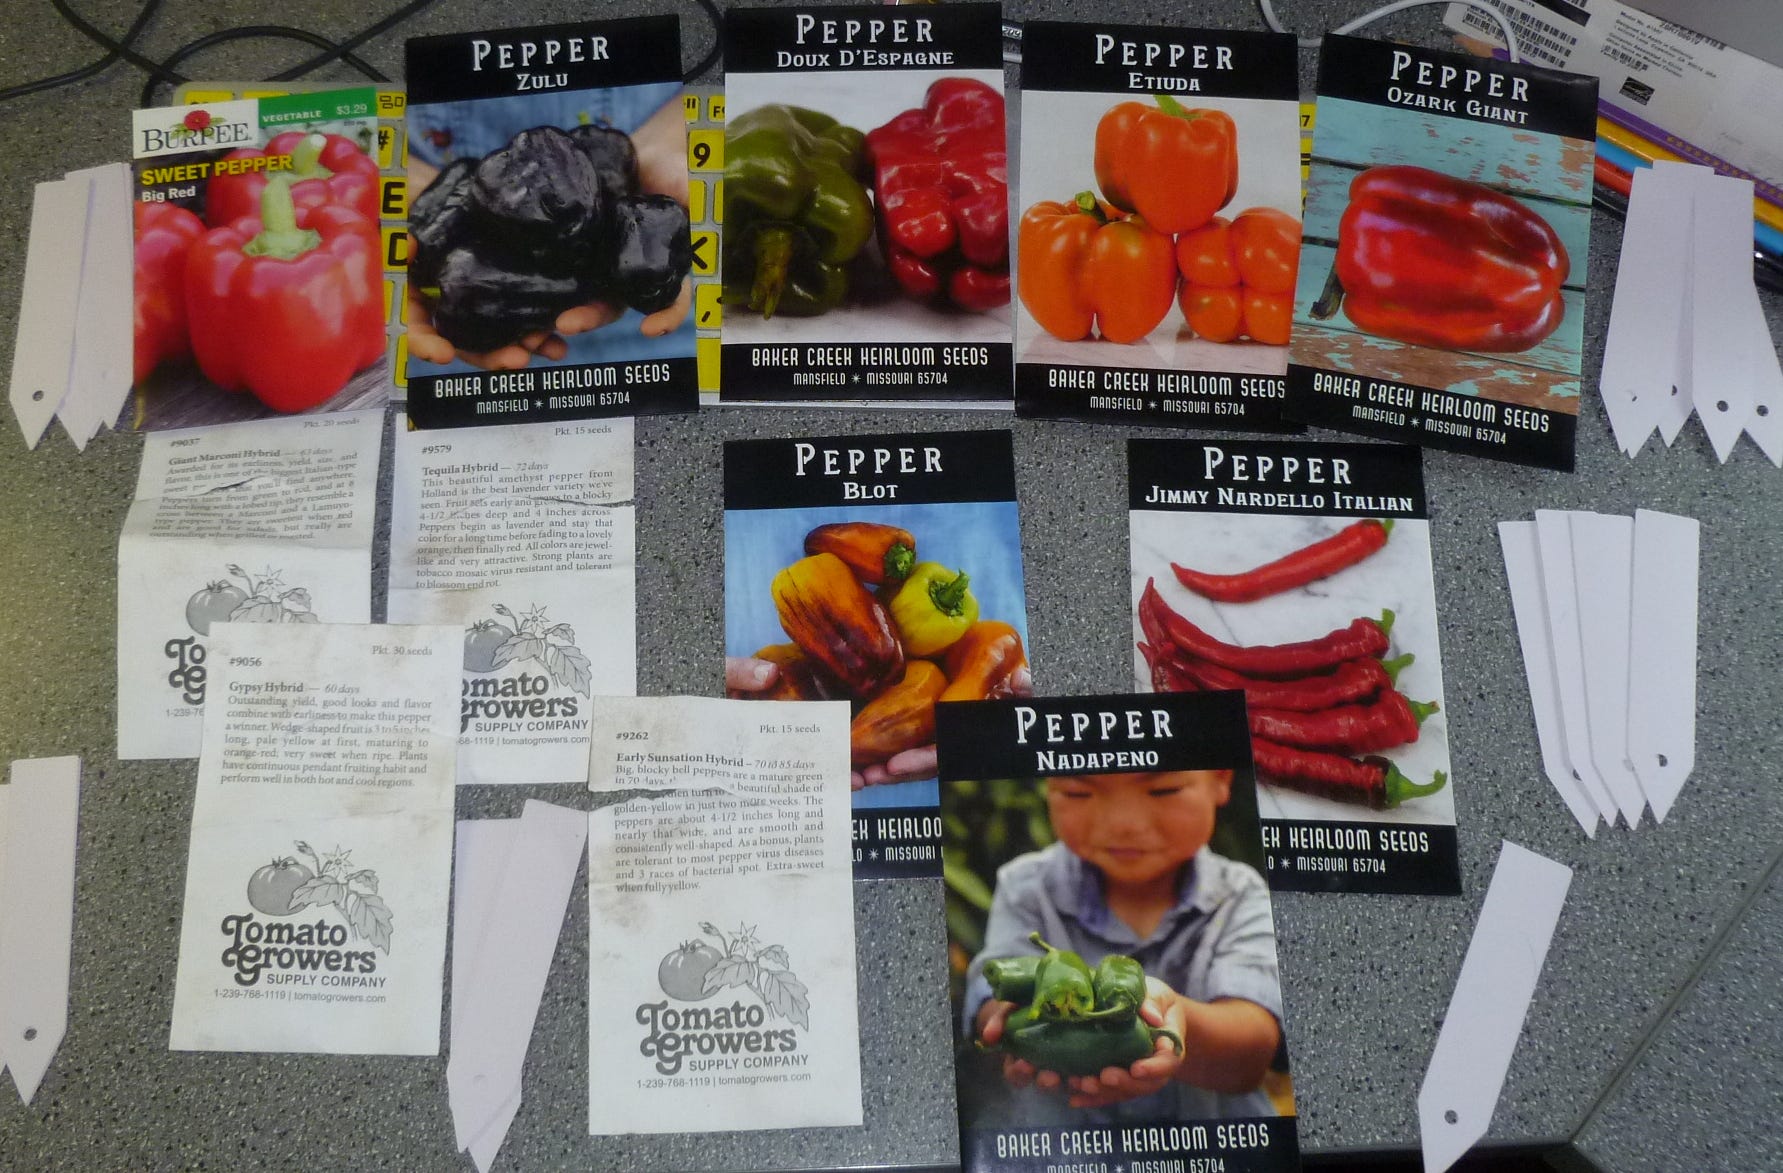
Seed Starting Tips
In this special podcast for the Garden Basics Newsletter, Beyond the Basics, I wanted to highlight five great garden hints offered by Debbie Flower from the original podcast, Episode 163 of the Garden Basics with Farmer Fred:• Soaking pepper seeds in hydrogen peroxide can speed up germination; and, how seeds germinate. • Why seeds don’t need fertilizer.• How to know when to transplant those seedlings into larger containers. • Why seedlings need a light period and a dark period each day.• The importance of air movement and the development of reaction wood for the young seedlings.*On Episode 163 of the Garden Basics with Farmer Fred podcast, we delved into seed starting tips, especially for those slow-to-germinate pepper seeds, which can take up to three weeks to show their first set of leaves. Our favorite retired college horticultural professor, Debbie Flower, offered several speedy seed germinating tips, which could be applied to just about any seed you’re trying to coax to life.What you’ll need for successful seed germination and growth, according to Debbie:• Small, clean seed trays or containers with drain holes.• A soilless seed starting mix. (We offer up several homemade recipes, too)• The benefit of soaking pepper seeds for a few minutes in hydrogen peroxide.• Bottom heat via a propagation mat.• Consistent moisture.• Lights, once the seedlings appear.• Air movement.• Transplanting those seedlings into bigger containers once roots pop out of the bottom.Listen to all of Episode 163 for more details about all those tips. Or read the transcript.Debbie Flower is a horticultural treasure. One listen to what she has to say isn’t enough. She is offering up so many great tips for gardeners in our “scenic bypasses”, that it really pays to either listen a couple of times or read the entire transcript. I am amazed at all I am learning from her; and, I’m listening to what she has to say at least four times (the original interview, two editing sessions, proofing the final) and polishing the transcript. And reading and editing that transcript, although last on the list, reveals more great gardening information that I had missed before.(A word of warning for future podcasters who will deal with transcripts: digital robots that provide the original transcript are notoriously inaccurate. Be prepared to spend at least an hour per 30 minutes of interviews to do the corrections. Translating from a transcription of the spoken word to a transcription intended for readers takes work. I am convinced that World War 3 could start due to someone reading a raw, robot-generated transcript; there’s that much misinformation included in the original file.)In Episode 163, we also discussed the importance of gentle watering of seedling trays, so as not to dislodge the seeds. We have different ideas about the best sort of gentle watering equipment to use. A list and links of all the seed starting implements that we discussed, including watering equipment, is here:Grow lightsDramm Water Breaker nozzlePump Pressure Water SprayerMulti Head hose-end sprayer with Mist settingSeed Starting trays, kitsIndoor GreenhousesOutdoor GreenhousesSeed Starting Mix* The phrase, “reaction wood”, awakens the thirteen year-old boy in me. I wonder how many giggling scientists it took to come up with the explanation of the importance of air movement in the development of reaction wood among young plants. According to this scholarly presentation, the answer would be: 10.As an Amazon Associate, I earn from qualifying purchases from some of the underlined links in the newsletter. This is how I am trying to keep this a free newsletter. And as long as you buy whatever you want from Amazon using any of those links to get into the Amazon site, I get a few pennies. Thank you.Thanks for Subscribing and Spreading the Word About the Garden Basics with Farmer Fred newsletter, I appreciate your support. And thank you for listening to the Garden Basics with Farmer Fred podcast! It’s available wherever you get your podcasts. Please share it with your garden friends.Fred Hoffman is also a University of California Cooperative Extension Master Gardener in Sacramento County. This is a public episode. If you'd like to discuss this with other subscribers or get access to bonus episodes, visit gardenbasics.substack.com/subscribe
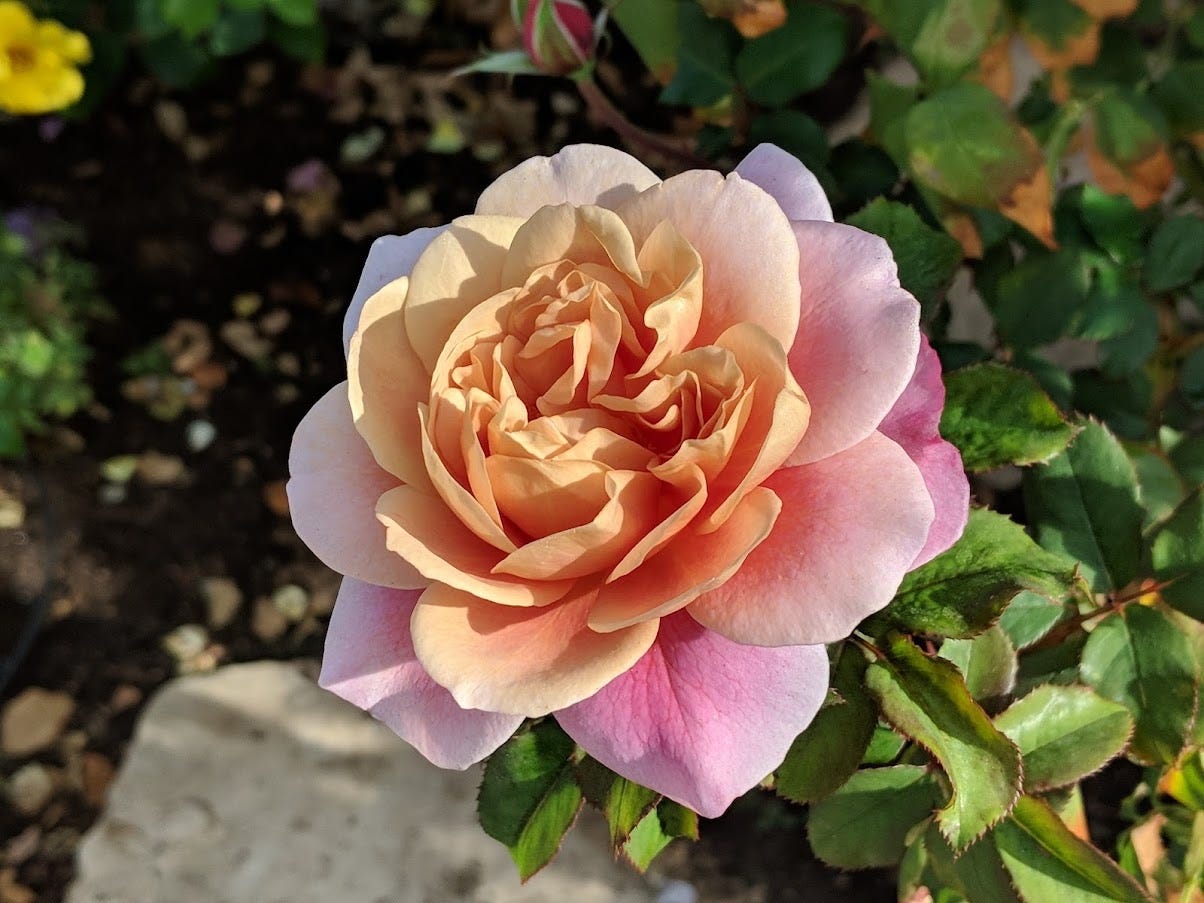
The Best Roses for America? One Master Rosarian's List.
Podcast Bonus: High Scoring Roses for Most of the United StatesWe like to check in with Master Rosarian Charlotte Owendyk of the Sierra Foothills Rose Society, to find out which roses have captured her fancy in the last year or two. And beyond that, which roses she recommends because they can be easy to grow in a variety of climates. The Sierra Foothill Rose Society, after all, has California members from near sea level in Sacramento and Roseville all the way up to Lake Tahoe, more than a mile up in the Sierra Nevada mountains. Is there a rose that can be grown in such varied climates? Sure enough, Owendyk has a list that she likes to call, “Bulletproof Roses”. Owendyk didn’t hesitate to respond about her favorite, widely adaptable rose. “One rose that can really take the heat and the cold is ‘Distant Drums’, which has a very distinct coloration,” she says. “The petals are apricot-colored in the center, surrounded by lavender on the outer petals. It’s hardy down to USDA Zone 4, and has a wonderful strong scent with great disease resistance.” We here are considered to be in USDA Zone 9, where winter lows seldom drop below the upper 20’s. USDA Zone 4, on the other hand, has seen lows dip down to 31 below zero in the winter. Yet, ‘Distant Drums’ can do well for your aunt and uncle in North Dakota. Lake Tahoe (USDA Zone 6) is relatively balmy in comparison, where January overnight lows average about 26 degrees above zero.Another top performing rose for most of the United States, according to Owendyk is the floribunda rose, ‘Iceberg”, and its close relative ‘Burgundy Iceberg’. Floribunda roses are noted for their massive, long-lasting, colorful displays of large clusters of white flowers.However, when it comes to a quick turnaround for getting new blossoms, nothing beats “Secret”, says Owendyk. “Normally, hybrid tea roses take five or six weeks to rebloom after deadheading,” says Owendyk. “For ‘Secret’, it’s only four to five weeks. That’s why it’s one of my favorite roses. Plus, it’s very fragrant.”Other rose varieties that Owendyk is fond of in 2022, the ones she recommends for rose growers across the country, include:• “Belinda’s Dream”, a shrub rose (“A tough, soft pink rose, with great disease and heat resistance” says Owendyk.)• “Cinco De Mayo” (“Wonderful ruffled, smoky lavender flowers”).• “Lyda Rose” (“The flowers look like apple blossoms, absolutely stunning”).• ”Gemini” (“This All-America hybrid tea rose winner is very vigorous, with coral-and-cream colored petals”). • “Memorial Day” (“Extremely fragrant rose that blooms all summer, plus the canes don’t have many prickles or thorns”).• “Sally Holmes” (“A shrub rose that can get seven feet tall and is tolerant of some shade”).Other honorable mentions in Owendyk’s list of roses for everyone include “Betty Boop”, “Dick Clark”, Cherry Parfait“, “Julia Child”, “Marilyn Monroe”, “Playgirl”, “Rock N Roll”, and “Quietness”.“Floribunda? What’s That?” A Modern Rose GlossaryMaster Rosarian Charlotte Owendyk and I talked rose pruning in Episode 162 of the “Garden Basics with Farmer Fred” podcast. The episode may have had you wishing for The American Rose Society’s “Handbook for Selecting Roses” , a great, pocket-sized encyclopedia of roses, and rose information, perfect for anyone shopping for good rose varieties. Plus, it has a lot of handy definitions when trying to decipher head-scratching questions such as, “What’s the difference between a floribunda and a grandiflora rose?” Here then, is a brief glossary of rose varieties, courtesy of the ARS:GRANDIFLORA ROSEIn 1954, the introduction of a rose crossing between the ‘Charlotte Armstrong’ (a hybrid tea rose) and the floribunda rose, ‘Floradora’, resulted in a flower with carmine rose and dawn pink coloration. The cross had the characteristics of a hybrid tea rose, but also the ability to bear clusters or trusses and grow to a commanding height of six to eight feet or more. Thus, the class of Grandiflora was born. The first Grandiflora was named “Queen Elizabeth” in honor of the (at the time) very young queen of England.FLORIBUNDA ROSEThe floribunda class of roses is characterized by its profuse ability to bear flowers in large clusters or trusses with more than one bloom in flower at any one time. Floribundas provide massive, colorful, long-lasting garden displays. Floribundas have the edge on hybrid tea roses. Hybrid teas bloom in cycles every six or seven weeks. Floribundas, on the other hand, can bloom continuously. One standout floribunda, with an ARS rating of 8.6, is ‘Lavaglut’.HYBRID TEA ROSESProbably the most recognizable class of roses, due to the large, shapely blooms, with each flower containing 30 to 50 petals. Flowers are borne on long stems either singly or with several sidebuds. One highly rated hybrid tea rose that is widely available at nurseries is ‘Mr. Lincoln’.MINIATURE ROSESThe height of the average miniature rose is about 15 to 30 inches, making them ideal for edging beds and containers. M
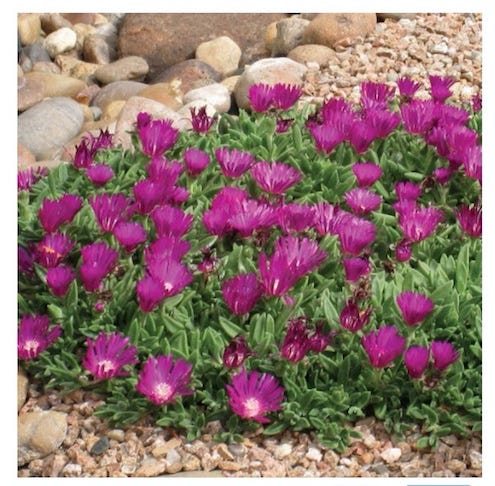
Cold Tolerant Succulents. Plants for a School Garden. Pepper Seed Germination Tips.
ABOVE: Tips for Germinating Pepper Seeds in Less Than Two or Three WeeksEpisode 161 of the Garden Basics with Farmer Fred podcast delved into two popular issues: tips for choosing the easiest to grow succulents; and, the best plants and themes for a school/home school garden. In this newsletter, we expand on those two topics, plus a bonus podcast (above) with information on getting pepper seeds to germinate quicker. More tips are included at the bottom of this “Beyond the Garden Basics” newsletter. There’s no need to wait two or three weeks to see those pepper seeds begin to sprout! (Usually. Your results may vary. All gardening is local.)Succulents That Can Take a Bit More Cold WeatherFor gardeners just starting off their succulent garden, either indoors or outdoors, our interview with Robin Stockwell in Episode 161 has a lot of good advice on choosing and planting these unthirsty, beautiful blooming plants, which thrive in warmer climates. And what’s true for all plants is true for succulents: choose the right plant for the right place. The beauty of succulents: they do well, indoors, too. In the right sized pot, with the correct soil mix, of course. Robin gets into those details in Episode 161.But what about for gardeners in colder climates? Are there any succulents that can take a freeze better than others? Robin Stockwell notes those in his beautiful, excellent book, “Succulents: The Ultimate Guide to Choosing, Designing, and Growing 200 Easy-Care Plants”. Unfortunately, it may be difficult finding this book, even though it is only five years old. Check with your favorite used book sources for a possible copy, or Amazon.Stockwell highlights those succulents that can tolerate outdoor temperatures at or below freezing:Delosperma (many). Hardy to 20 degrees.Sedum hispanicum. Hardy to 20 degrees.Sedum rupestre ‘Angelina’. Hardy to 20 degrees.Sedum rupestre ‘Blue Spruce’. Hardy to 20 degrees.Sempervivum (many). Hardy to 25 degrees.Another strategy for growing tender succulents that may be a bit chilly in the outdoors in the winter where you live: grow them in pots, and move them to a warmer location (against a south or west facing wall, preferably with a cover) or…indoors.Starting a School Garden? Tips for the Home School garden, as well.In Episode 161 of Garden Basics, we tackled a question from a school superintendent who wants to start an elementary school garden. Our in-house school marm, Debbie Flower, has first hand experience with this, and offered up plenty of good tips, including making sure that the plant selections can overlap beyond botany lessons to other scientific endeavors in the classroom, such as choosing plants that attract beneficial insects and pollinators to control pests; and, choosing plants that may reflect on the Native-American culture of the area: which plants did the first residents consume and use? Homeschool instructors, as well, can pick up a lot of good tips for providing a well-rounded education, just by growing the right plants, especially native plants. Give it a listen.And if you are interested in attracting bees and other pollinators to your garden, here’s a list of plants that can provide year-round bee attraction in California’s interior. For all zones, check out these regional plant recommendations of the Xerces Society for attracting bees, butterflies, hummingbirds and other pollinators to your garden.More Tips for Germinating Pepper SeedsFor many home vegetable gardeners, growing peppers from seed can be an excruciating experience. January is the time for many in USDA Zones 7, 8, and 9 to start those seeds. Colder climates can wait another month or so. Still, it can take 12 weeks or more from the time of planting a pepper seed to the point where it is vigorous enough to be taken outdoors. However, there are some tips for speeding up that process.Home gardeners who grow their tomatoes from seed usually get fairly quick results after sowing the seeds indoors. Given the right germinating conditions - a soilless planting mix, good drainage, plenty of light, plenty of warmth - tomato seeds can pop up in 8-10 days.Pepper seeds are a different story. Why is it some peppers can take weeks to germinate? "The important thing in getting your (pepper) seeds to germinate is to keep them warm – the soil temperature should be in the 80's", says Renee Shepherd of Renee's Garden, a popular seed catalog based in Felton, California. "Germination is very much related to even moisture and warm temperatures. You should see germination within 2 to 3 weeks if it's warm enough. I strongly suggest using bottom heat to achieve the warmth the seeds need – most good nurseries carry electric seed starting mats which will keep your seed soil at the right temperature in order for the pepper seeds to sprout. A local mail order source is Peaceful Valley Farm Supply."For those who want to comparison shop, another source for heating mats for your pepper seeds: Amazon.Another trick that some gardeners
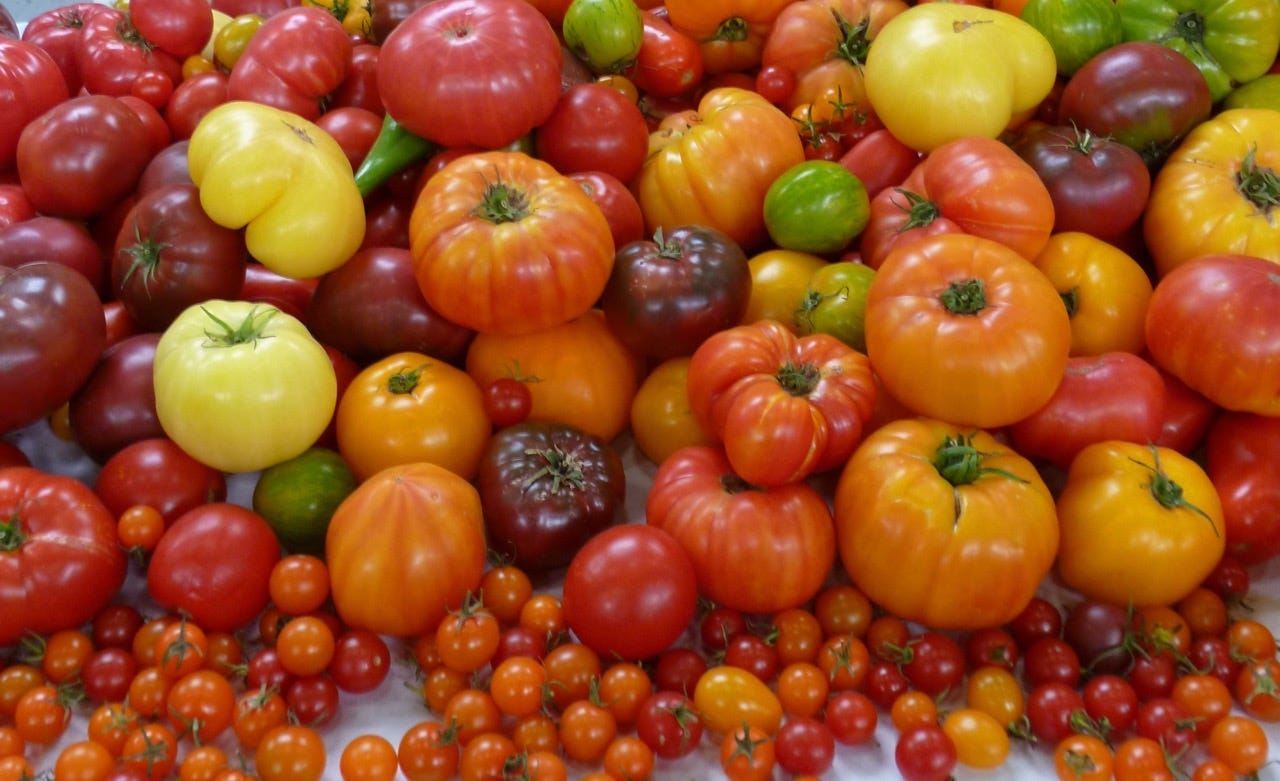
Tomato Varieties, Winners & Losers
All About Tomatoes!Gardeners LOVE growing tomatoes. So much so that the subject of tomatoes made the Top 5 audience favorite segments among all of the 2021 Garden Basics with Farmer Fred podcasts. The latest episode, #160, The Greatest Hits of 2021: All About Tomatoes, runs over an hour. And the top listened-to segments are directly or indirectly related to growing tomatoes: Starting Tomato Seeds (episode 79), Reusing Potting Soil (also Episode 79), Transplanting Tomatoes (Episode 93), Tomatillo Pollination (Episode 124), Tomato Pruning (Episode 106) and Tomato Troubleshooting (Episode 110).There is so much to talk about when it comes to growing tomatoes, that even an hour+ special podcast isn’t enough. So, for the Garden Basics Newsletter readers…enjoy the conversation posted at the beginning of this newsletter with Don Shor of Redwood Barn Nursery in Davis, CA. We talk about our tomato winners and losers of 2021 in our own yards; the best tomatoes to grow for the novice gardener (or any gardener who want a successful tomato-growing experience); and, our picks for our favorites to grow this year.By the way, if you know a gardener who is venturing into growing tomatoes for the first time or just wants more tomato information, please share this newsletter with them.Thank you!We spent a bit of this special newsletter podcast talking about the All-American Selections Winners, and how that can be a good barometer for choosing the tomato varieties that you might want to plant this spring and summer. The AAS has tomato trial gardens throughout the country; many of their choices are national winners. You can also drill down into the complete AAS Winners list to find the best performing vegetables and flowers for your region of the country.Growing Tomatoes in ContainersThis year’s Great Tomato Growing Experiment: is this small area (4’x16’), adjacent to a north-facing fence, truly the sunniest spot on the property?After monitoring my entire full sun-deprived Folsom yard for nearly three years, this one spot, near the garage, may be the one area that gets more than eight hours of direct sun a day, perfect for growing tomatoes.The dilemma (well, two dilemmas, actually): because it is a concrete surface, the tomatoes must be grown in containers; and, how do you avoid water stains on the concrete when the barrels drain?Solution: use a big container (in this case, half barrels with five 7/8” drain holes drilled through the bottom) and place that container on top of a catch basin with several 3/4” holes drilled on the side rim on the back side, allowing the water to drain from the catch basin to the 12” wide gravel area along the fence line.The prototype catch basin was at the suggestion of Master Gardener Lori Ann Asmus, owner of Emerald City Interior Landscape Services, who decorates Christmas trees professionally (you can see her work during the holiday season at various lobbies in public buildings, including the downtown Sacramento’s Citizen Hotel).The catch basins were, in reality, meant for placing beneath Christmas trees to catch any water overflowing the tree holders. They are available wherever fine Christmas tree accessories are sold. And Amazon, of course.The barrel/catch basin combo have shims under the front side, allowing a gentle slope towards the fence, coaxing the water to go out the back side of the holes in the catch basin and into the gravel. So far, so good.Regarding the container dilemma: when planting thirsty summer vegetables in full sun, try to use the largest containers, preferably made out of something that doesn’t allow heat build-up. Plastic pots are notorious for overheating the soil. It’s not unusual for the soil in an unprotected plastic pot in full sun to reach temperatures in excess of 140 degrees on a day in the upper 90’s. A wood barrel works perfect for that purpose. Plus, the greater volume of soil in a barrel (as opposed to a 15-gallon plastic pot) also helps the plant avoid stress from dried-out soil if you miss a watering during 90 and 100-degree days. And, more soil means more room for root development. And don’t forget Smart Pots, lightweight fabric containers that breathe, so they stay cooler and inhibit root girdling, as well.Because a container plant may need water every day in the summer, I’ve given these two tomato plants (a Champion full-size tomato and a very popular grape tomato, Juliet) their own watering system: a battery operated timer on a nearby faucet with a Y-adapter. Connected to the timer is a short, half-inch drip line run, going along the backside of the barrels. Connected to the half inch line: quarter inch tubing snaked through a small hole on the lower backside of the barrel, and topped off with an adjustable drip bubbler/sprinkler in the middle, which sends out 6 or 8 even streams of water in a circle. Unfamiliar with drip irrigation systems? Entire kits are available, such as this. Pro tip: run the quarter inch line in the barrel BEFORE filling it with a
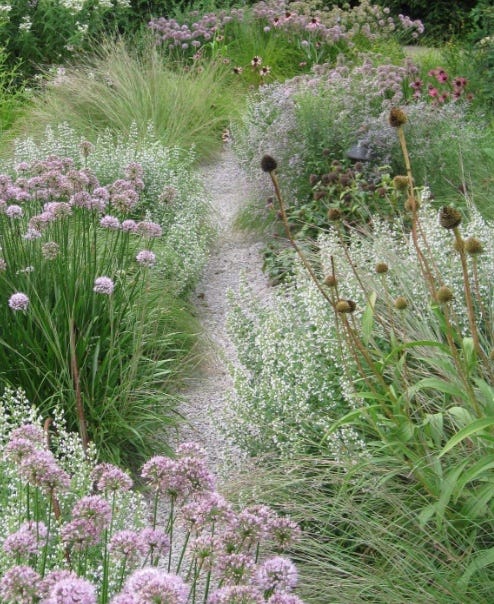
Is Gravel Gardening Right For You?
In episode 159 of the Garden Basics with Farmer Fred podcast, we discussed gardening trends of 2022 that might have appeal for you. We talked with Andrew Bunting of the Pennsylvania Horticultural Society, which released its list of garden trends worth pursuing in the coming year. Among the trends catching on in many parts of the country (some of which are fairly well established in other parts of the U.S.), are putting in pollinator-friendly plants, converting lawns into gardens, attending a plant swap, and more. Their complete list is at the bottom of this newsletter.One trend we discussed that you did not hear on the Garden Basics podcast: the increased interest in gravel gardening. Their are some rather profound differences between gravel gardening and maintaining a landscape topped with rocks, which has been popular in the southwest for more than a century.There are some rather beautiful examples of gravel gardens back East and in the midwest, as you will hear Bunting describe in this special podcast edition of the Garden Basics with Farmer Fred newsletter.One gravel garden that Bunting highlighted was the Olbrich Botanical Gardens in Wisconsin. You can see and listen to Jeff Epping of Olbrich describe the development and results of their gravel garden experiments here.In this newsletter podcast, Bunting describes the success of gravel gardens throughout the mid-Atlantic region. Following that, retired college horticulture professor Debbie Flower and myself will discuss whether this is appropriate for the hot climates of USDA Zone 9, and some of the possible drawbacks. Still, the results from back East are certainly eye-catching. But is it right for you, especially if you live in a hot summer/low rainfall climate? As we say in the podcast, go ahead and try, but do it on a small scale at first.The Pennsylvania Horticultural Society is also putting together the Philadelphia Flower Show, June 11-19, 2022. For more information about the Society, along with details about their 2022 Flower Show, click here. Here is their list of the 2022 Garden Trends:• Utilize Native and Pollinator-Friendly Plants. Coax bees and pollen-loving insects to your gardens. Native plants attract native pollinators. A good California source for the appropriate plants is the Calscape website, Calscape.org, for ideas for native plants suited to wherever you live in California.• Consider Turning Lawn Space into Garden Space. Removing a small piece of lawn and transforming it into garden space has the power to significantly lower fossil fuel emissions that would otherwise be applied to the lawn through regular trimming and maintenance. Your new garden space can also boost its positive environmental impact by being used as a pollinator garden, perennial garden, or even a vegetable patch.• Attend a Plant Swap and Make a New Friend. A great way to incorporate new plants in your garden and gain expertise as a beginning gardener is by attending a plant swap. At a plant swap, attendees can bring their small plants, cuttings, potting soil, pots, seeds or other gardening equipment and exchange them for something they don’t have. This is a simple way to diversify your garden, learn new horticultural skills, and connect with fellow gardeners. Many of these exchanges can be found online in local Facebook pages or the Next Door gardening groups.• Try Gravel Gardening. Saving water in the garden isn’t just a passing fad here in California; it’s the law. The Pennsylvania Horticulture Society has noted that more and more areas in the U.S. are experiencing inconsistent weather patterns and periods of drought. Planting gardens that require little watering or irrigation is growing in popularity. However, there is one trend back East that may sound intriguing to some California gardeners: gravel gardening, which offers a way to cut back on water and fertilizer use in your garden through eliminating the use of soil. Gravel gardens can incorporate a multitude of plants, including a wide array of succulents and ornamental grasses, as well as lavender, ceanothus and sage. A word of warning for California gardeners: if you excavate several inches of soil and fill it with gravel, make sure the soil below has good drainage. Also, when temperatures hit triple digits, a gravel garden may require regular irrigation. Starting a gravel garden in an area that gets afternoon shade may eliminate that need for more frequent watering.• Grow Your Own Fruit. Growing fruit is no longer reserved for those with large yards. Even just a few fruit trees can produce hundreds of pieces of fruit, perfect for jams, jellies, cookies, ice cream, or simply eating as-is. Dwarf fruit trees come in many varieties including figs, mulberries, apples, peaches and pears, and are ideal for growing in a limited, sunny space.• Cut Flowers Are Trending. Across the country, boutique flower businesses are incorporating more and more classic cut flowers like zinnia, dahlia, poppy, cosmos, and Shasta
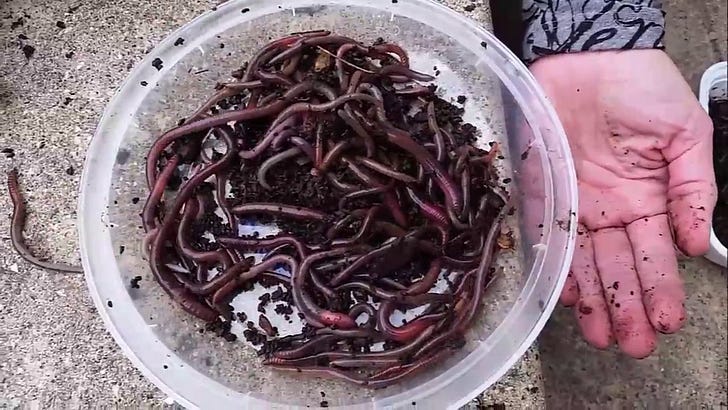
BEYOND BASICS: JUMPING WORMS
YOU DON'T WANT THESE WORMS IN YOUR GARDEN, COMPOST OR WORM BINThe damage that jumping worms (aka Asian Jumping Worms, Crazy Worms, Alabama Jumpers, or Snake Worms) can do to your garden soil.(video originally produced by the Wisconsin Department of Natural Resources)More on how jumping worms damage your soil structure, from Oregon State University:Because they have very large mouths akin to mechanical excavators, jumping worms are able to grasp and consume large amounts. With their voracious appetite, they outcompete the native microbial organisms and invertebrates that other organisms feed on. Their propensity to eat all the litter creates bare soil where invasive plants and animals move in, altering native ecosystems. They also remove the mulch that helps cool the soil and conserve moisture,Further, the castings – or fecal material – of most worms contain extremely important microbes that help fight soil-borne plant diseases and repel insects. Worm castings also improve soil structure by diversifying the size of soil particles, which enhances moisture penetration and increases water retention. With jumping worms, the outcome is the opposite. Since their gut biome is slightly different, there aren’t the same beneficial results.“What they are casting out doesn’t absorb moisture well so you end up losing porosity, which affects the overall structure of the soil,” said Sam Chan, Oregon State University Sea Grant Extension watershed health and aquatic invasive species specialist. “Initially wet and gummy, the castings quickly dry into hard granules that are difficult to rewet, not the best medium for growing plants.”The changes to soil structure and composition caused by the worm castings can attract certain unwanted microbes, which creates an increased susceptibility to disease and can cause girdled roots. Plant stems and roots at the surface of the soil may become exposed to more environmental extremes from the loss of litter and decomposed organic matter and changes to soil structure.Jumping worms have been outlawed in many states, but not all, and can still be found online for fishing. Chan advises to be careful not to purchase jumping worms, also known as crazy worm, Asian jumping worm and snake worm, and to spread the word about their danger. Many people – even those who sell them – aren’t aware of their invasiveness.To help decrease the spread of jumping worms, shake off the roots of plants when sharing or buying at a private plant sale. Buy bareroot plants when possible. Never share compost, mulch, soil or plants that contain a known infestation.Nurseries are being careful, but it’s still a good practice to inspect the soil for cocoons when you transplant. If you find jumping worms in your garden, they will probably be in pockets rather than the whole garden. Brush off your shoes and equipment when you move from place to place in an effort to keep them from spreading. If they are in contained spaces, you can spread plastic to heat the soil. Once it reaches 104 degrees F, the cocoons die.Audio from Episode 126 of the Garden Basics with Farmer Fred Podcast This is a public episode. If you'd like to discuss this with other subscribers or get access to bonus episodes, visit gardenbasics.substack.com/subscribe