
Beyond the Garden Basics Podcast
176 episodes — Page 3 of 4
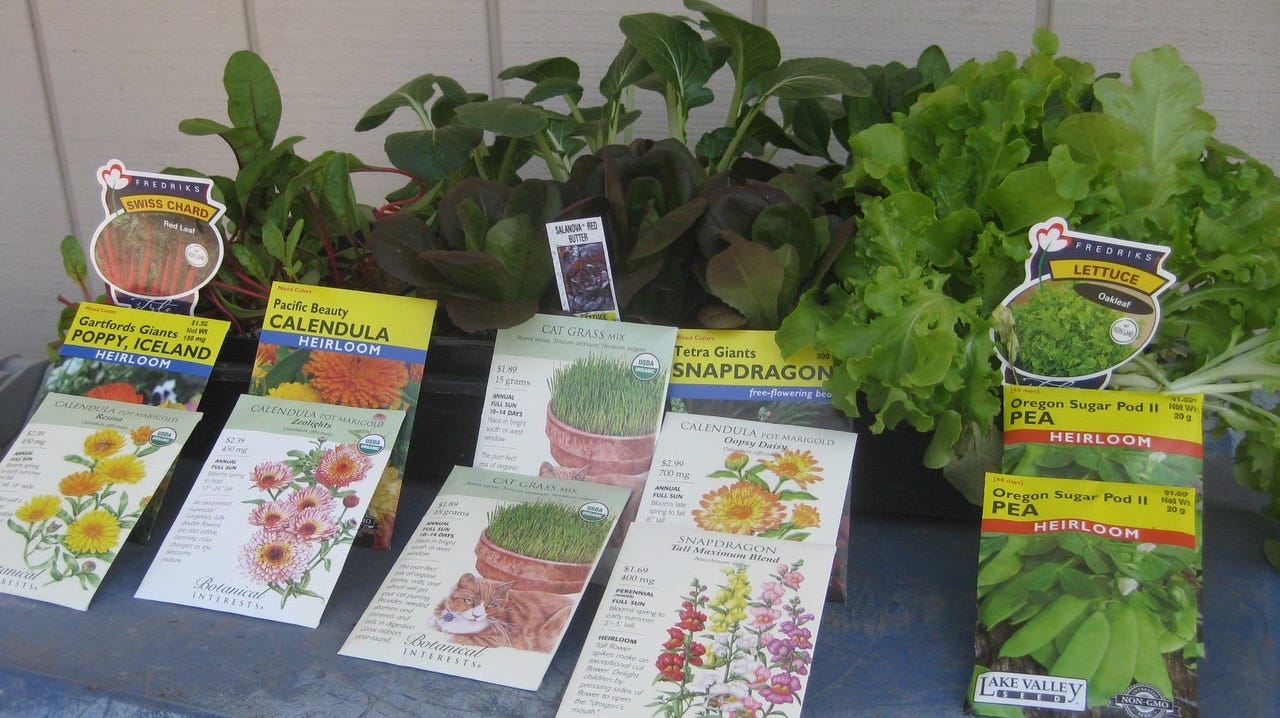
Late Summer is the Time to Start the Fall Vegetable Garden
In today’s newsletter podcast (above), Don Shor of Redwood Barn Nursery in Davis explains why now is the best time to be planting your vegetables for autumn and winter (in milder areas of the country). For those of you who live in the West, the South, parts of the Midwest and mid-Atlantic states, (USDA Zones 7, 8, and 9) we get down to specifics in this audio episode on the best varieties of vegetables to grow during the cooler months of fall and winter: lettuce, spinach, Swiss chard, cabbage, Chinese cabbage, cilantro, broccoli, cauliflower, beets, snow peas, fava beans, carrots, celery, onions, garlic, parsnips, shallots and turnips.We’ll tell you about some tasty, easy to grow varieties that maybe you’ve never eaten, such as pak choi, black seeded simpson lettuce, Danvers half long carrots, and Romanesco broccoli. What’s that? Give a listen. Fall Vegetable Gardening BasicsDo you want your family to eat healthy year-round? The healthiest, freshest foods are the fruits and vegetables you grow yourself. And in many areas of the West and South, the 365-day vegetable garden is easy to achieve. And now, late summer (August and September), is the time to be planting the seeds and transplants for the vegetables your family will enjoy throughout the fall, winter and following spring.Although we are still in mid-summer, this is the time to start your winter vegetable garden here in Northern California, as well as other mild-winter areas around the state and the nation. Most of this planting can be done during the milder months of September and October (along with mid-August for some winter crops). For specific crop planting times for the various areas of California, refer to the UC Master Gardening Vegetable Planting webpage.Designing Your Cool Season Garden BedThe winter garden bed should have many of the same characteristics as the summer garden: a sunny and level location close to the house;a convenient water source; and, soil that drains easily. Because of possible heavy rains in winter, raised beds can solve that drainage problem for homeowners living with clay soil. Mix in other soil amendments, such as compost and manure, to improve crop production in the foggy, wet, cold days that await. For foothill gardeners, a raised bed with wooden sides has an added benefit. Those structures can support a hinged, translucent top, such as glass, polyethelene or fiberglass…an instant cold frame to protect winter vegetables from low temperatures or heavy wind and rain. Starting vegetables in the heat of the summer, especially from seed, requires a consistently moist seedbed until the plants are up and growing. An automatic garden watering system, such as a battery operated timer that attaches to a faucet, can ease that process. Cool Season Vegetable Varieties Here are some of the winter vegetable varieties that do well in Northern California, how much room to leave between the plants in each row, and how much to plant for a family of four (with moderate appetites):Artichokes: A bit of a challenge in the interior valleys. Easy to grow in coastal areas. Plant from roots, not seed. Green Globe; 4 feet apart; 5-10 plants.Broccoli: Green Goliath, Green Duke, Waltham 29; 10 inches apart; 20 foot row.Brussels sprouts: Jade Cross Hybrid; 24 inches apart; 20 foot row.Cabbage: Earliana, Copenhagen Market, Savoy King, Burpee Hybrid; 24 inches apart;15 plants. Cauliflower: Snowcrown, Snowball Y, Purple Head; 24 inches apart; 15 plants.Carrots: Nantes or Danvers half long, Short n' Sweet; 2 inches apart; 25 footrow.Chinese cabbage: Michili, Pak Choi; 6 inches apart; 10 foot row.Garlic: California Late, California Early, Elephant Garlic; 6 inches apart; 20 foot row.Kale: Dwarf Blue Curled Vates, Dwarf Curled Scotch; 10 inches apart; 12 plants.Kohlrabi: Early White Vienna, Sweet Vienna; 3 inches apart; 10 foot row.Loose leaf lettuce: Ruby, Bibb, Salad Bowl, Green Ice; 6 inches apart; 15 foot row.Peas: Mammoth Melting Sugar, Sugar Ann, Sugar Snap. 2 inches apart; 5 foot row.Onions: Stockton Red, Stockton Yellow, Walla Walla, Texas White; 4 inches apart; 20 foot row.Radish: Champion, Watermelon, Crimson Giant, Cherry Belle; 5 inches apart; 20 foot row.Rutabaga: Victoria, Valentine, Strawberry; 3 inches apart; 15 foot row.Spinach: Melody Hybrid, America, Bloomsdale Long Standing; 6 inches apart; 15 foot row.Turnips: Purple Top White Globe, Shogoin (greens); 2 inches apart; 10 foot row.Perennial Vegetables that need a lot of room:Asparagus: Mary Washington, UC72, UC157, 500w; 12 inches apart; 20 foot row.Rhubarb: Victoria, German Wine, Crimson Cherry; 2 feet apart ; 20 foot row.“It’s the Best Garden Event in Northern California!” (I said that)Harvest Day at the Fair Oaks Horticulture Center Saturday, August 5, 8am-2pm. Free!Debbie Flower and I will be talking about “Garden Tips to Save Time, Money and Water” at Harvest Day at 830 am. The Fair Oaks Horticulture Center is located at 11549 Fair Oaks Blvd, in Fair Oaks Park, Sacramento County,
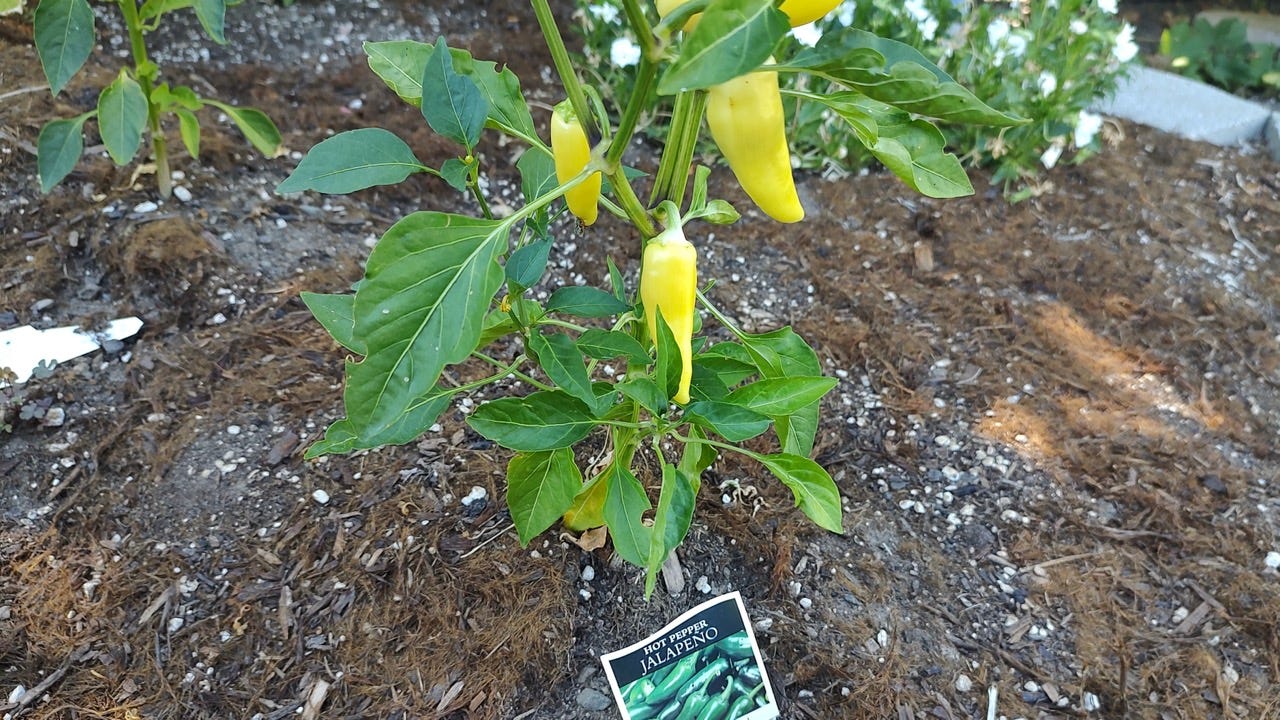
Jalapenogate
In today’s newsletter podcast, Debbie Arrington of the publication, “Sacramento Digs Gardening”, discusses why jalapeño pepper as well as other pepper seeds and plants may have been mismarked this year. Read her original story on the topic here.Did you ever grow a plant that wasn’t what you thought it would be, due to a mismarked tag or a seed packet that was incorrectly packed? It happens every year, with varieties of annual or perennial ornamentals that do not produce the exact color flower that was promised, or a vegetable variety that looks and tastes slightly different. Or, it could be the home gardener who saves seeds and grows them out in the following years. In that case, “home operator error” could be to blame, due to a mixup while sorting personal collections of harvested seeds, or attempting to save certain hybrid seeds that have a high probability of producing something different in the subsequent growing seasons. Or, it could have resulted from a surprise in the mail after placing a seed order, especially in a marketplace such as Amazon, Etsy or another vendor that you know very little about.A few years ago, I was on the hunt for a particular gaillardia, also known as blanketflower. The particular variety I was searching for was “Arizona Apricot”. This red-yellow colorful perennial (or annual, in colder climates) puts on its best show of daisy-like flowers in the summer.I finally found a source for this particular seed via Amazon. Imagine my surprise when the seed arrived, in a nondescript small plastic bag, labeled “Gaillardia seed from Qatar.” Qatar? What the heck, let’s try it. When it blossomed the next summer, it was not “Arizona Apricot.” Oh well, an inexpensive mistake on my part, shopping in a lightly regulated, on-line marketplace.But imagine this scenario playing out on a much larger scale: an American seed distributor who purchases seeds overseas for their clients here, which include home gardeners, wholesale and retail nurseries, as well as farmers growing particular varieties for restaurants and canneries. That is the current situation in the world of Jalapeño peppers - as well as a myriad of other vegetable and ornamental seeds - where seeds grown overseas (in this case, some suspect China) were mixed up before shipment. And it’s only after the plants grown from those seeds started fruiting that the alarm bells went off.Right now, there appears to be five mislabeled pepper plants - hot as well as sweet - that have ticked off home gardeners in 14 states (or more, by now) and sent larger shockwaves among those in the business of buying, selling and growing those pepper seeds. John Porter is a University of Nebraska Cooperative Extension Urban Agriculture specialist who wrote about this brouhaha from a Midwest perspective for the Garden Professors website. His research brought out this information:Getting a sweet banana pepper instead of a Jalapeño ‘Tam’, for the home gardener, is a disappointment. But for the home gardener growing sweet bell peppers, to have a “Purple Beauty” pepper turn out to be a Hungarian Hot Wax pepper could instigate a mad dash to the kitchen for a glass of burn-soothing whole milk (Pro tip: whole milk or ice cream douses the heat after eating a too-hot pepper; drinking water spreads the heat). But, then again, a gardener with any sort of wariness to hot peppers should not be taste-testing an elongated yellow pepper when they were expecting a blocky purple bell pepper.For your future reference at pepper tasting parties:It’s a Small World, After AllAs you might imagine, American growers are concerned about the future for seed mixups. Was this a one-off event, or will we see more of this in the years ahead? Michael Fiore of Smith’s Gardentown nursery in Wichita Falls, Texas is worried, and has some practical advice: save your own seed. Seed Security: It’s a Real Problem in ChinaThe Wall Street Journal, in a July 24, 2023 story, brought up an interesting angle to JalapeñoGate, without mentioning it: Corruption in the Chinese Seed Trading Business. The article states:“(Chinese) Officials say the goal is to stop the proliferation of fake and substandard seeds that could jeopardize food production and safety, while punishing officials, merchants and farmers who siphon agricultural subsidies and peddle low-grade seeds.The Farmers’ Daily newspaper cited a case where a seed company paid more than 80 local officials to sell substandard seeds across nearly 30 villages in the southwestern province of Sichuan, causing ‘severe losses for farmers’ who found that the seeds germinated at a rate far below state benchmarks.”Bottom Line: Learn the basics about seed saving.“It’s the Best Garden Event in Northern California!” (I said that)Harvest Day at the Fair Oaks Horticulture Center Saturday, August 5, 8am-2pm. Free!Debbie Flower and I will be talking about “Garden Tips to Save Time, Money and Water” at Harvest Day at 830 am. The Fair Oaks Horticulture Center is located at 1154
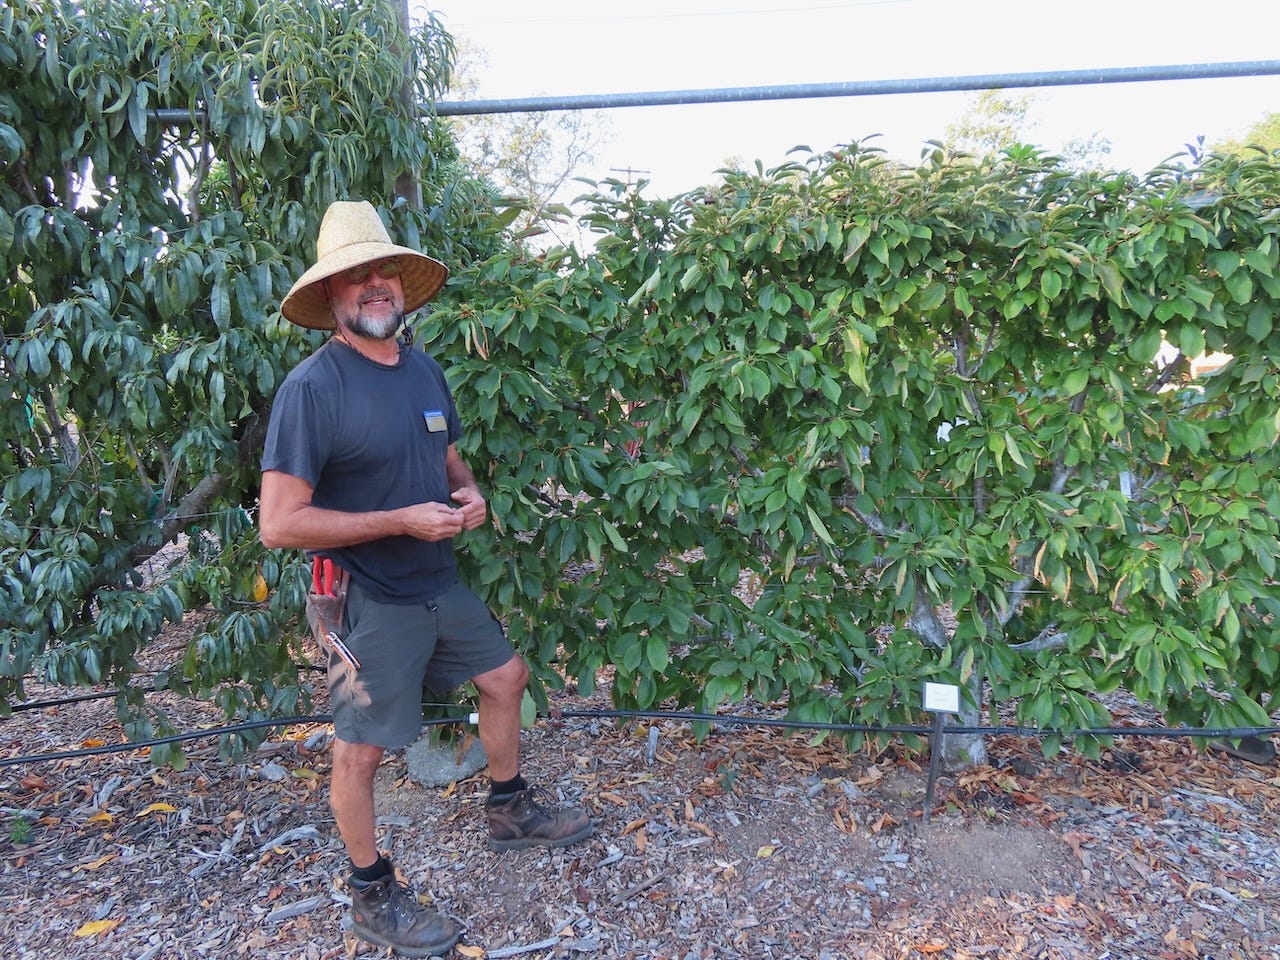
Drooping Leaves vs Heatwaves
Record-breaking heat waves have pummeled the world, especially during the last two years. What’s a gardener to do?In today’s newsletter podcast (above), Master Gardener Quentyn Young walks us through the fruit tree orchard at the Fair Oaks Horticulture Center, discussing how a record heat wave adversely effected the trees and the fruit. Plus, he has tips for dealing with extended heat waves in the home orchard.Heatwaves vs. Drooping LeavesHere we go again. Another multi-day bout of triple digit temperatures hit us last weekend and beyond. I’m just guessing that SOMEWHERE in the northern hemisphere of planet Earth, this will be the case for the balance of the summer, possibly into early Fall. What should a gardener do if the plants in your outdoor vegetable and flower gardens start showing droopy leaves when the temperature tops 100 degrees? Or, as the National Weather Service warned, 110 degrees? There are two schools of thought about what you should do. One school says plants naturally conserve moisture on a hot afternoon by allowing their leaves to sag; wait until the morning before determining if the plant needs water. According to the University of Maryland: “Sometimes a plant wilts on a hot day because moisture is evaporating from the leaves faster than the roots can take it up. If there is ample soil moisture, the plant will absorb water in the evening to restore turgor to the stems and leaves.” They also point out that hot, drying winds can also cause temporary wilting even when soil moisture is adequate.The other school says: Don't believe that first school. "Large, thin leaves, common in many ornamental, annual and vegetable species, do not conserve water," writes Washington State University Horticulture Professor Linda Chalker-Scott. "Tomatoes, zucchini and black-eyed Susans...are not water conservers. Chronic wilting of these and others can eventually cause leaf tip and margin necrosis (or tissue death). It also reduces growth, so that your yield of tomatoes, zucchini and black-eyed Susan flowers will be decreased." She advises applying a layer of mulch around those plants to help conserve water.However, be forewarned: drooping leaves can also indicate a lack of oxygen in the soil due to too much standing water. Using a moisture meter, plunge it into the soil to a depth of eight to 12 inches. That can help determine whether the suffering plant might benefit from a drink of water or that there is too much water present in the soil. Check the moisture in the root zone before your usual watering, as well. Improper watering is the number one cause of plant failure.The U.C. Master Gardeners of Marin County offer some tips to relieve heat stress on plants during extreme weather events:• Water thoroughly in the morning on days when high temperatures are expected, to help plants cope with excess heat. If discovered in time during a heat wave, a drooping, wilted plant can often be revived with additional water. • Watch for radiant heat - Pay special attention to plants next to walkways, patios, and other structures that radiate heat. They may be the first to show signs of heat stress and the need for extra water.• Add mulch - Apply two to four inches of organic mulch over the root areas around garden plants, trees, and shrubs. This will lower soil temperature and diminish moisture loss.• Provide shade - Use shade cloth to provide direct sun protection and reduce the air temperature around sun and heat-exposed plants. • Avoid applying fertilizers during extreme heat as they stimulate growth and add to plant stress. Fertilizers also absorb moisture from the root zone.• Harvest ripening fruit to give plants a break during hot spells. Fruiting plants will drop flowers during periods of extreme heat to conserve energy. And a few more pieces of advice from the University of Maryland:• Severe heat and water stress when a plant is in bloom may cause scorching or browning of flower buds and blossoms.• Locate garden close to a water source. Be prepared to water all vegetable plants deeply at least once each week during hot, dry weather. • Conversely, vegetable plant roots growing in poorly drained soils can quickly become deprived of needed oxygen leading to wilting and yellowing and browning of leaves and stems. This will be most noticeable on tight, clayey soils during prolonged rainy periods and can lead to severe disease problems. Avoid poorly drained soils. Plant in raised beds if necessary. “It’s the Best Garden Event in Northern California!” (I said that)Harvest Day at the Fair Oaks Horticulture Center Saturday, August 5, 8am-2pm. Free!Debbie Flower and I will be talking about “Garden Tips to Save Time, Money and Water” at Harvest Day at 830 am. The Fair Oaks Horticulture Center is located at 11549 Fair Oaks Blvd, in Fair Oaks Park, Sacramento County, California. Hope to see you there! More details here. Presented by the U.C. Master Gardeners of Sacramento County.Thank you for also listening to the Garden Ba
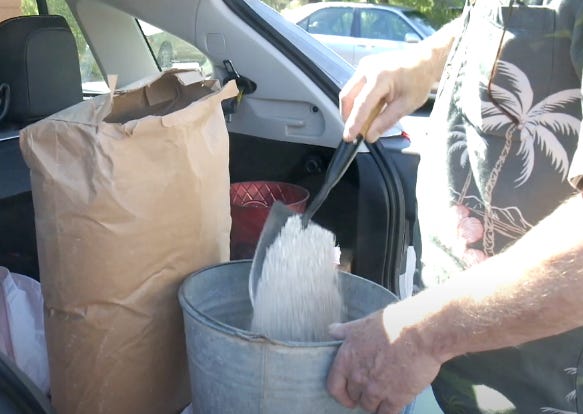
Is Your Fertilizer Radioactive?
Phosphorus, in the world of plant fertilizers, is considered a macronutrient, an important element used by plants. Phosphorus is used to promote root and tuber growth, as well as the production of flowers and seeds. But, do you really need to add it every time you fertilize? And why have 13 states - as well as several municipalities - placed restrictions on the use of phosphorus?Phosphorus is the “P” in “N-P-K”, the percentage of macronutrients found listed on the front of a container of fertilizer. But how much phosphorus do your plants need for sufficient growth?Apparently, not as much as Calcium or Magnesium, according to this chart presented as evidence by the University of Wisconsin. Should phosphorus be getting as much credit as Nitrogen or Potassium, every time you look at a bag of fertilizer? Garden author Robert Kourik (“Sustainable Food Gardens”) points out that not only is Phosphorus over applied by gardeners, it may not be organic, and it is certainly detrimental to the health of aquatic life when it is allowed to runoff into local streams. And speaking of detrimental, in today’s newsletter podcast (above), Kourik talks about the time he took a bag of phosphorus fertilizer to the local radiation analyst. Things started clicking! He has video, too:According to the Chicago Botanic Garden, when too much phosphorus is applied or is applied at the wrong time—such as right before it rains—most of it is washed away and ends up in the local waterways. This type of pollution is called nonpoint source pollution. It causes eutrophication (a reduction of dissolved oxygen in water bodies caused by an increase of minerals and organic nutrients) of rivers and lakes. This reduced level of oxygen in water ends up suffocating fish. Several municipalities have banned the use of phosphorus-containing fertilizers for turf or lawn areas. These laws are designed to protect local water quality in lakes, streams, and ponds. According to several experts, in most cases, phosphorus is not needed to maintain a healthy lawn. Retailers near towns that have enacted a ban are required to alert customers about the prohibition of phosphorus in fertilizers for lawn and turf by posting a sign where fertilizers are sold.At least 11 states ban phosphorus fertilizer use or sale: Illinois, Maine, Maryland, Michigan, Minnesota, New Jersey, New York, Vermont, Virginia, Washington, and Wisconsin.More are joining that group, including Pennsylvania and Florida, as well as several cities and counties, especially those that border large bodies of water. But it isn’t just lawns. Phosphorus, as well as nitrogen, are facing restrictions in all fertilizers offered for sale there.Consider these controversial restrictions that are in Brevard County Florida:“Spring is a popular time to fertilize the lawn, but did you know there are wrong ways to fertilize plants? Are you aware that a fertilizer ban goes into effect on June 1?Follow these fertilizer ordinances throughout Brevard County which state:* No nitrogen or phosphorus can be applied to any plants between June 1 and Sept. 30.* When applying a fertilizer with nitrogen, it must contain a minimum of 50% slow-release nitrogen and must be applied at a maximum rate of 1 pound of nitrogen per 1,000 square feet per application.* Phosphorus can only be applied if a soil test indicates it is needed.* When applying phosphorus, a maximum of .25 pounds per 1,000 square feet can be applied at one time, with a maximum of .5 pounds per 1,000 square feet applied yearly.* Do not fertilize if heavy rain is forecast.* A 10-foot fertilizer-free zone next to water bodies must be maintained in Cape Canaveral, Cocoa, Indian Harbor Beach, Malabar, Palm Bay and Satellite Beach. Residents living in unincorporated Brevard County, Melbourne, and Melbourne Beach must maintain a 15-foot fertilizer-free zone along water bodies. The City of Rockledge has a fertilizer-free zone east of Rockledge Drive. All other municipalities not mentioned have a 25-foot fertilizer-free zone along the IRL, Banana River and any other water body.* Keep fertilizer and grass clippings on the lawn and off sidewalks, driveways, roads and out of storm drains and water bodies.”Is Phosphorus Radioactive?According to the EPA, The United States mines and consumes about 23 million tons of phosphate rock per year, most of it (95%) for wet-process phosphoric acid or super phosphoric acid intended for fertilizers, with the balance used to produce phosphorus compounds for industrial applications, primarily glyphosate herbicide.The most important use of phosphate rock is in the production of phosphate fertilizers. Due to its chemical properties, phosphate rock may contain significant quantities of naturally occurring radioactive materials (NORM):* Uranium* Thorium* Radium* Their decay productsUranium concentrations in phosphate ores found in the U.S. range from 20 - 300 parts per million (ppm). Thorium occurs at essentially background levels, between 1 - 5 ppm
Six Common Tomato Problems
For those of you who did not receive last Friday’s Beyond the Garden Basics newsletter, here it is. My apologies. I will send the gremlins to bed without dinner.In today’s newsletter podcast (above), we chat with Don Shor of Redwood Barn Nursery in Davis, CA. Don is a big fan of growing tomatoes, and it helps that his nursery is located in a county that just so happens to be one of the top tomato producing regions in the entire world. In this conversation about tomato troubles (originally aired in June of 2020 on the Garden Basics with Farmer Fred podcast), Don talks about many of the tomato travails we discuss in today’s newsletter, along with a few more. Alas, we did not get into many tomato issues (especially diseases) that might be daily occurrences in more humid climates, nor did we discuss everybody’s summertime garden pal, the tomato hornworm. We’re saving that for a future newsletter.The tomato, according to the National Gardening Association, is America’s favorite backyard vegetable. 86% of American gardens contain at least one tomato plant. Nothing beats the flavor and aroma of a homegrown tomato in the summer. However, with that pleasure, comes a bit of pain. Now is the time when several tomato problems can crop up, leaving gardeners fretting about the future of their plants.“Why are the tomato blossoms falling off?”Tomato growers’ primary concern during the plant’s young growing stage is centered around, “Why are the tomato blossoms falling off?”According to the tomato experts at UC Davis, blossom drop is usually weather related. Nighttime temperatures below 55 or daytime temperatures above 90 degrees can cause premature blossom failure on tomato plants. Planting tomatoes too early in the spring is stressful for the plants. Late April through early June is good for planting most tomato varieties here.Other causes of tomato blossom failure and fruit drop include planting tomatoes where there is too much shade or using too much nitrogen fertilizer. Be sure to read and follow all label directions on a fertilizer intended for tomatoes and vegetables.Thinking of using a tomato hormone spray to help the plant maintain its blossoms? The tomato experts at UC Davis say that won’t work when temperatures are forecast to be in the 90’s or above.Abiotic Disorders of Tomato PlantsAccording to the University of California Statewide Master Gardener Program, five of the most common tomato maladies are abiotic disorders. “Abiotic” does not refer to pests or diseases, but to environmental issues, such as unfavorable soil conditions, temperature extremes, physical or chemical injuries, and watering issues – either too much or too little, and, of course, “operator error.” The abiotic problems of tomatoes include:• Sunburn Sunburn or sun scald is recognizable by a light brown or leathery-looking area on the sides of tomatoes that are getting hit by direct sun. Too much sunlight on tomatoes can be controlled by not pruning away leaf cover; maintaining plant vigor to produce adequate leaf cover; or, providing partial shade with a light-colored shade cloth or row cover during the hours of most intense sunlight.• Blossom End Rot This looks like sunburn, except it's the bottom of the tomato that becomes brown. Generally, it is a calcium deficiency brought on by fluctuating soil moisture or soils with too much salt. Maintain even soil moisture; amend the planting area with compost to improve water retention; avoid heavy applications of high-nitrogen fertilizer; and, if a soil test determines the area is lacking calcium, adding gypsum to the soil at the end of the season.• Fruit Cracks (Catfacing) Cat Facing refers to the circular concentric cracks around the stem end. Cracks that radiate outward from the stem, or malformation and cracking at the blossom end is also called fruit cracking. This happens when blossoming and fruit formation begins during hot weather as well as high soil moisture levels. Most gardeners just live with these conditions, knowing they can just cut away the damaged looking area and still have a tasty tomato. To help limit future outbreaks, keep the soil evenly moist; maintain leaf cover; give the plants some partial shade during hours of most intense sunlight; and add mulch, about three to seven inches high, around the plant, to maintain soil moisture and moderate temperature swings.• Solar Yellowing and Green Shoulders Noticeable by a yellow or yellow-orange color. Also, the upper portions of the tomato remain green even though the lower portion looks red and ripe. Caused by high temperatures and high light intensity, the solution - once again – is to maintain adequate plant vigor to encourage more leaf cover, avoid over-pruning, and provide partial shade during the hours of the most intense sunlight.• Leaf RollThe older tomato leaves may roll upward and inward suddenly and become stiff to the touch, brittle and leathery. Caused by high light intensity and high soil moisture, particularly when the t

Selecting and Caring For Garden Hand Tools
Trying to decipher the basics on how to sharp garden hand tools can be a bit daunting to understand in an audio format. Here’s Sacramento County Master Gardener Bill Black, with his YouTube video about garden tool sharpening. Every picture tells a story, don’t it?How to Care and Store Your Garden Hand ToolsAs the weather heats up, don’t ignore your garden tools after a hard day in the yard. A good habit to get into is to clean and store your garden tools correctly before you go indoors for the afternoon.We know that cleaning the mud and dirt off shovels, trowels and other digging tools can help prevent rust. Did you know that how you store your garden tools might also lead to rust? On the Garden Basics podcast (Episode 165, “Garden Tool Care”), retired college horticulture professor Debbie Flower explained how that could happen.“On a garage surface, for example, moisture can move up through a concrete floor, if it's just a pad on the ground,” Flower said. “And that can cause the tips of a shovel to rust.”The cure for that? Hang the tools or store them upside down, she says.“Use wall hooks to hang the tools,” says Flower. “Or you can make tool storage dividers in which the tool sits on the ground, but it's the handle that touches the ground, not the metal blade.”And the wise gardener can help ensure that their garden tools can last a lifetime by first purchasing well-made tools. San Joaquin County Master Gardeners Lee Miller and Victor Rosasco advise you: instead of purchasing several inexpensive tools, pick the one tool that you will use the most, and then buy the highest quality one you can find.In a previous edition of the San Joaquin County Master Gardener’s newsletter, “Garden Notes,” the pair write that good tools can last a lifetime and you get what you pay for. An example would be a spading fork with heavy forged tines, such as one from English toolmaker Clarington Forge. It might cost about three times more than a cheaper spading fork. They point out that the cheaper spading fork might have inexpensive tines that will bend after a few plunges into heavy clay soil. Whenever possible, purchase tools that are forged from one piece of metal. They are stronger and less likely to be compromised. A spading fork usually has four flat, wide tines that make it much easier than a shovel for penetrating tough soil, turning raw compost, transplanting, or weeding.The duo also points out that shovel heads made of sheet metal, wrapped around the handle, are less expensive…but not as strong and durable as ones forged with a socket for the shovel handle. “When you step into the soil on a shovel and the blade feels like it is moving sideways, you know you have a cheap shovel,” they advise. “Good shovels also have blunt tops or pads so when you step on the shovel, it is more comfortable.”The Master Gardeners point out that tool sharpening is a required skill to keep shovels and pruners in good working order, so you don’t have to work as hard. Miller and Rosasco say that surprisingly, many cutting and digging tools are not sharp upon initial purchase: “Right off, it is important to sharpen them. After this initial sharpening, tool edges can be maintained with a sharpening stone or a mill file. Files sharpen only on the forward stroke. So, it is ‘stroke, lift, return, and stroke again’. For pruners, loppers, or any fine cutting tool, never use a grinder. If the edge is nicked, as sometimes happens when we accidentally cut wire or another hard surface, a file is best for removing the nicks. If it’s just dull, a small sharpening stone, file or diamond sharpener can be used.”The pair agree that maintenance is key for protecting your investment in quality garden tools. Store your tools indoors. Moreover, don’t forget to give them a bit of care: “Keep tools, especially shovels, clean and shiny,” they say. “Dirt left on the tool creates a rusty surface to which more dirt will stick. Use a wire brush or whatever is at hand to remove dirt after using. Spraying with a vegetable oil or a commercial penetrating oil and water-displacing spray (such as WD-40) will help keep rust away while stored.”In an earlier edition of this newsletter, we asked the experts about the pros and cons of choosing bypass vs. anvil pruners. You can check out that edition from February 2022 here.“It’s the Best Garden Event in Northern California!” (I said that)Harvest Day at the Fair Oaks Horticulture Center Saturday, August 5, 8am-2pm. Free!Debbie Flower and I will be talking about “Garden Tips to Save Time, Money and Water” at Harvest Day at 830 am. The Fair Oaks Horticulture Center is located at 11549 Fair Oaks Blvd, in Fair Oaks Park, Sacramento County, California. Hope to see you there! More details here. Presented by the U.C. Master Gardeners of Sacramento County.Thank you for also listening to the Garden Basics with Farmer Fred podcast! It’s available wherever you get your podcasts. Please share it with your garden friends.Fred Hoffman is also a Un

Summer Cucumber Issues
Today’s newsletter podcast (above) features Master Gardener/Vegetable Expert Gail Pothour, discussing her favorite cucumber varieties, as well as tips and tricks for their success. Originally featured in Episode 263 of the Garden Basics with Farmer Fred podcast, in which we talked about the Top 5 favorite homegrown vegetables, according to the National Gardening Association. According to the NGA, cucumbers are the second most popular crop for home gardeners. Number One? Tomatoes, of course. A transcript of our conversation with Gail about cucumbers can be found towards the bottom of this newsletter. Meanwhile…Tackling Summer Cucumber IssuesLast week we tackled the topic of poor pollination of summer squash plants. The lack of late spring zucchini fruit production is usually due to uncooperative weather, a lack of bee activity, or erratic coordination of the development of the male and female flowers of those vines. This week, we turn our attention to a close relative of summer squash, cucumbers. Cucumbers are the second most popular homegrown vegetable (after tomatoes), according to the National Gardening Association. And sure enough, many gardeners are fretting now about these summertime princes of the pickling world.We asked our favorite retired college horticulture professor, Sacramento-based Debbie Flower, about the primary needs for growing cucumbers successfully. She says freshness, warmth and water are at the top of the list.“The soil needs to be moist, not wet, but moist, all the time,” explains Flower. “Cucumbers are a warm season plant, a warm season annual. They need soil temperatures to be quite warm when you seed them. And you typically want to direct seed them, not start them from transplants ahead of time. They get root bound while in a container, it dwarfs them. They will never grow very big. If you do that once in your gardening life, you’ll remember it. It's such a disappointment.“I just tried my second time planting my cucumber seeds. I had planted some old seeds a few weeks ago and that might have been my problem. In general, you don't want to keep cucumber seeds more than two years. And these were two-year-old seeds. Even though I stored them correctly, in the refrigerator over those two years, they just didn't germinate. So yesterday I planted fresh seed. I would advise starting with fresh seed, plant them directly into the garden when your night temperatures have settled at 50 to 55 degrees Fahrenheit or greater. They need six to eight hours of sun, that's considered full sun. They need well drained, fertile soil and regular moisture.”Cucumbers are natural climbers and are less prone to rot issues and diseases when grown vertically. Training them up one or two heavy-duty, 6-gauge metal livestock panels to support the cucumbers eases harvesting chores.Cucumbers can also be grown in large containers, 18-24” deep. According to the Santa Clara County Master Gardeners: 18" to 24" deep containers (such as half-barrels or livestock watering troughs) can be used for deep-rooted vegetables such as tomatoes, potatoes, zucchini, winter squashes, beans, corn, cucumbers.Solving Cucumber BitternessA very bitter gardener wrote to us recently: “I have never managed to grow vigorous cucumber vines, and the cucumbers themselves are often bitter. I've heard many explanations for this, including lack of water, weather that is too hot and weather that is too cold. What is the truth?”We solicited the advice of three University of California cucumber experts about controlling bitterness. All had similar answers.• Select the newer hybrid varieties, which have been bred to reduce the cause of the bitterness. That’s according to Dennis Pettinger, longtime UC Cooperative Extension Environmental Horticulturist. He adds, “If the cucumbers express bitterness, it can usually be eliminated by peeling away the skin and outer flesh and removing the stem end.”• According to the Contra Costa County Master Gardeners, the newer cucumber varieties that have been bred to be less bitter include Diva, Sweet Success, Cool Breeze, Summer Dance, Improved Long Green, Eversweet, Ashley, Sunnybrook, Saticoy Hybrid, and Lemon.• Plant cucumbers in full sun and adjust your watering with the weather to reduce plant stress. El Dorado County Master Gardener Kathy Ruiz writes, “Cool temperatures and shady sites seem to trigger bitterness in cucumbers. Research notes that temperature variations of more than 20 degrees, moisture stress and storage on the vine too long or near other ripening vegetables also can cause bitterness.”• Again, moisture consistency is key. UC Master Gardener Chantal Guillemin of Contra Costa County writes: “Since cucumbers require ample and regular irrigation during their growing period, add mulches, composted green waste or manure to the soil to increase the soil’s water-holding capacity and supply nutrients to the plants.” Compost or well-aged manures should be mixed into the soil well before planting. Then, top
Where's the Zucchini?
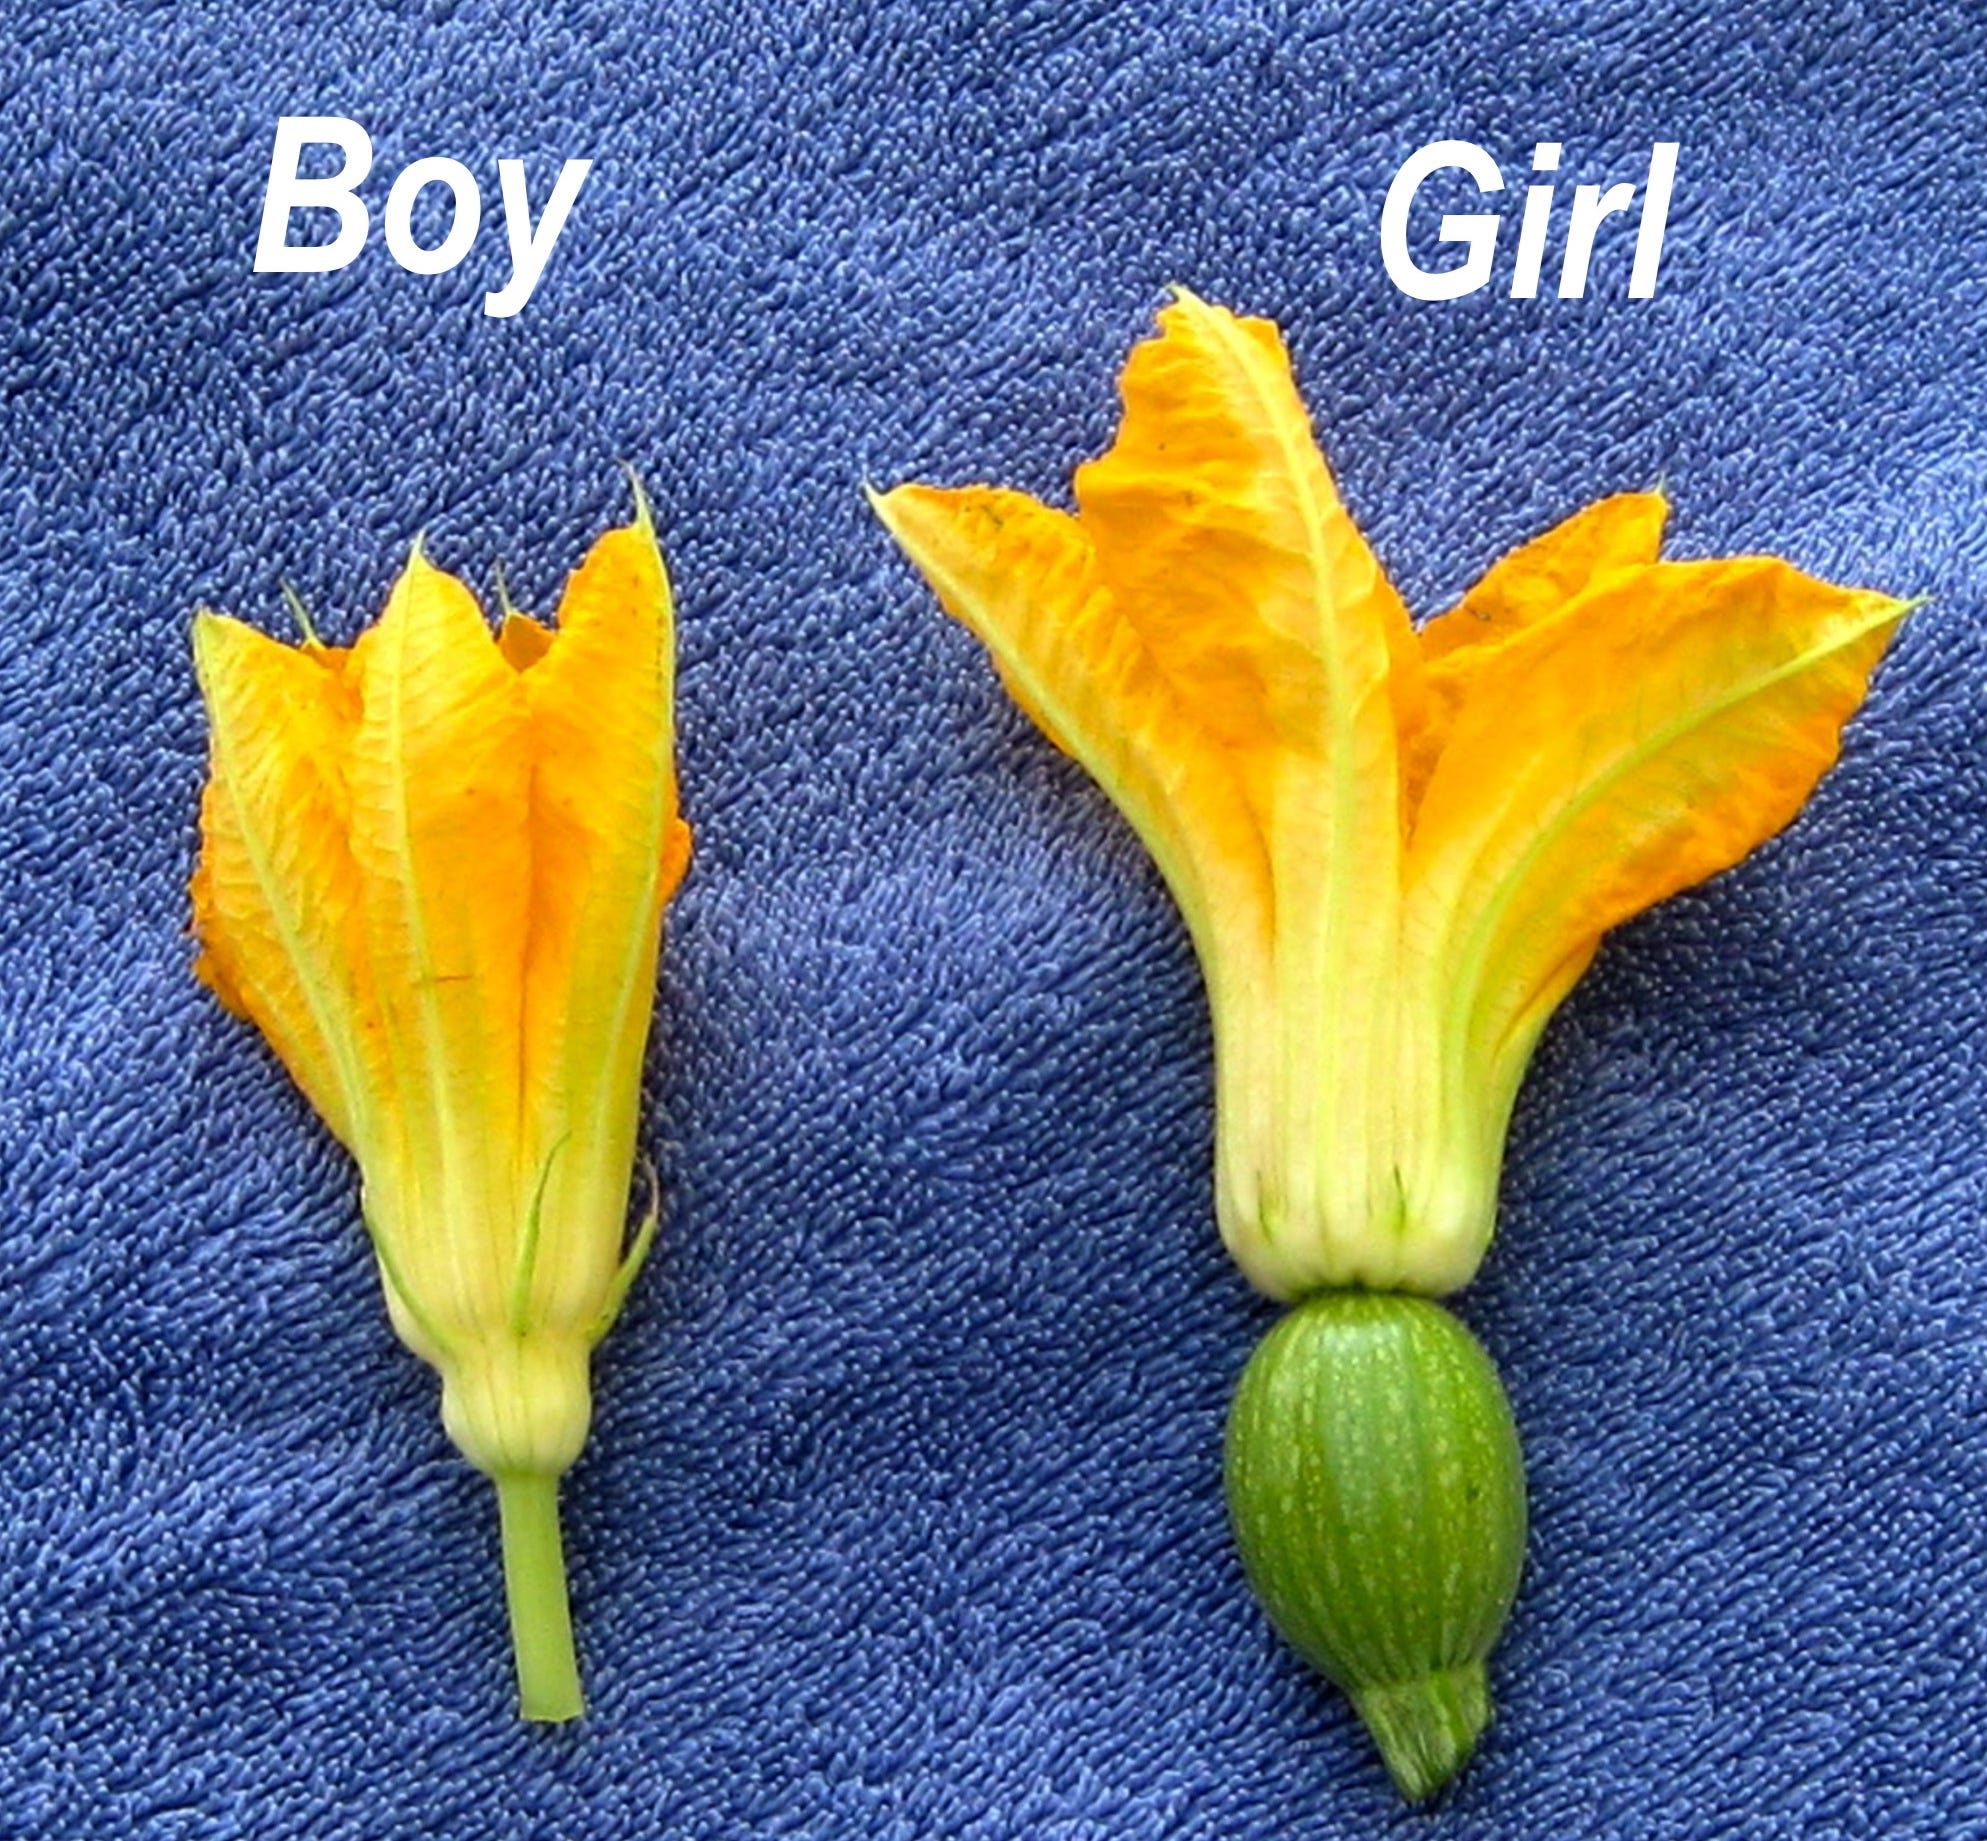
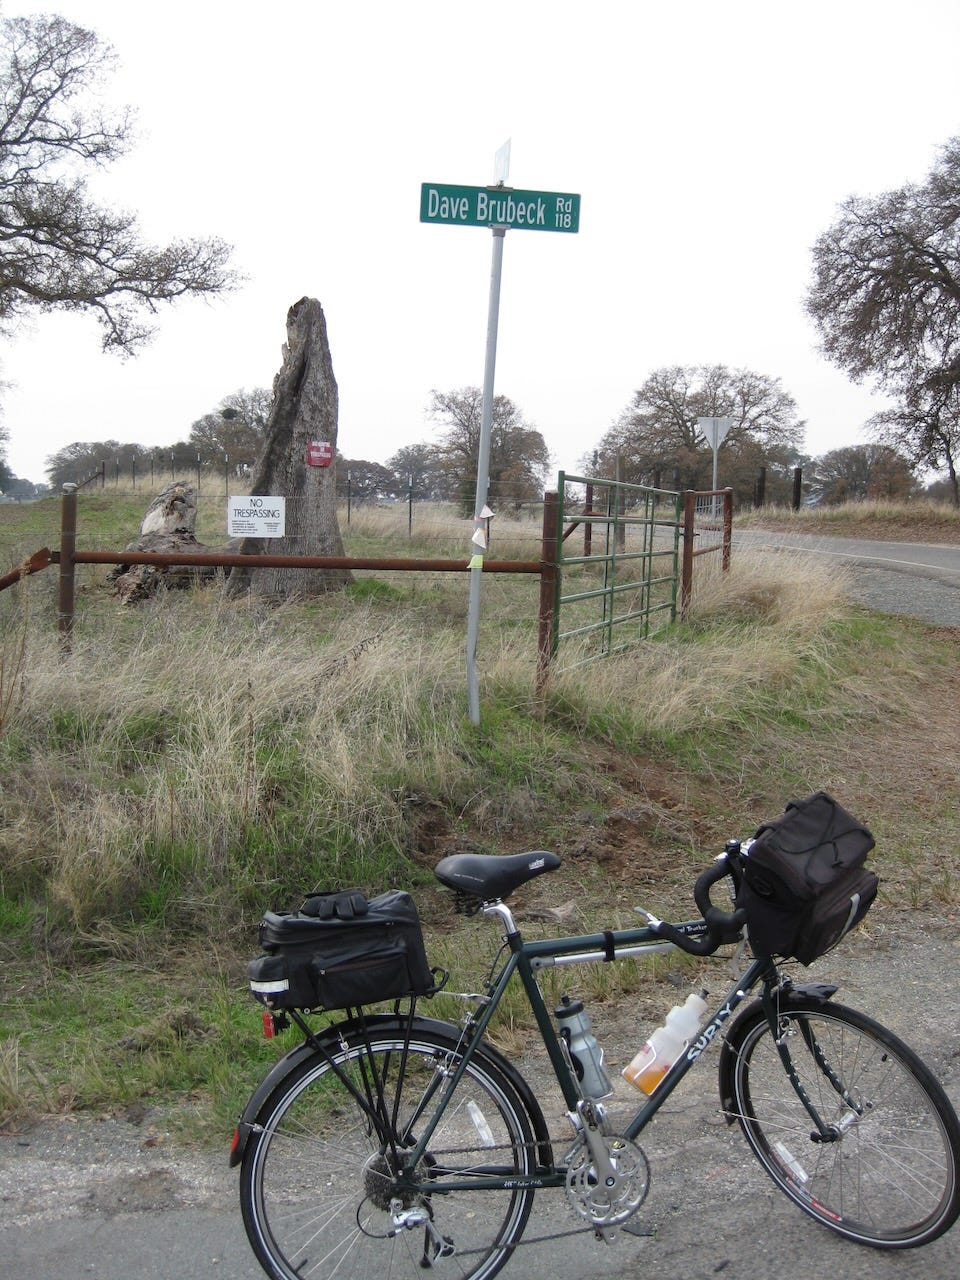
Where is the zucchini? That question is a popular one in the garden e-mail bag lately. Gardeners are fretting over a total lack of summer squash flowers. Other problems include zucchini flowers that drop off, or young fruit that dies back.A lot of it has to do with timing. Many gardeners tend to plant zucchini seeds at the same time as tomato and pepper plants, usually in April. That’s a bit too early. The heat-loving summer squash varieties get off to a better start when planted in May or June.However, there are more variables.Squash needs daytime temperatures in the 80’s and 90’s for best results. Usually, it’s too much heat - temperatures at or above 100 degrees – that slow zucchini production here. Lately, daytime highs have been in the 70’s, a bit below what those squash plants require for quicker results. In addition, if that yellow squash is an older, heirloom variety, it may not grow as vigorously as a newer hybrid variety. Another limiting factor can be too much shade. Make sure all squash plants receive as much sun as possible.Zucchini and other members of the summer squash family typically have a hard time producing fruit in late spring and early summer, due to incomplete pollination. This problem should straighten itself out if bees are in the area and the weather cooperates. Most years, these issues sort themselves out by July. And before you know it, you’ve got more zucchini than you need or desire.However, you can help that struggling squash plant, according to Hunter Johnson, Jr., a retired University of California Cooperative Extension Vegetable Specialist.According to Johnson, gardeners often become concerned when many squash flowers appear early, but fruits fail to set. The reason for this: all the early flowers produced are males, in heirloom squash varieties. Female flowers develop somewhat later. In newer, hybrid varieties of summer squash, the first flowers to appear are usually females, and these will fail to develop unless there are male squash flowers, and bees, in the nearby area.Squash and other members of the cucurbit family have this flowering habit, which is unique among vegetable crops. They bear two kinds of flowers, male and female, both on the same plant. For fruit set to occur, pollen from the male flower must be transferred to the female flower. The pollen is sticky; so, wind-blown pollination does not occur. Honeybees are the principal means by which pollen is transferred from the male to the female flower. When bees are absent, fruit set on garden plants in the cucurbit family is very poor and often non-existent. If only a few bees are present in the area, partial pollination may occur, resulting in misshapen fruit as well as low yield.When no bees are present in the garden or the bee population is too low, the dedicated gardener can stand in for the bee by pollinating by hand. Hand pollination is a tedious chore, but it is the only means of obtaining fruit set in the absence of bees. The pollen is yellow in color and produced on the structure in the center of the male flower. You can use a small artist's paint brush to transfer pollen, or you can break off a male flower, remove its petals to expose the pollen-bearing structure, and roll the pollen onto the stigma in the center of the female flower.When hand pollinating, it is important to use only freshly opened flowers, early in the day. Flowers open in the morning and are receptive for only one day.The female flower in cucurbits can be recognized easily by the presence of a miniature fruit (ovary) at the base of the flower. The female squash flower is borne on a very short stem, with that bulge at the base. The male squash flower can be identified by its long, slender stem.As far as all that extra zucchini you’ll get later in the summer? Consider donating it to a food bank, food pantry, or food closet in your area. Find the one nearest to you at ampleharvest.org.Thank you for also listening to the Garden Basics with Farmer Fred podcast! It’s available wherever you get your podcasts. Please share it with your garden friends.Fred Hoffman is also a University of California Cooperative Extension Master Gardener in Sacramento County. And he likes to ride his bike. This is a public episode. If you'd like to discuss this with other subscribers or get access to bonus episodes, visit gardenbasics.substack.com/subscribe
Growing Healthy Greens Year Round
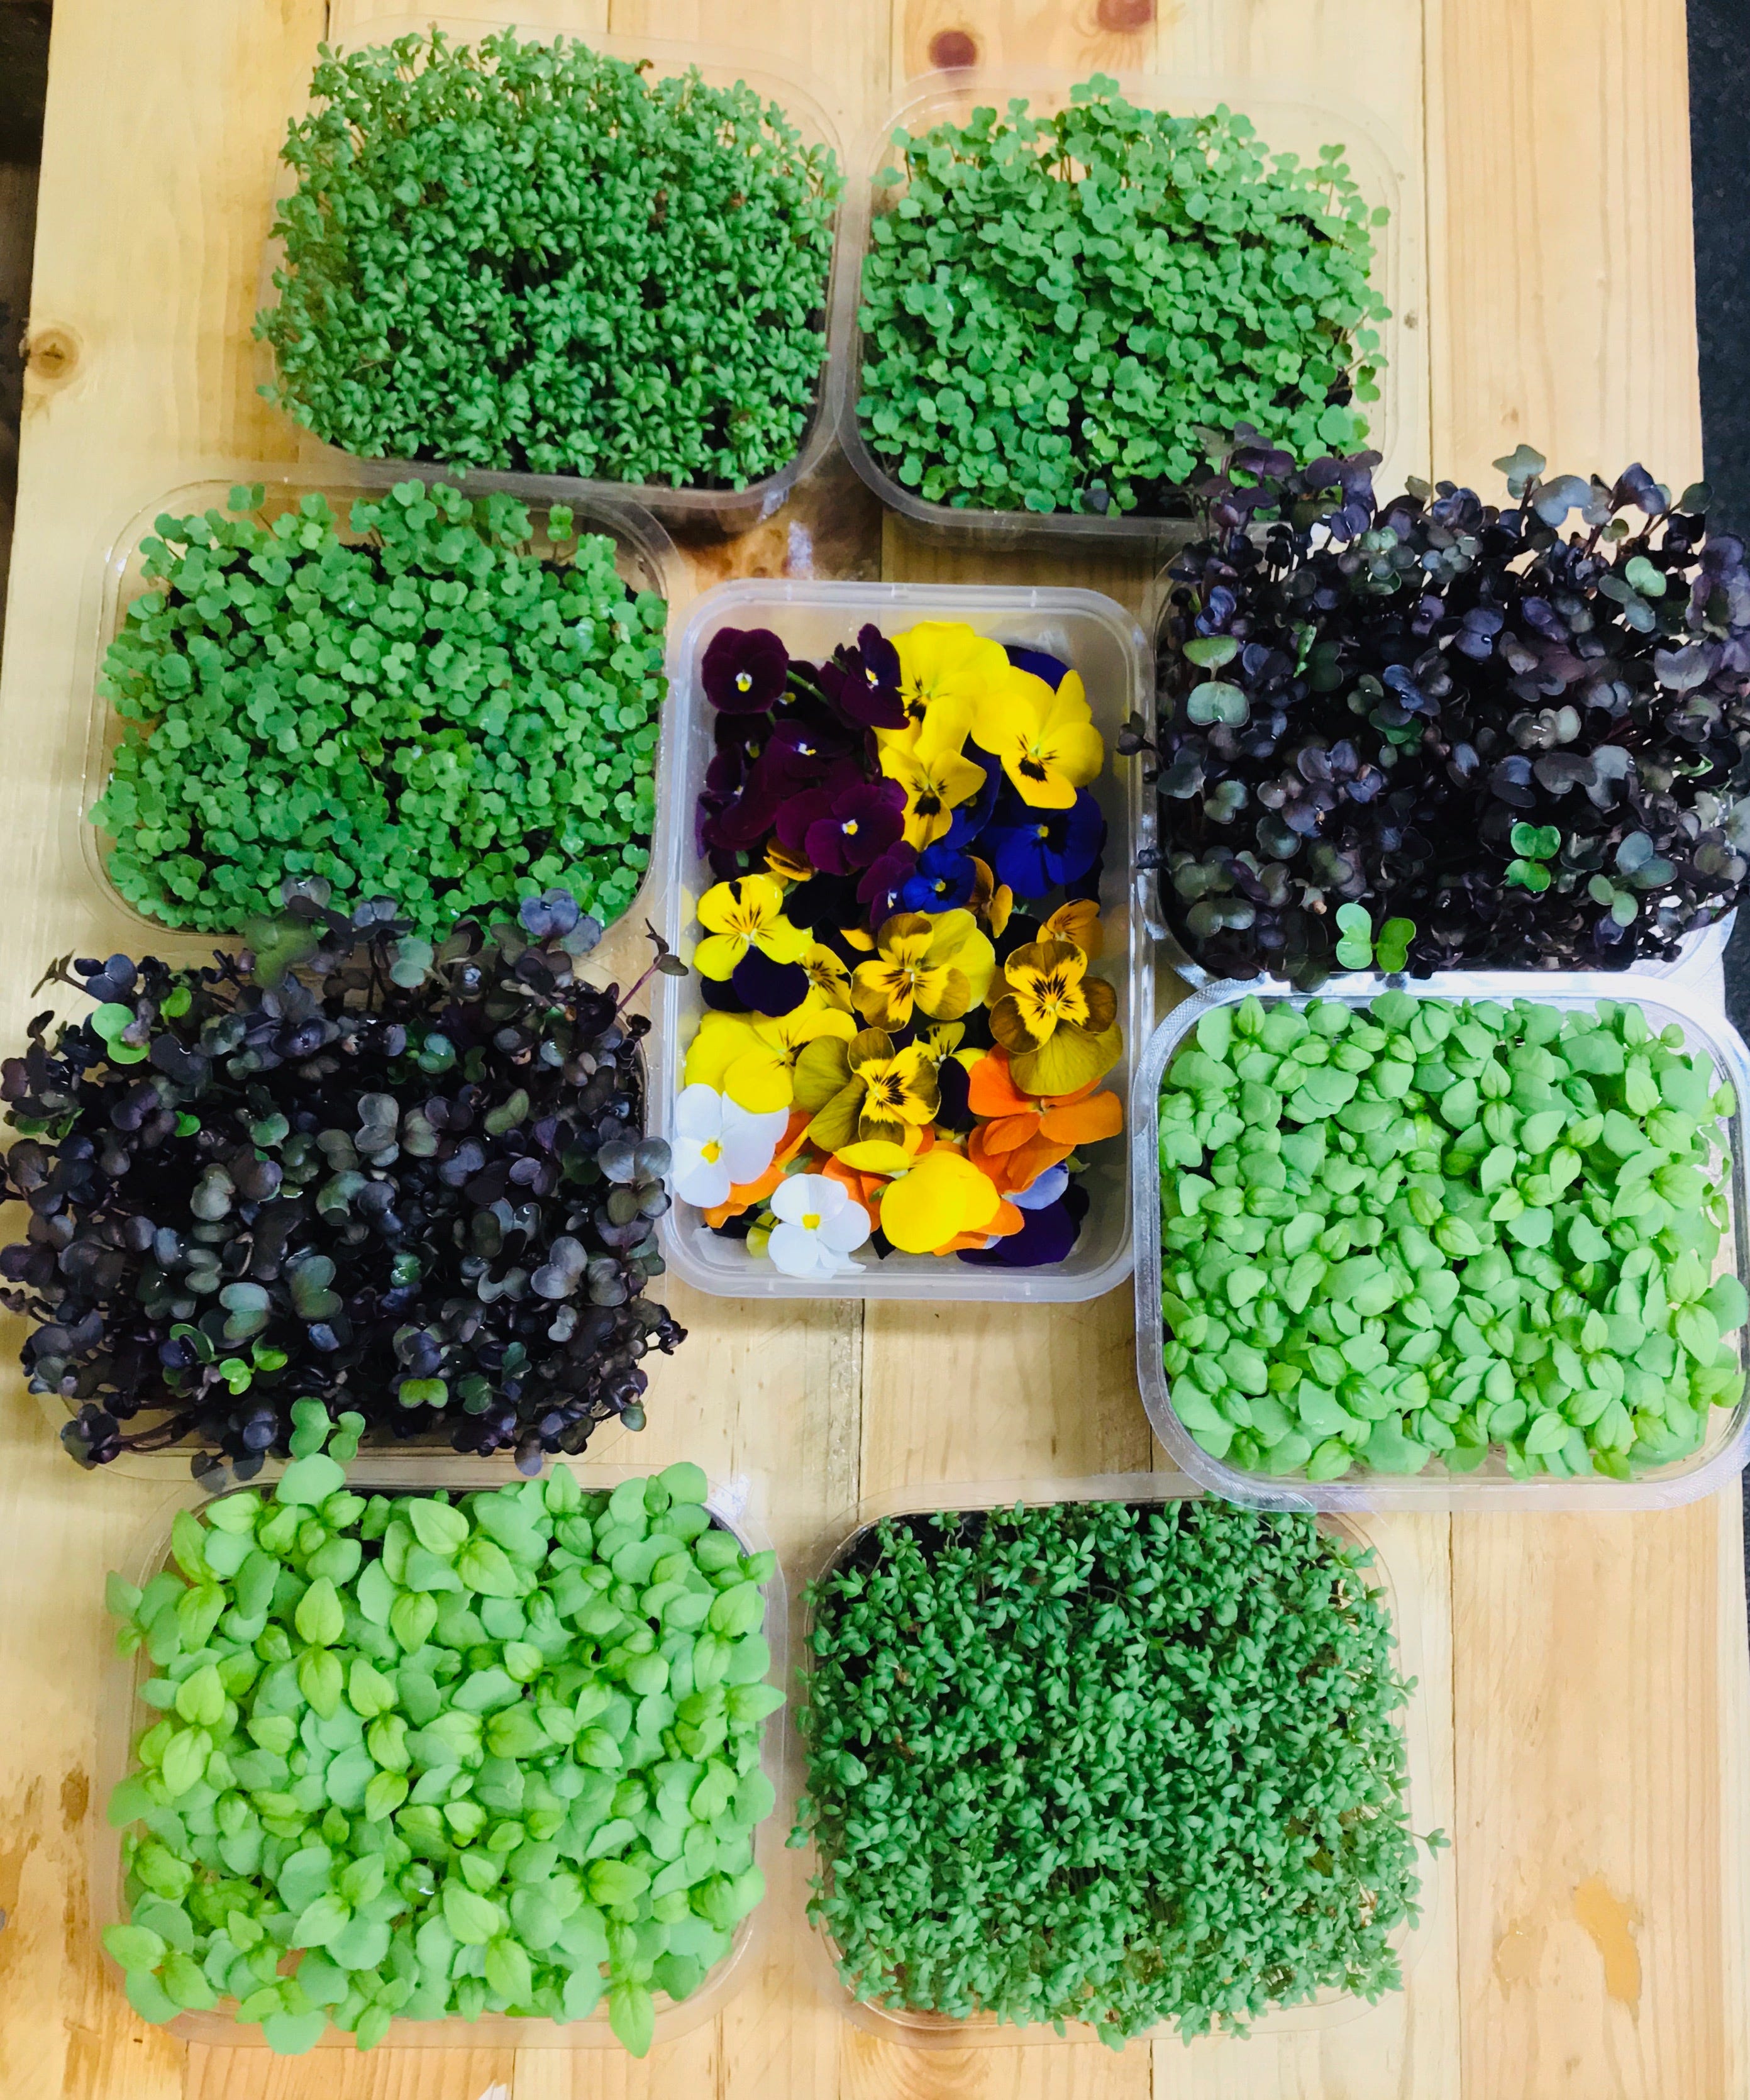
If you listened to this week’s Garden Basics with Farmer Fred podcast (Ep. 269: “Growing Your Brain Food Garden”), you heard Dr. Laura Varich of FreshPhysician.com tout the cholesterol-fighting qualities of many home grown vegetables. Lowering cholesterol levels is widely known as a key factor in reducing heart disease. According to Varich, you’re not only doing your heart a favor, but also your brain. High cholesterol levels can also lead to blockages in the brain which can lead to a stroke. And recent evidence has shown that the same narrowing of those brain vessels is also associated with Alzheimer's disease. It seems that plaques and tangles that develop in Alzheimer's disease are likely not to cause the disease, but are instead the brain's response to the damage to that poor blood flow. Examination of the brains of Alzheimer's patients have found significant blockages in the arteries that bring blood to the critical memory centers of the brain. In other words, it's very similar to heart disease and stroke. High blood cholesterol is a major risk factor for the development of Alzheimer's disease.Among the garden crops that are some of the best for reversing high cholesterol levels (in conjunction with a reduction in consumption of ultra processed food and getting regular exercise) are greens, whole grains and cruciferous vegetables such as broccoli, cauliflower, kale and cabbage. She is especially fond of growing microgreens. Here’s Dr. Varich’s list of the nine best food groups for brain health:If you live in a hot summer climate, however, growing many of the greens and cruciferous vegetables is seemingly near impossible before they bolt and turn bitter. Those crops definitely prefer a cool climate (where summer temperatures seldom get into the upper 90’s), or the mid-to-late fall, winter, and early spring climate of USDA Zones 9 and 10.So can a hot climate gardener, who wants to eat healthier homegrown vegetables year-round, thwart this summertime stop sign? Yes.In today’s Beyond the Garden Basics newsletter podcast (above) we present three ways to eat healthy, homegrown greens year round:* Growing Microgreens with Master Gardener Gail Pothour (at 00:00 of the newsletter podcast)* How to Grow Cilantro in a Hot Summer Climate with Renee Shepherd of Renee’s Garden seed catalog (22:37)* Growing the Cheapskate Salad Bowl, with Brad Gates of Wild Boar Farms (25:24)Lettuce Varieties to Grow in Hot Summer ClimatesAn especially vexing garden issue for greens lovers in USDA Zones 8, 9 and 10: How do you grow lettuce in the summertime? We discussed this in Episode 264 of the Garden Basics podcast with vegetable expert and Master Gardener Gail Pothour. A transcript of that conversation follows:Farmer Fred: All right, now we come to number nine on the list of the 10 most popular garden vegetables and it's a cool season crop in California. If you live in a very mild climate, or the Bay area of California, you can certainly grow all the lettuce varieties you want. And I can I can see why people grow lettuce and I hope that you try something different than Iceberg. Iceberg, to me, is the least nutritious, colorless, tasteless, lettuce that has fallen into mass marketing. There's a lot of leaf lettuce varieties that are so much tastier and also can withstand heat better than Iceberg.Gail Pothour: Yeah, I was gonna say Iceberg doesn't do that well in the Sacramento area. We're too hot. And so we generally recommend gardeners to try looseleaf or romaine or one of the butterhead types. But if you need to have an Iceberg, pick that up at the store, don't try growing it. It won't do that well here.Farmer Fred: Yeah, it's a waste of space. As a matter of fact, I have been on a lifelong garden search for a lettuce variety, a loose leaf lettuce variety, that can take the heat. Some are better than others as far as getting through July, perhaps. But it seems like when July turns into August, they all start bolting.Gail Pothour: Right. And actually, several years ago, we did an experiment two years in a row at the Fair Oaks Horticulture Center. Because we get this question a lot, “Why can't I grow lettuce in the summer?”. So we thought okay, let's find some varieties, and grow them through the heat of summer and see how they do. First off, you need to start with some varieties that are heat resistant, like Jericho that was bred in Israel, so it's a little more heat resistant. And we tried half dozen or so different varieties we monitored when we planted them, how many weeks it was before they started bolting. Some did better than others. Some did pretty well. But what we found is you need to mulch heavily to keep the moisture in, to keep them well watered, provide shade during their entire lifespan in the summer, and then be prepared as soon as one starts to bolt, take it out and then replant with another transplant. So kind of a succession planting. It is possible but it's a lot of work. It takes a lot of water and shading and

11 Garden Tips for Success
Recorded last week in front of a live audience at a meeting of the Sun City/Lincoln Hills (CA) garden club. Included a Power Point presentation, which I mistakenly referred to as “slides”. And yes, I still have a slide projector in a closet somewhere, along with a box of slides of my cross-country bicycle trip in 1988. It’s probably next to the Betamax VCR and the Sony 630-D reel-to-reel stereo recorder (sweet!). But, at least I know what a “podcast” is!1. ALL GARDENING IS LOCAL. In your own yard, there are microclimates where certain plants will have a better chance for success. For example, monitor the morning low temperatures in various areas of your yard to find the warmest home for citrus trees. Just moved to a new home and wondering what grows well there? Take a walk through your neighborhood. Mimic the garden successes that you see.2. KNOW YOUR SOIL. A complete soil test will let you know what nutritional elements your soil is missing, including nitrogen, phosphorus and potassium; and, micronutrients such as calcium, magnesium, boron, iron zinc, sulfur and others. University of Massachusetts/Amherst, Colorado State University, and Texas A&M offer a complete soil test at very reasonable rates. For the do-it-yourselfer, there are variety of test kits available for testing pH (Rapitest), and LaMotte kits for pH as well as Nitrogen, Phosphorus and Potassium. All plants are adapted to a certain pH range of soil acidity or alkalinity. Monitor your soil moisture with a soil probe, moisture meter, trowel or screwdriver.3. RIGHT PLANT, RIGHT PLACE. In our area, roses won’t bloom in full shade and many tomato varieties won’t produce fruit. On the other hand, winter daphne, impatiens and hydrangeas will croak in full sun. Know the sunlight requirements for your plants in your location. The Sunset Western Garden book is a good source for finding out how much sun or shade your plants need where you live.4. MULCH, MULCH, MULCH. Benefits of mulch: Retains moisture. Keeps soil temperature constant, reducing plant stress. Suppresses weeds. Gradually increases soil organic matter, feeding the soil. Attracts beneficial organisms that improve soil fertility and porosity. Mulch encourages healthier plants, reducing the needs for pesticides and fertilizers. Protects roots and plants from mechanical injury. On hillsides and around rural homes, it suppresses the spread of brush fires.5. MOTHER NATURE BATS LAST. When you apply broad-spectrum synthetic insecticides, the bad bugs will eventually find a way to overcome that issue, usually developing a resistance to that chemical. The same is true of weeds, treated repeatedly with herbicides. To battle the bad bugs, lend Mother Nature a helping hand. Limit the use of insecticides and provide the right plants for food and shelter for beneficial insects. Build it and they will come.6. WHAT’S OLD IS NEW AGAIN. Growing heirloom fruit and vegetables is not a passing fad. A University of Texas study showed that older varieties of vegetables are more nutritious than their newer, hybrid counterparts. Beneficials are attracted to the fragrance of older flower varieties. In the Sierra Foothills, the Felix Gillet Institute is rescuing Gold Rush-era fruit and nut trees. These abandoned specimens, uncared for since the 1800’s but still thriving, may hold the key for future drought tolerant plants as well as a gene pool for adding pest and disease resistance to new varieties.7. EVERYTHING YOU KNOW IS WRONG. In the 1940’s & 50’s, DDT was available to home gardeners as a pesticide. Turns out, it caused cancer and killed birds. In the 1960’s-70’s, the Modesto Ash was considered the “perfect shade tree” for the Central Valley of California. Turns out, it is susceptible to anthracnose, mistletoe and is no longer recommended. In the first decade of the 21st century, the pesticides Diazinon and Dursban were taken off store shelves for health reasons. Proven ineffective, despite claims to the contrary: Vitamin B-1 for transplant shock, store-bought ladybugs, and tomato calcium spray to cure blossom end rot.8. IF IT WORKS FOR YOU, FINE; BUT KEEP AN OPEN MIND. If you're using safe gardening techniques that others frown upon - and those techniques are working…well, who are we to tell you to stop? Still, new research, techniques or equipment may make your chores a heck of a lot easier and satisfying. Today’s solution could become tomorrow’s problem. Be open to change.9. READ AND FOLLOW ALL LABEL DIRECTIONS. The instruction label on all pesticides is the law. Don’t assume that an insecticide or herbicide will kill a bad bug or weed if it is not listed on the label. Follow the instructions for when and how to apply the product.10. LIFE IS TOO SHORT TO PUT UP WITH A PROBLEM PLANT. Become familiar with the euphemism, “Shovel-Prune.”11. BERMUDA GRASS IS FOREVER. Runners on top of the soil, rhizomes beneath the soil, prolific seed heads, roots that can live for decades, just waiting for a bit of light. Instead
Thin Your Fruits and Vegs, Now!
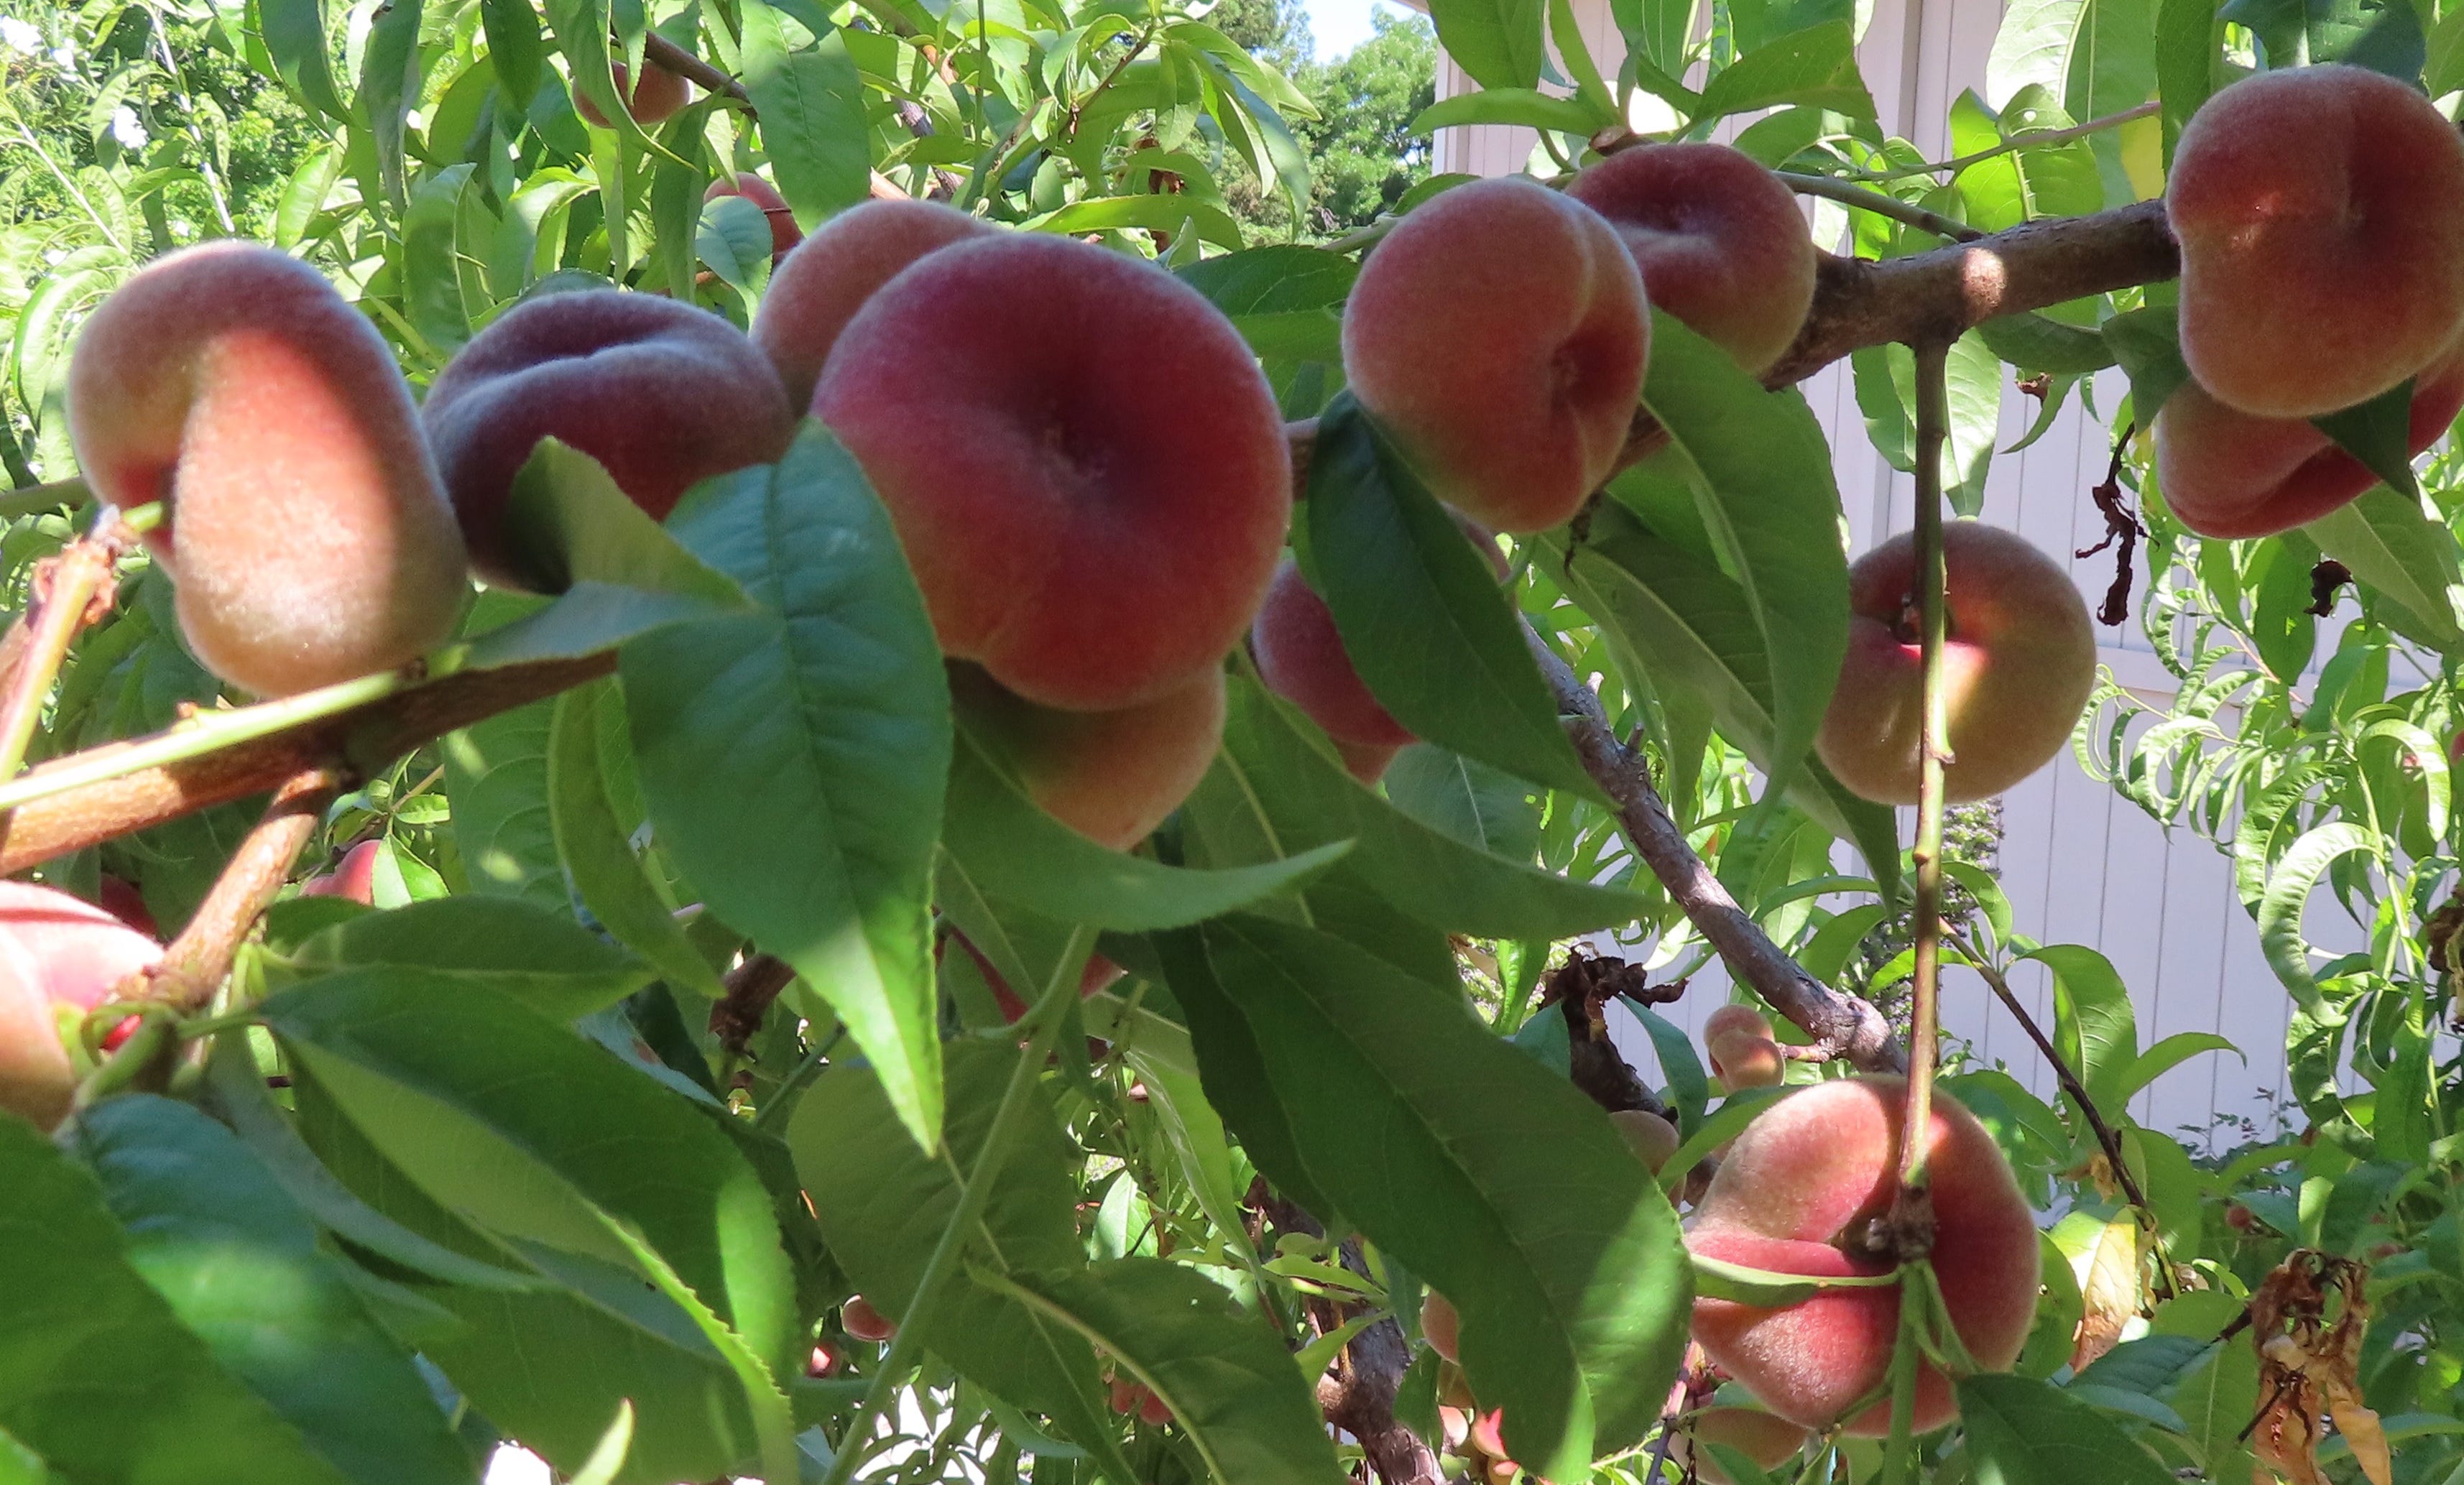
Thinning Crowded Fruit on Fruit Trees, Shrubs and VinesA prolifically producing peach tree next to an often-used walkway in our narrow side yard serves as a not so-subtle reminder this time of year: thin the fruit before trouble begins. And if a glance up into the canopy of your peach, pear, nectarine, apple, kiwifruit, persimmon, apricot, or other deciduous fruit trees and vines (including table grapes) shows crowded young fruit, take action. Rubbing or tightly packed little fruit in a tree now can lead to big problems in the summer, such as undersized fruit, injured or diseased fruit, excessive fruit drop, and broken fruit tree branches.Some tips:• Remove some of the fruit. Space fruit evenly along each branch, with perhaps five inches between each piece of fruit. More importantly, be sure to leave the largest sized fruits on the tree or vine.• For table grapes, remove grape bunches so that there is at least six inches of space between each remaining bunch of table grapes. Cut off the "tails" from the remaining bunches at that same time. This is the lower one-quarter to one third of the bunch, where it begins to taper down in size. This will send more energy to the remaining grapes on the bunch.• Because of their small size, cherries are not usually thinned from backyard trees. In addition, nut crops, such as almonds and walnuts, are not thinned.• For shrub-like fruit bushes, such as blueberries, pruning may not be necessary on older shrubs with thicker branches that can support the weight of the fruit. Younger plants may need thinning if you see the branches bending precariously. And, as you may have noticed, the local bird population may be helping you thin the blueberries. That’s a definite sign that those blueberries are close to being ripe. If the robin population seems to be spending most of their time around your berries, cover the plants with bird nettingThe UCANR informational sheet, “Fruit Trees: Thinning Young Fruit” has more deciduous spring fruit thinning advice.• Citrus trees tend to thin themselves, a phenomenon called “June Drop.” However, citrus fruit thinning now can help that tree produce next fall and winter.Certain citrus types, such as Valencia oranges and some mandarins, produce heavily one year followed by a year with sparse production. This is called alternate bearing. You can reduce the potential of a tree to alternate bear by reducing the fruit load in a heavy fruit set year by thinning out some of the fruit.Also, fertilize less in light years and more in heavy fruit production years so that the trees needs are met according to the demands of the fruit load. Despite using these strategies, some varieties will just alternate bear. Do not allow the old citrus fruit to stay on the tree longer than necessary. This may contribute to a smaller crop and perhaps, more fruit drop, for next year’s crop.More Fruit Thinning Tips• Here’s a valuable tip from the experts at Louisiana State University: when thinning fruit, keep looking at the tree; don't look at the ground. Seeing all that fallen fruit may dissuade you from the primary task. Cut off the excess fruit. Pick it up when finished pruning. Don’t try to juggle the chores of pruning and catching the fruit in a bucket. You may need both hands free for gently moving one piece of fruit out of the way to prune out the unwanted fruit.• Snip off, don’t pull off, the fruit. Pulling can damage the branch, inhibiting future production. The best tool to use for thinning is a pair of needle-nose pruners. The long, thin blades can easily get into tight spaces to snip the fruit along its stem.VEGETABLE THINNINGPlanting easy-to-grow vegetables that can get out of hand quickly is a time-honored gardening tradition in the spring. Carrots, corn, cucumbers, eggplant, radishes, summer squash and winter squash all emerge with little effort, but can take over a garden by summer. The problem is: because the emerging plants are small, many gardeners don’t have the heart to thin them out to their proper spacing.The result is an undersized crop, greater incidence of pests and diseases, or, too much of a good thing. The popular summer squash, zucchini, is a perfect example of the latter. Here are the planting and thinning instructions for zucchini seeds from the Burpee Seeds website:“Sow one to two seeds about 36 inches apart. Cover with one inch of fine soil. Firm lightly and keep evenly moist. Zucchini seedlings emerge in 10-14 days. Thin to one plant when seedlings have two sets of leaves.” That seems reasonable. And thrifty. And certainly clearer than these instructions on the back of a packet of Ferry-Morse zucchini seeds:Not sure how you leave three seedlings on one 2’x2’ hill, and yet space the plants four feet apart.Because they have calloused hands but soft hearts, many backyard gardeners will ignore rational spacing instructions, let alone keeping only one plant. And what happens? Overwhelmed gardeners go on midnight runs in August, surreptitiously pl

The Best Roses For Cut Flowers
(From a 2022 interview with Master Rosarian Debbie Arrington. Originally aired on May 20, 2022, Garden Basics podcast)Farmer FredWhat is America's favorite flower? Well, of course, it's the rose. Something like 85% of all Americans say their favorite flower is the rose. How do you grow them? Well, we've talked about that on this show. You can go back and look for various episodes of the Garden Basics podcast where we talked about planting roses and pruning roses. We've even talked about fragrant roses. However, our next guest we've had on several times talking about roses, including the most edible roses. It's Debbie Arrington, Master Rosarian, the typist behind the Sacramento Digs gardening blog, a daily effort that has all sorts of good gardening tips including tips on roses. And Debbie, I am so into cutting roses now for display indoors. Is this what happens when you get old? You just descend into a cut flower garden mode. And that seems to be what I'm doing. And all of a sudden, I love going out to the yard every day, and picking off some rose branches and bringing them inside for display. And from my perspective, what I'm looking for in a rose as a cut flower is something that maintains its beauty for several days, if not longer. Something that, when I'm picking it, chances are I won't get stuck by a prickle. I mean little prickles are okay, but I don't want anything too thorny if you will, please. Maybe something that doesn't shed a lot while it's on display. Things like that. Everybody has their own criteria, as you might discover. And I imagine, Debbie Arrington, in the world of Master Rosarians, this might be a topic of great discussion, shall we say?Debbie Arrington Yes, it is. Because there are literally tens of thousands of different rose varieties that you could choose from, and everybody has their own opinion of what is “the best”. But the qualities that you describe is a rose that has a long stem, a presence in the room and in the vase, has few prickles, so you aren't getting thorns in your finger every time you admire it. Those are all qualities that people that grow roses professionally want in a rose. And those are also good things to have in your own garden roses. So we have several favorites that we can share with you today. I should add that I'm President of the Sacramento Rose Society, and we just had our 74th annual show. And it was our first show in three years due to COVID regulations. So we had a lot of pent up energy. And our roses seem to, as well, because we had well over 1000 blooms in the room.Farmer Fred Wow. And who won?Debbie Arrington Oh, the the top prize went to Marilyn Monroe, not mine this time. But one that was grown by Charlotte Owendyk. Marilyn is an outstanding show rose. She's one of the best exhibition roses ever introduced. But I don't necessarily recommend Marilyn for everybody's garden because she has some of the most vicious thorns you will ever see on a rose plant. It's only because she is so beautiful she ever made it to the market.Farmer Fred Okay, I'll cross that off my list.Debbie Arrington The roses that were sitting next to her up on the top shelf are both really good garden roses, as well as exhibition roses that fit all the qualities that you want in a cut flower with a lot less pain. And those are Ring of Fire, which is a hybrid tea that is a dark orange bordering on red. And it just sort of flows. And it's a really large, but the buds measure about two and a half up to three inches long. Then when the flower opens fully, you know, it's about five, six inches across is a big rose the color. It has a sort of inner burning orangey color beneath the red. So it just sort of glows in the vase, so very eye catching rows and excellent dark green foliage. So it just really sets it off nice. And it puts out very long stems easily 24-30 inches, this great big rose on the top. So they're very handsome. And the other one that was the Princess of our show was was the aptly named Hot Princess. And Hot Princess is a wonderful rose, both in the garden and in the vase, because it has beautiful form to it, a beautiful point that slowly opens, it has that sort of rolling pedals. That's a dark dark pink, and another one that has this almost fluorescent color to it. And so both of those make them very eye catching. And when you're competing against 1000 other roses, you have to have something that is going to draw the eye to it other than than the other flowers next to it, and it does it in the garden and also does it in the vase, both those roses. One of the reasons they're so outstanding for exhibition is because they put out good long stems. The key to growing long stems is when you cut a rose, is to cut a lot of stem with it. And that includes deadheading to the plant. Right now people have a lot of roses, they've gone through their first flush of bloom. And there's a lot of dead roses on the plant that have spent flowers. Most people will just snip them off with ma
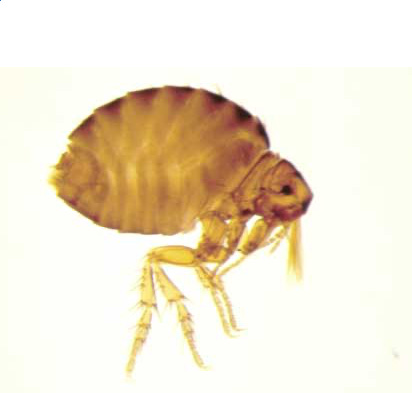
Flea and Tick Control Tips
As the weather warms, so do outbreaks of fleas and ticks. Today’s newsletter podcast features an interview with retired veterinarian and Master Gardener Heidi Napier, who talks about these pests, along with a scenic bypass about controlling slugs and snails using less toxic products that won’t harm your kids or dogs.Flea Control TipsThis pest can live indoors and out, as well as on your pets. However, a combination of remedies can reduce a flea population. The trick, though, is to attack the problem simultaneously on three fronts: indoors, outdoors and on your pets. Here are a few flea control suggestions from the UC Integrated Pest Management Program.Inside the Home:• Wash throw rugs and the pet’s bedding in hot, soapy water once a week.• Vacuum daily or every other day to remove flea eggs, larvae, and adults. Include upholstered furniture, cushions as well as in cracks and crevices of furniture.• Vacuum carpets, especially beneath furniture and in areas frequented by pets. Recent studies suggest that destroying the vacuum bags isn’t necessary.• Use a hand sprayer to treat all carpets with an insecticide that contains an insect growth regulator. The most effective spray products contain the Insect Growth Regulator methoprene or pyriproxyfen. Aerosol foggers don’t provide the coverage and long-term effectiveness of direct sprays.• Hand spray pet sleeping areas, areas beneath furniture, baseboards, and windowsills.On the Pet:• If you administer oral or topical products early in the year before flea populations begin to build, the products can prevent fleas from establishing themselves in your home. Contact your veterinarian for advice in selecting the best flea-control product for your situation.• Use a spot-on or oral treatment, which can be purchased in pet stores or from vets, or a systemic oral treatment, which is available from vets only. Active ingredients suggested by UC that are available over the counter include Fipronil and Imidacloprid. Prescription products include those with the active ingredients Dinotefuran, Lufenuron, Nitenpyram, Pyriprole, Selamectin and Spinosad.• University of California research has shown that neither Vitamin B1 supplements nor brewer's yeast prevents fleas from feeding. In addition, herbal collars and ultrasonic devices are not effective flea repellents.• In our home, we spend quality time with our cat and dogs when we bring out the flea comb. This fine-toothed comb manages to pick off at least a couple of fleas from the cat each week, as well as letting us know when there is a major flea outbreak.Outside the Home:• If you treat your pets with spot-on or oral treatments, you’ll rarely need to spray outdoors.• Sprays are only necessary outdoors if you detect lots of fleas, usually in shady areas or places where pets rest. To locate heavy infestations, walk around pet resting areas wearing knee-high white socks. If fleas are present, they will jump onto the socks and be readily visible.Tick control tips from UCANR:* Ticks can spread several diseases to humans and pets, but Lyme disease is the most common. In California, Lyme disease is carried by the western blacklegged tick which occurs throughout the state.* Lyme disease has been reported in most California counties, but some areas pose higher risks than others.* You can protect yourself from ticks and the diseases they transmit by wearing long pants and long-sleeved shirts outdoors, using an EPA registered repellent with 20-30% DEET, or applying permethrin to clothing. * Check yourself often after being outside in areas that are prone to ticks (forests, woodlands, and grasslands).* Shower within 2 hours of exposure to ticks and place clothing in a hot dryer for an hour to kill any ticks that may be on them.* Safely remove ticks with tweezers by grabbing the tick as close to the skin as possible and slowly pulling it out.* The California Department of Public Health (CDPH) says to control ticks around your home, remove leaf and grass litter from your yard and create a 3-foot barrier of mulch or gravel between your lawn and unmanaged or forested areas.From the University of Massachusetts/Amherst Hort Notes, May 2023:Q. I have been receiving offers and seeing advertisements for services to spray for ticks and mosquitoes. Is this something to consider and is it safe?A. Perimeter yard sprays are recommended as part of a three phase plan: Protect Yourself, Protect Your Pet and Protect Your Yard. I tell people not to depend on a yard spray as their only effort. Wearing permethrin treated clothing/footwear should be a front-burner tactic; a yard spray is a way to further reduce exposure risk.As far as yard spraying, this is something you can easily do yourself with a hose-end sprayer available at any garden center. Check out our video on yard spraying, as well as other resources about ticks, at capecod.gov/ticks(link is external). When contracting a service, there are key questions to ask about what, where and when to spray.* Wh
Can Human Food Also Be Plant Food?
Interview with Robert Pavlis of GardenMyths.com:Can Human Food also be Plant Food? (It depends how you apply it.)(originally aired in Episode 126 of the Garden Basics Podcast)Farmer Fred: What do you give plants to drink besides water and plant food? This question actually has been asked on many social media outlets, and in many gardening groups. And you might be surprised at the number of household kitchen products that are given to plants. Are they worth it? There is one gentleman who actually tackles a lot of garden myths. He's even written a book on the subject. It's Robert Pavlis. He's a well known speaker-educator, with over 40 years of gardening experience. He's the author of several books including "Building Natural Ponds", "Soil Science for Gardeners", and "Garden Myths". And he publishes the popular gardening blog, gardenmyths.com as well as garden fundamentals.com . He gardens in Ontario, Canada, and Robert Pavlis, it's a pleasure to have you on the program. Tell us, for those of us who aren't familiar with gardening conditions in Ontario, Canada, exactly what your seasons are.Robert Pavlis: Well, we have a USDA Zone five garden, so we have a fairly long winter. Around here we don't get great snow cover but we do have snow and then we have hail and sleet and everything in between. And then it gets warm and then it gets cold. So even though our winters aren't that cold, the problem here is that we have this freeze-thaw problem. Then spring comes, the summers are quite humid, quite hot. So today is 29 degrees centigrade (84 F). And fall comes pretty quick. And you know, by middle September, while things are finished in the garden by October, we could have frost.Farmer Fred: So if you're going to grow a summer vegetable garden there, you start around Mother's Day and wrap it up by, I guess, the end of September.Robert Pavlis: Yeah, well, our traditional last frost date is May 24. That's moved back now to around May 10. So a lot of gardeners up here will try to extend that season. So we use things like rowcovers, or we gamble, what I call gambling in the garden. And I plant things two or three weeks early and hope it doesn't freeze. But that doesn't always work. And we try various other ways to keep things a little warmer. But yeah, early May. Tomatoes and warm season crops, they probably won't go out until late, middle-late May, depending on the year.Farmer Fred: All right. So a bit shorter than here in California, to say the least.Robert Pavlis: Just a little bit. Right.Farmer Fred: All right. Well, I love your GardenMyths.com column that you post, and people can subscribe to it. It's free, and you get email notifications when they are released. And awhile back, you had one on feeding plants from the kitchen, discussing which products actually work. And for those of you who are short of time, the quick answer is, "not many". But I am amazed, though, at what food scraps people are feeding to plants that they think will work. I guess we should start off with discussing exactly how plants absorb nutrients.Robert Pavlis: Plant roots only absorb certain things. And they have to be what I call small molecules. So nitrogen, potassium, phosphate, these are all small molecules. But what you have in most plants is large molecules, proteins, carbohydrates, and so on. And you can put all that you want on a plant, it can't use it until it decomposes. That's why that composting process is so important. We're taking large molecules, converting them to these small little nutrients that plants can use. And until that happens, plants get no benefit. And they need a certain amount of those, they need a fair amount of nitrogen. They use a fair amount of potassium and phosphate, and then they use about a half a dozen other minor nutrients like calcium, magnesium, manganese, and sulfur. And they need all of those. So one of the things I look at when we're talking about the stuff we're putting on our plants, the first question you really need to ask is, what nutrients are in there? And by the way, the one nutrient that most soil is missing is nitrogen. And I won't get into why, just accept the fact that most of the other nutrients are probably there in the soil. But nitrogen can go away very quickly. It doesn't stick to soil, it runs away. So in most cases, growth is controlled by the amount of nitrogen you give your plants. Now, if you are deficient in one of those other things, you also need to add that one, but nitrogen is a key one. So the key question is how much nitrogen is in what I called food scraps, adding to my plants, and if it's very minor, then it's really not going to do much for your plants.Farmer Fred: And besides, it has to be converted by the soil biology into a form that the plant can use.Robert Pavlis: That's right, and nitrogen is used mostly as nitrates and some as urea. But plants pretty much use nitrates. So if I take a big protein molecule, which has lots of nitrogen in it, and I give it to my p

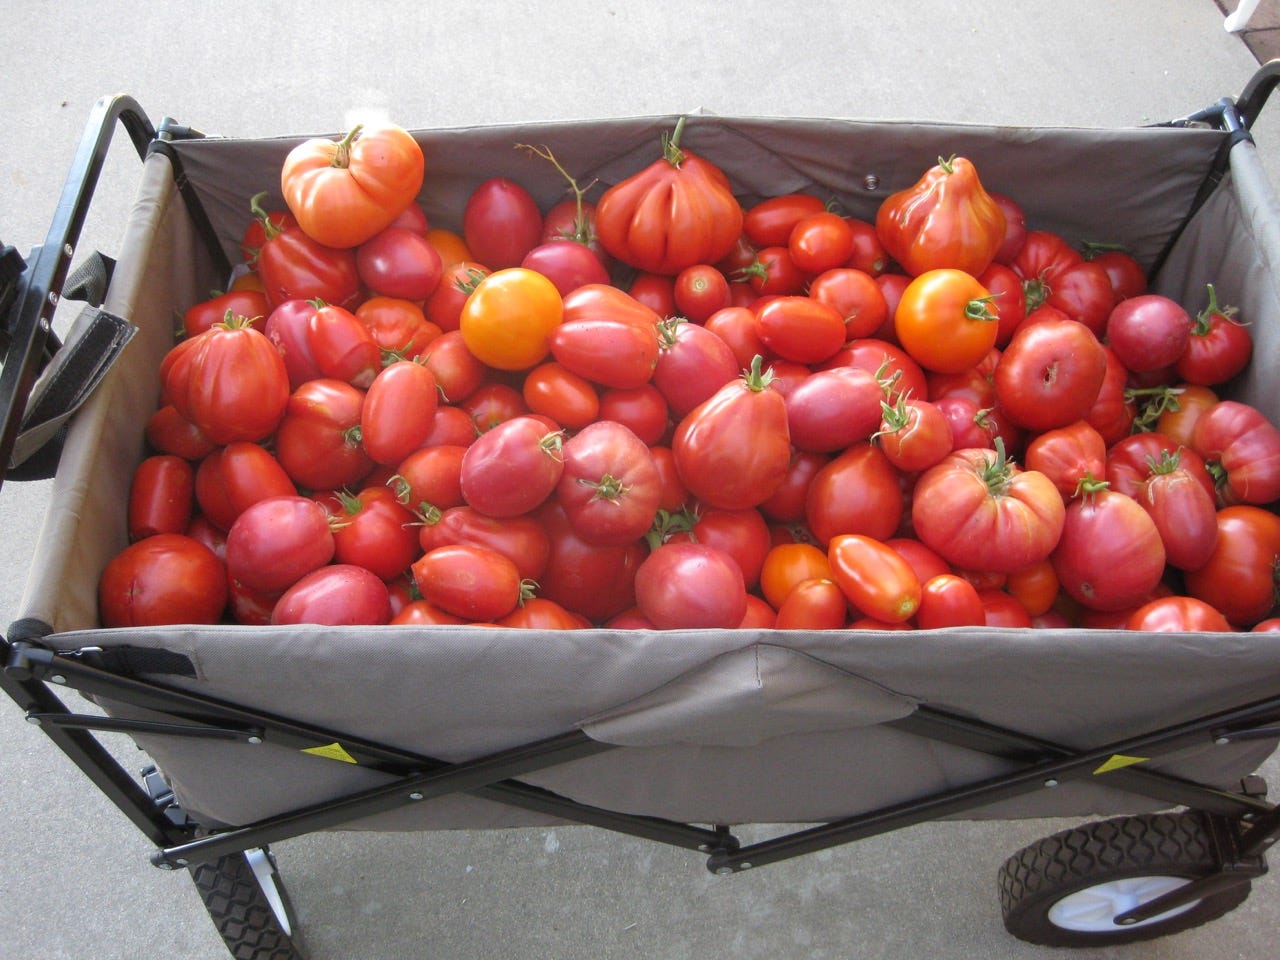
Happy Tomato Planting Day! But Which Varieties?
For years (decades, really), I’ve been promoting April 28 as Official Tomato Planting Day* for our area here in Northern California (Southern Sacramento and Northern San Joaquin Valleys, low foothills, and East Bay). And this time around in 2023, the weather has been very cooperative to make this year’s April 28th celebration an excellent time to start planting tomatoes.Wherever you are in the country, you have your own Official Tomato Planting Day. And it may change from year to year. The factors you are looking for include that the warmth of spring has settled in. Daytime highs will be in the 80’s (and above) for the foreseeable future. Early morning low air temperatures are steadily above 50 degrees. Soil temperatures are near 60 degrees. With those conditions, newly planted tomatoes will get off to a quick start. Just add water and fertilizer.Now, the question is…which tomato varieties to plant?We’ve talked in the past about the tried-and-true performers for our area, tomato varieties that will be in stock at area nurseries and garden centers now. If you are new to tomato gardening, start with three winners: The Sungold cherry tomato, the Early Girl tomato as your main season crop, and Big Beef for a large, slicing tomato. Other sure bets include Whopper, Champion, Ace, and Sweet 100.All the ones mentioned so far are hybrid tomatoes. Hybrid varieties are bred for desirable traits such as early productivity, adaptability to the local climate, vigor, and disease resistance, helping to guarantee success for the new tomato gardener. According to the UC Davis Vegetable Research and Information Center, Fusarium and Verticillium wilt are common diseases that can destroy a whole tomato crop. Many hybrid tomato varieties are resistant to these two diseases. Look for the letters, “VF”, after the cultivar name, indicating resistance to the wilts. “VFN” means the plants are resistant to verticillium, fusarium, and nematodes; “VFNT” adds tobacco mosaic virus to the resistance list.However, perhaps you want to stretch your tomato growing horizons this year by planting heirloom tomato varieties, which are noted for their flavor, aroma, and beauty. The downside to heirloom tomatoes? Production variability and a lack of disease resistance. Sacramento County Master Gardener Cathy Coulter explains the traits of an heirloom tomato. “An heirloom tomato is an open-pollinated variety that has been passed down at least 50 years through several generations in a family, ethnic, religious, or tribal group, or was commercially introduced before 1940,” says Coulter. “Some tomatoes now marketed as ‘heirloom’ are actually a cross between two different heirlooms (crossed on purpose or by nature) or are a cross between an heirloom and a hybrid tomato. The cross is then stabilized over several generations, so they become open-pollinated.”In other words, there is no agreed-upon standard for what makes a tomato variety an “heirloom.”One Northern California tomato plant breeder, Brad Gates of Wild Boar Farms, specializes in developing those modern heirlooms. “The most common definition of an heirloom tomato that I can come up with is that it's 50 years or older,” says Gates. “That seems to be the loose definition of an heirloom, because the definition of a heirloom is something that's been passed down from generation to generation. So somewhere along the line, somebody threw out the 50-year mark, and it seems to be the most popular. So some of my varieties are maybe working on 20 years old now. So they'll just have a little bit of a wait. But I think when most people think they want an heirloom, they want a tomato that's something other than round, red and tasteless.” Listen to the podcast (above) to find out more about Brad Gates’ tips and techniques for starting tomatoes from seed, as well as what it takes to breed a “modern heirloom” tomato. Originally aired in Episode 75 of the Garden Basics podcast.Sacramento County Master Gardener Gail Pothour is a fan of Wild Boar Farms’ “Brad’s Atomic Grape” tomato, a variety that is definitely neither red, round nor tasteless. “It is a kind of a grape tomato, which is the size of a cherry tomato, but it's elongated, kind of egg shaped,” says Pothour. “It's multicolored, with shades of purples and greens and red stripes and streaks all through it. And it's very tasty. It's got a good hang time, too. You don't have to pick it right now. It'll hang on the plant. I've been growing ‘Brad’s Atomic Grape’ for several years and it's become one of my favorites.”Davis, CA-based nursery owner Don Shor has his favorite heirloom tomatoes that he grows repeatedly for their beauty, productivity, and their flavor. “Most years, ‘Mortgage Lifter’ does reasonably well for me,” says Shor. “Another one that has done extremely well is ‘Cherokee Purple’. It was my top producer in 2021 of all my tomatoes. It's a good one for the valley and good one for hot climates.”In our garden, the heirloom tomato varieties that I ten

You Grew It. Now Eat It!
The healthiest food you can eat is the food you grow yourself. It doesn’t get any fresher than that. In today’s newsletter podcast, we talk with two Master Gardener/chefs: Kathy Morrison of the daily “Sacramento Digs Gardening” newsletter, and Master Gardener and Chef/instructor Andi MacDonald. Kathy has several recipes using ingredients that just might be maturing in your garden right now. And that’s the thrust of what is published in each Sunday’s edition of the Sacramento Digs Gardening Newsletter: If it’s ripening in your yard, she has a recipe for it. We have many of the recipes she mentioned in our chat here; for more, check out her Sunday posts, or the springtime recipes that Kathy and Co-content producer Debbie Arrington have compiled in their first recipe e-book, which is available for free at SacramentoDigsGardening.com. And their newsletter is free, as well, with little or no advertising (they will be going to heaven, I am sure). Even though their newsletter has a definite Sacramento slant about gardening activities here in Northern California, there’s a lot of good information provided in their daily posts that inspire gardeners everywhere. Go ahead. Subscribe.Here’s the recipe for the Strawberry Salad with Violets (courtesy of Sacramento Digs Gardening):Spring strawberry salad with fresh violetsMakes 2 to 4 servingsIngredients:4 to 6 strawberries, hulled and sliced crosswise2 radishes, sliced1 scallion, chopped2 tablespoons slivered almonds2 cups lettuce, roughly cut or torn into pieces1 cup baby spinach leaves, roughly cut or torn into pieces Dressing:3 tablespoons extra virgin olive oil1 tablespoon red wine vinegar1 teaspoon Dijon mustard½ teaspoon sugar¼ teaspoon seasoning salt Garnish:2 to 3 tablespoons fresh violets or violas (optional) Instructions: In a large bowl, put sliced strawberries, radishes, scallions, lettuce and spinach. Toss lightly. In a jar, combine olive oil, vinegar, Dijon mustard, sugar and seasoning salt. Cover jar and shake to combine. Pour dressing over salad and toss lightly again. Divide salad onto plates. Garnish with violets or violas. Serve immediately.Another recipe from the Sac Digs Gardening e-cookbook that Kathy raved about in today’s newsletter podcast: Baked Asparagus ala Sacramento:Baked asparagus a la SacramentoAdapted from Sunset magazineServes 4Ingredients:1 pound fresh asparagus, washed3 hard-boiled eggs1 tablespoon butter1 tablespoon flour1 cup milk1 cup soft bread crumbsSalt and pepper to taste½ cup dried buttered crumbs¼ cup grated Parmesan cheeseInstructions:Preheat oven to 375 degrees F. Break or cut the asparagus into 1-inch pieces. Steam until tender. Cook, cool and shell the eggs. Slice. Make a cream sauce with the butter, flour and milk. (Melt the butter in a saucepan, stir in flour until bubbly, then gradually add milk. Cook until sauce starts to thicken.) Add the soft bread crumbs and seasoning.In a buttered casserole dish, spread a thin layer of sauce on the bottom, then a layer of the cooked asparagus, then a layer of the sliced hard-cooked eggs. Repeat until the dish is filled. Sprinkle the top with the dried buttered crumbs and the grated cheese. Cover and bake in a moderate oven (375 degrees) for 30 minutes, removing the lid the last 10 minutes to allow the top to brown lightly. Serve warm.And, I would be remiss if I didn’t include Kathy’s recipe for Cherry Salsa!Cherry salsa Makes 2 cups Ingredients:2 cups fresh sweet cherries, any variety or a mix, de-stemmed and pitted Zest and juice of 1 lime 1/4 cup chopped red onion 1/2 cup chopped fresh cilantro 1 jalapeño pepper, seeds removed (keep them if you like more kick in your salsa), minced 1 fresh garlic clove, minced Salt and freshly ground pepper Instructions :Halve the pitted cherries and then chop them. Place in a bowl, then stir in the lime zest and lime juice. Add the red onion, cilantro, minced jalapeño and garlic clove. Add salt and pepper to taste.Cover the bowl and let the salsa chill in the refrigerator 45 minutes for the flavors to meld. When ready to serve, taste and adjust seasonings. Serve over grilled chicken breasts or grilled pork tenderloin, or with tortilla chips. Variations : This salsa also is delicious with any of these mix-ins: 1 chopped ripe but firm avocado; 1 chopped white nectarine; 1 chopped ripe mango.And, I did come across one recipe at the Sacramento Digs Gardening Spring e-cookbook that piqued my interest, just because I have beets ripening, as well as blood oranges: Roasted Beets and Citrus Salad. Check it out!Master Gardener/Chef Instructor Andi MacDonald is the “camp cook” for all the Master Gardeners who volunteer their services on Open Garden Days at the Fair Oaks Horticulture Center. Each month, the aroma wafting from the gazebo is so enticing, Master Gardeners keep checking their watch, asking: “Is it Lunchtime yet?”This month’s treat: Moroccan Lentil SoupAndi writes: “Lentil soup makes a simple, hearty, and inexpensive meal. This one is low in fat
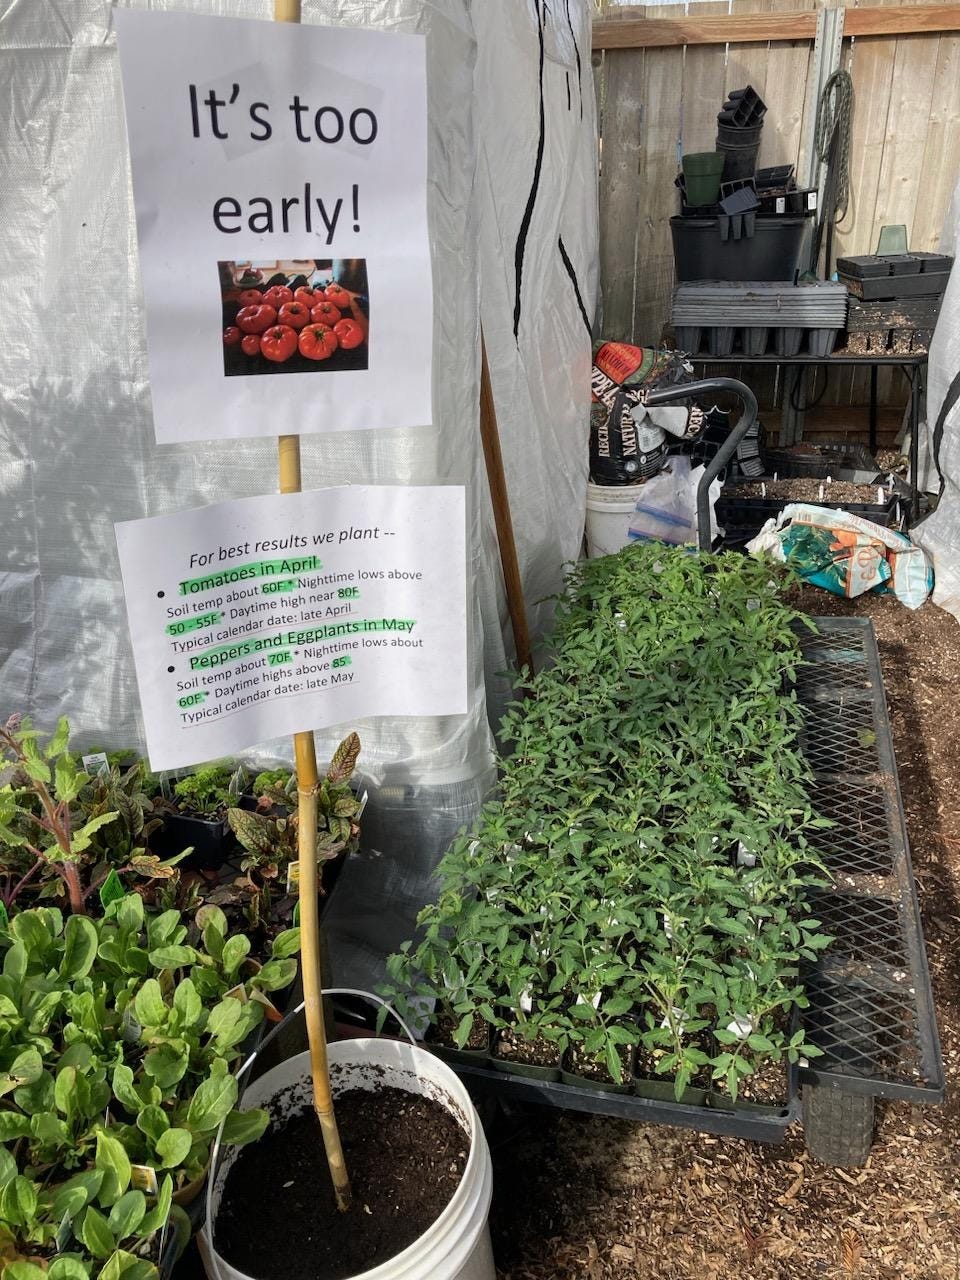
Tomato Growing Tips For 2023
For the best tomato growing season ever, we have tips. Just a few tips.Today’s newsletter podcast features excerpts from two episodes of the Garden Basics podcast, Episode 93 with America’s Favorite Retired College Horticulture Professor, Debbie Flower, and Episode 259 with Don Shor, proprietor of Redwood Barn Nursery in Davis, CA. two tomato chats with these scenic bypasses for tomato success. As the sign posted at Don Shor’s Redwood Barn Nursery proclaims: IT’S TOO EARLY.Wherever you live, wait until nighttime temperatures are steadily above 50 degrees and the soil temperature where you’ll be planting is approaching 60 degrees. Less stress on the tomato plant means earlier, better growth. Note to tomato growers in the desert southwest: how were the tomatoes this past winter?If you have never “moved up” your young tomato plants into larger pots, start that habit about a month or three weeks before you put them in the ground. Those tomato plants in their original three or four inch nursery containers (or HEAVEN FORBID! in a six-pack) may already be root bound. By the way, why would you want to plant six Early Girl or Better Boy or Sungold tomatoes, all of which would ripen at the same time? As Don Shor is fond of saying about your tomato garden: “Diversify your portfolio!”Another tomato choosing task: if those tomato plants have been sitting in the nursery for more than a few weeks, or look like there about to tumble off the shelf, always turn over a tomato plant container at the nursery and make sure the roots aren’t coming out the bottom. Ditto for those tomato plants on your back patio, waiting to be planted. Watch for protruding roots! Root stress can set a tomato plant back. Sure, it will recover after it’s finally been planted in the ground, but it will take awhile. Meanwhile, tomatoes that have been repotted into larger pots can stretch their legs for a few weeks, putting on height and vigor to give you a “ready-to-grow” tomato plant once it is in the ground. Athletes warm up before an event. So should your tomato plants.Even though the calendar says “April”, your soil is just beginning to wake up from winter. Early April is a great time to go shopping for tomato plants. Late April, and continuing through June, is the time to plant tomatoes into the garden. By the end of this month, the weather will be more conducive to rapid tomato plant growth because of more sun, warmer nights (steadily above 50 degrees) and warmer soil (60 degrees and above). But be prepared for sticker shock when shopping.Checking out the garden center shelves of tomato plants recently at a big box store, tiny tomato plants in four-inch pots were selling for nearly six dollars; six-packs of tomato plants, which were even smaller, were approaching seven dollars.“Yes, the prices have definitely gone up,” explains Don Shor, owner of Redwood Barn Nursery in Davis. “And there are a couple of reasons for that, besides the increasing cost of labor. One is the cost of heating greenhouses. You don't get tomato seedlings available in March and early April if you don't have a heated greenhouse. If you do it at home, you've got to start them indoors, move the young seedlings outdoors during the day, and then move them back in during the evening. They're not doing that in big commercial wholesale nurseries. They're using propane or natural gas to heat those greenhouses. Plus, greenhouses aren’t very effective when it's cloudy. And we've had a lot of cloudy days.”Shor emphasizes a few rules for beginning tomato gardeners: don’t buy too many tomato plants, and “diversify your portfolio”. For the first time gardener, start with perhaps one plant per family member, maybe a total of five tomato plants. And those tomato varieties should be easy to grow hybrids (not necessarily heirlooms) of varying sizes, including a cherry tomato, a paste tomato, an early ripening full size tomato, a reliable main season tomato, and a variety that strikes your fancy, which could be an alluring heirloom variety.“There's a whole group of red tomatoes that are classic and reliable,” says Shor. “Better Boy, Champion, Red Delicious, and Whopper. Those are four that I find very similar in their performance. The most consistent, year to year, has been Champion, which has an easy to remember name. But all those are good. Better Boy has been very consistent over the years.”The key is: plant several different sized tomatoes that vary in ripening times as insurance in case of wild weather swings. Gardeners may remember last September, when the first nine days of the month sizzled with temperatures above 100, including three days above 110, with high temperature records falling by the wayside. For many tomato growers, including myself, most of the medium to large tomatoes shut down production for the year after that September heatwave. That was highly unusual for our area, where serving homegrown tomatoes on Thanksgiving is not uncommon. The ones that made it through that he
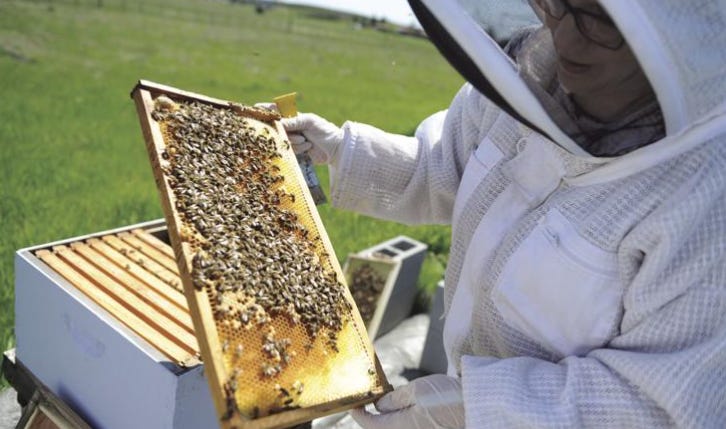
Backyard Beekeeping Advice
If the idea of raising backyard chickens appeals to you, you just might be mulling over the thought, “Well, why not raise backyard bees, too?”You may have listened to Episode 260 of the Garden Basics with Farmer Fred podcast, featuring urban chicken consultant Cherie Sintes-Glover discuss beginning a backyard chicken raising hobby. Cherie, besides being an urban chicken consultant, is also an apprentice Master Beekeeper. In today’s Beyond the Garden Basics newsletter podcast (above), she talks about how to get started raising bees. Her suggestions include:• Although bees are available now (April-May), they are best ordered in the winter months, due to demand.• Strive for ordering bees from local sources. Bees that are adapted to your climate have the highest success rate.• Take local beekeeping classes in the winter, before you get bees. Learn about the equipment you will need, as well as learning about bee temperament. Check with your local bee supply company for class information in your area.Cherie, a resident of San Joaquin County in Central California, is part of the Big Valley Beekeepers Guild, which is online at bigvalleybeekeepersguild.org. They also maintain an active page on Facebook. There, you can get a feeling for what’s involved with your new hobby!Bees are one of the best pollinators to have flying around your food and flower gardens. It’s been said that bees are responsible for one out of every three bites of food you eat. Today, we take attracting bees to your garden one step further: how about raising your own hive of honeybees? Besides a honeybee conversation with Cherie Sintes-Glover, we talk on today’s newsletter podcast with one of the world’s foremost bee authorities, Dr. Norman Gary, on how you can become a successful honeybee hobbyist. That just so happens to also be the title of his book, “The Honeybee Hobbyist”.The book contains:* Detailed, practical instructions for hobby beekeeping* Bee anatomy, behavior, and reproduction* How to safely open a hive and use a bee smoker* How to monitor hive conditions, prevent swarming, and deal with bee diseases* Sting prevention and effective strategies for safe handling* Fun uses for your beekeeping hobby, including entertainment and education* Urban beekeeping, with updated information on beekeeping on rooftops and in city environments.According to the University of California Agriculture and Natural Resources on-line publication, Bug Squad:Gary, known internationally as "The Bee Man," holds a doctorate in entomology (apiculture) from Cornell University and served on the UC Davis entomology faculty from 1962 to 1994. A beekeeper for seven decades and the author of Honey Bee Hobbyist: The Care and Keeping of Bees, he has written more than 100 publications, including scientific papers, book chapters and popular articles in beekeeping trade journals. He drew widespread acclaim for wearing a head-to-toe suit of clustered bees while "Buzzin' with His Bee-Flat Clarinet." (As a professional musician, he performs in area bands, but sans the bees.)"The Bee Man" holds the Guinness World record for keeping 109 bees inside his closed mouth for 10 seconds. You may have seen him and/or the bees he trained in action scenes in movies, television shows and commercials. His credits over the last 35 years include 18 films, including Fried Green Tomatoes; more than 70 television shows, including the Johnny Carson and Jay Leno shows; six commercials; and hundreds of live Thriller Bee Shows in the Western states.Your Harvest to Better Health Begins at Dave Wilson Nursery!Thank you for also listening to the Garden Basics with Farmer Fred podcast! It’s available wherever you get your podcasts. Please share it with your garden friends.Fred Hoffman is also a University of California Cooperative Extension Master Gardener in Sacramento County. And he likes to ride his bike. This is a public episode. If you'd like to discuss this with other subscribers or get access to bonus episodes, visit gardenbasics.substack.com/subscribe
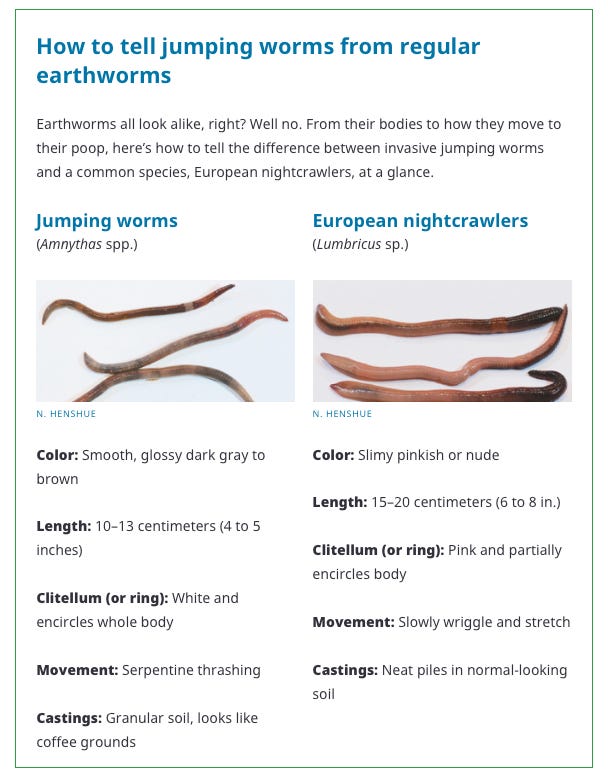
Jumping Worms: An Update, Again
Jumping worms, and the publicity about them, are spreading. Debbie Flower (America’s Favorite Retired College Horticulture Professor) and I talked about this in August of 2021 in Episode 126 of the Garden Basics with Farmer Fred podcast. We provided an update on Episode 217 in August of 2022 (listen to that chat in today’s newsletter podcast). Jumping worms have been in the United States for more than a half century. And they’re moving around the country, with our unknowing help. As Debbie pointed out in the podcast (above), one of the biggest threats is their poop. Because they tend to reside near the surface and move horizontally through the mulch layer, their poop is more highly mineralized and not incorporated deeper into the soil. Plus, that poop tends to be hydrophobic: it repels water. As a result, the soil fungi and bacteria that would be incorporating typical castings into forms of nutrients for plant availability isn’t happening. The biggest threat is to emerging native plants that would use the nutrients and moisture normally in the soil to germinate, either as understory plants in the forest, or freestanding wildflowers in pastures or prairies.Verified, effective controls at this point, are still being studied. From Cornell University, come this: “Research is currently being conducted on invasive worms at the University of Wisconsin and several practices do show some promise of control. Abrasive materials such as biochar (ground up charcoal) and diatomaceous earth (fossilized diatoms) may show some promise in killing adult jumping worms. Incorporate one of these products into the infested soil to a depth where the worms are located; worms that come in contact with the materials will be adversely affected.”Again, that is ongoing research. Debbie and I, in the newsletter podcast, suggest other possible control measures, including using mustard to bring them to the surface, identify them as jumping worms, and discard them (the recipe is in the podcast). Oh, you don’t want to listen? OK, here’s the transcript, which can also be found in Episode 217 of the Garden Basics podcast:Sarah in Sacramento Hi, Fred and Debbie. This is Sarah from Sacramento. My question is about jumping worms. I've heard they're very destructive. And unfortunately, I recently found three in my yard. So I'd like to know a little more about them. My question has three parts. First, how much of a concern are these worms for the home gardener? And second, is there anything I could or should be doing about the jumping worms? Should I kill the worms when I find them, or just leave them be? And third, I keep reading that their castings deplete the soil? I'm wondering if that's actually true. And if so, why are these worms so different from other types of worms which are generally good for the soil? I have heard the jumping worms eat organic matter really quickly. So could I offset this by simply adding a lot more mulch? Any other advice for me? Thank you so much.Farmer Fred Jumping worms. Yes, indeed. We've tackled this topic before here on the garden basics podcast, but the jumping worms are jumping all over the place. Debbie Flower is here, America's favorite retired college horticultural professor, and golly now we have them in our own backyard, Debbie.Debbie Flower Yeah, that's unfortunate. Right.Farmer Fred And one of the primary ways they spread is through fishing bait. If you go to a bait shop, you may see see worms intended for fishing, and they go by a variety of names, like jumping worm or Asian jumping worm or crazy worms or Alabama jumpers, or snake worms. Don't buy them. And if you do buy them and you have bait left over at the end of your little trip, get rid of them, put them in the trash. Yes, jumping worms, as the caller said, they kind of destroy organic matter because they have a rather big mouthpiece.Debbie Flower And super, super, super fast. And that's the problem. Regular earthworms that we're used to and maybe keep in our house to consume our kitchen waste also consume organic matter, but they do it much more slowly. And when the jumping worms consume all the organic matter on the surface of the soil, especially in forests or places around lakes or natural areas, then the there is no organic matter on the surface of the soil that allows other plants, typically their native plants, in those situations, to establish and grow. And so it's causing fast destruction of the mulch layer and is causing destruction of the native plants.Farmer Fred And they live very shallowly. Unlike earthworms that tend to go vertically, the jumping worms tend to live horizontally.Debbie Flower yes, just below the mulch layer and on top of the soil, that's one way to identify them. If you find a worm there, along with their, their poop, their feces, their black and crumbled, it looks like coffee almost, then that's probably a jumping worm. They're also recognizable because they do jump. And they have a white collar that goes all the wa

If You Can’t Dig Down, Grow Up! Raised Bed & Container Planting Tips
In today’s “Beyond the Garden Basics” newsletter/podcast, we revisit a chat we had three years ago with Linda Chalker-Scott, Washington State University Horticulture Professor, author of several outstanding garden books, and one of the forces behind the Facebook group page, “The Garden Professors”. Here, Linda discusses why loading up the bottom of planting containers with pot shards, gravel, styrofoam or other soil displacing items is not a good idea. It’s not even a bad idea. It’s a terrible idea! She explains why.Meanwhile, looking out the window….Tired of the rain yet, California? At our place, the monthly rainfall has exceeded the normal amount for the first three months of 2023, and March isn’t even over yet! Your garden soil may also be struggling trying to absorb all that rain, resulting in perennially muddy locations. Most plants don’t like wet feet. For your garden areas, especially those yards with heavy clay soil, there are a couple of options.When we get two dry days in a row, take a walk through the garden on Day Number Three (before it starts raining again). If the ground is still wet or feels squishy, mark that area with a post or grape stake. That way, you’ll remember when we finally get to the return of dry weather exactly where the ground is probably saturated, unsuitable for most in-ground plants to develop healthy roots.The permanent answer for dealing with too-wet clay soil is to install an in-ground drainage system, provided you can locate the end drain in an area that won’t impact your neighbors’ yard and garden. If it will impact them, consult with a landscape irrigation or drainage specialist who may be able to advise you on how you could place the end of the drain in a sump (a hole in the ground on your property) and then pump the water out to a gutter, if local codes allow that.Can’t Dig Down? Build Up.The other solution? If you can’t dig down, build up. Construct raised beds or use large containers filled with an easy-draining, commercial potting mix.A word of caution if building a raised bed on an existing lawn area: remove the turf below the raised bed area first. Dig out a few inches of the turf area, down to at least the turf root zone. If you leave the grass in place, that layer of turf could impede the drainage of water from the raised bed. The same is true if using weed cloth beneath a raised bed or a layer of gravel or small rock in a large container. That could also slow the rate of water movement, leading to ongoing soggy soil in the raised bed or containers. If building raised beds, first loosen the existing soil in the area with a spading fork after removing the turf. Then, mix in an inch or two of the soil mix for your raised bed with the existing soil in that area to improve drainage. If gophers are a problem in your area, putting down sheets of quarter-inch mesh hardware cloth below and partially up the inside walls of the raised bed can help protect future plants.A persistent garden myth is that using a coarse material, especially rocks or gravel in the bottom of a container or raised bed, will improve drainage. Linda Chalker-Scott, Horticulture professor at Washington State University, writes about the topic in her excellent books, “The Informed Gardener” and “The Informed Gardener Blooms Again”.“This is just one of those myths that refuses to die, regardless of solid scientific evidence to the contrary,” explains Chalker-Scott. “Nearly every book or web site on container gardening recommends placing coarse material at the bottom of containers for drainage. The materials most often recommended for this misguided practice are sand, gravel, pebbles, and pot shards.Nearly 100 years ago, soil scientists demonstrated that water does not move easily from layers of finer textured materials to layers of more coarse texture. Since then, similar studies have produced the same results. Gravitational water will not move from a finely soil texture into a coarser material until the finer soil is saturated. Since the stated goal for using coarse material in the bottoms of containers is to ‘keep soil from getting water-logged,’ it is ironic that adding this material will induce the very state it is intended to prevent. Alleged ‘drainage material’ added to containers will only hinder water movement.” For a container planting, all you need are drain holes and a good quality potting mix.Thank you for also listening to the Garden Basics with Farmer Fred podcast! It’s available wherever you get your podcasts. Please share it with your garden friends.Fred Hoffman is also a University of California Cooperative Extension Master Gardener in Sacramento County. And he likes to ride his bike. This is a public episode. If you'd like to discuss this with other subscribers or get access to bonus episodes, visit gardenbasics.substack.com/subscribe
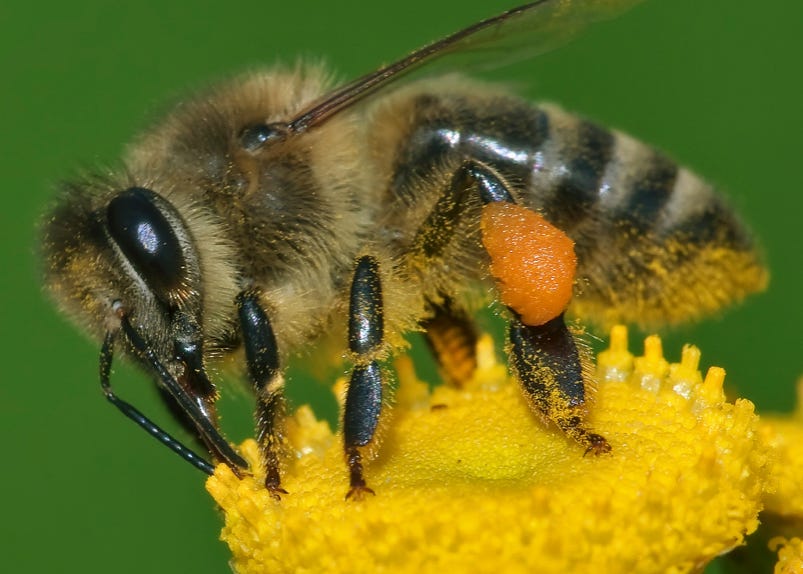
How Honeybees Say, "Come and Get It!"
One in every three bites of food you take comes courtesy of a bee. Without their pollination efforts, our diet and our gardens would be, to say the least, boring. In today’s “Beyond the Garden Basics” newsletter/podcast, we talk with Dr. James Nieh, of the School of Biological Sciences at UC San Diego. He and his team have been studying how honeybees communicate with each other, and how their elaborate dance moves are interpreted by the other honeybees in the hive. Basically, if you know where all the good pollen is, shake your booty, and do the Waggle Dance!Dr. Nieh’s original study can be found in the March 2023 issue of the Journal of Science. A more gardener-friendly version can be read at ModernFarmer.com. Or, listen to the podcast (above) or read the transcript!TRANSCRIPT - How Honeybees Say, “Come and Get It!”Farmer Fred 0:00 Have you heard about the Waggle Dance? No, it's not an obscure Chubby Checker record from the 1960s. Nor is it the follow up to the Soupy Sales song, “Do the Mouse”. The Waggle Dance is something bees do. And it's how they communicate to their hive mates, the other bees, telling them where the good stuff is, where the pollen is, and how to get there. iI’s a very elaborate dance. If you're like me, if you're a gardener, and you spend a lot of time in the garden, sometimes you'll just sit down and watch the bees, and wonder: “How the heck did they find these plants?” What is going on in their communication? We're talking to a gentleman who has studied this for a living. He and fellow scientists have an article published in the Journal of Science, and it's all about the Waggle Dance and how they discovered it. We're talking with Dr. James Nieh. He's the Associate Dean School of Biological Sciences at the University of California, San Diego. He's a professor in the Department of Ecology, Behavior, and Evolution. And I always like talking to university bee specialists, because they seem to have a fun job. And it sounds like you have a very interesting job. I don't know how you get the bees to slow down long enough to study their dance. Dr. James Nieh 1:14 Thank you, Fred. It's a pleasure to talk to you. We actually don't have them stand still. We watch them as they're in motion. But you're right, it sometimes can be a challenge to move with the bees, as they're dancing. Farmer FredSo let's talk about the whole thrust of your paper. And if people want to read more about it, there's a very good explanation that you wrote for the March 2023 edition of Modern Farmer magazine and website. It’s called “Unlocking Secrets of the Honeybee Dance Language.” What was your impetus for studying this? Dr. James Nieh 1:45 One of the things we wanted to learn is, why is it that some animals, like human beings, songbirds, and naked mole-rats, why do they have to learn language? We know that other animals, many of them are actually born with the ability to have a perfect animal communication system or animal language without the need for learning. That is what actually motivated us to look at honey bees, because honey bees have a very sophisticated animal language. And we suspect because it is so complicated, that learning might be involved. Farmer Fred 2:18 And we have known for a few decades that bees do communicate by movement, haven't we? Dr. James Nieh 2:24 Yes, that's right. In fact, it was something that Aristotle even suspected thousands of years ago. Although if you look at the translation, there's a little bit of uncertainty if he knew about the Waggle Dance. But some historians of science say that he did. And it really is a Waggle Dance, it is a shake your booty. But what is amazing is the amount of information that is communicated via a bee to the fellow bees about where the pollen is, and how to get there. It's truly remarkable. And it's the most complex example of animal language that communicates something like location that we know of. Farmer Fred 3:01 And also according to your paper, the movement also reveals the quality of a pollen resource. Dr. James Nieh 3:06 That's right. When bees are repeating this figure-eight motion multiple times, the more times they repeat it, the higher the quality of the resource. And there are two motions, there's the waggle phase, if you imagine the bee as a little arrow, she's running forward with her head pointed forward, and her abdomen is waggling. So that's called the waggle run because she's running while waggling. And then there's something called the return phase where she's returning back in a semicircle. And that creates one half of the figure eight. And that return phase is faster, the more excited she is about the food. So it's almost as if she's more eager to come back and do more Waggles. Farmer Fred 3:45 And is this just happening at the hive? Anybody who's sat for a while and watched bees at work, they'll sometimes think, “oh my goodness, I'm going to be stung. Look at that bee as it's going after that pollen. It’s shaking its behind at m

Pepper Seeds Slow to Germinate? Some Speedy Tips.
In today’s Newsletter podcast, we revisit some advice given to us by America’s Favorite Retired College Horticulture Professor, Debbie Flower, on how to get your pepper seeds to germinate more quickly, which can take up to three weeks before you see green leaves popping up above the soil surface. We were talking to the Elk Grove Garden Club last month, a wide-ranging conversation, which included how to tell if those old vegetable or flower seeds you have tucked away in a drawer will germinate or not. You can hear the entire chat in Episode 253 of the Garden Basics with Farmer Fred podcast.Home gardeners who grow their tomatoes from seed usually get fairly quick results after sowing the seeds indoors. Given the right germinating conditions - a soilless planting mix, good drainage, plenty of light, plenty of warmth - tomato seeds can pop up in 8-10 days.Pepper seeds are a different story. Why is it some peppers can take weeks to germinate?"The important thing in getting your (pepper) seeds to germinate is to keep them warm – the soil temperature should be in the 80's", says Renee Shepherd of Renee's Garden, a popular seed catalog based in Felton, California. "Germination is very much related to even moisture and warm temperatures. You should see germination within 2 to 3 weeks if it's warm enough. I strongly suggest using bottom heat to achieve the warmth the seeds need – most good nurseries carry good little electric seed starting mats which will keep your seeds at the right temperature to sprout. One online order source is Peaceful Valley Farm Supply."For those who want to comparison shop, another source for heating mats for your pepper seeds: Amazon.Another trick that some gardeners employ is soaking the pepper seed for a few hours before sowing to soften the seed coat. The value of that is open to debate."I have never heard of soaking pepper seed overnight and have never done it in 20 years of running a trial garden," says Shepherd.On the other hand, Professor Debbie Flower, formerly of the American River College Horticulture Department, sees the benefits of some "immersion therapy" for pepper seeds. "We soaked our pepper seeds in hydrogen peroxide for 10 minutes," explains Flower. "That's not enough time to scarify (soften or break the seed coat), or even get them soaked, but enough to kill exterior diseases."Many sweet pepper varieties will show their initial leaves about two weeks after planting the seeds. But some varieties of peppers take longer to pop up than others. "The hot pepper varieties take longer to germinate, some to three weeks," says Flower.But if you are experimenting with the really hot pepper varieties, such as the Bhut Jolokia (Ghost Pepper), it could take up to four months, says the Trade Winds Fruit website:"Chinense species (e.g. Habanero's) generally take longer to germinate than most common peppers. Keep soil warm to very warm (75-90F) for better germination. Do not use acidic soil. Some Chinense peppers, in particular Bhut Jolokia, Naga Morich and related peppers are very slow to germinate, averaging 1-4 months germination time."By the way, if you are growing the Bhut Jolokia...you're playing with fire. The Ghost Pepper is rated at 850,000 Scoville units of heat. For comparison, the habanero rates 200,000; the Jalapeno is 5,000; the Anaheim equals 1,000. And sweet bell peppers? 0.Another factor that can determine the rate of germination of pepper seeds: the pH of your seed starting mix. One of the most common ingredients in most seed starting mixes is peat moss, which is highly acidic, with a pH around 4.0. Pepper heads, including the Horticulture students at American River College, have found quicker germination when Coir (coconut fiber) is substituted for peat moss. Coir has a closer-to-neutral pH: around 6.5. The tests at American River College bear this out after trying Coir in their pepper seed soil mix. "We had the best germination of peppers ever!" says Flower.And don't be in a rush to set them out in their permanent garden home. "Pepper seedlings need to be grown out until they have at least several sets of true leaves, and it is at least 55° at night before you plant them out," explains Renee Shepherd. "And they will need a little time to get used to being outdoors, as well." In USDA Zone 9, that would be around mid-May. Be patient. After originally talking about this speedy pepper germination technique, other gardeners chimed in with their favorite tricks. One method that was seconded by many: germinate your pepper seeds in between two moist paper towels in a room that is between 70 and 80 degrees. For many, that room might be the kitchen or bathroom. When the "tails" appear after about 6 or 7 days (the tails, by the way, are the emerging roots), gently transplant them into a moist, seed starting mix, preferably one that uses the more neutral coir instead of the lower pH peat moss. Or, make your own. My preferred home mix consists of equal parts coir, perlite and fine
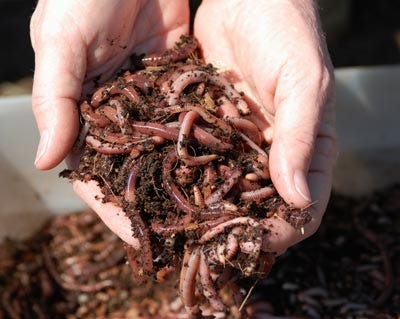
The Scoop on Worm Poop
In today’s newsletter podcast, we delve into the world of earthworms and red wrigglers with garden writer Amy Stewart, who authored the 2005 book, “The Earth Moved: On the Remarkable Achievements of Earthworms”. We recorded our chat back when the book was released, at her home (then) in Eureka, in northwest California. But we’re not here on the printed page to praise earthworms (although they are highly deserving of it), but to discuss their close relatives, the red wigglers, an excellent worm for composting. And now for something NOT completely different:From the Garden Basics e-mail bag, Don writes: “I discovered your podcast last week. Very interesting and cool stuff! I just retired at the end of last year and one of the items on my list of four, ‘To-Do’ items in retirement, is to create and maintain a backyard wildlife refuge with a focus on pollinators. On another note, my wife and I love sweet tea. We brew at least one pot per day, maybe two in the summer. What can we do with all the used tea bags?”Don, as usual, I’ll get to the answer for your question in a roundabout way. To have a successful garden to attract pollinators, you need successful soil. One of the best soil amendments to add for happy plants are worm castings, also known as worm poop, or, more euphemistically, vermicompost. According to Alameda County (CA) Master Gardener Judy Matthew: “Worm castings add beneficial bacteria to the compost which when spread around the garden, stimulates plant growth and can help protect plants against some diseases. The worm castings also help the compost-amended soil retain water.” You want more science about worm castings? Here you go.However, better soil doesn’t come cheap when using bagged worm castings. The price of a one cubic foot bag of worm castings is approaching twenty dollars here in California. You may want to tack on a new “to-do” item for your pollinator garden, Don: vermicomposting. Raising worms, who feast on many kitchen scraps and paper goods will return the favor, giving you a soil amendment teeming with microbial activity, perfect for plant roots to enjoy. One of those kitchen scraps they enjoy just happens to be tea bags.And don’t worry about the worms if you go on a three-week vacation. Give them some extra food before you leave and re-dampen the bedding. They won’t complain.Worms do best at temperatures slightly less than room temperature. Putting them in a cool indoor room or basement is an excellent idea. Some enthusiasts keep a worm bin at work, near their desk or in the break room. If you maintain the right balance of food, the bins won’t smell, either.Here are tips from the Sacramento County (CA) Master Gardeners here and here on starting and maintaining a worm composting bin. Some of those tips include:• All you need to create worm castings is a worm box, bedding material, red wriggler worms (not earth worms) and food scraps.• Bins can be purchased or homemade. Use a solid color (not clear) plastic storage box or a sturdy wooden box with a tight-fitting lid to keep out pests and protect your worms. If making your own bin, be sure to drill ¼-inch holes in the bottom to allow for drainage.• Worms will not escape; they dislike light and will migrate toward the center of the box.• A commercial vermicomposting system that features stackable bins take up a house-friendly smaller footprint, perhaps 24 by 24 inches.• Moistened, shredded newspaper or corrugated cardboard, shredded leaves, purchased pine shavings, or coconut fiber (coir) bedding provides worms with a balanced diet as well as a damp, aerated place to live.• Always keep the bedding as moist as a wrung-out sponge.• Place the worm bin in the shade or indoors. The best temperature range for thriving worms is between 55° and 75°F.• Worms love most fruits and vegetables, used tea bags, used coffee grounds and filters. Do not feed them animal products, dairy, onions, or processed foods. Limit citrus peels to less than 20% of the food. You’ll soon figure out what they’ll eat and what they’ll ignore.• Chopping the food into small pieces, one inch or less in size, will speed up the composting process.• To avoid fruit flies and odors, cover the food with at least one inch of bedding.• Use red wigglers or red worms, NOT earthworms or certain “fishing worms” such as Alabama jumping worms. Red wigglers can be purchased at some better nurseries, worm farms, and fishing supply stores.• The castings are ready when they are dark and fine in texture. Separate the worms from the castings. Place the worm castings in your garden bed before planting. Work the castings lightly into the soil with a rake. Cover with mulch or compost.The Sacramento County Master Gardeners have a great vermicomposting display area at the Fair Oaks Horticulture Center, which is open one day per month to the public. The next Open Garden Day will be on Saturday, March 11, from 9 am to noon.Thank you for listening to the Garden Basics with Farmer Fred podcast! It’s av

Vegan Split Pea Soup
Here is Andi MacDonald’s “More Than Basic Split Pea Soup” vegan recipe. It serves 6-8 people. She explains its origins:“My Aunt Carol lived on the Central Coast of California. When we visited, my father took us to Pea Soup Andersen’s restaurant in Buellton, where we dined on endless bowls of pea soup. Ten-year-old me thought that this was the height of culinary genius. I went back a few years ago and concluded that the soup was okay, bit it needed more oomph. That’s what this version is: basic comfort, but with a bit more to it.Directions are for an Instant Pot. To make this on the stovetop, follow the basic directions, but cook it for a couple of hours, stirring frequently to prevent scorching.”Ingredients:* 1 lb dried split peas* 1 Tbs olive oil* 1 medium onion, diced small* 2 medium carrots, diced small* 2 stalks of celery, diced small* 6 cloves of garlic, minced* 2 medium russet potatoes, peeled and diced small* 1 Tbs fresh thyme leaves (or 1 tsp dried)* 1 Tbs fresh oregano, (or 1 tsp dried)* 1-2 bay leaves* 1/2 tsp black pepper* 8 cups vegetable stock (low sodium preferred)* 1 Tbs soy sauce* 1 Tbs liquid smoke* Salt to tasteSet the Instant Pot to sauté. Cook the onions, carrots, and celery in olive oil until the onions soften. Stir in the garlic and cook for about one minute. Add the thyme, oregano, bay leaves, and pepper. Add the vegetable stock, soy sauce, and liquid smoke. Add the potatoes and the split peas.Put the lid on the Instant Pot and seal. On manual mode, set the time for 20 minutes. When the timer goes off, let the pot release naturally for 30-40 minutes.Release the valve, and stir the soup vigorously for a minute or so to break down the split peas. Taste, and add salt if needed.This soup will thicken as it sits. If made ahead (and refrigerated), you will need to thin it with water or stock before reheating.For more cooking tips, check out Andy’s Magic Apron on Facebook.I have questions, I have thoughts:What is in Wright’s Liquid Smoke? (Answer: not much)The Bay LaurelYou can grow just about every ingredient in this split pea soup recipe in your home garden. However, one ingredient in the recipe caught my fancy, because it is one of my favorite plants to grow, the bay laurel, also known as Sweet Bay or Grecian Laurel (Laurus nobilis).If I may quote the American Horticultural Society book, “The Encyclopedia of Garden Plants”:The Bay Laurel is “an evergreen, broadly conical tree, about 40 feet tall and 30 feet wide. For USDA Zones 8-10. Narrow oval, leathery, glossy, dark green leaves are very aromatic and used in cooking. Small, star-shaped, pale yellow flowers are borne in spring and are followed by globose to ovoid, green, then black fruits.”The bay tree is frost hardy, but foliage may be scorched by extremely cold weather or strong, cold winds. Needs a sheltered position in sun or semi-shade and fertile, well-drained soil. In tubs, may be grown well as standards, which should be trimmed during the summer. Propagate by semi-ripe cuttings in summer or by seed in autumn.”My thoughts on this plant: WINNER, WINNER, WINNER! In Northern California, it is easy to care for and not fussy about watering. Prune or don’t prune. It’s up to you. Bay laurel is a great, evergreen privacy screen that isn’t overly messy (because of the weight of the leaves, fallen ones tend to stay nearby the plant). We had a row of these at the old radio ranch in Herald, CA next to a swimming pool, and never had to skim out any bay laurel leaves. And, it was a great privacy screen located 15 feet away from the hot tub. p.s. The official Town Motto for Herald: “Where’s Herald?”.Because it is a broadleaf evergreen tree, the small birds - finches and wrens especially - love it for perching and nesting. The happy bird chatter from our row of bay laurels in the early evening was a delight. They were probably describing their day to others, hunting for garden pests. Did they pick off leaves of desirable garden plants? Yes. So, you plant enough for everyone to enjoy! Birds are always welcome in my garden.If you listened to Episode 254 of the Garden Basics podcast (the Feb. 24, 2023 edition), you heard aromatherapist Amy Anthony rave about the bay laurel, as well. The scent, she says, can help you build courage. Sounds like a plant every cold-call salesperson should own.The bay laurel is slow to grow, especially from cuttings. But once it takes off, it shoots up to 20 feet or more in less than ten years. (“Ten years?!? I don’t want to wait no ten years!”). Trust me, it’s worth the wait.Thank you for listening to the Garden Basics with Farmer Fred podcast! It’s available wherever you get your podcasts. Please share it with your garden friends.As an Amazon Associate, I earn from qualifying purchases from some of the underlined links in the newsletter. This is how I am trying to keep this a free newsletter. And as long as you buy whatever you want from Amazon using any of those links to get into the Amazon site, I get a few pennies.
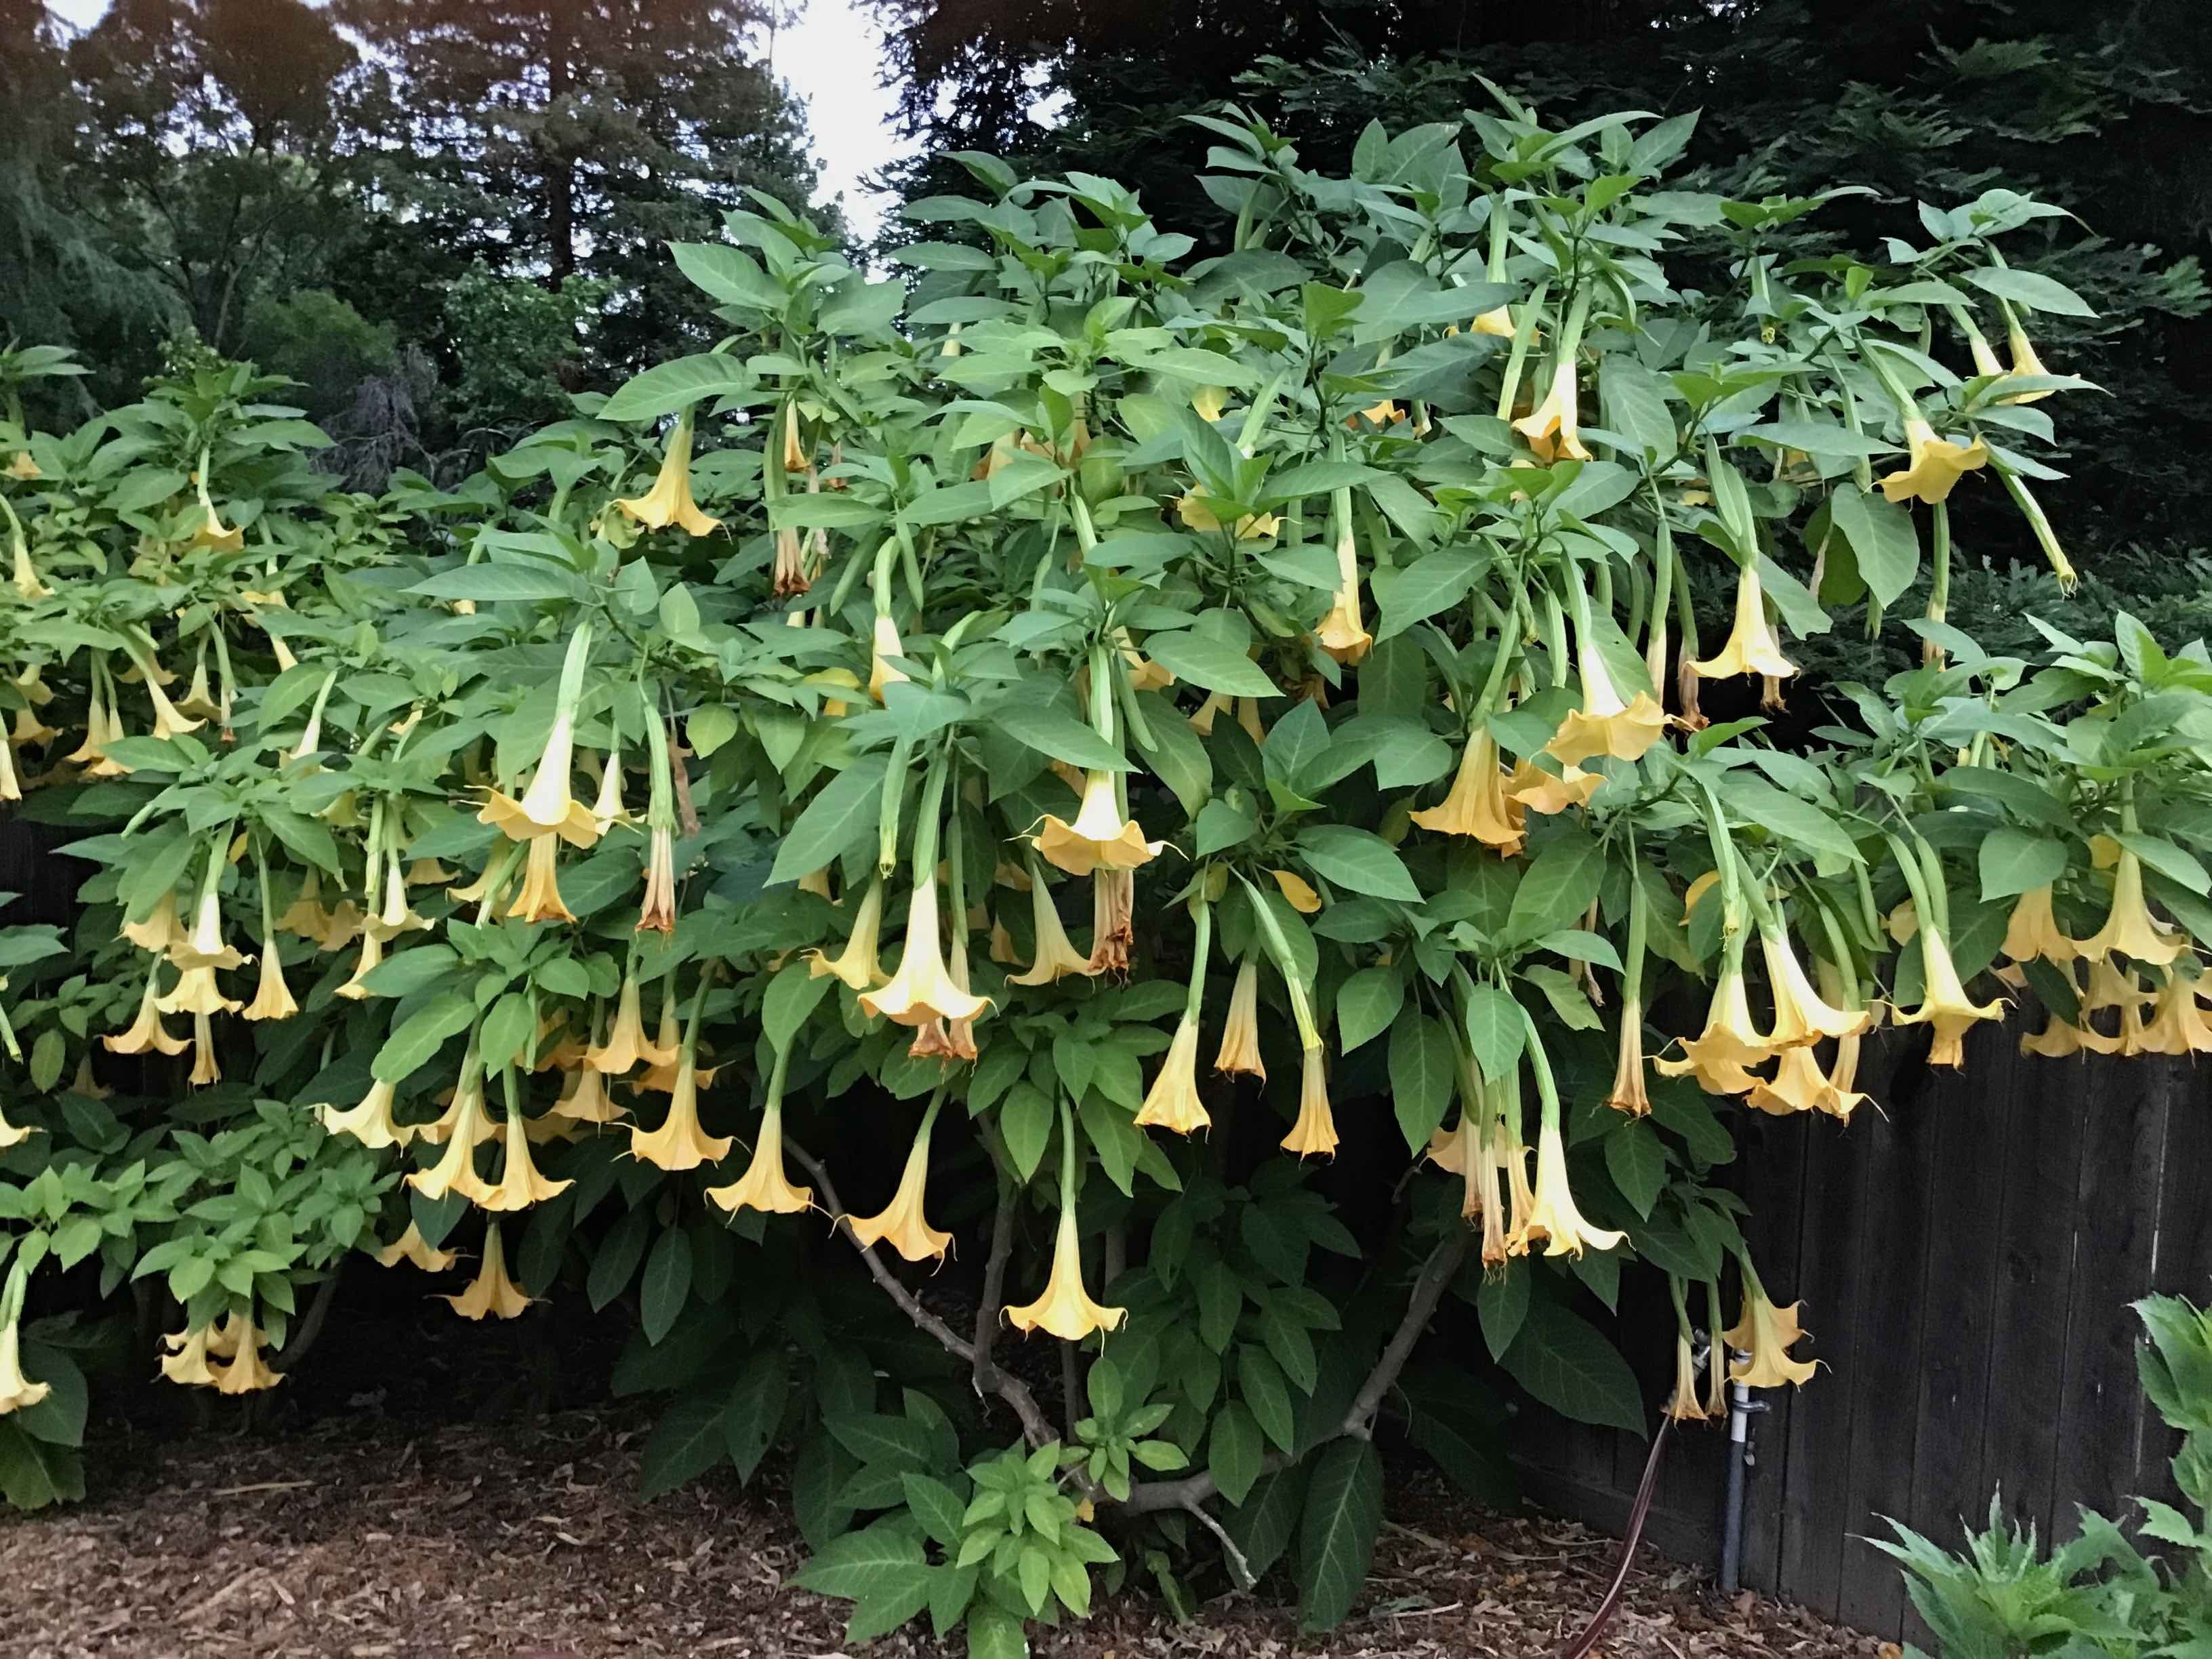
Freeze Damaged Plants? Embrace the Ugly.
Newsletter podcast excerpted from Episode 253 of the Garden Basics with Farmer Fred podcast. Recorded live, at the Elk Grove, CA Garden Club.Please note that the words below originated as a recent garden column in the Lodi (CA) News-Sentinel. Those of you in Michigan, Minnesota, Maine and other states where there are hardware stores that stock snowblowers year round can quit snickering at our plant panic when temperatures dip into the 20’s. Still, the advice holds true for wherever you live: give freeze-damaged plants a chance to recover.Our area has had quite the one-two punch of weather events so far in 2023. In January, it was record rains, near hurricane force winds, a tornado, flooding, and falling trees. Then, at the end of January, a hard freeze descended on many areas around us, where temperatures fell to the mid-twenties on January 31. That was followed by two consecutive February mornings with temperatures at or below 32 degrees. It was a triple punch that many of our more tender plants couldn’t take.How’s your garden looking these days, after all that weather? Your results may vary because all gardening is local. Many plants that we thought could shrug off the cold mornings are not looking good right now. Here, the salvias are dying back. Dependable, late winter blooming nasturtiums look like mush. That popular summer blooming low growing shrub, the lantana, has lost all its leaves.As gardeners, we like to put in plants that strike our fancy but are better suited to areas of California that get fewer frosts and freezes. We got away with very mild winters for a long stretch here in the Central Valley, encouraging our semi-tropical plant growing fantasies.And that’s especially true for those who planted tender perennials and shrubs. That list includes avocados and citrus trees. Wise gardeners here may have planted them in areas where they may be getting protection from wind as well as reflected heat from south-facing walls and patios in the early morning hours. And because cold air tends to flow downwards, planting semi-tropical plants in the higher sections of your property may give them a few degrees of protection from a freeze.Chuck Had a Tough Time RecentlyI feel bad for our ten-foot tall brugmansia shrub, also known as Angel’s Trumpet. Brugmansias, especially the variety ‘Charles Grimaldi’, are prized for their large, yellow or pink, aromatic, bell-shaped flowers, spring through fall. And, if the weather cooperates, it will flower through much of the winter, as well. Chuck – as I affectionately refer to Mr. Grimaldi - had thrived here for the last seven years, even blooming in the winter, in the lowest part of the yard (oops). Until now.So, what should a shivering gardener do, weeks after a hard freeze, when temperatures were at or below freezing for several consecutive hours?Number one: don’t prune away the dead portions now. If plants in your garden look blackened and wilted now, new growth may emanate from the base of the plant when the weather warms over the next couple of months. Pruning away the dead portions now would expose buds that may still be alive; another frosty morning could wipe out those survivors. Keep the shears in the garage and let the dead portions of the plants protect the understory.It may take until mid-Spring before you see new growth. Patience is key before you pick up the pruners. In the meantime, tolerate the ugly, and look for new growth, especially near the base of the plant.Water Can Help Your Plants Get Through a Freeze. But Not SucculentsNumber two: If it doesn’t rain, keep your tender plants well-watered, especially container plants. Make sure your garden and potted plants remain moist. Water gives off heat at night, and damp soil can protect plants from freezing, especially avocados and borderline citrus trees, such as lemons and limes. Moist soil retains heat better than dry soil, protecting roots and warming the air surrounding the soil. Too much water in the soil, however, can suffocate the roots of plants.Succulents, such as cactus, are the exception, however. According to the Arizona-based Desert Botanical Garden, most succulents survive freezing temperatures best if the soil around them is dry. Oh, and keep your frost protection gear handy...just in case we get another late winter surprise. Don’t let the latest string of sunny February days fool you. Historically, we can get freezing mornings through early spring.P.S. Chuck is already showing green growth near the base.Thank you for listening to the Garden Basics with Farmer Fred podcast! It’s available wherever you get your podcasts. Please share it with your garden friends.As an Amazon Associate, I earn from qualifying purchases from some of the underlined links in the newsletter. This is how I am trying to keep this a free newsletter. And as long as you buy whatever you want from Amazon using any of those links to get into the Amazon site, I get a few pennies. Thank you.Thanks for Subscribing and Sp
Winter is Rose Pruning Time
Rose Pruning Time is Here Mid to late winter is rose pruning time, wherever you can grow roses. Here in California and in other USDA Zone 9 areas, mid-December through Super Bowl Sunday (usually the second week in February) is ideal. For colder rose-growing climates, late February through the early rounds of the NCAA Basketball Tournament (mid to late March) is pruning time. Former sportswriter and current Master Rosarian Debbie Arrington supplied those dates. Listen to the above podcast for what she has to say about choosing the right equipment, especially clothing, when pruning roses.Here then, are some "California (and USDA Zone 9) Rules" for pruning hybrid tea, floribundas, grandifloras and miniature roses this winter. Instructions on how to prune climbing roses would exceed my word limit here, But Debbie Arrington has tips for climbers in the podcast, and here’s a link for more info on pruning climbing roses.By the way, ask 100 rosarians how to prune roses, and you may get many varied answers. Hell, rosarians don't agree on much when it comes to roses. Which goes to show you: ROSES ARE THE MOST FORGIVING PLANT IN NATURE. Give them the basics (sun, water, decent soil), and they can pretty much take whatever you throw at them, and come back blooming. Roses, especially the repeat bloomers, would appreciate a monthly fertilization during the growing season...if you remember.Rose Pruning Tools:• A pair of hand bypass pruners (I prefer the Felco #2 or Felco #7).• Long Handled loppers (My Corona loppers have lasted for years).• One or two pruning saws (a small hand-held and/or a larger bow-style pruning saw). • For a large rose garden, a rechargeable, battery operated hand-held chain saw is the choice of many rosarians, especially when getting a rose ready for “shovel-pruning”.• Thorn resistant, long sleeved rose pruning gloves.Pruning Roses for USDA Zone 9:• Prune out all dead, aged and weak growth. • Gnarly stems and gnarly thorns indicate "aged".• Remove any borer-infested branches, as well. A hollow or blackened center of a stem may indicate the presence of borers. Keep cutting until you see a solid, creamy colored interior. That is the sign of a healthy branch.• Make no cuts on hybrid tea rose bushes or grandifloras below your knee, unless you're removing the cane completely.• Leave as many primary canes as the plant can handle. Many cold climate rosarians might advise you to leave only three canes per hybrid tea rose bush. Here in USDA Zone 9, a vigorously growing hybrid tea or grandiflora rose might have as many as nine healthy canes. Keep most, if not all of those canes, for even more roses during spring through fall.• Try to make all cuts without extreme angles. Nothing exceeding 45 degree cuts; 90 degree cuts (or as close to that as possible) is fine. This is especially true of thick canes. The low part of a 45 degree cut on these would extend past, ultimately damaging, weakening or killing the eye (new bud) you are trying to cut above. • All cuts should be made one-quarter inch above a dormant eye or intersection of two branches.• Do not use glue, tree seal or paint on pruning cuts. A clean cut will heal much more quickly when left alone.• When you are finished, strip all remaining leaves from your roses, then blow or rake all the leaves out of the beds and send them to the dump, not the compost pile. Since all the fungus spores and insect eggs are there from the last growing season, removing these from your yard now reduces next year's problems. Thank you for listening to the Garden Basics with Farmer Fred podcast! It’s available wherever you get your podcasts. Please share it with your garden friends.As an Amazon Associate, I earn from qualifying purchases from some of the underlined links in the newsletter. This is how I am trying to keep this a free newsletter. And as long as you buy whatever you want from Amazon using any of those links to get into the Amazon site, I get a few pennies. Thank you.Thanks for Subscribing and Spreading the Word About the Beyond the Basics: The Garden Basics with Farmer Fred newsletter, I appreciate your support. Fred Hoffman is also a University of California Cooperative Extension Master Gardener in Sacramento County. This is a public episode. If you'd like to discuss this with other subscribers or get access to bonus episodes, visit gardenbasics.substack.com/subscribe
Drain That Rain!
“Where does the water go?” That’s a question I frequently ask myself while bicycling throughout the region, staring at rain-soaked suburban yards. This is also a question homeowners should ask themselves before, during, and after the rainy season.One of the best pieces of advice I can offer any new homeowner: before you spend any time and money on landscaping projects or a garden, live with the existing property for a year. This allows you to take monthly pictures of the area where you want a future garden, perennials, shrubs and trees.When we moved to our new home seven years ago, that’s what we did before we embarked on a totally redesigned landscape. Taking a series of pictures on a regular basis on sunny days, especially at different times of the day (9am, 1pm, 5pm), will remind you how much shade your future plants will be dealing with, and you can plant accordingly.A plant labeled for “full sun” will need at least six hours (preferably eight hours) of direct sun a day. “Part Sun/Part Shade” plants, 4-6 hours of sun per day. “Shade” should be reserved for those plants that get little direct sun (less than four hours) and preferably dappled sun, such as protection from an overhanging deciduous tree.However, the more important reason to live with that new yard for a year before embarking on outdoor landscaping projects: figure out where water goes, both after regular irrigation and after rainstorms. In our case, we discovered that few of the yard sprinklers worked fully or accurately, and that a heavy downpour of rain ends up in the garage. And the basement would flood.As a result, the price of our landscape rehab zoomed upward, to include a complete drip irrigation system for both the front yard and backyard, as well as an underground hard pipe drain system to move roof gutter water away from the house and garage to another part of the yard. You can hear more about how to do that in the podcast above, with landscape designer Michael Glassman.Home and Garden Pests That Sing in the RainThe other problem with wet weather: some home and garden pests love it when it’s wet; and others will seek refuge in drier quarters, such as in your home.The authors of the University of California Ag and Natural Resources publication, “Pests in the Urban Landscape,” offer some “Wet Weather Do’s and Don’ts” to ward off problems:• Check for snails and slugs. They like it moist and will sing in the rain. Unfortunately, their singing sounds a lot like, “chomp, chomp, chomp.” These garden leaf and flower munchers don’t like it too wet. They may be easily found headed for dry land – sidewalks and driveways – during a deluge. Find them under loose boards, as well. That’s the time for hand-picking or stomping them. Chemical controls for these mollusk family members are ineffective in the rain.• Remove weeds and unwanted plants. When the ground is wet, pulling them out goes much more quickly. Among the winter weeds spreading here right now are oxalis, nutsedge and groundsel. You may have other cool season weedy invaders in your yard.• Dump standing water. This wet winter is already favoring a big mosquito season ahead. Deprive breeding mosquitoes of water-nesting sites such as flowerpot saucers, wheelbarrows, buckets, clogged storm drains, and roof gutters.• Check for ants, cockroaches, and earwigs. These pests may invite themselves into your home when flooding or heavy rains make the outdoors unappealing to them. Seal any cracks or openings in your home. Outdoors, check the perimeter of your home as well as around doors and windows for insect entryways. Weather stripping, door sweeps, and traps placed beneath eave-protected walkways can help keep them outside. Indoors, keep food tightly sealed and the counters clean, especially near electrical outlets that might provide an entryway.• Remove yard mushrooms. Mild temperatures and wet soil are a combination that mushrooms and other fruiting bodies of fungi love. The good news is they are not harmful to your lawn and garden. The bad news? They can be poisonous to children and pets, when consumed. Rake them up.• Don’t apply outdoor fertilizer or pesticides now. Both are easily susceptible to being washed off the soil or plants and into our waterways. Wait for several days of dry weather before applying any sprays, dusts, liquids, or granules.• Avoid pruning plants unless it is to remove broken or damaged branches. Rainfall and open wounds in the winter on plants is a recipe for spreading diseases. Apricots, cherries, and olives should never be pruned during cool, wet, conditions, advises UCANR.• A common site on sidewalks after a rainstorm are worms, struggling to get out of the wet soil and onto dry land. If you have easy draining soil, you may see their mounds in lawns and gardens as they come up temporarily for air. Those mounds are a great fertilizer: worm castings. Just knock them down with your foot or a rake to feed the soil.• Tread lightly through the garden during or just afte
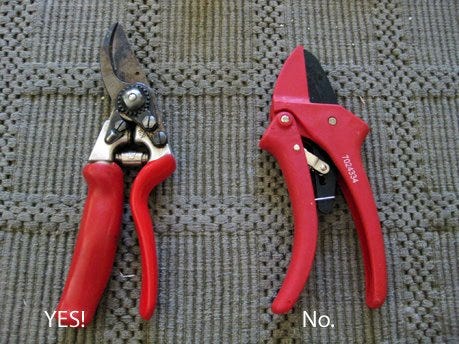
Bypass or Anvil Pruners? We Ask the Experts.
In today’s newsletter podcast (above): America’s Favorite Retired College Horticulture Professor, Debbie Flower, discusses the pros and cons of bypass and anvil pruners; and the best tool for sharpening pruners.This time of year, stroll down the tool aisle of any garden center and you'll find a vast array of cutting instruments, all designed with the backyard gardener in mind. Blade heads of short-handled pruners and long-handled loppers usually come in two different styles: bypass and anvil. Bypass loppers or pruners have a stainless steel curved blade that uses a scissors action to pass next to, not on top of, the lower surface, sometimes called the hook, designed to catch and hold the branch while the cutting blade comes down. Bypass pruners offer a cleaner cut, as the blade slices all the way through the stem. The cutting blade of anvil-style pruners comes down onto the center of a soft metal or hard plastic lower surface, called the anvil or table. Anvil pruners tend to crush the soft tissue of the stem, stopping the flow of nutrients, prolonging the healing time for the cut surface. Despite the bypass pruner's benefits, garden centers still offer a nearly equal number of anvil-style pruners and loppers, a never-ending source of confusion for the gardener hunting for cutting tools. We asked local garden experts their pruning preference: bypass or anvil? The late Sacramento County Farm Advisor, Chuck Ingels, preferred bypass pruners. "I never use anvil pruners because you often can't cut close enough to the branch collar without leaving somewhat of a stub," said Ingels. "When they begin to wear, they often don't cut all the way through. Also, they crush the bark, which bypass pruners can do also, but you can turn the shears so the blade is closer to the collar and make a clean cut." "I don't use and usually do not recommend anvil pruners," says Luanne Leineke, formerly the Community Shade Coordinator for the Sacramento Tree Foundation. "I tend to see too many wounded branches, particularly when the bark is soft. I suggest using bypass pruners for up to three quarters of an inch-thick branches, loppers for up to one inch thickness and a hand saw for anything larger." Pete Strasser is a former plant pathologist with a former Sacramento nursery, Capital Nursery. Pete has only one use for anvil pruners. "Anvils are for deadheading annuals, and that's about it." Loren Oki, Landscape Horticulture Specialist with UC Cooperative Extension in Davis, also has limited use for anvils: "I was taught that bypass pruners were used on live material, whereas the anvil types were better for dead wood. The bypass type cuts cleaner through the softer material without causing much damage." Steve Zien, owner of the Citrus Heights-based organic landscape consulting business, Living Resources, leaves no doubt to his preference: "I would never use anvil pruners! Never ever, unless something needed to be pruned right then and there, and it was the only tool I had beside my teeth."Bottom line: Bypass pruners are much more versatile than anvil pruners. Every gardener should own a pair of bypass pruners. But a word of warning: don't force cut a branch with bypass pruners that were not meant to cut a larger branch. Using too much force to work the blade through the wood could damage the entire unit. If those bypass pruners are advertised as cutting through one-inch branches, don't exceed that limit. Move up to a larger cutting tool for those bigger branches, such as bypass loppers, a small branch saw (my favorite), a bow saw, or when you finally realize that "Life is too short to put up with a problem plant", a good quality chain saw.Perhaps have a pair of small bypass snippers for the cut flower garden. And larger anvil ratchet loppers for removing dead wood. Finally, whatever you purchase, buy quality. Look for pruning tools that have replaceable parts (blades, springs,etc) that can easily be disassembled for cleaning, sharpening, oiling, and maintenance.The 3-Cut Pruning Method for Large BranchesIllustration provided by Texas A&M Forest ServiceThank you for listening to the Garden Basics with Farmer Fred podcast! It’s available wherever you get your podcasts. Please share it with your garden friends.As an Amazon Associate, I earn from qualifying purchases from some of the underlined links in the newsletter. This is how I am trying to keep this a free newsletter. And as long as you buy whatever you want from Amazon using any of those links to get into the Amazon site, I get a few pennies. Thank you.Fred Hoffman is also a University of California Cooperative Extension Master Gardener in Sacramento County. This is a public episode. If you'd like to discuss this with other subscribers or get access to bonus episodes, visit gardenbasics.substack.com/subscribe
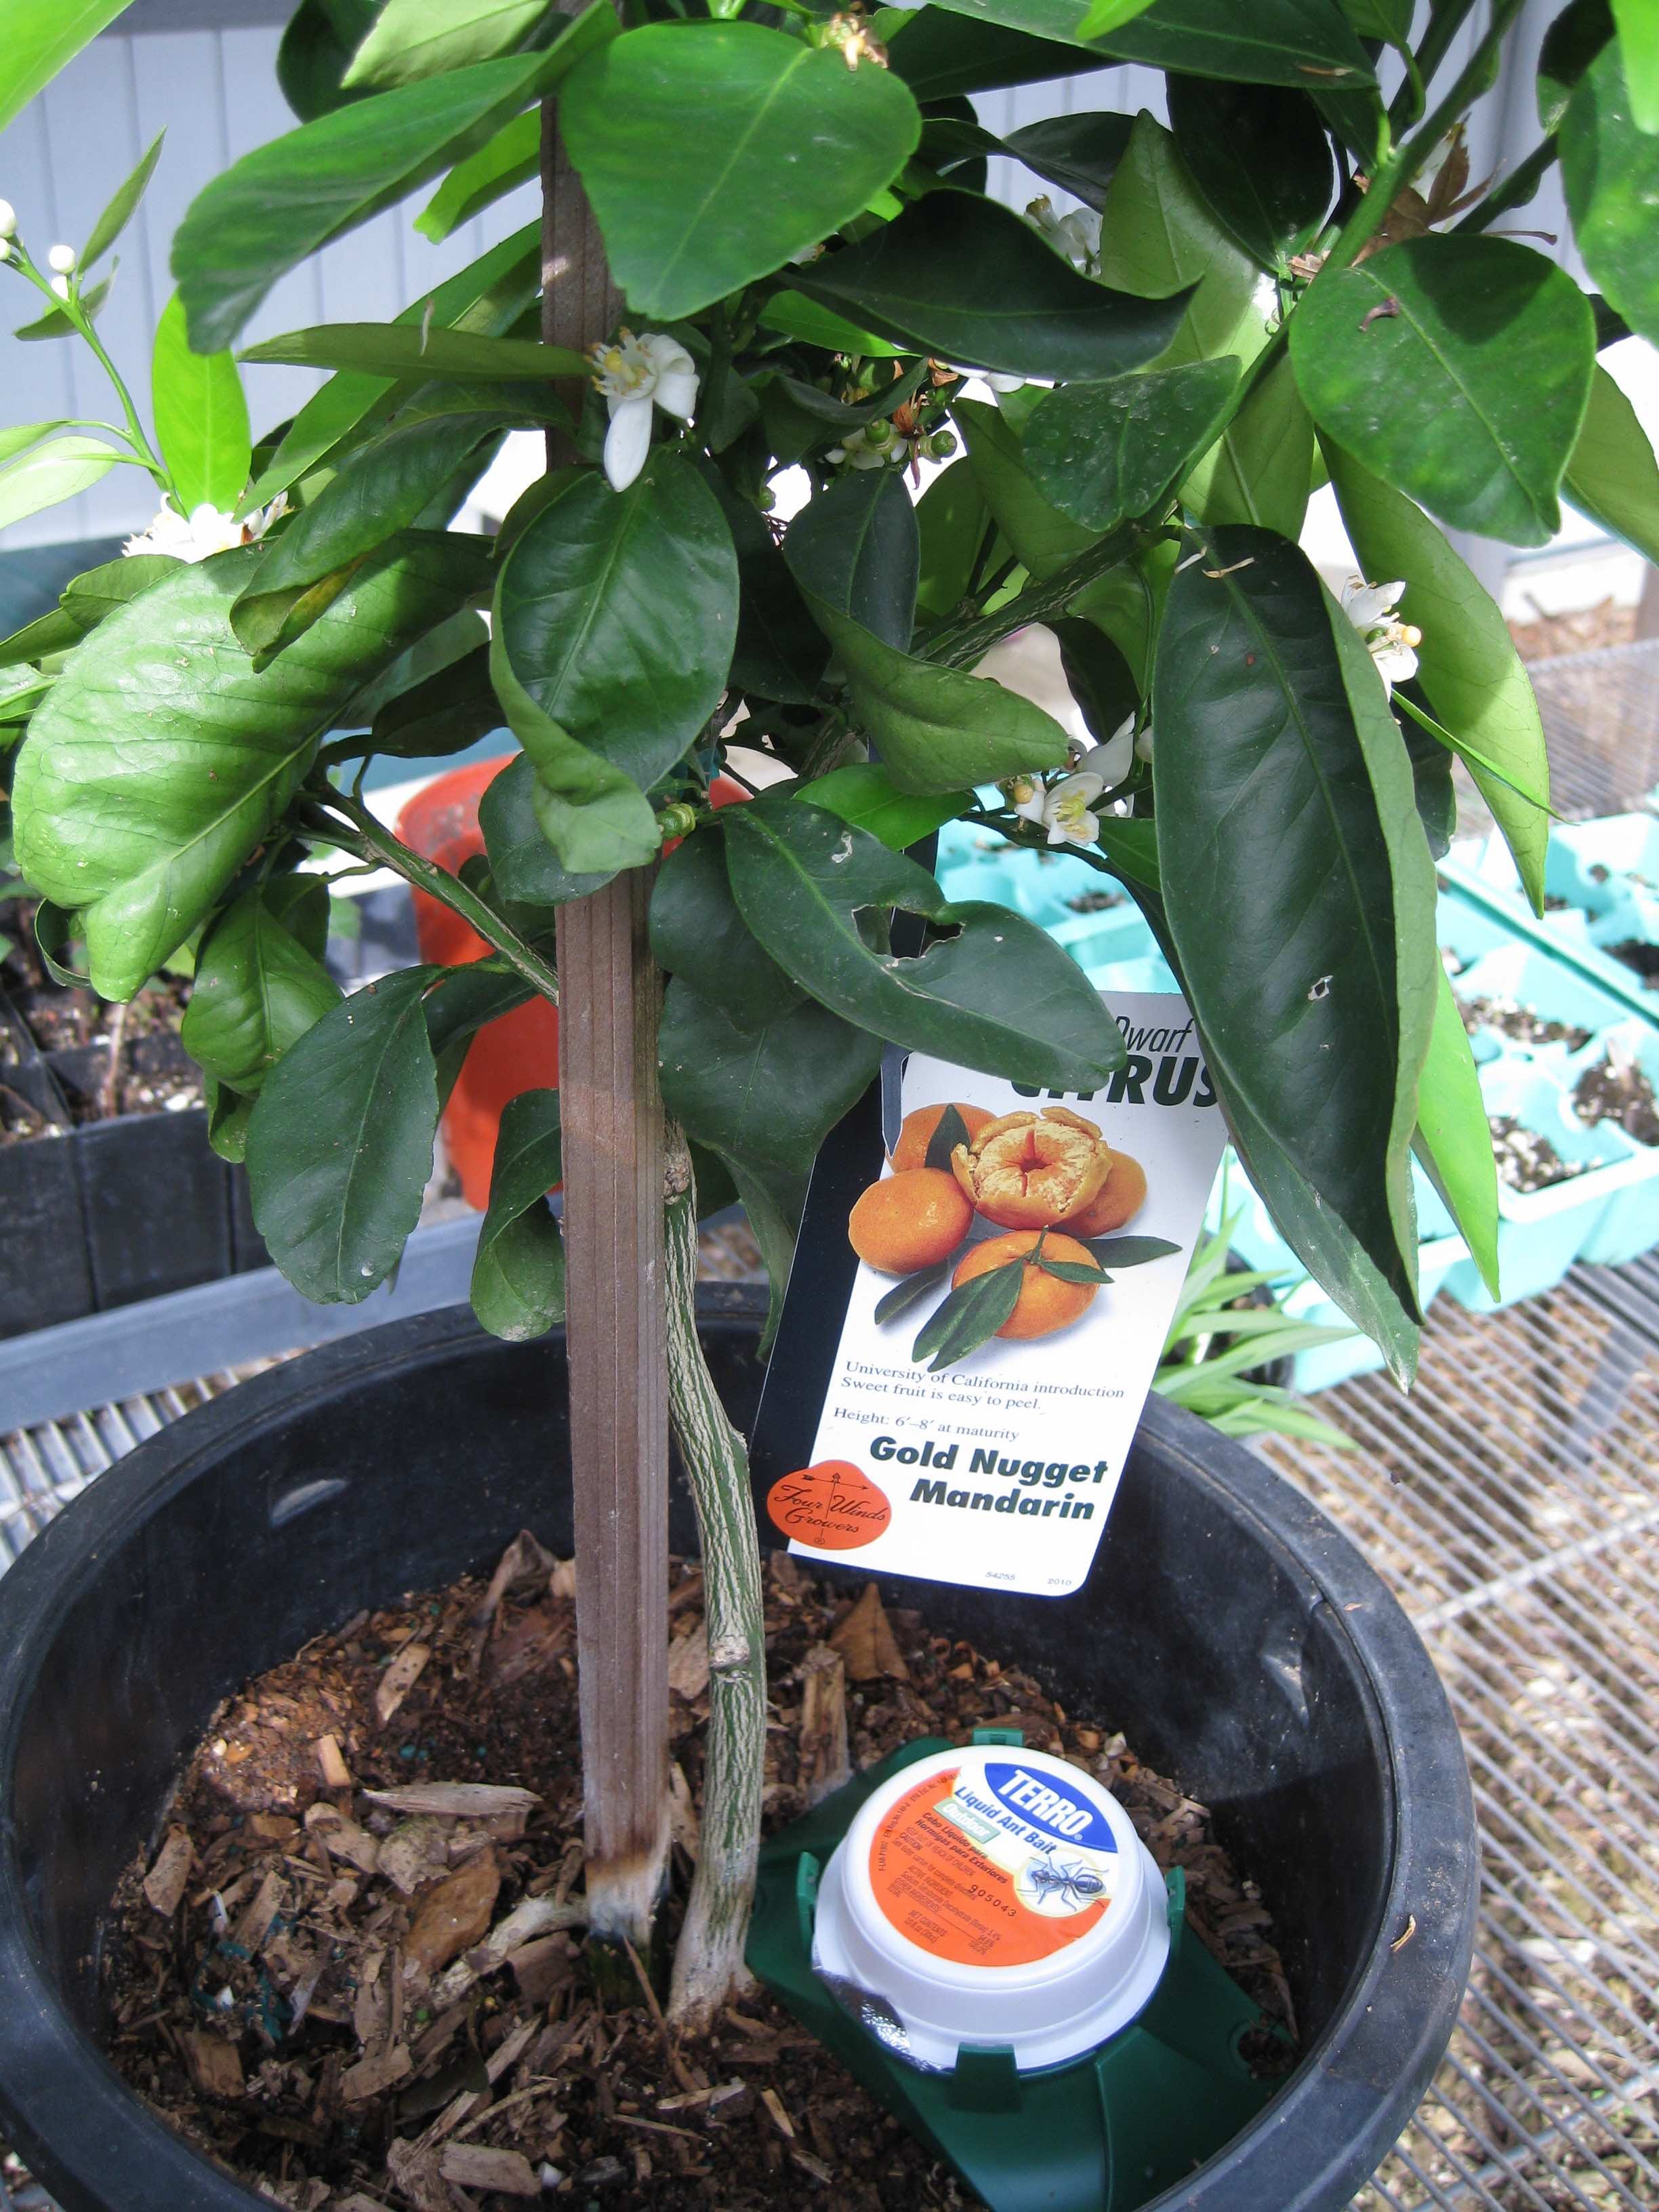
Ant Control
The recent bout of colder, wetter weather means ants have begun their march towards the warmth and comfort of your house, greenhouse or outbuildings. In today’s newsletter podcast, America’s Favorite Retired College Horticulture Professor, Debbie Flower, lists many ways to control ant populations, both indoors and outdoors, including her home recipe for lethal outdoor ant bait:1 part boric acid (1 teaspoon, e.g.) - available at most garden centers9 or 10 parts sugar (9 or 10 teaspoons sugar)Add enough water to make a slurry.Put slurry in a small container, tuna can size.Add 2 or 3 cotton balls and rotate them until they are completely covered in the slurry.Put a lid on the container. Lid must have holes big enough for ants to crawl through (about 1/8”).Bury in soil so lid is at soil level.Leave it alone. You won't see dead ants. They visit, take the bait back to the colony, and kill the entire colony.Commercial boric-acid ant baits are available, as well, for placing near outdoor plants where you see ants climbing up and down, herding aphids or gathering nectar.A word of praise for ants. Ants are a beneficial part of any successful garden. According to “Ants Are Ecologically Beneficial”, a publication of Iowa State University: “It is hard to imagine any other insect or animal that has a more important and positive impact on the terrestrial environment that sustains us. Ants are among the leading predators of other insects, helping to keep pest populations low. Ants move approximately the same amount of soil as earthworms, loosening the soil in the process and increasing air and water movement into the ground. They keep the ecosystem clean of dead insect carcasses and aid in the destruction and decomposition of plant and animal matter. By carrying bits of plants and animal remains into their nests, the soil is fertilized, and nutrients recycled through the world’s ecosystems. They carry seeds and help plants disperse into new areas.”However, as any gardener will swear, there are a couple of double-edged swords in that statement. Ant tunnels beneath the surface of a garden bed could move water too quickly to lower levels, making it unavailable to plant roots, especially in sandier soils. The solution for that: mix in compost on a regular basis. And those plant seeds that ants can disperse into new areas? There might be weed seeds in that mix. Yet another reason to own a long-handled hoe.It’s when ants start invading your house that homeowners need to act.Homeowners might reach for the spray can to douse those little scavengers. Many of those spray pesticides are only effective with direct contact on the ants. In addition, the stronger sprays, with residual action to thwart the next wave of ants, are potentially harmful to you, your children, and your pets.Here are some more modern, family-friendly indoor ant control methods from the University of California Ag and Natural Resources’ “Home, Garden, Turf, and Landscape Pests” publication, “Ants”:• Find where the ants are entering the house, then caulk any cracks and crevices both indoors and out.• Wipe up ant trails with soapy water when you see them.• Store food that is attractive to ants in closed containers.• Ant-proof kitchen garbage pails with sticky barriers like petroleum jelly.• Clean up grease and spills, pet food, and other possible food sources for ants.• Place pet food dishes in a moat of water with a drop of dishwashing liquid. The soap will keep the ants from floating.• If you decide to use a pesticide, choose prepackaged or refillable bait stations instead of sprays. Place them near ant trails and nest openings. Ant bait stations take time to work. It can take five to 10 days before you start seeing fewer ants. In the meantime, keep washing away the ant trails.In my experience, weak liquid boric acid combined with water in specially designed, refillable ant bait stations have proven effective, if given time. Boric acid powders and outdoor refillable ant bait stations are also available for outdoor ant control, especially if they have taken up residence in a long-neglected mulch pile of chipped/shredded tree parts. You’ll discover them in your first shovel full when you finally get around to using that mulch. Put down the shovel and pick up the powdered boric acid. Sprinkle it on the mulch pile and turn it into the middle of the pile. The ants will find it. But give them a couple of weeks before you return to that mulching task. Around the outer foundation of the house, the UC Integrated Pest Management team reports that several refillable bait stations are recommended, including the Ant Café, Antopia, Ant-No-More, and KM AntPro.A slow, but effective way to control Argentine ant populations is with a diluted, liquid boric acid product in a reusable ant bait station. Place the station outdoors near foundations where you see ants on the march.Thank you, also, for listening to the Garden Basics with Farmer Fred podcast! It’s available wherever you ge

Poinsettia Pointers
In today’s newsletter podcast: Back in November of 2020, we chatted about poinsettia plant basics, with Bill Eisley, a wholesale grower of poinsettia plants in Auburn, CA. Searching for that last minute Christmas gift? Many stores, including supermarkets, are now offering red and ivory-colored poinsettias, tropical plants native to Mexico, that are showstoppers this time of year for any dining room table. Even more colorful varieties are available at area nurseries and garden centers.Don’t grab and run with the first poinsettia plant you see. Take a few minutes to closely examine the plant.• Avoid buying poinsettias from exterior store displays. Poinsettias (Euphorbia pulcherrima) are tropical plants. They will be stressed in temperatures below 60 degrees. Choose a poinsettia from a well-lit indoor display.• The eye-catching red color (or white, cream, salmon or pink) on the poinsettia plants is not the flower; those are the modified leaves, known as bracts. The true flowers of a poinsettia are the small yellow berries, the cyathia, in the center of the bracts. Choose poinsettias that have tightly budded cyathias, not ones that are fully open.• Make sure that the smaller bracts surrounding the cyathia are fully colored. If these secondary bracts are not fully colored, the plants will quickly fade and lose color. • Examine the plant's soil before purchasing. It is best to avoid waterlogged soil, particularly if the plant appears wilted. Such a condition could signify irreversible root rot.Here are a few ideas to keep poinsettia plants looking good for another couple of months indoors:• Place your plant in indirect sunlight for at least six hours per day. If direct sun can't be avoided, diffuse the light with a shade or sheer curtain. • Provide room temperature between 68 - 70 F. If you are comfortable, so is your poinsettia. • Do not place plants near cold drafts or sources of heat. Avoid placing plants near appliances, wood stoves or ventilating ducts. • Water your plant when the soil feels dry to the touch. Avoid overwatering your plant. Don’t let it sit in standing water. • Always remove decorative foil from the outside of a container before watering. Allow the water to drain completely. Afterwards, return the decorative foil to the container, if desired.• It is not necessary to fertilize your plant when it is in bloom.If you want to try to get that poinsettia to rebloom for Christmas 2023 – and you have a lot of patience and perseverance – try these tactics:• In late March or early April, cut back the plant so that two buds remain, about six inches from the base. The plant may still look elegant before you start this radical surgery, but the pruning is necessary to help it look great for next December. • In April, place the plant - pot and all- outside in a mostly sunny, warm area; against a south wall beneath the overhang of your house or apartment would be ideal. Keep the poinsettia watered, pruning back the branches by a couple of inches in June and August to keep the plant from getting leggy. When the red color begins to show, start feeding the plant with a fertilizer that has a bit more nitrogen in it than phosphorus and potassium. Follow label directions.• In late October, before the first frost, bring the plant back into the house and keep it in a dark closet or room for at least fourteen hours a day. The plant will bloom only when it has had these long "nights." By next Christmas, you'll again be able to enjoy the striking beauty of that same poinsettia plant. If all this sounds like a lot of work, it is. Moreover, the result may not be as spectacular as the original plant's bloom. The good news: there will always be more colorful poinsettias for sale next holiday season. So, when you’re done enjoying that poinsettia plant this winter, you can always add it to your compost bin.More tips on poinsettia care from the National Garden Bureau.Thank you for listening to the Garden Basics with Farmer Fred podcast! It’s available wherever you get your podcasts. Please share it with your garden friends.As an Amazon Associate, I earn from qualifying purchases from some of the underlined links in the newsletter. This is how I am trying to keep this a free newsletter. And as long as you buy whatever you want from Amazon using any of those links to get into the Amazon site, I get a few pennies. Thank you.Thanks for Subscribing and Spreading the Word About the Beyond the Basics: The Garden Basics with Farmer Fred newsletter, I appreciate your support. Fred Hoffman is also a University of California Cooperative Extension Master Gardener in Sacramento County. This is a public episode. If you'd like to discuss this with other subscribers or get access to bonus episodes, visit gardenbasics.substack.com/subscribe
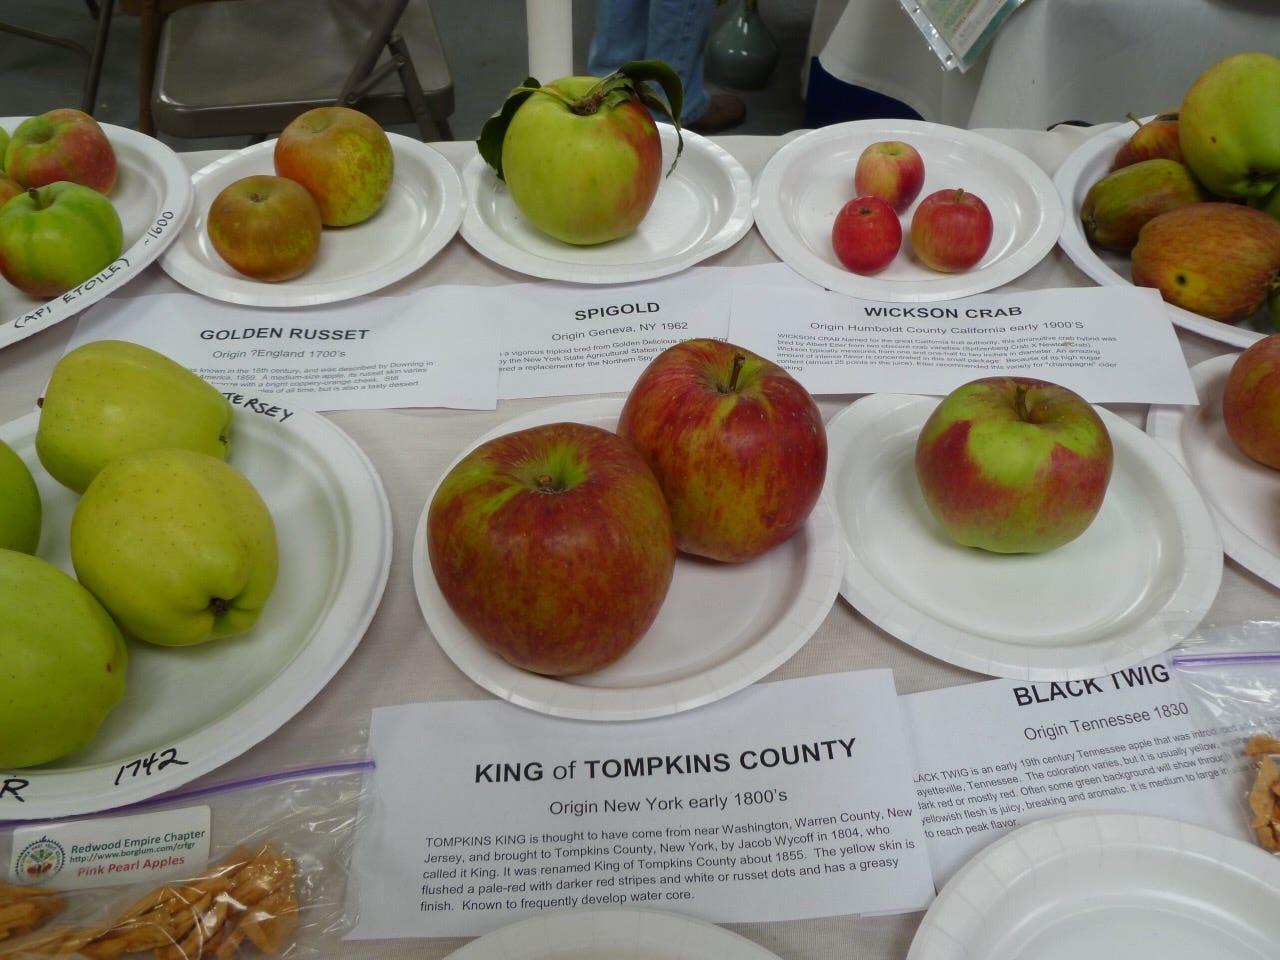
All About Fruit Tree Chill Hours, and More
What are Fruit Tree Chill Hours? Do They Matter?In today’s newsletter podcast (Above. Originally aired in Episode 105 of Garden Basics), Tom Spellman of Dave Wilson Nursery explains the term “chill hours” and how cold winter temperatures helps production on many deciduous fruit trees, especially apples. Chill hours refer primarily to low temperatures (usually between 32 and 45 degrees Fahrenheit) during a fruit tree’s dormant months in the winter. But Tom Spellman is throwing a monkey wrench into the hard rules about growing fruit trees that require lots of winter chilling hours (more than 800 hours) in areas of the country that don’t get that cold in the winter. And he is having a lot of success in his test orchard in Southern California, where accumulated winter chill hours seldom top 100, but still has nighttime cooling in the 40’s and 50’s. Tom explains his “high chill trees in a low chill test area” in today’s newsletter podcast (above). The key, Tom points out, is “All Gardening is Local” (hmm…that sounds familiar!). Most chill hour requirements listed for deciduous fruit trees were originally established where the tree has been growing - and producing - for decades. The only way to see if a particular fruit tree that supposedly requires winter chill can succeed in your area, is to try to grow it in your locale. And as Tom points out in an article he wrote for the Dave Wilson website, “Fruit varieties can be productive where chill hours are less than recommended if there is sufficient cool weather (45-55°F) during the dormant period.”1. In fall, deciduous fruit trees lose their leaves and enter a dormant state in order to survive winter. To end dormancy, bloom and set fruit they require a certain amount of winter cold (their “chilling requirement”) followed by a certain amount of heat. Chilling requirements vary widely among varieties.2. Fruit varieties with chilling requirements much lower than received at the planting location may end dormancy and bloom too early, subjecting tree, bloom and fruit to freeze damage. Conversely, varieties with chilling requirements much higher than received will suffer delayed, weak leafing and blooming and will not fruit satisfactorily.3. To quantify fruit tree chilling Dave Wilson Nursery uses the most widely used method, the Hours Below 45°F model. One hour below 45°F during the dormant period (autumn leaf fall to spring bud break) equals one hour of chilling or one “chill hour”.4. Research indicates fruit tree chilling also occurs above 45°F (to about 55°F), is most effective at about 35-50°F, and does not occur below about 30°F. Chilling temperatures are most effective in early dormancy and during that time accumulated chilling can be negated by temperatures above 60°F. Such findings help explain the response of specific varieties to different climates, i.e. to different patterns of cold and warm temperatures.5. Generally, fruit growers have most success with varieties that have stated chilling requirements similar to the chilling typically received at the planting location: “high chill” varieties (800-1,000+ hours) for cold winter climates, “low chill” varieties (500 hours and less) for warm winter climates.6. Published chilling requirements for a fruit variety can be the minimum chilling required to produce a satisfactory home garden crop up to a higher requirement for the consistent, maximum crop sought by commercial growers. Note that many apple varieties can set fruit with far less chilling than recommended, color and quality depending on climate.7. Fruit varieties can be productive where chill hours are less than recommended if there is sufficient cool weather (45-55°F) during the dormant period.8. Some cold hardy fruit varieties are widely adapted because they have a low or moderate chilling requirement as well as a cold hardiness deriving from a high heat requirement for ending dormancy.9. Much of California has an ideal, virtually frost-free fruit growing climate where almost any kind of deciduous fruit can be grown, including varieties with chilling requirements anywhere from 100 to 800 or more hours.10. A variety is proven for a climate or region only by growing it there. When choosing fruit varieties always refer to area retail nurseries, agricultural universities, county extension offices and master gardeners for local fruit growing information and ideas.CAN YOU GROW AN APPLE TREE FROM SEED?Callers to the Garden Basics podcast or questions to the Farmer Fred e-mail bag also contain the attempts of many home garden scientists, trying to expand their horticultural horizons. Someone is always trying to grow something that is not intended (supposedly) for the local area. Roberta of Carmichael (Sacramento County, CA) is trying to emulate Johnny Appleseed: "I have two Maiden Blush apple trees in my yard. They ripen in August (which isn't very good). Is there anything I can do to make them ripen later in the year? I grew these trees from seeds from apples of

2023 All-America Plant Selections Winners
In today’s newsletter podcast: Diane Blazek, Executive Director of All-America Selections (AAS) and the National Garden Bureau, explains how a plant is selected to become an All-America Selection winning plant.In Episode 243 of the Garden Basics with Farmer Fred Podcast, Diane goes into the details of each of the winning plants in the 2023 AAS plant competition. Give it a listen while looking at the pictures and comments. More info, plus 90 years worth of previous winners, at the AAS website. Coleus Premium Sun Coral CandyFoliage Color: MultiPlant Habit: MoundedPlant Height: 10-16 inchesDoes well indoors, in a window with good natural lighting.JUDGE'S OBSERVATIONS* “Leaves are vibrant on a very tight, densely leaved plant”* “Each plant is very uniform, with only minor fading when in full sun”* “Very nice habit, excellent color, very full, robust, and rounded”* “This is excellent for container plantings”* “Phenomenal compact growth habit with appealing foliage color”===================== Colocasia ROYAL HAWAIIAN® WaikikiFoliage Color: Deep-green glossy foliage with white markings and vivid pink veinsPlant Habit: Clump formingPlant Height: 36 inchesAlso known as Taro or Elephant’s EarJUDGE'S OBSERVATIONS* “Great foliage color on a compact plant”* “Color holds up well even in full sun and after a frost”* “Lush, large full leaves with great color”* “Tricolor foliage is stunning, red petioles stand out”* “A fantastic elephant ear that will add drama to the garden”========================== Echinacea Artisan™ Yellow Ombre F1Plant Habit: BushyPlant Height: 24-34 inchesBloom Time: Summer to frostBloom Color: YellowBloom Size: 3-4 inchesAlso known as coneflower. The designation, “F1” or “F1 Hybrid” after a plant name is - according to my Master Gardener friends - “the first generation hybrid seed or plant that occurs following the successful cross-pollination of one genetically uniform plant variety with another specific genetically uniform variety.” If you can’t remember that, just tell anybody who asks about F1, “they found it in the back of the very first Ford pickup truck.”JUDGE'S OBSERVATIONS* “A more saturated bright yellow flower color”* “A very nice yellow Echinacea. Consistently better than comparisons”* “Due to the saturated color of the entry, it deserves an award.”* “Flower color lasted all season”* “The foliage was cleaner and slightly larger”============================================ Pepper cayenne Wildcat F1Plant Height: 36-42 inchesFruit Color (Harvest): Green or RedFruit Shape: Long, curledFruit Size: 8-12 inchesFruit Flavor Description: Mild pungency 500-1500 Scoville unitsNumber Of Fruits Per Plant: 20-25Can be grown in an 8 or 15-gallon container.JUDGE'S OBSERVATIONS* “The entry fruits were large, about 8″ long, and mostly straight”* “Lots of fruit production”* “Entry did have HUGE fruits compared to the comparisons, which made harvest easier (easy to see a 6″ bright red pepper!)”* “Good flavor and a moderate heat level make this a multi-purpose pepper for your garden”* “The sheer size of these peppers is astonishing. They are literally almost 100% larger than the others, volumetrically speaking. Insanity”===================== Pepper jalapeno San Joaquin F1Plant Height: 30 inchesFruit Color (Harvest): Green-redFruit Size: 4 inchesFruit Flavor Description: A hint of heat at 2500-6000 Scoville unitsNumber Of Fruits Per Plant: 50That “hint of heat” may be more than you might desire. Pro tip: to soothe a burning mouth, drink whole milk or eat ice cream. Water, beer, and non-fat milk won’t help.JUDGE'S OBSERVATIONS* “Produced almost twice the peppers as the comparisons”* “Large, thick-walled fruits, well shaded by leaf canopy reducing fruit deformities”* “Nice compact plant with heavy yields. Large fruit would make excellent stuffers”* “Loved this variety’s mild heat and large fruits that did not crack”* “Excellent size, yield, and uniform upright growth. Very good taste”========================= Leucanthemum Carpet Angel®Plant Habit: SpreadingPlant Height: 4-6 inchesBloom Time: All growing seasonBloom Color: WhiteBloom Size: 3 inchesLeucanthemum is a new name for former members of the Chrysanthemum genus. Leucanthemums include the Shasta Daisy and the common daisy. Botanical name changes occur just to tick us off.JUDGE'S OBSERVATIONS* “Flowers were unique shape and color”* “Plants were a nice dwarf size”* “Very good winter hardiness”* “The performance is exceptional, surviving many challenges that proved too much for the comparison”* “The habit and bloom time on this trial is much better than the comparison”======================================= Salvia “Blue by You”Plant Habit: MoundedPlant Height: 20-22 inchesBloom Time: Late spring – Late summerBloom Color: BlueBloom Size: 10-12″ inchesA low-water use plant. Dead-head for more blooms. The bees will thank you.JUDGE'S OBSERVATIONS* “Intensely beautiful flower color: dark purple with dark burgundy calyces”* “Individual flower size is larger than th

A Persimmon Primer.
TODAY’S NEWSLETTER PODCAST: UC Davis Arboretum Superintendent Warren Roberts talks about persimmon trees, both American and Japanese persimmons.California's Central Valley was ablaze in October and early November with the other “orange” fruit tree: the brightly colored persimmon. And it's not just the fruit.Persimmon tree leaves can turn a brilliant hue of red before the first big wind and rain storm of late November washes them off their branches. What's left behind is the unpicked fruit, dangling like holiday ornaments during December. That's a feast for our eyes...as well as a banquet for hungry birds and squirrels.Persimmons have adapted well to our California climate: warm, dry summers and mild winters. At least 500 different Japanese persimmon (Diospyros kaki) varieties were brought to California during a major planting spree from 1870 to 1920. In 1877 alone, more than 5,000 plants in 19 varieties were imported from Japan. As a result, 99% of the U.S. commercial persimmon crop is grown here in California.Persimmons are quite nutritious, as well, loaded with Vitamin A, Vitamin C, Fiber, and antioxidants such as Beta-Carotene and Lycopene. If you live in the Central Valley, Southern California, Bay Area or low foothills as well as throughout USDA Zones 8 and 9 ... you can grow that! Bare root Japanese persimmon trees will be available at local nurseries during late December, January and February. Give them full sun and regular irrigation in the dry months for best production. Persimmon trees can tolerate partial shade.As Warren explained in the newsletter podcast, persimmons are usually classified as either astringent or non-astringent. For fresh eating straight from the tree, choose a non-astringent, self-pollinating variety such as Fuyu, Giant Fuyu, Yemon or Izu. Astrigent varieties, which need to soften thoroughly before they sweeten, include Hachiya, Chocolate or Tamopan. Those varieties are self-fruitful, as well.Persimmon growing advice from the California Rare Fruit Growers (CRFG):Location: Full sun with some air movement is recommended for persimmon trees in inland areas, although they will tolerate some partial shade. Persimmons grown in cooler areas should have full sun with protection from cooling breezes. As an attractive ornamental the tree fits well in the landscape. It does not compete well with eucalyptus.Soil: Persimmons can withstand a wide rage of conditions as long as the soil is not overly salty, but does best in deep, well drained loam. A pH range of 6.5 to 7.5 is preferred. The tree has a strong tap root which may mean digging a deeper hole than usual when planting (when on D. kaki stock).Irrigation: Persimmon trees will withstand short periods of drought, but the fruit will be larger and of higher quality with regular watering. Extreme drought will cause the leaves and fruit to drop prematurely. Any fruit left on the tree will probably sunburn. Some 36 to 48 inches of water are needed annually, applied gradually in spring and tapering off in the fall. Hot inland areas may require 2 or 3 applications weekly, while coastal areas may need watering only once every 6 weeks, depending on the soil. If a drip system is is used, the emitters should be moved away from the trunk as the tree matures.Fertilization: Most trees do well with a minimum of fertilizing. Excess nitrogen can cause fruit drop. If mature leaves are not deep green and shoot growth is less than a foot per year, apply a balanced fertilizer such as a 10-10-10 at a rate of 1 pound per inch of trunk diameter at ground level. Spread the fertilizer evenly under the canopy in late winter or early spring.Pruning: Prune persimmon trees to develop a strong framework of main branches while the tree is young. Otherwise the fruit, which is borne at the tips of the branches, may be too heavy and cause breakage. A regular program of removal of some new growth and heading others each year will improve structure and reduce alternate bearing. An open vase system is probably best. Even though the trees grow well on their own, persimmons can be pruned heavily as a hedge, as a screen, or to control size. They even make a nice espalier. Cut young trees back to 1/2 high (or about 3 feet) at the time of planting.Pests and Diseases: Persimmons are relatively problem-free, although mealybug and scale in association with ants can sometimes cause problems. Ant control will usually take care of these pests. Other occasional pests include white flies, thrips which can cause skin blemishes and a mite that is blamed for the "brown lace collar" near the calyx. Waterlogging can also cause root rot. Vertebrate pests such as squirrels, deer, coyotes, rats, opossums and birds are fond of the fruit and gophers will attack the roots. Other problems include blossom and young fruit shedding, especially on young trees. This is not usually a serious problem, but if the drop is excessive, it may be useful to try girdling a few branches. Over watering or over ferti
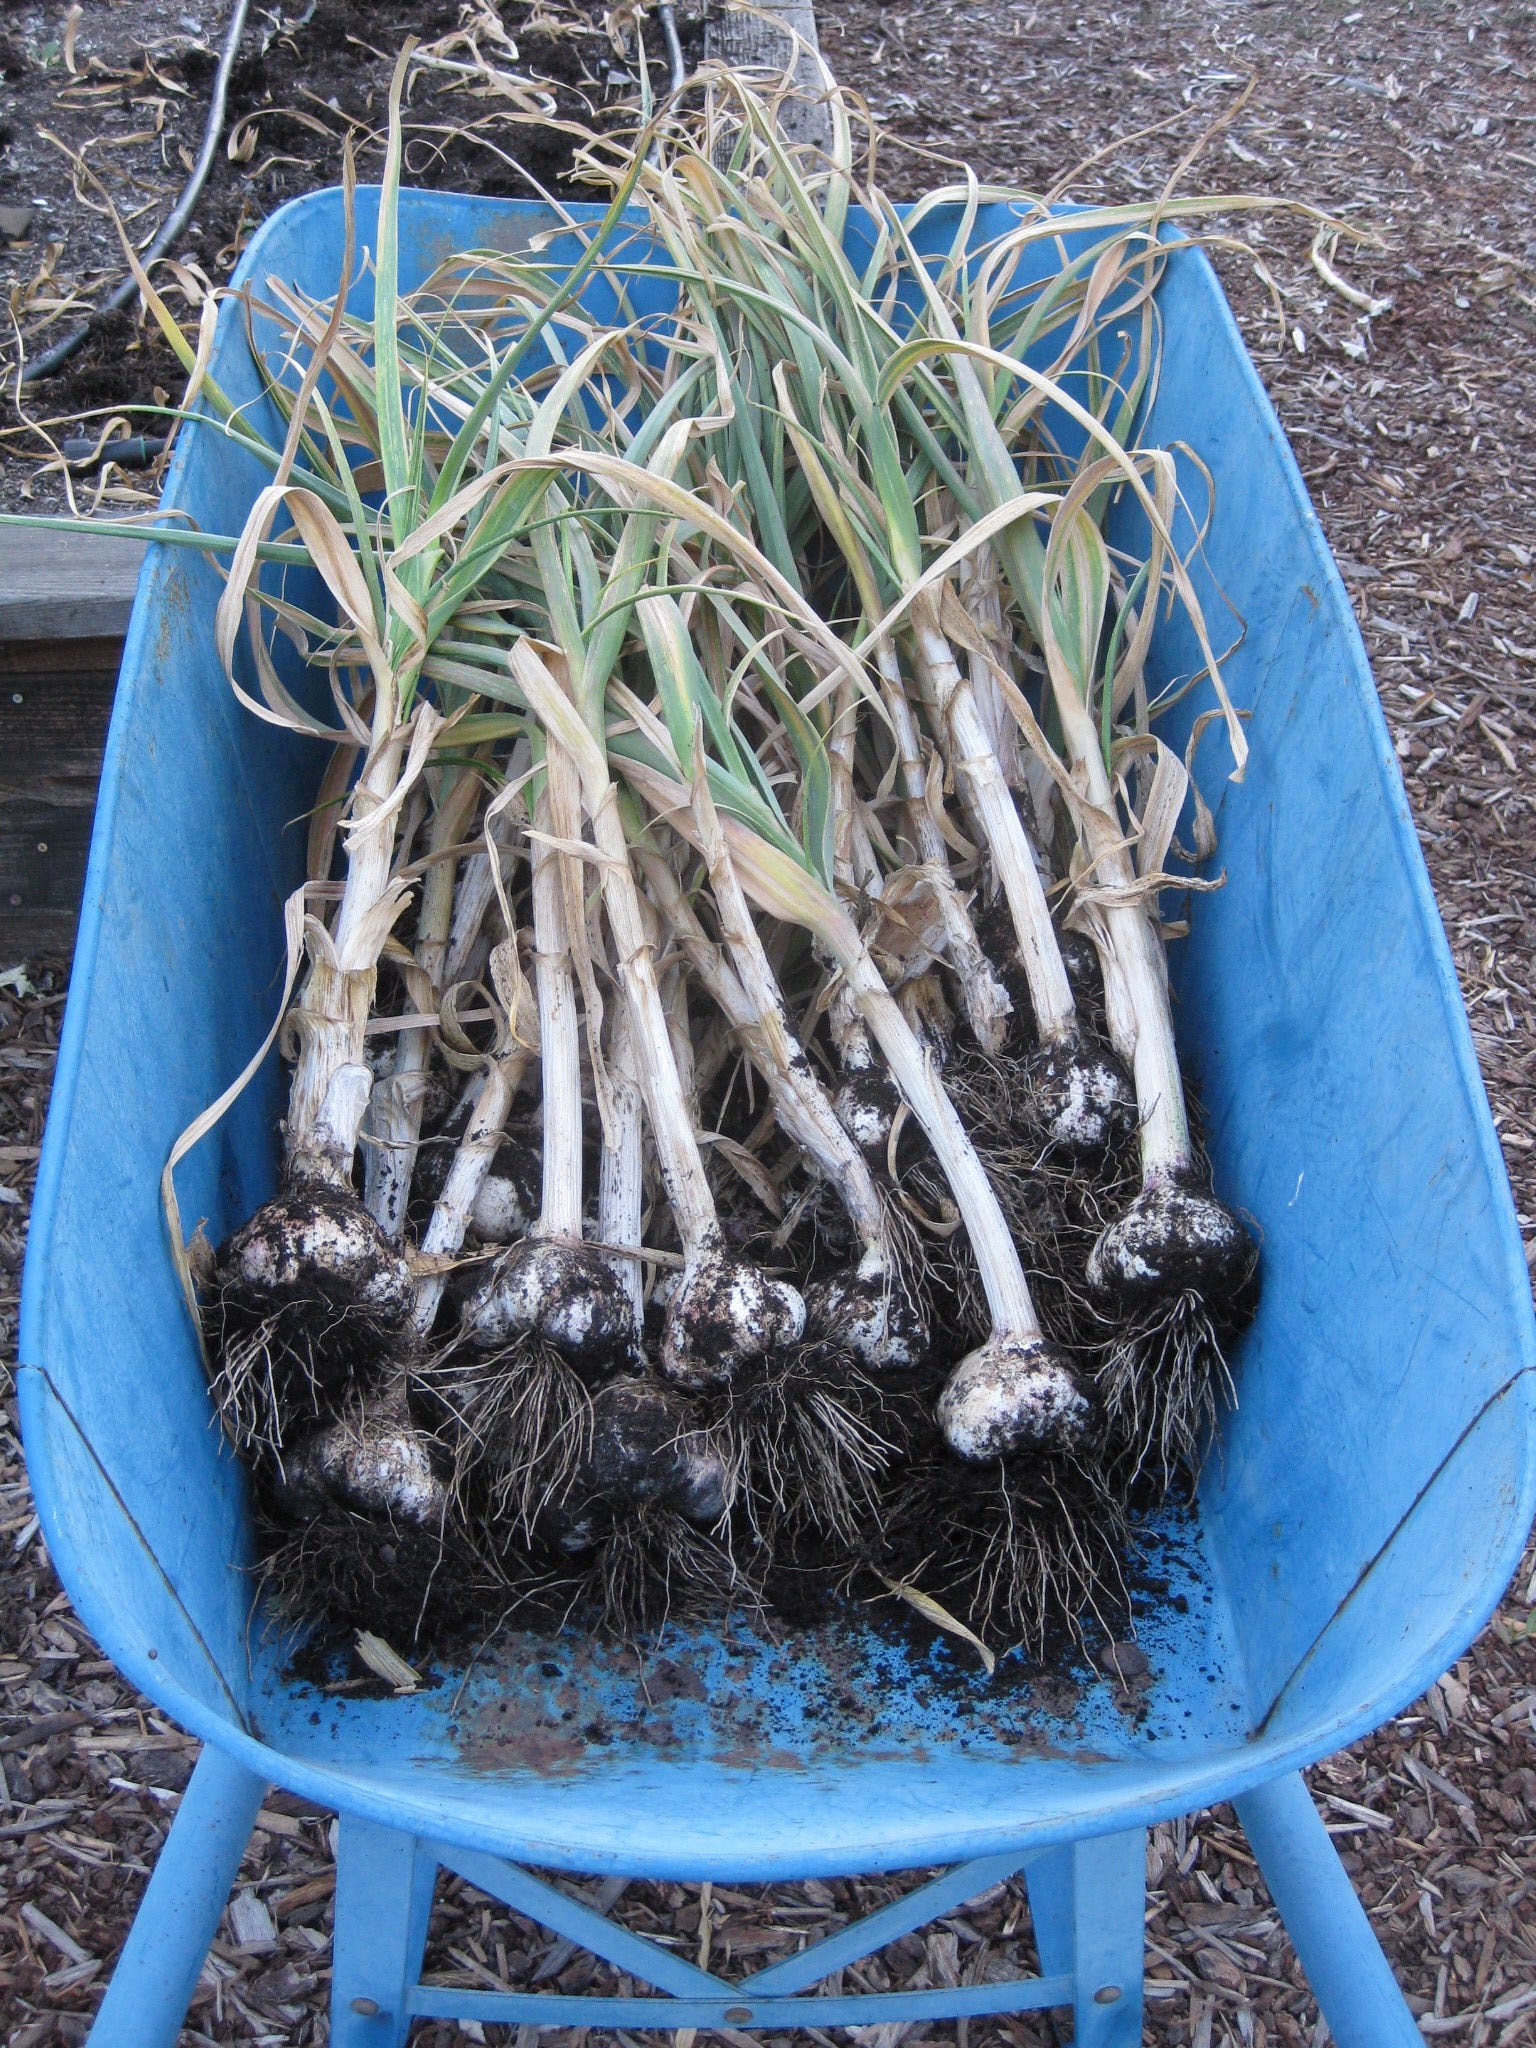
Garlic Growing Tips
Want to grow garlic?In milder climates (where the ground doesn’t freeze), now is the time to visit your favorite nursery, garden center or garden catalog company to choose the garlic varieties you want. Note I said, “varieties.” Grocery store garlic is primarily one or two varieties. Around here, it is usually California Early or California Late. And these two softneck, Artichoke varieties of garlic do grow well in USDA Zone 9. They take our late spring heat, are very productive, and can be stored (in a cool, dark room, in netted bags) for up to ten months. However, if you want a variety that has a deeper, full-bodied flavor, choose a hardneck variety, such as one of the Rocambole varieties, many of which do well in colder climates, where garlic is best planted two to four weeks before the ground freezes. In the past, I have had good luck with Killarney Red and German Red. Purple Stripe varieties are also quite flavorful, especially when used in baked dishes. Chesnok Red and FerganskiJ are two Purple Stripes that have done well here. Storage life for these varieties is much shorter, usually four to six months. The longest storing varieties – up to a year – are the Silverskins and Creoles, which include two of my favorites: Nootka Rose and Burgundy. Increasing in popularity because of their large size and tangy flavors are the Porcelain garlics, especially “Music”, with cloves as large as a Brazil nut.A well-stocked garden center or independent nursery may have a better supply right now than many garlic catalogs, which sell out of their stock quickly. For more information about garlic – including longer definitions than what is supplied here – check out online garlic company Filaree Farm in Washington State (filareefarm.com). Their site can answer many of your garlic questions. A very good book on the subject is “Growing Great Garlic” by Ron Engeland. A harder to find, out-of-print book, “The Complete Book of Garlic” by Ted Jordan, is a prized reference for garlic aficionados.University of California Cooperative Extension Master Gardener Advisor Emeritus Michelle Le Strange offers these garlic growing tips:• The first time you plant garlic you should buy planting cloves from your local nursery or garden center. Their heads (bulbs) are typically larger than those in the grocery store and more reliable to grow.• The best garlic grows in loose, reasonably fertile, well-drained soil.• Planting a single clove will yield a whole bulb. Break the bulbs apart and remove the very smallest cloves and any that are discolored, moldy, or missing their protective papery jackets.• Push the cloves, pointed end up, into the soil about two inches deep. Space the cloves about six inches apart, in rows eight to twelve inches apart.• Let the plants grow all winter, spring and into summer. Some attention to weeding, irrigation, and an occasional fertilizer feeding (in late winter/early spring) is all that is required.• A clump of shoots will grow about a foot tall. Irrigate until tops begin to brown, and then withhold water to let the plant dry naturally.• One indication to start harvesting is when the leaves fall over and about half of the lower leaves turn brown. You can also just dig up a few bulbs and cut them in half; if the cloves fill the skins, then the bulbs are ready to harvest.• Use a garden fork to lift the plants out of the ground with shoots and bulbs attached. Knock off clumps of dirt and then let the plants air dry for a few weeks. The cloves should be firm to the touch. After curing, the shoots can be cut a little above the bulb and the roots can be trimmed close to the bulb base.Filaree Farm recommends topping your garlic planting bed with a few inches of mulch, perhaps leaves or chopped up straw. Not only does the mulch feed the soil and suppress weeds, that mulch might dissuade four footed diggers. One home remedy I use to deter the neighborhood cats is six inch mesh concrete reinforcement wire, suspended about an inch above the surface. Cats dislike this prowling obstacle on raised garden beds.Filaree Farm also recommends not storing your garlic bulbs in the refrigerator. The air is too humid, and the garlic will begin to sprout. Ideal storage conditions for garlic are 55-65 degrees and 45%-60% humidity.Looking for an easy recipe that contains lots of garlic?This low-salt, slow cooker recipe contains 2/3 of a cup of garlic, and is perfect for serving at casual get-togethers or as a main dish on a cold winter night. To make it vegetarian, just leave out the chicken! Super Bowl of Chicken Salsa Chili14 oz. boneless, skinless, chicken: diced into 1" cubes5 oz. diced onions5 oz. diced red/green peppers2/3 Cup finely chopped garlic or elephant garlic10 oz diced tomatoes15 oz can of low salt garbanzo beans15 oz can of low salt black beans15 oz can of no salt added kidney beans16 oz cherry tomatoes28 oz. tomato puree1 cup unsalted chicken or vegetable broth2 TBS fresh cilantro1 TBS chili powder1 tsp cayenne pepper1 T

Roasted Tomatoes
Even though it is mid-November, many gardeners in milder areas of the country may still be harvesting tomatoes. What to do with those remaining, healthy tomatoes? Can or freeze them! Roasted tomatoes add so much more tomato flavor to any recipe you prepare that calls for tomatoes (such as pasta sauce, whole tomatoes or diced tomatoes). And it's an easy way to preserve the harvest for use throughout the year, either canned or frozen.To preserve the most flavor, roast them at a low temperature for a long period of time. Convection ovens, which distribute the heat more equally, are great for this. If you don't have a convection oven, be sure to turn the tomatoes once at the midpoint of the roasting process.Our recipe:• Cut fresh tomatoes into equally thick slices, about a quarter-inch to a half-inch thick (no peeling necessary!). Cherry tomatoes can be cut in half.• Place cut tomatoes in a single layer on a cookie sheet lined with parchment paper. • Drizzle with olive oil.• Bake for 90 minutes to two hours at 300 degrees (250 if your convection oven goes that low). If roasting on two trays simultaneously on upper and lower racks, switch them half way through. Check for doneness at 90 minutes; go longer if necessary.• The tomatoes will shrink, but should still look somewhat meaty.• Freeze in small batches or can them (hot water processing) in pint or quart jars.*There are naturally occurring sugars in tomatoes. In this recipe, there are no added sugars.Thank you for listening to the Garden Basics with Farmer Fred podcast! It’s available wherever you get your podcasts. Please share it with your garden friends.As an Amazon Associate, I earn from qualifying purchases from some of the underlined links in the newsletter. This is how I am trying to keep this a free newsletter. And as long as you buy whatever you want from Amazon using any of those links to get into the Amazon site, I get a few pennies. Thank you.Thanks for Subscribing and Spreading the Word About the Beyond the Basics: The Garden Basics with Farmer Fred newsletter, I appreciate your support. Fred Hoffman is also a University of California Cooperative Extension Master Gardener in Sacramento County.Thanks for reading Beyond Basics: The Garden Basics with Farmer Fred Newsletter! Subscribe for free to receive new posts and support my work. This is a public episode. If you'd like to discuss this with other subscribers or get access to bonus episodes, visit gardenbasics.substack.com/subscribe

Trees vs Storms
Today’s Podcast: Consulting Arborist Michael Santos tells us about online resources for homeowners to get more information about the trees in their yard.How to (Possibly) Thwart Tree Damage Before a StormDuring or after a particularly violent fall or winter wind/rain/snow storm, TV news crews rush to the most photogenic damage during these rare occasions: downed trees, usually leaning against a house or crushing a car.Without the correct care of the trees on your property, winter storms and trees will not get along. Most susceptible are the trees that keep their leaves year round, such as eucalyptus and camphor, along with the conifer family: pines, firs, redwoods and cedars. All that mass of greenery acts as a sail in a heavy wind, bending trees at ridiculous angles. Another cause of winter tree failure is crown rot, which despite its name, refers to the deterioration of the root system near the base of the tree. Combine that with a couple of inches of rain onto already saturated soils, and you have tree roots heaving towards the surface, leading to these pictures popping up on the TV news: If this is the view from your window, the day after a major rain and wind storm is not necessarily the best day for the gardener to tackle the hazardous task of cleaning up the remnants of trees, shrubs and other plants that took a beating. If wind and rain is still in the forecast, the prevalence of slippery conditions and the chance of more falling debris should limit your cleaning chores to dragging broken branches away from the scene of the crime. It is not a good day to be climbing ladders or scrambling into trees while balancing a chain saw. Leave that to the professionals.Signs of Potential Tree FailureArborists offer this good piece of advice for those surveying the fallen aftermath of a major storm: Limb failure is largely a product of poor tree maintenance over time. Take care of your trees, or they may take care of themselves in ways you won't appreciate. According to the University of California publication, "Inspect Your Landscape Trees for Hazards", a nice day in autumn (or winter, spring or summer, for that matter) is the time to take an inventory of any possible future tree damage before you, your house or your car becomes the next victim of a falling tree or branch.Leaning Trees: Are your trees not as upright as the result of recent heavy winds? Can you see newly upheaved roots or soil around those trees? Then, immediate action is required: call in a professional, certified, bonded and insured arborist to do an onsite inspection and offer a solution (find one near you at treesaregood.org). Newly leaning trees are an imminent hazard. If you have a tree that has leaned for a number of years, that tree can still be a hazard during wet, windy weather. Taking periodic photographs can help you determine if a greater lean is developing. Multiple Trunked Trees: This co-dominant condition can result in breakage of major tree parts during storms. Usually, these trunks are weakly attached. Inspect the point where the two trunks meet; if you see splitting beginning, call in an arborist.Weakly Attached Branches: Trees with many branches arising from the same point on the trunk are prone to breaking during wind storms. Prune out any split branches. Thin out multiple branches.Hanging or Broken Branches: If you see storm damaged branches hanging from the tree, remove them as soon as possible. This includes removing any completely broken branches that may be resting elsewhere in the tree's canopy.Cracks in Trunks and Branches: Measure the depth of any cracks with a ruler. If those cracks are more than three inches deep, call in an arborist to determine the best course of action.Dead Branches/Trees: Branches or entire trees that have completely died are very likely to come tumbling down in a storm. Dead branches are most noticeable in the summer when the tree is in full leaf.Cavities and Decay: Large, open pockets where branches meet the trunk, or at the base of the trunk, can mean big trouble. The presence of mushrooms on the bark or on exposed roots may indicate wood decay. Call in an arborist.The Arbor Day Foundation website has this guide to proper pruning techniques. Also: Tips for Hiring an Arborist. Choose the right pruning equipment for shrubs and trees: Hand Shears for branches less than the thickness of your little finger. Loppers for branches less than the thickness of your thumb. Pruning saws for branches greater than the thickness of your thumb.Want to avoid damaging your trees while pruning? Here’s an illustrated guide for pruning large branches (which are branches that are greater than the thickness of your thumb): The three-cut methodWhen pruning larger branches, use the three-cut method to prevent the falling branch from stripping the bark, below the cut. CUT ONE: Make a cut halfway through the underside of the branch to be removed. Position the cut about one foot out from the branch collar. That’s where
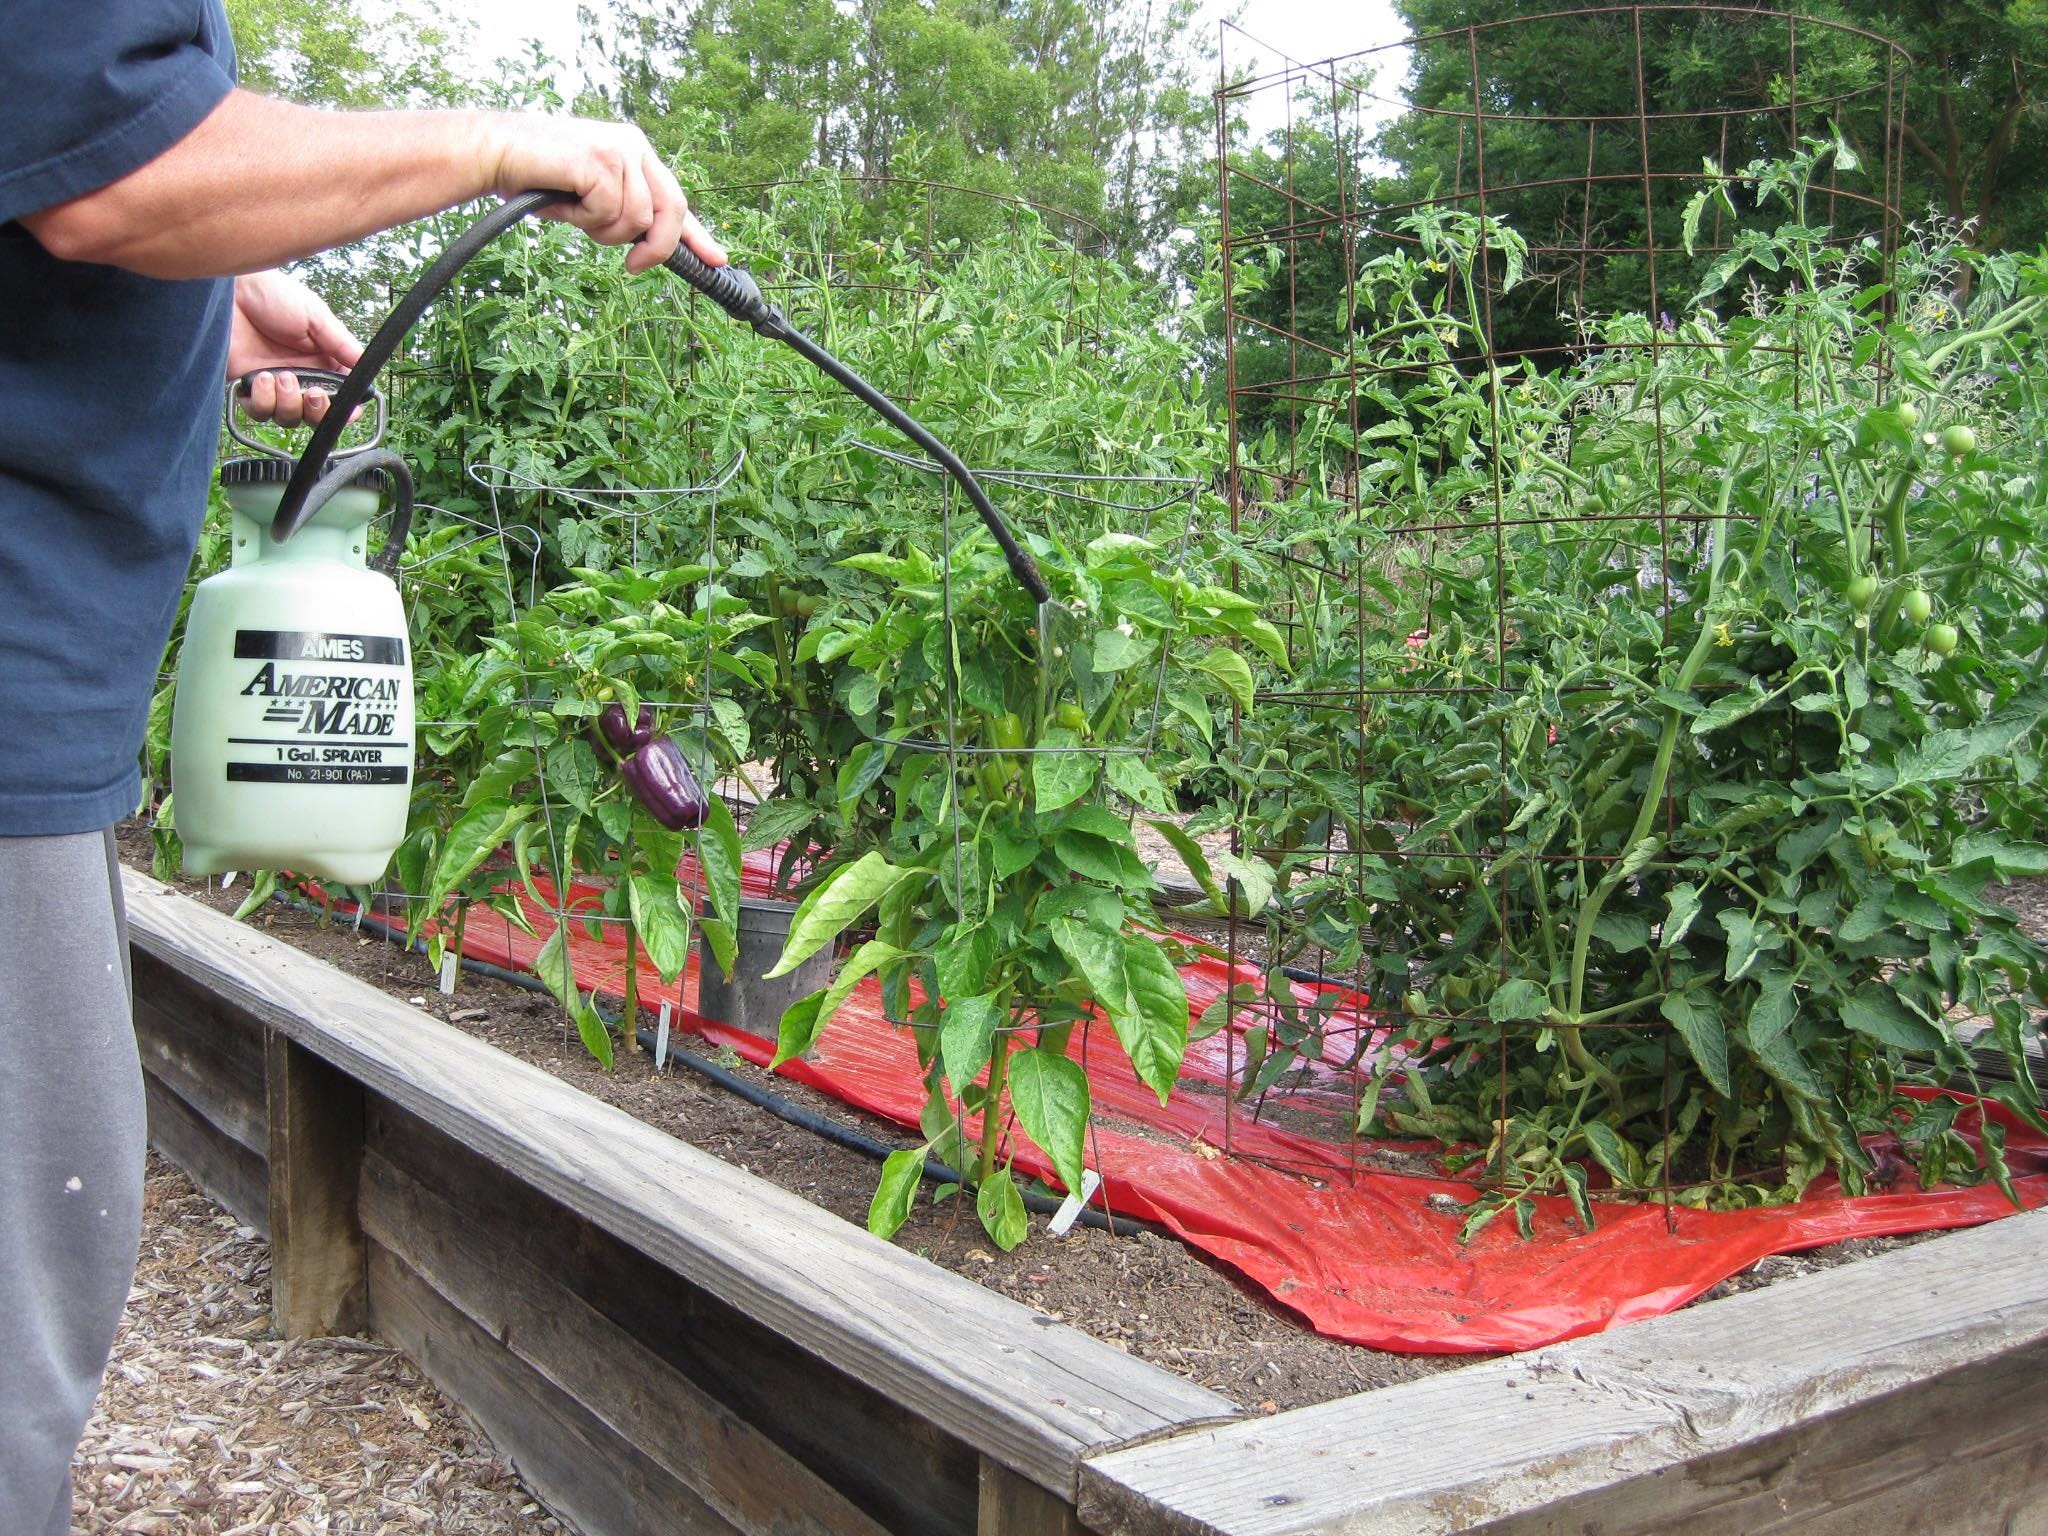
Can You Foliar Feed a Plant?
Does Foliar Feeding Plants Really Work?Are there benefits to spraying a water soluble fertilizer to the leaves of plants? Can leaves absorb nutrients?If a gardener were to believe what they read on Wikipedia, the answer would be yes. However, one only need to read the warnings associated with that article, which state repeatedly, “Citation Needed” and “This section needs additional citations for verification”.The study touting the use of foliar feeding that is cited in that Wikipedia post goes to a broken link. Not a good sign. The University of Missouri offers these warnings about foliar feeding:The mode-of-entry of essential elements into the leaves when applied as a foliar fertilizer still is under debate. Conventional theory is that foliar feeding is effective because plants can take in essential minerals in liquid form through pores in their leaf cuticle called stomata. The latter serve as points-of-entry for air laden with carbon dioxide used by the plant during photosynthesis.Research has revealed, however, nutrients are more likely to be taken in through the leaf cuticle. The latter contains a pathway of extremely minute pores (Conversely, negatively charged essential elements in ionic form such as phosphorous (HPO4-2), sulfur (SO4-2) and nitrate-form nitrogen (NO3-1) find leaf entry through the cuticle more challenging. Whereas opposite charges attract, like charges repel one another.As alluded to above, another consideration when foliar feeding is the fate of the nutrients after they enter the leaf. Smaller molecules or those with a lesser positive charge are more readily transported in the vascular system where they are translocated to other parts of the plant. Examples of the latter include ammonium (NH+), potassium (K+) and urea (NH2CONH2).On the other hand, larger molecules and ions with greater positive charges tend to stay fairly close to their point-of-entry as they adhere to the negatively-charged cell walls. Examples of fairly tightly held (immobile) nutrients include calcium (Ca++), iron (Fe++), manganese (Mn++), zinc (Zn++), and copper (Cu++).Therefore, when applied as foliar fertilizers, elements with strong positive charges such as calcium do not move much upon entering the leaf. Accordingly, elements such as phosphorous which are negatively charged are slow to enter the leaf. Both are relatively immobile after gaining entry.Kinda blows a hole into that long-held habit of spraying calcium on the leaves of a tomato plant to cure blossom end rot. And there’s plenty more holes in that habit, as well.However - and Debbie Flower points this out in the podcast - foliar feeding may work to solve a very particular cosmetic issue if there is a certain micronutrient deficiency. For example, a shortage of iron availability, causing a yellowing pattern in citrus leaves.And then, as Debbie says, foliar feeding of iron only works on that particular leaf; it doesn’t solve the problem for the entire plant. To cure a plant of a nutrient shortage, FEED THE SOIL.Thank you for listening to the Garden Basics with Farmer Fred podcast! It’s available wherever you get your podcasts. Please share it with your garden friends.As an Amazon Associate, I earn from qualifying purchases from some of the underlined links in the newsletter. This is how I am trying to keep this a free newsletter. And as long as you buy whatever you want from Amazon using any of those links to get into the Amazon site, I get a few pennies. Thank you.Thanks for Subscribing and Spreading the Word About the Beyond the Basics: The Garden Basics with Farmer Fred newsletter, I appreciate your support. Fred Hoffman is also a University of California Cooperative Extension Master Gardener in Sacramento County. This is a public episode. If you'd like to discuss this with other subscribers or get access to bonus episodes, visit gardenbasics.substack.com/subscribe

Curried Pumpkin Soup Recipe
CURRIED PUMPKIN SOUP (serves 6-8)by Andi Macdonald, Chef and Sacramento County Master GardenerINGREDIENTS* 2 tablespoons olive oil* 1 cup diced onions* 1/2 cup diced carrots* 1/2 cup diced celery* 1 tsp minced garlic* 1/2 cup dry white wine (optional)* 6 cups vegetable stock* Salt to taste* 1/2 tsp freshly ground black pepper* 1/4 cup curry paste* (or more, to taste)* 4 cups pumpkin puree*** 1 can coconut milk (12-13 ounces)* Chopped parsley for garnish* Toasted pumpkin seeds for garnish.INSTRUCTIONS* Heat the olive oil in a soup pot. Saute onion, carrots, and celery until soft. Add garlic and sauce one minute more. Add wine (optional). Boil down until almost evaporated. Be careful not to scorch the vegetables.* Add stock, pepper, curry paste, and pumpkin. Stir thoroughly to combine. Bring to a boil, immediately reduce heat to low, and simmer for 30 minutes. Add more liquid (stock or water) if soup seems to thick.* Puree the soup in small batches using a food processor or blender. You can either do this hot, being careful with hot liquid in a blender, or if time allows, let cool and then blend. Depending on how velvety you want the texture, you can pour the soup through a sieve after blending.* Return to pan and stir in coconut milk. Optional: add salt to suit your taste. Bring the soup to the brink of a boil. Reduce heat to low, and simmer for another 30 minutes. Taste again and adjust for salt and pepper. Pour into soup bowls and garnish with fresh parsley and pumpkin seeds.* Curry paste is available in many grocery stores in the specialty Asian sections. It can also be ordered online. Heat (spiciness) can vary, so take a taste before adding to the soup. You can always add more. Curry powder can be used instead of the paste. Start with a smaller amount and add more to taste.** Pumpkin puree can be canned or scraped from a roasted pumpkin (no seeds!). If you make your own, the flavor is better if a variety of winter squashes are used. For this recipe, I combine roasted butternut, kabocha, and pie pumpkins. I have found that the pumpkins sold as pie pumpkins aren’t as flavorful as a combination of squashes. They also tend to be more watery than other winter squashes. A note - if you make your own pumpkin pies, try a combination of winter squashes, as well.The best pumpkins for soup? Andi stresses that to make pumpkin soup as appealing as possible, use several different winter squashes in the puree. Her recipe uses a pumpkin, Butternut Squash and Kabocha squash. Johnny’s Selected Seed website mentions many more tasty winter squashes worth trying, including Delicata, Acorn, Hubbard, and Buttercup.In the podcast, for her pumpkin, Andi mentions purchasing a 7 or 8-inch pumpkin from the grocery store, with the word “Sweet” in its name. This website lists their favorite pumpkins for puree. One of them: Early Sweet Sugar Pie, an heirloom variety carried by Burpee Seeds. Their description: “The fine orange flesh of this favorite is the best for rich pumpkin pies. Easy to handle, at only 6-7 lb. each.”Seed company Botanical Interests says this about another with a similar name (perhaps it’s the same?), Sugar Pie, an heirloom: “Since the 1800s, 'Sugar Pie' has been the standard for making terrific pies, soups, muffins, and casseroles. Small, 6"-7" fruits are also good for carving decor-size jack o'lanterns. Stores for months. Also called 'New England' pumpkin.”Johnny’s Selected Seeds has an excellent page on choosing, growing, harvesting and storing the best winter squash varieties for eating. They offer these tips on harvesting and storing:* Wait 50–55 days after pollination or fruit set to harvest.* When fruits are ready for harvest, clip them from the vines and handle carefully.* Cure the fruits by exposing them to sun in the field for 5–7 days; or, if there is a threat of hard frost, cure the fruits inside for 5–7 days at 80–85°F/27–29°C with good air ventilation. The curing process will improve storage potential by toughening the skin, and it can speed up the necessary post-harvest storage interval needed by some types for optimal quality.* After curing, store fruits at 50–60°F/10–15°C, with 50–70% relative humidity and good ventilation. Repeated exposure to temperatures below 50°F/10°C may cause chilling damage.* Sort fruits on a regular basis to remove any rotten fruits.Thank you for listening to the Garden Basics with Farmer Fred podcast! It’s available wherever you get your podcasts. Please share it with your garden friends.As an Amazon Associate, I earn from qualifying purchases from some of the underlined links in the newsletter. This is how I am trying to keep this a free newsletter. And as long as you buy whatever you want from Amazon using any of those links to get into the Amazon site, I get a few pennies. Thank you.Thanks for Subscribing and Spreading the Word About the Beyond the Basics: The Garden Basics with Farmer Fred newsletter, I appreciate your support. Fred Hoffman is also a University of Cal

Too Many Peppers? Try This Sweet Pepper Relish
Here in Northern California, sweet peppers continue to ripen on the plants in October, turning rich shades of red, purple, and yellow. The result? Peppers that are sweeter. And probably more peppers than you know what to do with. We spend this time of year making several batches of sweet red pepper relish, using a recipe we found in an old copy of Sunset's Home Canning book.It's delicious on many dishes, including as a topping for hot dogs and hamburgers...or just dolloped onto a cracker. It's the one homemade holiday gift that we distribute each December that our friends and family actually request!Sweet Red Pepper Relish Recipe:6 pounds of sweet red peppers, seeded and cut into one-inch squares (we throw in a few Anaheim peppers for a touch of heat). Use your favorite blend of sweet and hot peppers!3 pounds onions, cut into one-inch chunks4 cups distilled white vinegar3 cups sugar2 Tbs canning salt or noniodized table salt1 Tbs mustard seedsChop the peppers and onions, then put in a food processor or food chopper with a medium blade. Pour chopped peppers and onions into a heavy-bottomed, 8-10 quart stainless steel or unchipped enamel pan. Mix in the vinegar, sugar, salt and mustard seed.Bring to a boil over medium-high heat, stirring occasionally.Reduce heat to medium-low and let it boil gently, uncovered.Stir often to prevent sticking.Cook about 50 minutes, until relish is thickened but still juicy.Makes about 7 pints.A quarter-cup serving has 81 calories, 1 g protein, 16 g carbohydrates, 2 g total fat, 0 mg cholesterol, 43 g sugar, 3 mg sodium Storage:Unprocessed: Ladle into pint jars or refrigerator containers, leaving a half-inch head space. Apply lids, let cool, then refrigerate. Refrigerator life: 1 month.orProcessed: Ladle hot relish into clean, hot pint jars, leaving a half-inch headspace.Run a narrow nonmetallic spatula between relish and jar sides to release air bubbles.Wipe rims and threads clean. Top with hot lids, then firmly screw on bands.Process in boiling water canner for 15 minutes. Shelf life: up to 1 year.Your Harvest to Better Health Begins at Dave Wilson Nursery!SOME OF OUR FAVORITE SWEET PEPPERS FlamingoFlamingo, from Harris Seed Company, is truely unique with fruit that mature from a light yellow to pinkish-orange, then to red. This sweet bell pepper has concentrated fruit set and can produce high yields. Similar to Gypsy, Flamingo performs well in most pepper growing areas and its earliness makes it a stand-out in the northern U.S. and Canada. Wonderful color change through the growing season. OK taste. Good grilled. Nu Mex Joe E. Parker6 to 7-inch thick-fleshed peppers turn from green to red and are relatively mild to medium in flavor. Ripens earlier than most other peppers of its type. 65 days." The overall winner of the Farmer Fred Pepper Party Taste Tests. Great in chili!. We grow this every year, great in salsas and for homemade nachos. Giant Marconi72 days. Large, tapered, elongated fruits grow 8" by 3", with a sweet, smoky flavor that's equally delectable when fruits are eaten green or red, fresh or grilled. Widely adaptable, it produces larger than normal crops just about anywhere. “Withstands severe weather with excellent disease resistance." This 2001 AAS Award Winner has (in my opinion) more flavor than the Giant Aconcagua. TequilaPeppers begin as lavender and stay that color for a long time before fading to a lovely orange, then finally red. Strong plants are tobacco mosaic virus resistant and tolerant to blossom end rot. 72 days. The Farmer Fred Absolute Favorite Sweet Pepper! Anaheim70 days. “Also know as the 'New Mexican Chile', this moderately pungent fruit is deep green, but turns red at full maturity. Excellent for canning, freezing or drying. 75 days." A good choice for nachos for the weak of heart...and stomach. Jimmy NardelloThese bright green and red sweet peppers fry beautifully. Originally from the Basilicata region of south Italy. The plants are 24" tall, and festooned with 10-12" peppers. One of my favorites for grilling. Corno di Toro YellowItalian 'bull's horn' colorful sweet peppers are 8 to 10 inches long and curved like a bull's horn. Ripen to deep red or bright yellow and are delicious fresh in salads, but more often are sauted or grilled. Prolific tall plants. 68 days. Gorgeous on the grill, and in salads, too.Thank you for listening to the Garden Basics with Farmer Fred podcast! It’s available wherever you get your podcasts. Please share it with your garden friends.As an Amazon Associate, I earn from qualifying purchases from some of the underlined links in the newsletter. This is how I am trying to keep this a free newsletter. And as long as you buy whatever you want from Amazon using any of those links to get into the Amazon site, I get a few pennies. Thank you.Thanks for Subscribing and Spreading the Word About the Beyond the Basics: The Garden Basics with Farmer Fred newsletter, I appreciate your support. Fred Hoffman is also a University of C

Reducing the Wildfire Threat to Your Home & Yard
In today’s “Beyond the Garden Basics” podcast, we talk with Douglas Kent, author of “Firescaping: Protecting Your Home with A Fire-Resistant Landscape”. He has a slightly different view of thwarting home and yard damage for residents of the urban-wildland interface, who are increasingly keeping a wary eye - and nose - in the air for smoke. And as we pointed out in the Garden Basics with Farmer Fred podcast this week (Ep. 235), in our chat with University of California Fire Advisor Luca Carmignani, it is the threat not so much from flames creeping onto your property as it is blowing, burning embers hurtling towards your house from a wind-driven wildfire. Those embers (or “firebrands”) can travel a half mile or more from the actual fire itself, whose ferocity is supercharged by winds that can reach 60 miles per hour or more. And it’s not just California. States throughout the West, Northwest, Southwest, intermountain west, and the South have been hit by massive wildfires, that the Washington Post estimates that 16% of all Americans - on 80 million properties - face the threat of wildfire.Wildfires remain a danger across California and much of the unusually dry Western United States, as there’s still plenty of time this fall for grass, woody debris, and other flammable materials to become dry and ignite, threatening homes adjacent to wildfire-prone areas with flying, embers. We are all hopeful that we will have a wet or snowy winter sooner, rather than later. In the meantime, the University of California has advice on prepping your home and landscape to slow the destruction in case of a wind-blown wildfire."The smaller the fuels – pine needles, grass, and small twigs – the faster they can dry out, meaning they will be ready to burn again a few days or weeks after a large rainstorm," said Susie Kocher, a UC Cooperative Extension forestry and natural resources advisor for the Central Sierra.When it comes to essential wildfire preparations in this age of drought, not every project requires a bank-breaking budget and an army of contractors.There are small – but significant – home and landscaping improvements that most people can complete by themselves during a weekend or two, with a quick run to the hardware store and some basic planning and safety precautions."There are a lot of factors that play into your home’s vulnerability to ignition; small changes and upgrades can help reduce some of that risk for people living in high wildfire risk areas," Kocher explained. "The bigger projects like replacing windows and roofs are very important, but there are definitely smaller projects that people can tackle right away at lower cost that also reduce risk. The main goal of these actions is to reduce the risk that wildfire embers can ignite your home."Kocher recommends these measures as simple but crucial ways to bolster your home’s wildfire resiliency.• Let’s start with what may be the most difficult task to accomplish. Not because it is dangerous, but because of reluctance: taking out all vegetation and wood chip mulch within five feet of your home. Creating defensible space immediately next to your home is a top priority, so be sure there’s nothing combustible within this primary zone. Plants, mulch, woodpiles, wicker furniture or anything that can catch fire should be removed.• And now for the more precarious task: removing debris from your roof. Because of its expansive surface, the roof is the most susceptible area of your house to embers. Removing accumulated leaves and needles is especially important if you have a complex roofline with dormers or other elements – that’s where embers gather, too, and could ignite flammable siding. And while you’re up there, give those gutters a good cleaning. Or, if you and the outdoor ladder are not on friendly terms anymore, hire a gutter cleaning service who can also blow debris off the roof.• Install metal flashing in vulnerable spots. Replacing all your siding with noncombustible material can be pricey, but a more manageable task would be adding corrosion-resistant metal flashing to select areas: roof-to-wall intersections, the place where the chimney comes out of the roof, and the edge where the deck meets the house.• Remove debris from between the boards of your deck and fence as well as below your porch. Embers can ignite leaves and needles stuck between the boards, so be sure to keep those gaps clean and clear.• Inspect vents and upgrade to finer mesh screens. Install or swap in noncombustible, corrosion-resistant metal mesh screening that is at least 1/8" mesh. 1/16" would be even better. However, that requires more frequent maintenance. These screens help prevent embers from entering your attic and crawl space. In addition, put together some vent covers that can be deployed if you have time before a wildfire arrives.More information and more fire-related links are available at the University of California Ag and Natural Resources webpage, “Wildfire Preparedness in the Hom
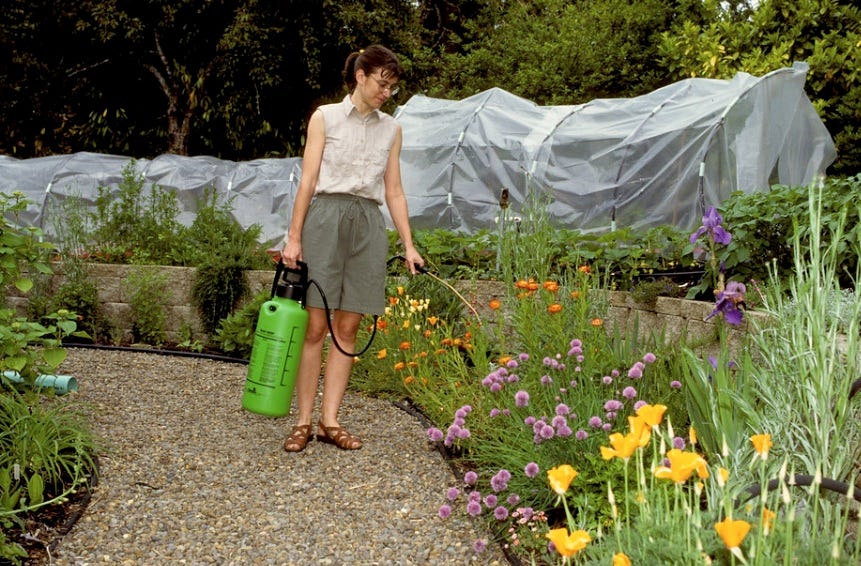
How Safe are Organic Garden Chemicals?
America’s Favorite Retired College Horticulture Professor, Debbie Flower, discusses garden chemical safety, including: when organic controls can be hazardous; the dangers of homemade pesticides; how to check for organic ingredients in a pesticide product; and, ways to determine if your organic garden “inputs” (water, mulches, manures) are safe to use.Despite your best organic efforts, this CDC study says there’s a high chance that glyphosate is probably in your urine:Here’s the background on one statement in that podcast: that there might be glyphosate in your urine:“…more than 80 percent of urine samples drawn from children and adults participating in a US health study contained a weedkilling chemical linked to cancer and other health problems. The June 30 report by a unit of the Centers for Disease Control and Prevention (CDC) found that out of 2,310 urine samples collected, 1,885 were laced with detectable traces of glyphosate, the active ingredient in herbicides sold around the world, including the widely used Roundup brand.”Sources For Water Testing:National Testing Laboratories: https://watercheck.comWater Testing Accredited Laboratories in California: https://www.calwater.com/waterquality/water-quality-testing-labs/Source for Organic rice straw: Brokenbox Ranch, Williams, CAFrom Clemson University: “Less Toxic Insecticides”:Factsheet | HGIC 2770 | Updated: Aug 27, 2021 |While a good pest management plan will start with preventative, cultural, and other non-chemical methods, these are sometimes not completely effective on their own. In this case, a pesticide may be considered. If pesticide use is deemed necessary for control of the pest problem, it is good practice to use the least toxic pesticide that will do the job effectively. Although all pesticides are by their nature toxic in some way to some organisms, there are now a number of “less toxic” pesticide options.Insecticides may be considered less toxic for several reasons. Generally, they should pose less risk to human and environmental health than conventional insecticides. Many break down rapidly and do not accumulate in the body or environment. Some are very pest specific and do little or no damage to other organisms. Still, others, such as bait stations, minimize human exposure to the pesticide.While “organic” insecticides are often less damaging to the environment than conventional insecticides, they are still pesticides. All pesticides should be evaluated before selection for level of toxicity, effectiveness, environmental impacts, and costs. Some “organic” or natural pesticides are as toxic, or even more toxic, than some synthetic pesticides. All pesticide products have a toxicity signal word on the label, which will be “caution”, “warning”, or “danger”. Choose the products with “caution” on the label, as they are least apt to harm the user and the environment.Soaps & OilsInsecticidal soaps and oils have a number of advantages for controlling insects. They are virtually non-toxic to humans and other mammals and are relatively safe to beneficial insects in the landscape. They control a wide range of common soft-bodied pests, including aphids, mealybugs, thrips, whiteflies, mites, and scales. It is difficult for pests to develop resistance to oils and soaps. Soaps and oils are now readily available and relatively inexpensive.Both soaps and oils can cause damage to plants if applied when plants are water-stressed, temperatures are above 90 °F, sprayed in direct sunlight, or when high humidity prevents rapid drying. Some plants are sensitive to oil or insecticidal soap sprays. See sensitive plant lists in HGIC 2771, Insecticidal Soaps for Garden Pest Control. Read and follow the label.Since soaps and oils work on contact, an effective application must coat both the upper and lower leaf surfaces as well as stems for best results. Repeated applications may be necessary. Apply soap or oil sprays in the early morning or late evening to reduce drying times for more effective insect pest control.Insecticidal Soaps: Insecticidal soaps kill by suffocation; additionally, they damage the protective coat of soft-bodied insects, causing them to dehydrate.Homemade soap recipes are not recommended because they may be more likely to cause foliage burn. Commercial insecticidal soaps are tested on plants and are less likely to cause damage. Some are available as concentrates to dilute before spraying, and some are available as pre-mixed Ready to Use (RTU) bottles. Examples of insecticidal soap products are:* Bonide Insecticidal Soap RTU* Espoma Organic Insect Soap RTU* Garden Safe Insecticidal Soap Insect Killer RTU* Miracle-Gro Natures’s Care Insecticidal Soap RTU* Natria Insecticidal Soap RTU* Natural Guard Insecticidal Soap Concentrate* Safer Brand Insect Killing Soap Concentrate* Whitney Farms Insecticidal Soap RTUHorticultural Oils: Oil products smother soft-bodied insects on contact. Oils are formulated as either horticultural or dormant oils. Dormant oi
How to Grow Citrus Indoors
Growing Citrus Trees IndoorsHere in California, or if you live in Arizona or Texas or Florida, you get to grow citrus in your backyard, year round. For most of the rest of the nation, though, that would be a challenge. A challenge to the point where maybe you have to bring it indoors for the winter. That could even be true here in California if you’re growing a citrus variety, such as lime trees, that can lose their fruit when the thermometer drops to 32 degrees, which happens here in the Central Valley on a regular basis. Maybe you have a really nice greenhouse to grow citrus. Combined with a heater to keep temperatures above 40, that would be ideal.When it comes to tips for growing citrus, we turn to Lance Walheim, who has written several books about citrus. His titles include, “Citrus The Complete Guide to Selecting and Growing More Than 100 Varieties," and “All About Citrus and Other Subtropical Fruits.” He also was one of the contributing editors to the Sunset Western garden book that has a very good citrus section.Walheim says indoor citrus growers need to choose the right varieties to be successful.“I have met many people who have been growing Meyer lemons and kumquats back East in very cold climates for 30-40 years, so people can be successful about it,” says Walheim. “But make sure you choose the right variety. I think you need to try growing citrus that is highly acidic. One of the best ones is the Meyer lemon tree. It's a very precocious tree that loves to bloom, and doesn't need a lot of heat to ripen. And it's a small tree so it can grows perfectly well in a container. All the kumquat hybrids, including Calamondins, are perfect for indoors. Also, they have smaller fruit that ripens quicker. And again, they have a propensity to rebloom often.” And despite the reputation of lime trees being very cold sensitive, Walheim says one lime variety, in particular, makes for a good household specimen. “Bearss lime is a good variety to try indoors,” says Walheim.And what about the option of letting your citrus trees enjoy the warmer months outdoors and bringing them indoors for the winter? Is that viable? “It certainly is,” exclaims Walheim. “The key thing is to provide a transition zone, if moving it back and forth. When you're moving a citrus tree from indoors to outside in the late winter or early spring, or from the outside to the indoor conditions in November or December in the Central Valley (or earlier in colder climates), you're really changing things for that tree. The humidity levels outside could be over 50-60%. You take it inside where the house is heated, you're dropping down to 10% humidity. So those are dramatic changes, and they're going to affect the tree as will the changing light conditions. So what I really recommend, whether you're going inside or outside as you provide a transition period, is to do it gradually.”The process involves moving that tree every day for awhile, so make sure the plant is in a container that isn’t too big for you to move, perhaps 15 to 20 inches across at the top. Better yet, mount the container on a heavy duty small furniture dolly to roll the plant inside and out.“If you're taking the tree outside, make sure it is in a shady spot during this transition period, it may take several weeks,” says Walheim. Give them a shady condition several hours a day, and then move them back inside for the night. Move them to more outside light gradually.”Walheim says the more critical transition is moving a containerized citrus tree to the indoors for the winter in colder climates. “You certainly don't want them next to a heater vent, you want to do whatever you can to increase the humidity, which means they can be placed on a tray with some rocks over it where you can add water to the base and increase humidity around the tree,” says Walheim. “Give them as much light as you possibly can. But what's going to happen, especially with a Meyer lemon, you're going to bring them indoors, and they're going to drop their leaves because of the lower humidity levels as less intense light. After that, the next thing that might happen is that they're going to bloom. The stress of all that it's going to make them bloom, so you're going to get some flowers, they probably won't set fruit indoors, but you will start getting some new growth. Make sure that you are doing a good job to maintain the water in the pot. Don’t overwater or underwater. And then they'll start to grow again.”Other Tips from Walheim regarding growing indoor citrus:• “They are widely adapted to soil types, so I think that most potting soils, the quality potting soils, are probably going to be okay. It's more important that we make sure we get those fertilizer nutrients into the soil.”• “I would make sure I used a good citrus fruit food or another fertilizer that had the micronutrients in it of zinc, iron and manganese. But you are hoping that that tree is going to grow when it's inside unless you're totally shutting it d

Fresh Corn Soup Recipe
Fresh Corn Soup (plus the cob)Recipe by Andi MacDonald, Sacramento Co. Master Gardener and Professional ChefServes 4During the dog days of summer, this soup is so refreshing served chilled. The secret ingredient is the corn stock, made from the corn cobs that generally get tossed. If corn is out of season, frozen can substitute and vegetable stock can be used instead of the corn stock. Perhaps not as good, but still pretty good!2 tablespoons olive oil4 ears of fresh corn, 2 cups altogether1 cup onion, medium dice½ cup carrots, medium dice½ cup celery, medium dice1 clove of garlic, minced1 tablespoon fresh thyme, or 1 teaspoon dried6 cups corn stock (or vegetable stock, unsalted if possible)1 teaspoon salt, or to taste½ teaspoon black pepper, or to tasteBasil Oil for garnish (optional)Shuck the corn and shave the kernels from the cob. Set the corn kernels aside for later. Snap the cobs in half and place them in a stock pot. Add 12 cups of water. Bring to a vigorous boil, turn down to a low boil, and reduce to 6 cups, about 1 hour. Let cool, discard the cobs, and save the corn stock for the soup.In a soup pot, warm the olive oil over low heat. Add onions, carrots, and celery and cook on a low heat until vegetables are soft (this is called sweating). Stir frequently and do not let the vegetables brown. (To aid the sweating, cover the pan with a lid.) This will take about 30 minutes, and maybe longer.Add the corn, garlic, and thyme and cook for 20 minutes, stirring frequently to keep the vegetables from sticking. Keep the heat low and do not allow to brown.Add corn stock and bring to a simmer/very low boil. Cook for 30 minutes. The vegetables need to be quite soft. Remove from heat and allow to cool to room temperature.Add the soup to a blender and puree. Depending on the blender, you might need to do this in batches. Strain through a fine sieve, discarding the solids. The soup is best if velvety-smooth.Serve hot or chilled, garnished with a drizzle of basil oil. To serve hot, return to the soup pot and heat to a near boil. To serve chilled, refrigerate for at least 4 hours. Can be made several days ahead and refrigerated. The soup will thicken as it sits. If it’s too thick, thin with corn or vegetable stock, and adjust the salt to taste.Basil Oil: Put 2 tablespoons of minced basil and ½ cup of olive oil into a small blender cup. Blitz until the basil is incorporated. Let sit for one hour and then strain through a small sieve.Thank you for listening to the Garden Basics with Farmer Fred podcast! It’s available wherever you get your podcasts. Please share it with your garden friends.As an Amazon Associate, I earn from qualifying purchases from some of the underlined links in the newsletter. This is how I am trying to keep this a free newsletter. And as long as you buy whatever you want from Amazon using any of those links to get into the Amazon site, I get a few pennies. Thank you.Thanks for Subscribing and Spreading the Word About the Beyond the Basics: The Garden Basics with Farmer Fred newsletter, I appreciate your support. Fred Hoffman is also a University of California Cooperative Extension Master Gardener in Sacramento County. This is a public episode. If you'd like to discuss this with other subscribers or get access to bonus episodes, visit gardenbasics.substack.com/subscribe

Grow A Yardful of Phytonutrients
In today’s newsletter podcast, we continue our chat with Dr. Laura Varich, from FreshPhysician.com , a conversation that we began on Episode 228 of the Garden Basics with Farmer Fred podcast. Dr. Varich is a former pediatric radiologist who is now focused on what’s really the cause of so many of the diseases in our society: poor eating habits. Specifically, we are missing a critical element in our diet: phytonutrients. We’re eating too much of colorfully-packaged, highly-processed factory food and not enough fresh from-the-garden (or farmer’s market) colorful food. The result: rampant increases, across all ages, of heart disease, diabetes, high blood pressure, cancer, and other ailments.In both podcasts, she encourages getting out into the yard and growing fresh fruits and vegetables, which is also great exercise. The healthiest food you can eat is the food you grow yourself…and then consume it, fresh. Or, at least, make regular runs to the farmer’s market in your area.What are phytonutrients? Dr. Varich explains that in the podcasts. And, here’s the word from Harvard University:Phytonutrients: Paint your plate with the colors of the rainbowDid you know that adding color to your meals will help you live a longer, healthier life? Colorful fruits and vegetables can paint a beautiful picture of health because they contain phytonutrients, compounds that give plants their rich colors as well as their distinctive tastes and aromas. Phytonutrients also strengthen a plant’s immune system. They protect the plant from threats in their natural environment such as disease and excessive sun.When humans eat plant foods, phytonutrients protect us from chronic diseases. Phytonutrients have potent anti-cancer and anti-heart disease effects. And epidemiological research suggests that food patterns that include fruits and vegetables are associated with a reduced risk of many chronic diseases, including cardiovascular disease, and may be protective against certain types of cancers.The American Cancer Society recommends 2 1/2 cups per day of fruits and vegetables. The most recent US Dietary Guidelines recommend consuming even more: 2 1/2 cups of vegetables and 2 cups of fruit, based on a 2,000-calorie diet.To get started, try to include as many plant-based colors in your meals and snacks as possible. Each color provides various health benefits and no one color is superior to another, which is why a balance of all colors is most important. Getting the most phytonutrients also means eating the colorful skins, the richest sources of the phytonutrients, along with the paler flesh. Try to avoid peeling foods like apples, peaches and eggplant, lest you lose their most concentrated source of beneficial chemicals.Following is a rundown of fruits and vegetables sorted by color, along with the phytonutrients they contain, and which foods you’ll find them in.Red: Rich in the carotenoid lycopene, a potent scavenger of gene-damaging free radicals that seems to protect against prostate cancer as well as heart and lung disease.Found in: strawberries, cranberries, raspberries, tomatoes, cherries, apples, beets, watermelon, red grapes, red peppers, red onions.Orange and yellow: Provide beta cryptothanxin, which supports intracellular communication and may help prevent heart disease.Found in: carrots, sweet potatoes, yellow peppers, oranges, bananas, pineapple, tangerines, mango, pumpkin, apricots, winter squash (butternut, acorn), peaches, cantaloupe, cornGreen: These foods are rich in cancer-blocking chemicals like sulforaphane, isocyanate, and indoles, which inhibit the action of carcinogens (cancer-causing compounds).Found in: spinach, avocados, asparagus, artichokes, broccoli, alfalfa sprouts, kale, cabbage, Brussels sprouts, kiwi fruit, collard greens, green tea, green herbs (mint, rosemary, sage, thyme, and basil)Blue and purple: Have powerful antioxidants called anthocyanins believed to delay cellular aging and help the heart by blocking the formation of blood clots.Found in: blueberries, blackberries, elderberries, Concord grapes, raisins, eggplant, plums, figs, prunes, lavender, purple cabbageWhite and brown: The onion family contains allicin, which has anti-tumor properties. Other foods in this group contain antioxidant flavonoids like quercetin and kaempferol.Found in: onions, cauliflower, garlic, leeks, parsnips, daikon radish, mushroomsReach for the rainbowReaching a total of 4 1/2 cups of colorful fruits and vegetable a day is the goal for a powerful plate. Here are some ways to make it happen:* Servings are not that big. 1/2 cup of chopped raw vegetables or fruit makes one serving. Leafy greens take up more space, so 1 cup chopped counts as a serving. 1/2 cup of dried fruit equals one serving.* Think in twos. Try to eat two servings in the morning, two in the afternoon, and two at night.* Snacks count, too. Feeling hungry between meals? Munch on a piece of fruit or grab some sliced raw vegetables to go.* When shopping, look at yo

Cation Exchange Capacity for Gardeners
Debbie Flower, America’s Favorite Retired College Horticulture Professor, brought up the subject of “Cation Exchange Capacity” back in Episode 193 of the Garden Basics with Farmer Fred podcast, while discussing the limited lifespan of bagged worm castings. That alone should pique your interest. Go ahead and listen to that segment or read the transcript. I’ll wait.In the podcast in this newsletter, Debbie goes into depth about cation exchange capacity. If you were a high school chemistry class wizard, you’re excited to learn how the electronic charges in the soil aid and abet the feeding of plants. The rest of us need a bit more help (I took high school chemistry a couple of times. I still don’t get it.).Here’s an almost easy to understand explanation of the chemistry going on beneath our feet. From Australia’s Katharine Brown (The University of Western Australia) and Jeremy Lemon (Department of Agriculture and Food, Western Australia), entitled, “Cations and Cation Exchange Capacity”. At the very least, you’ll learn about “meq”. Again, this is why this newsletter is entitled the way it is.Cations and Cation Exchange CapacityKey Points* Cation exchange capacity (CEC) is the total capacity of a soil to hold exchangeable cations.* CEC is an inherent soil characteristic and is difficult to alter significantly.* It influences the soil’s ability to hold onto essential nutrients and provides a buffer against soil acidification.* Soils with a higher clay fraction tend to have a higher CEC.* Organic matter has a very high CEC.* Sandy soils rely heavily on the high CEC of organic matter for the retention of nutrients in the topsoil.* BackgroundCation exchange capacity (CEC) is a measure of the soil’s ability to hold positively charged ions. It is a very important soil property influencing soil structure stability, nutrient availability, soil pH and the soil’s reaction to fertilisers and other ameliorants (Hazleton and Murphy 2007).What are exchangeable cations?The clay mineral and organic matter components of soil have negatively charged sites on their surfaces which adsorb and hold positively charged ions (cations) by electrostatic force. This electrical charge is critical to the supply of nutrients to plants because many nutrients exist as cations (e.g. magnesium, potassium and calcium). In general terms, soils with large quantities of negative charge are more fertile because they retain more cations (McKenzie et al. 2004) however, productive crops and pastures can be grown on low CEC soils.The main ions associated with CEC in soils are the exchangeable cations calcium (Ca2+), magnesium (Mg2+), sodium (Na+) and potassium (K+) (Rayment and Higginson 1992), and are generally referred to as the base cations. In most cases, summing the analysed base cations gives an adequate measure of CEC (‘CEC by bases’). However, as soils become more acidic these cations are replaced by H+, Al3+ and Mn2+, and common methods will produce CEC values much higher than what occurs in the field (McKenzie et al. 2004). This ‘exchange acidity’ needs to be included when summing the base cations and this measurement is referred to as effective CEC (ECEC).Measuring CECDifferent laboratories use various methods to measure CEC, and can return contrasting results depending on the fraction of the soil measured. In Australia, some laboratories measure CEC directly and others calculate it as CEC by bases. Cation exchange capacity is commonly measured on the fine earth fraction (soil particles less than 2 mm in size). In gravelly soils the effective CEC of the soil as a whole is diluted, and if only the fine (clay) fraction is analysed, reported CEC values will be higher than actual field values.Measuring CEC involves washing the soil to remove excess salts and using an ‘index ion’ to determine the total positive charge in relation to original soil mass. This involves bringing the soil to a predetermined pH before analysis. Methods, including pre-treatment, for measuring CEC and exchangeable cations are presented by Rengasamy and Churchman (1999) and described in detail by Rayment and Higginson (1992).UnitsCEC is conventionally expressed in meq/100 g (Rengasamy and Churchman 1999) which is numerically equal to centimoles of charge per kilogram of exchanger (cmol(+)/kg).Management ImplicationsSoil type and CECThe CEC of soils varies according the clay %, the type of clay, soil pH and amount of organic matter. Pure sand has a very low CEC, less than 2 meq/100 g, and the CEC of the sand and silt size fractions (2 µm/2 mm) of most soils is negligible. Claying sandy soils for managing water repellence increases the CEC of the surface layers by a small amount depending on type and amount of clay added. Typically CEC is increased by less than 1 meq/100 g.The most commonly occurring clay in Western Australian soils, kaolinite, has a CEC of about 10 meq/100 g. Other clays such as illite and smectite have CECs ranging from 25 to 100 meq/100 g. Organic matter h

Plant Hormones
In today’s newsletter podcast, America’s Favorite Retired Horticultural Professor, Debbie Flower, explains plant hormones, and how they can help you become a better gardener. Want to propagate your own plants from cuttings? Depending on the plant, hormones can help. The book, “Propagating Plants” by Alan Toogood has more information. Online, the site “Untamed Science” has an easy to understand page on how the five major plant hormones work.Want bigger table grapes? Hormones, such as Gibberellic acid can help. If you’re a commercial grower. According to the California Garden Web:“Growers use several methods to increase cluster and berry size: cluster and berry thinning; trunk girdling; and gibberellic acid sprays. Gibberellic acid is a synthetic plant growth regulator and is not available to home gardeners. Some increase in size can be achieved by cluster and berry thinning and trunk girdling.” How To Increase The Size Of Your Seedless Table GrapesMid-Spring is the best time to thin out, trim and fertilize seedless table grapes.1. Thin out the bunches so that there is at least six inches of space between each remaining bunch ot table grapes. Late April to mid May is best for this. 2. Cut off the "tails" from the remaining bunches at that same time. This is the lower one-quarter to one third of the bunch, where it begins to taper down in size. This will send more energy to the remaining grapes on the bunch. 3. Fertilize...or not. The book, "The California Master Gardener Handbook" advises that a half pound of ammonium sulfate can be applied for each vine at berry set (when the berries are about a quarter-inch big, usually in May). Remember, though, that too much nitrogen can result in an overabundance of vine growth and not enough grapes for eating. The late Chuck Ingels, Sacramento County farm advisor, said that very little nitrogen, if any, is needed. If you opt to use another commercial fertilizer, follow label directions. 4. Water. The same book advises gardeners to apply about 50 gallons of water per week per vine, during the hottest months (June through August) in the Central Valley of California. Apply less (about 35 gallons a week) during May and September. 5. Girdle the Stems in late May. According to Chuck Ingels, in the Sacramento County Cooperative Extension brochure, "Grapevines: Girdling and Cluster Thinning to Increase Berry Size":Girdling removes the inner and outer bark from around the trunk. The inner bark, or phloem, is where carbohydrates produced by photosynthesizing leaves move to developing organs (including fruit and roots). Removal of a strip of bark prevents the translocation of carbohydrates to the root system thus making more available for fruit growth until the girdle heals in about four weeks. Girdling can make berries about 30% larger if done correctly. If is particularly effective on seedless varieties; no effect on seeded varieties.How to Girdle Vines: Remove a strip of bark, down to the wood, that is 1/8 to 1/4 inch wide. A double bladed girdling knife makes the job easier. It is essential that all the phloem tissue is removed, so press fairly hard. Check for completeness about 20 minutes afeter the girdle is made. A proper girdle will have the appearance of an all white, fibrous ring of wood (xylem). Remove any brown portions of the ring; if there is even an 1/8" of phloem tissue left, the girdle's benefits are lost. Be sure not to cut so deep as to damage the water conducting xylem and weaken the vine. With a proper cut, the ring should just pop out."For commercial growers: “Using Plant Growth Regulators to Increase the Size of Table Grape Berries”Thank you for listening to the Garden Basics with Farmer Fred podcast! It’s available wherever you get your podcasts. Please share it with your garden friends.As an Amazon Associate, I earn from qualifying purchases from some of the underlined links in the newsletter. This is how I am trying to keep this a free newsletter. And as long as you buy whatever you want from Amazon using any of those links to get into the Amazon site, I get a few pennies. Thank you.Thanks for Subscribing and Spreading the Word About the Beyond the Basics: The Garden Basics with Farmer Fred newsletter, I appreciate your support. Fred Hoffman is also a University of California Cooperative Extension Master Gardener in Sacramento County. This is a public episode. If you'd like to discuss this with other subscribers or get access to bonus episodes, visit gardenbasics.substack.com/subscribe

All About Imidacloprid
A question into the Garden Basics with Farmer Fred podcast raised more questions for myself and Debbie Flower, America’s Favorite Retired College Horticulture professor. First, the question:“Recently, a Pest Control Company came by to inject my birch trees (soil) with a chemical (Imidacloprid) that helps prevent sticky droppings from landing on my driveway, etc.This year they came by and also started inject all shrubs and also injected my plum tree and lime tree. I asked why and they said it was part of their new procedure. I am concerned that my limes and plums may not be safe to eat. Is this a worry? While I only make jam out of the plums, I do enjoy fresh lime juice.Thanks.”You’ll have to listen to the podcast (above) where we enumerate the many ramifications raised by this question, such as: What was the exact concentration of Imidacloprid used? Is the product registered for use on the crop of concern? Is the pest listed on the product label? All of this information could be found on the product label. Which is why we are fond of saying: read and follow all label directions.Imidacloprid is an active ingredient in many popular systemic insecticides. It’s also banned in some regions. Scientists have pointed out that the government (the EPA) needs to take a harder look at this insecticide due to its effect on pollinating insects, such as honeybees. From the October 31, 2021 International Journal of Molecular Sciences:“In conclusion, the lethal dose/concentration and molecular effects of sublethal dosages of imidacloprid on honey bees and other pollinator bees were integrated and reviewed. Molecular evidence suggests that the expression of the immune response, detoxification, oxidation-reduction, and other development-related genes was ubiquitously affected among different species of target bees. Transcriptomic approaches revealed that even very low dosages/concentrations of imidacloprid could cause global effects, even altering the developmental queue and inducing a precocious forager. Realistic field levels of imidacloprid severely impact the sustainable development and population dynamics of domesticated and wild pollinators. The application of imidacloprid and other neonicotinoid pesticides should be more carefully and rigorously evaluated.”What is Imidacloprid? From the National Pesticide Information Center at Oregon State University:What is imidacloprid?Imidacloprid is an insecticide that was made to mimic nicotine. Nicotine is naturally found in many plants, including tobacco, and is toxic to insects. Imidacloprid is used to control sucking insects, termites, some soil insects, and fleas on pets. It has been used in products sold in the United States since 1994.What are some products that contain imidacloprid?Products containing imidacloprid come in many forms, including liquids, granules, dusts, and packages that dissolve in water. Imidacloprid products may be used on crops, houses, or used in flea products for pets. There are over 400 products for sale in the United States that contain imidacloprid.Always follow label instructions and take steps to avoid exposure. If any exposures occur, be sure to follow the First Aid instructions on the product label carefully. For additional treatment advice, contact the Poison Control Center at 1-800-222-1222. If you wish to discuss a pesticide problem, please call 1-800-858-7378.How does imidacloprid work?Imidacloprid disrupts the nerve's ability to send a normal signal, and the nervous system stops working the way it should. Imidacloprid is much more toxic to insects and other invertebrates than it is to mammals and birds because it binds better to the receptors of insect nerve cells.Imidacloprid is a systemic insecticide, which means that plants take it up from the soil or through the leaves and it spreads throughout the plant's stems, leaves, fruit, and flowers. Insects that chew or suck on the treated plants end up eating the imidacloprid as well. Once the insects eat the imidacloprid, it damages their nervous system and they eventually die.How might I be exposed to imidacloprid?There are four ways that people can be exposed to chemicals. Chemicals may get on the skin, get into the eyes, be inhaled, or be eaten. This can happen if someone handles a pesticide or a pet recently treated with a product and does not wash their hands before eating. You could be exposed to imidacloprid if you are applying a product to your yard, on a pet, or in another location and get the product on your skin or breathe in spray mist. Because imidacloprid is a systemic insecticide, you could be exposed to imidacloprid if you ate the fruit, leaves, or roots of plants that were grown in soil treated with imidacloprid.From the submitted product label of a supplier of imidacloprid to the EPA, intended for use by homeowners, comes this series of warnings:The questioner in the podcast was wondering how safe is it to eat the fruit or drink the juice of a lime from his backyard tree. Th
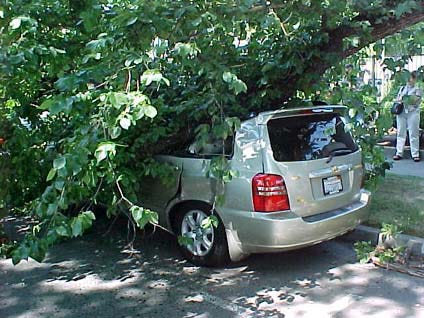
Kaboom! Sudden Tree Limb Failure
It happens without warning every summer. A tree branch from an oak, eucalyptus, elm, ash, or other large, old tree crashes to the ground on a warm, non-windy day. It’s a phenomenon referred to as sudden limb failure or summer branch drop. According to the Butte County (CA) Master Gardeners newsletter:“A break due to summer branch drop usually occurs three to twelve feet away from the trunk, along the length of the branch. The broken branches are usually long and horizontal, as opposed to upright, frequently extending to or beyond the average tree canopy. While some limbs that drop show evidence of wounds or decay, many of these failed limbs appear to be quite sound. Older, less vigorous trees seem to be more prone to this problem. Once a tree has lost a limb due to summer branch drop, it is more likely to lose another.”Why sudden limb failure happens is not very well understood. The Butte County Master Gardeners newsletter goes on to discuss the possibility of the combination of drought and ethylene gas, a hormone found in all plants, as being part of the problem:“Drought stress during a hot, calm afternoon reduces the flow of water in the branch, causing the branch temperature and the concentration of ethylene to increase. Ethylene is known to promote the process of cell aging. Elevated levels of ethylene may weaken the cell wall cementation, which when coupled with reduced transpiration and increased root pressure, increases internal sap pressure, moisture content of branches, and limb weight, resulting in branch failure. Old wounds and decay hidden inside a limb, possibly resulting from improper pruning, occasionally contribute to branch drop, but this does not account for the majority of summer branch drop failures. Pruning that encourages uneven growth at the end of a limb can put tremendous stress on the limb due to the added weight of the new growth.Although there is no guaranteed way to prevent summer branch drop, several things can be done to mitigate this hazard in oaks and other commonly affected tree species such as eucalyptus, elm, and ash. On mature trees, shorten and lighten long horizontal branches and open up the tree by thinning to healthy lateral branches to reduce branch weight. Inspect the tree for externally visible defects and prune out damaged or sickly low-vigor limbs that have decay or cavities. Although watering is required to keep most ornamental trees healthy in hot summer climates, don't forget that summer moisture can encourage oak root fungus and other oak pathogens that can kill oaks when the summer-watered area is within 10 feet of the trunk. Finally, do not park cars or place play structures, benches, or picnic tables beneath older, susceptible trees. Falling limbs can't harm people - or property - if they aren't under the tree.”If you own any large, old trees, it pays to hire an arborist to come out and examine your trees. Regular tree inspections every few years can spot trouble before it happens, especially weakly attached branches, injuries, or disease.Many times, though, homeowners choose an arborist without doing their due diligence. Make sure whomever you hire is licensed, bonded, and insured. Under some circumstances you might be held financially responsible if an uninsured worker is hurt on your property, or damage is done to a neighbor’s property. Have more than one arborist submit an estimate.Also, consider hiring a specialist, a consulting arborist. Their job is to tell you what’s wrong with your trees, in writing. “I think a consulting arborist can provide the best value actually, in many cases for a homeowner, when they actually call us before they need us,” Bay Area-based consulting arborist Michael Santos told us in today’s newsletter podcast. “They think their tree is fine. Or maybe they've just acquired the property and these trees are new to them, they have no history with them, and they want to know what they need to do. Oftentimes, a consulting arborist can provide the best value before something negatively has happened to the tree like a large limb failure, or a significant disease has started. Calling us sooner rather than later can really help the longevity and the outcome for their trees.”One professional organization that can help you find an arborist or consulting arborist is the International Society of Arboriculture (ISA), online at Treesaregood.org. At the ISA website, you may enter your zip code or city and obtain a list of certified arborists in your area. In the meantime, watch where you park your car in the summertime.Thank you for listening to the Garden Basics with Farmer Fred podcast! It’s available wherever you get your podcasts. Please share it with your garden friends.As an Amazon Associate, I earn from qualifying purchases from some of the underlined links in the newsletter. This is how I am trying to keep this a free newsletter. And as long as you buy whatever you want from Amazon using any of those links to get into the Amazon sit

Roses That Can Take the Heat
“Of all flowers, methinks rose is best”. Shakespeare said that. He lived in Stratford-upon-Avon, about halfway between London and Birmingham, England. However, the roses he saw 600 years ago never endured 100 degree heat…until recently.Although roses were found originally in Central Asia, they spread quickly throughout the Northern Hemisphere between the 12th and 18th centuries.Those old roses wouldn’t stand a chance in the heatwaves of the 21st century, succumbing to scorched flowers, leaves, and buds…as well as dying off due to a lack of regular watering in drought-effected areas.Of course, hybridization of roses in the 19th, 20th and 21st centuries has created varieties that can withstand a number of modern ailments, including air pollution.So, what are the modern roses that can take the heat, when temperatures hit 100 degrees for several days in a row? What are the traits of a heat-tolerant rose? Master Rosarian Debbie Arrington of the Sacramento Rose Society (and the Sacramento Digs Gardening blog) enumerated several in the podcast at the top of this page. Sacramento (City Motto: “At Least It’s a Dry Heat”) is no stranger to prolonged, triple digit heat waves, which can occur anytime from May through September. So, the area is a good testing ground for roses that maintain their color, health and vigor throughout spring, summer - and sometimes fall - heatwaves. One trait many of these have in common: these rose bushes produce light-colored blooms of white, pink or yellow. Most red roses, Arrington explains, absorb more of the heat, and will be among the first to scorch. Sorry about that, Bobby Darin.Among the roses on Debbie Arrington’s list of heat-tolerant roses: IcebergIceberg is a floribunda rose, a class of roses characterized, according to the American Rose Society’s Handbook for Selecting Roses, by its “profuse ability to bear flowers in large clusters or trusses with more than one bloom in flower at any one time. This class is unrivaled for providing massive, colorful, long-lasting garden displays… Floribundas are hardier, easier to care for and more reliable in wet weather than their hybrid tea counterparts.” Iceberg was introduced in 1958. Julia ChildMaster Rosarian Charlotte Owendyk of the Sierra Foothills Rose Society loves Julia Child so much, it lines her walkway. A floribunda with medium yellow blooms, this 2005 introduction - one that is also on Debbie Arrington’s list of heat tolerant roses - is also an American Rose Society’s Members’ Choice winner and an All-America Rose Selections champion. JoyOne of my favorite miniature roses that blooms it’s little head off, despite being grown in a container, sitting on reflective rocks, facing south, with the hottest side of the house right behind it. Debbie Arrington likes it, too. A pink blend, Joy was introduced in 2007. Joy was an American Rose Society Award of Excellence Winner, as well as an ARS Members’ Choice winner.Here are a few other roses that are heat-tolerant, according to Debbie Arrington. Listen to her descriptions of these roses in the podcast at the top of the page. Shockwave (Floribunda) Day Breaker (Floribunda) First Prize (Hybrid Tea) Baldo Villegas and his namesake rose (mini-floribunda)And, I’m out of room for more pictures. The rest of the heat tolerant roses that Debbie mentions in the podcast:Edisto (miniature)Whirlaway (mini-floribunda)Innocence (miniature)The Drift Series of low growing shrub rosesThe Knock Out collection of landscape roses, especially Home Run.Thank you for listening to the Garden Basics with Farmer Fred podcast! It’s available wherever you get your podcasts. Please share it with your garden friends.As an Amazon Associate, I earn from qualifying purchases from some of the underlined links in the newsletter. This is how I am trying to keep this a free newsletter. And as long as you buy whatever you want from Amazon using any of those links to get into the Amazon site, I get a few pennies. Thank you.Thanks for Subscribing and Spreading the Word About the Beyond the Basics: The Garden Basics with Farmer Fred newsletter, I appreciate your support. Fred Hoffman is also a University of California Cooperative Extension Master Gardener in Sacramento County. This is a public episode. If you'd like to discuss this with other subscribers or get access to bonus episodes, visit gardenbasics.substack.com/subscribe
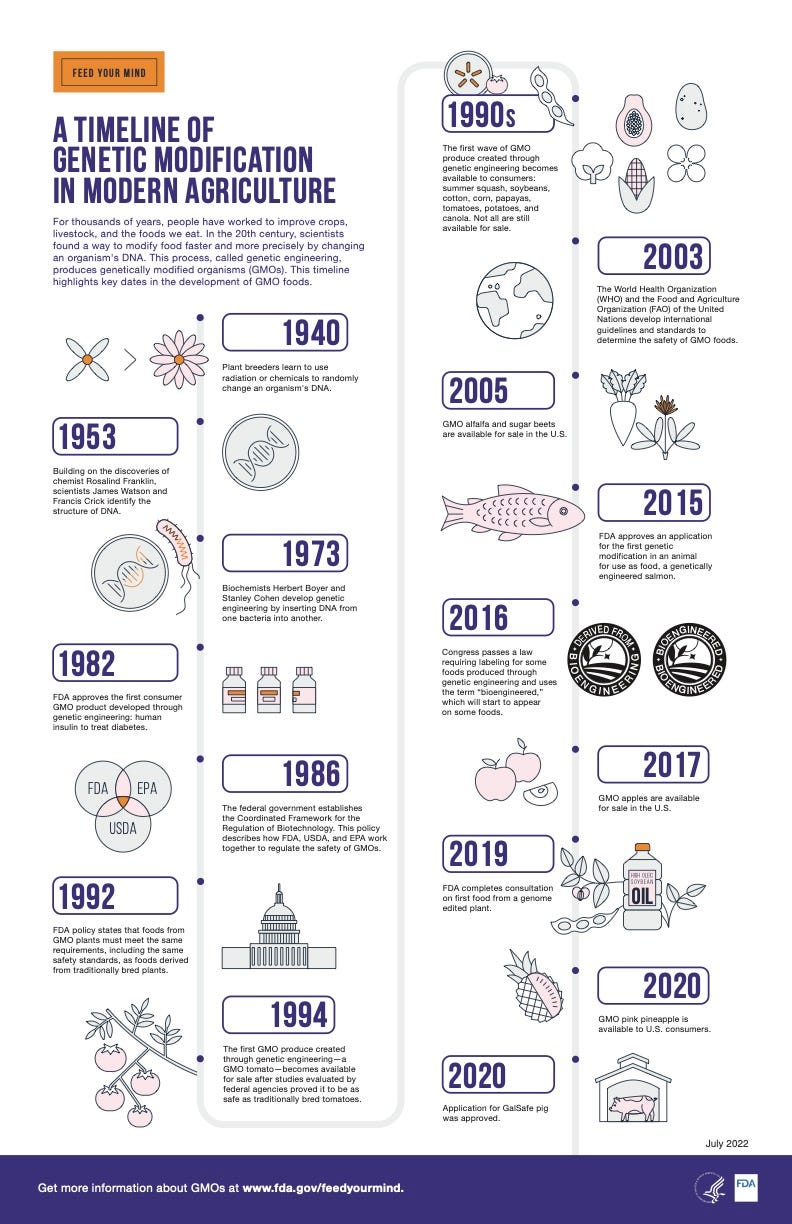
Should Chicken Manure Fertilizer Be Considered "Organic"?
Today’s “Beyond the Garden Basics” podcast takes a closer look at a very popular organic fertilizer: chicken manure. As retired organic landscape consultant Steve Zien of Living Resources Company points out, manures are an excellent soil amendment, especially their contribution to the soil biology. In this day and age, however, should chicken manure still be considered organic? Up to 90% of the corn produced in America is from Genetically Engineered seed. A major part of a chicken’s diet is corn, along with soybeans, of which a substantial portion is also grown with GE seed. Can we trust that what comes out of the other end of those chickens is organic? It depends who you ask.One chicken manure fertilizer supplier, who specializes in organic fertilizers, danced around that topic…anonymously. “I occasionally get this same question from home gardeners. Usually the person asking prefers a more “purist” definition of organic so it’s unlikely that I am going to change their opinion.Dictionary.com: https://www.dictionary.com/browse/organicOrganic is:* derived from a living organism* a substance, as a fertilizer or pesticide, of animal or vegetable origin.Chicken manure meets both of these definitions.In addition, the National Organic Program (NOP) is responsible for the regulatory program that is part of the USDA agricultural marketing services that determine crops that can receive the USDA Organic Seal. The NOP clearly indicates that animal manure is an approved input for organic crop production: https://www.ecfr.gov/current/title-7/subtitle-B/chapter-I/subchapter-M/part-205/subpart-C/section-205.203Most likely the “purist” will not accept that the kale they purchased with the USDA Organic Seal grown with poultry manure is truly organic but that is what the USDA has decided. I usually like to ask; what then is your definition of an organic input? Feather meal, blood meal, meat & bone meal are common organic fertilizer products and are all produced and processed from conventionally raised poultry, swine, or bovine. If the position is that only an organically raised livestock manure can be considered “organic” then the consumer needs to recognize that the organic feed that those organically raised chickens are eating is likely grown with conventionally raised chicken manure or conventionally raised feather meal, etc…Often what I’ve found is the person questioning “is your chicken manure really organic” is more concerned about the about the use of steroids, hormones, and/or antibiotics fed to the conventionally raised livestock. Steroids & hormones are a complete myth with modern farming practices – they are banned by the USDA and not used: https://www.nationalchickencouncil.org/nationwide-survey-reveals-nearly-80-percent-americans-mistakenly-belive-chicken-contains-added-hormones-steroids/#:~:text=hormones%20or%20steroids.-,No%20chicken%20sold%20or%20raised%20in%20the%20U.S.%20is%20given,the%20healthier%20growth%20of%20birds.Antibiotics are occasionally used in broiler operations and rarely used in layer operations. Still, I would argue that even if antibiotics have been used, residual levels do not exist in the manure. The composting process exponentially grows beneficial bacteria and fungus to break down the organic matter in the manure. If antibiotics were present, how would the beneficial bacteria grow?I guess this doesn’t necessarily directly answer the corn GMO question but it’s in the same ballpark.” GMO vs GEIf you listened to the podcast, you know we delved into the difference between GMO (Genetically Modified Organism) and GE (Genetically Engineered). University of Vermont Public Radio has an easy-to-understand, mud-filled primer on this topic.Basically, “GMO” has a very broad definition. It’s a plant breeding process that has been around since the dawn of agriculture: plant pollen, being transferred from one plant variety to another plant variety, usually creating a slightly different plant within the same species. Think about the pollen of sweet corn being wind blown (or insect carried) to an adjoining field where popcorn is planted. The result: kernels that won’t pop, they’ll just burn when heated. Every tomato or pepper variety in your garden may be an heirloom variety, but it, too, had a beginning, 50, 100, or hundreds of years ago, when the wind or a bee moved pollen between two different tomato varieties, creating a new variety: a Genetically Modified Organism. Genetic Engineered food, on the other hand, is considered by the FDA as introduced in the 1990’s. One of the first GE foods available to the public? The Flavr-Savr tomato, developed by several UC Davis professors at Calgene in 1994. The tomato was taken off the market in 1998 for a variety of reasons.Unfortunately, language is a virus. And the term, “GMO” is still used in some circles when “GE” is what they are really upset about. Will the “non-GMO” label you read on many food products ever be changed to the more accurate, “non-GE” label? T