
Beyond the Garden Basics Podcast
176 episodes — Page 2 of 4

Growing Microgreens
Today’s Beyond the Garden Basics Newsletter expands upon a topic we were briefly discussing in Episode 395 of the Garden Basics Podcast, “Survival Garden Basics”. In this case, the short chat was about the value of microgreens, and how they are easy to grow, and because of their small size, super-packed with nutrients. In today’s “Beyond the Garden Basics” newsletter podcast (above), Sacramento County (CA) Master Gardener Gail Pothour discusses how to grow and harvest microgreens, and how they can be used in various dishes. This conversation originally aired on a Garden Basics podcast back in 2020.Beyond The Garden Basics with Farmer Fred is a reader-supported publication. To receive new posts and support my work, consider becoming a paid subscriber. It will also help feed these two hungry rescues…and this (formerly) stray cat.The ABCs of MicrogreensOne great resource for gardeners about microgreens comes from Penn State Extension, entitled, “The ABCs of Microgreens”. Among the highlights of that article:Many edible plant species can be used to produce microgreens. Among the standard vegetable species, the most popular ones are those belonging to the broccoli family (Brassicaceae), such as broccoli, radish, cauliflower, arugula, cabbage, kale, kohlrabi, mustard, mizuna, cress, broccoli raab, etc., which are characterized by a very short growth cycle (7–8 days maximum) and by the typical pungent taste of cole crops which is primarily due to their content of glucosinolates, natural compounds considered anti-cancer per excellence.Other vegetable species commonly grown as microgreens include beet, Swiss chard, spinach, amaranth, lettuce, chicory, endive, carrot, celery, fennel, leek, onion, and cucumber. Microgreens are produced by also sprouting cereals such as barley, oat, wheat, corn, and pseudo-cereals like quinoa, legumes such as pea, alfalfa, bean, fava bean, lentil, clover, chickpea, and fenugreek, and even oleaginous and fiber species like sunflower and flax, respectively.Interesting microgreens are also produced using the seeds of aromatic herbs such as basil, cilantro, dill, chives, and cumin, or using the seeds of some wild edible species such as borage (Borago officinalis L.), wild chicory (Cichorium intybus L.), common dandelion (Taraxacum officinale Weber), sea asparagus (Salicornia patulaDuval-Jouve), etc.In some cases, mixes of different species are used to obtain specific color or taste combinations. When mixes are used it is very important to balance the seed density as well as to make sure that seeds of different species or cultivars will germinate and grow at the same time.Some common vegetable crops like tomato, pepper, eggplant, and potato are not edible at the seedling stage and are not suitable to produce microgreens because they contain alkaloids, which at high levels, are toxic for humans. If using wild species, it is very important to recognize the plants from which seeds are collected because many spontaneous species contain toxic compounds while they may look like edible plants. Therefore, if you are not a plant expert, refrain from using wild plants to produce microgreens. Also, you should exclude any species for which you may have an allergic reaction.That Penn State Extension article did point out one very important fact about growing microgreens at home: remember, different seed varieties grow at differing rates, so be cautious if using a mix of microgreens. Probably better to purchase each variety separately and grow each in its own container. And, a good portion of the article dealt with the microgreen mathematics involved: because you should sow the seeds thickly, how many seeds should you sow in a single container? No worries. There’s a link to an Excel file that does the calculation for you.How Nutritious are Microgreens?I’ve often heard from dietitians and health food aficionados that consuming microgreens and baby greens provide more nutrition than their full grown counterparts. Is that true? In a 2021 published study of two greens - spinach and roselle - researchers discovered that these plants - when harvested within 20 days of sowing - have some critical nutritional benefits greater than the full grown plant, according to the National Library of Medicine:“Compared to field grown mature foliage, greenhouse-grown micro/baby-greens were lower in digestible carbohydrates and CA (calcium) but higher in digestible protein, P (phosphorus), K (potassium), Mg (magnesium), Fe (iron), Mn (manganese), and Zn (zinc).”From the National Library of Medicine (Nov. 2021): Nutrient Content of Micro/Baby-Green and Field-Grown Mature Foliage of Tropical Spinach (Amaranthus sp.) and Roselle (Hibiscus sabdariffa L.)Note: “DAS” - Days After SowingSo, for certain nutritive boosts, nature’s “fast food” (greens harvested at microgreen or baby green stage) is the way to go. Better yet, it’s quick from the garden to the plate, reaching cutting stage in 10 to 20 days after sowing in optimum conditi

What Exactly is a Grocery Store "Vine-Ripened" Tomato?
If you’re reading this as May turns into June, and you live in the West, you know you’re going through a heat wave, including triple digit temperatures in parts of California. A more widespread - and longer - heat wave is expected in mid-June. And, long range forecasts are calling for a much hotter summer (July through September) than usual throughout most of North America. This is not good news for your south and west facing backyard tomatoes, especially.Give a listen to today’s newsletter podcast clip (a short one) from Episode 383 of last March, the 2025 Tomato Preview Show. Don Shor of Redwood Barn Nursery in Davis offers tips on protecting your young, west-facing tomatoes (as well as bell peppers) from developing sunscald or sunburn during an extended heatwave.It’s a technique that allows commercial tomatoes to be picked early in their life, stored, possibly treated with ethylene gas, and then shipped to grocery stores after they’ve reddened up and gotten a bit soft…with parts of their stem still attached. These tomatoes receive a premium price, because they are labeled as “vine-ripened”.Processors and grocery stores insist this fits the definition of “vine-ripened”. Actually, there is no legal definition of “vine-ripened”, according to the USDA. The closest they come is in their “standards” for a mature tomato, which might come as a shock to you who grow backyard tomatoes. Thank you for becoming a paid subscriber. It helps me feed the animals that reside here. And the people who are building me a new bike.From the USDA’s “United States Standards for Grades of Tomatoes on the Vine”:§51.2172 Mature.''Mature'' means that the contents of two or more seed cavities have developed a jellylike consistency and the seeds are well developed. External color shows at least a definite break from green to tannish-yellow, pink or red color on not less than 10 percent of the surface.You may have assumed that those grocery store “vine-ripened” tomatoes were picked red and shipped immediately. You may have noticed that the tomatoes had a “tomato aroma”. Actually, if they still have a piece of the vine attached to them, that is the part that is emitting the aroma, according to “America’s Test Kitchen”. They also quickly point out, however, that “…in blind side-by-side tastings, my colleagues and I have never been able to consistently find a difference in flavor” between on-the-vine and ethylene-ripened tomatoes.They quote a study that reaffirms their findings. That study was published in “The Journal of Food Science - a Publication of the Institute of Food Technologists”. It was conducted primarily by the staff of Rutgers University Food Science and Plant Science Departments, with support from the New Jersey-NASA Specialized Center of Research and Training. Do any of these firms have ties to the commercial tomato industry? I’ll let a newspaper or magazine with a team of researchers try to track down that answer.The title of the study was: “Quality Comparison of Hydroponic Tomatoes (Lycopersicon esculentum) Ripened On and Off Vine”. Before moving on, a clarification for you real tomato heads from NeetPrep.com (which bills itself as “India’s #1 Classroom Test Series”) regarding the question of the correct biological name for the tomato:“In 1753, Linnaeus placed the tomato in the genus Solanum (alongside the potato) as Solanum lycopersicum. In 1768, Philip Miller moved it to its own genus, naming it Lycopersicon esculentum. Genetic evidence has now shown that Linnaeus was correct to put the tomato in the genus Solanum, making Solanum lycopersicum the correct name. Both names, however, will probably be found in the literature for some time.”OK, lets ask the first obvious, basic question about this tomato taste test: What is the difference between the taste of a hydroponically-grown indoor tomato and an in-ground outdoor grown tomato? Although I was entertained by the variety of answers I read at crowd-aggregation site Quora, primarily from hydroponic enthusiasts, permaculturists, and way too many people not clear on the concept, I will rely on Google’s AI summary of the difference, which may have problems of its own:* Hydroponic Tomatoes:* Controlled Environment: Hydroponic systems allow for precise control over nutrient levels, light, temperature, and humidity, which can lead to larger, juicier fruits but sometimes with a less complex flavor.* Less Soil Interactions: Soil-grown tomatoes benefit from interactions with beneficial bacteria and fungi, which can contribute to unique flavors and compounds.* Potential for Bland Taste: Hydroponically grown tomatoes may have a lower concentration of certain flavor compounds, leading to a more muted taste.* Sweeter Taste: Some studies have shown that hydroponic tomatoes can be sweeter due to increased water and sugar content.* Soil-Grown Tomatoes:* Complex Flavors: Soil provides a diverse environment with organic matter, beneficial microbes, and minerals that can contribute to a more

More Effective Raised Bed Drip Irrigation Techniques
Both free and paid subscribers have full access to the Friday edition of the Beyond the Garden Basics newsletter. Because cutting off free subscribers in the middle of a newsletter isn’t a nice thing to do.At the top of the page: an excerpt of a conversation with Don Shor of Redwood Barn Nursery about growing tomatoes with drip irrigation in raised beds from Episode 288 of the Garden Basics with Farmer Fred podcast.Another podcast episode that really delves into drip irrigation was Episode 227, Understanding Drip Irrigation”. That featured an in-depth chat with author Robert Kourik, who literally wrote the book about good drip irrigation techniques and equipment. Give that a listen.Drip Irrigation Lessons Learned the Hard WayAfter working with drip irritation systems in the garden for more than 40 years, consider this my “Lessons learned the Hard Way.”Example One: my original raised beds, from the early ‘90’s featured three parallel drip lines with inline emitters running the length of a four foot wide bed. Also lacking: no individual on-off valves for each bed. All the beds were, in effect, running on a single circuit simultaneously. The irrigation was running for two to three hours a day, four or five days a week, to achieve plant growing success.The problem was the lack of water during a single irrigation flowing from the one-gallon inline emitters spaced 12 inches apart, on lines that were 18 inches apart in the raised beds. Complicating the matter: no attention was given to the cross-spacing of the emitters between lines. If all the emitters were lined up like little soldiers on those three lines, there were large areas of soil that had a hard time getting water.The biggest lesson I’ve learned about raised bed gardening is something that Don Shor of Redwood Barn Nursery has pounded into our heads for decades: you have to consider a raised bed as just a large plant container, with all the limitations involved of dealing with potted plants:• It dries out quicker.• Drainage could be problematic.• Tall plants, such as corn, tend to fall down and go boom much more readily in a raised bed than in an in-ground planting during a summer windstorm. A couple of reasons for that: the raised bed soil is not very good at anchoring roots. The water pattern in a raised bed does not encourage a wider plant root system. Roots will follow the water, not vice-versa.Water tends to go straight down in a raised bed instead of spreading out, due to a higher content of loose, friable, potting mix-like sandy soil. In the backyard garden, there is probably a higher content of clay, which allows water to spread out. For example, in a freshly filled new raised bed with a premium potting mix, the water released from a drip emitter may only have a diameter of 8 inches across, as it descends through this mix. In your backyard soil, that probably has a lot more clay? That water diameter may spread out 18 inches as it trickles downward.Did you know that the paid subscribers to the Beyond the Garden Basics newsletter are helping to keep the neighborhood abandoned cats happy by distracting them from the garden?Cut Your Drip Irrigation Woes with These TipsThe solution? Add more parallel lines. Add mulch.Solution number two: Stagger the lines so that emitters were not side by side.But there was one more trick to employ to help preserve soil moisture: grind up fallen leaves from neighborhood oak trees, and use it as a mulch, several inches thick, year round.Mulch, as I have reminded you for decades: • Retains moisture. • Keeps soil temperature constant, reducing plant stress. • Suppresses weeds. • Gradually increases soil organic matter, feeding the soil. • Attracts beneficial organisms that improve soil fertility and porosity. • Encourages healthier plants, reducing the needs for pesticides and fertilizers. • Protects roots and plants from mechanical injury. • On hillsides and around rural homes, certain mulches can suppress the spread of brush fires.One solution occurred to be early on in my adventures in drip irrigation of raised beds. Using 4’x5’ sheets of concrete reinforcement screening, with six inch mesh spacing, to keep the dogs and cats out of the raised beds.Note as well that even though you can bury the in-line emitter drip tubing beneath the mulch, I like to keep the end caps visible. That’s a reminder to occasionally undo them and flush any debris or impurities out of the lines.Paid subscribers to the Beyond the Garden Basics newsletter can read the archives of over 200 editions of this newsletter! And they get a special Monday edition, as well. And besides, I need a new bike. Thank you.Thank you for also listening to the Garden Basics with Farmer Fred podcast! It’s available wherever you get your podcasts. Please share it with your garden friends. And your subscription to this newsletter helps keep the Garden Basics podcast alive, as well. Thank you for your support.Fred Hoffman is also a University of California Cooperative

Peppers Worth a Try
In Episode 390 of the Garden Basics podcast, Master Gardener Gail Pothour offered some great tips for growing peppers this spring and summer. We also discussed sweet, warm and hot pepper varieties that might be worth a try in your own garden. That portion of our discussion is also in the newsletter podcast at the top of the page.Also in today’s newsletter podcast, Diane Blazek, the Executive Director of the All America Selections plant winners, talks about her favorite award-winning, not-so-hot peppers.Gail Pothour did share a little gardening secret of hers: if she is in doubt about the quality of the bargain potting soil she’s using, she will toss in her “fertility mix”: a concoction of organic materials to give a boost to that potting soil. Gail explains:“The organic fertility mix recipe is from John Greenler of Zephyr Community Farm in Stoughton, Wisconsin (who I believe may be, or previously was, a professor at the University of Wisconsin at Madison with a PhD focused on plant biology). I found it in a book, “Great Garden Formulas - The Ultimate Book of Mix-It-Yourself Concoctions for Your Garden” (Rodale Press). The recipe for Zephyr Farms Original Organic Fertility Mix is as follows:2 cups rock phosphate2 cups greensand2 cups blood meal1/2 cup bone meal1/4 cup kelp mealMix all ingredients together. Makes 6 1/4 cups of fertility mix. Sprinkle mix over 15 gallons of commercial potting soil. (Note: a 2 cubic foot bag of potting soil = **Rock phosphate provides phosphorus**Greensand and kelp meal provide potassium and trace minerals**Blood meal provides nitrogen**Bone meal provides phosphorus and calciumI generally am not a proponent of DIY concoctions, but this fertility mix seems to provide a good blend of nutrients to potting soil that is sometimes lacking in nutrition. In my opinion, you get what you pay for when it comes to potting soil. But I am also always looking for a bargain, so if what I have purchased does not have a long list of good quality organic ingredients, then I add this fertility mix.”Peppers Worth a TryPeppers worth a try, from the conversation between myself and Gail. Most of these are sweet to mildly hot. Sweet peppers generally come in at 0 Scoville Units. The exceptionally hot ones are noted, as well.Pot-a-Peno (mildly hot. 5000 Scoville Units)“Plentiful small, green jalapeño fruits have a traditional spicy zip that is great in any dish where you want a little punch of spice. Simply leave the fruit on the vine a few extra weeks and they will ripen to red for a sweet, spicy flavor. This variety is earlier to mature than other jalapenos giving you a head start on your garden’s harvest. A unique trait of Pot-a-peno is how the fruit hangs down beneath the plant making it very easy to harvest without damaging the appearance or productivity of the plant. A dense foliage canopy makes for an attractive addition to your patio or balcony garden.”Tricked You“90 Days. An improved version of the very popular Fooled You that is sure to become a favorite in its own right. Easy-to-grow, 4" fruits have excellent jalapeno flavor without the heat. Great for combining with hot jalapenos to customize the level of heat in homemade salsa and hot sauce. An X3R® variety.”Red Impact“Lamuyo-type peppers are notoriously difficult to grow, but the new Red Impact variety is here to change that. This AAS Winning pepper is easy to grow and produces thick, sweet walls, even when green. It is also much sweeter than other varieties and loaded with fruits for a high yielding gem. Red Impact plants are upright and tidy, with a strong disease package that protects your investment. The fruit is dark red, highly uniform in shape and size.”Sheepnose Pimento“80 Days. A tried-and-true heirloom. Pimento-shaped, 3 by 4" fruits are very sweet and meaty, making them ideal for canning, freezing and eating fresh. Plants are very productive, and fruits keep for weeks in the refrigerator.”FlamingoFrom Harris Seeds: “The vigorous hybrid pepper plant is resistant to TMV and prolific. Its smooth, tapered fruit are a good size (3-1/2 x 3-1/2" ) They have a waxy finish and turn from ivory-yellow to orange-red. Flamingo is a beautiful, sweet salad pepper with a bright color. If you are using Gypsy in your program, you should grow Flamingo for its improved yields and much larger size.”Gypsy“The early and heavy production of the yellow sweet pepper Gypsy provides color and flavor variety to your salads and dips. The 3-4 inch wedge-shaped fruits are very tender, crunchy and sweet. The plants average 18-20 inches in height with a 14-18 inch spread and are resistant to tobacco mosaic virus disease.”Mariachi mildly hot. 500-2000 Scoville Units“Mariachi sets fruits and produces an abundant crop of high quality, mild chile peppers. The chile peppers are pendant meaning they will hang below the stem. It is a fleshy pepper that ripens from creamy white to rose, then red. Some people may wait for the mature red pepper, but because its flavor is

Indoor/Outdoor Ant Control Tips
A bout of colder, wetter weather means ants will have begun their march towards the warmth and comfort of your house, greenhouse or outbuildings. In today’s newsletter podcast, America’s Favorite Retired College Horticulture Professor, Debbie Flower, lists many ways to control ant populations, both indoors and outdoors. She includes her home recipe for a lethal (but only lethal for ants) outdoor ant bait:1 part boric acid (1 teaspoon, e.g.) - available at most garden centers9 or 10 parts sugar (9 or 10 teaspoons sugar)Add enough water to make a slurry.Put slurry in a small container, tuna can size.Add 2 or 3 cotton balls and rotate them until they are completely covered in the slurry.Put a lid on the container. Lid must have holes big enough for ants to crawl through (about 1/8”).Bury in soil so lid is at soil level.Leave it alone. You won't see dead ants. They visit, take the bait back to the colony, and kill the entire colony.Commercial boric-acid ant baits are available, as well, for placing near outdoor plants where you see ants climbing up and down, herding aphids or gathering nectar.A word of praise for ants.Ants are a beneficial part of any successful garden. According to “Ants Are Ecologically Beneficial”, a publication of Iowa State University:“It is hard to imagine any other insect or animal that has a more important and positive impact on the terrestrial environment that sustains us. Ants are among the leading predators of other insects, helping to keep pest populations low. Ants move approximately the same amount of soil as earthworms, loosening the soil in the process and increasing air and water movement into the ground. They keep the ecosystem clean of dead insect carcasses and aid in the destruction and decomposition of plant and animal matter. By carrying bits of plants and animal remains into their nests, the soil is fertilized, and nutrients recycled through the world’s ecosystems. They carry seeds and help plants disperse into new areas.”However, as any gardener will swear, there are a couple of double-edged swords in that statement. Ant tunnels beneath the surface of a garden bed could move water too quickly to lower levels, making it unavailable to plant roots, especially in sandier soils. The solution for that: mix in compost on a regular basis. And those plant seeds that ants can disperse into new areas? There might be weed seeds in that mix. Yet another reason to own a long-handled hoe.It’s when ants start invading your house that homeowners need to act.Homeowners might reach for the spray can to douse those little scavengers. Many of those spray pesticides are only effective with direct contact on the ants. In addition, the stronger sprays, with residual action to thwart the next wave of ants, are potentially harmful to you, your children, and your pets.Here are some more modern, family-friendly indoor ant control methods from the University of California Ag and Natural Resources’ “Home, Garden, Turf, and Landscape Pests” publication, “Ants”:• Find where the ants are entering the house, then caulk any cracks and crevices both indoors and out.• Wipe up ant trails with soapy water when you see them.• Store food that is attractive to ants in closed containers.• Ant-proof kitchen garbage pails with sticky barriers like petroleum jelly.• Clean up grease and spills, pet food, and other possible food sources for ants.• Place pet food dishes in a moat of water with a drop of dishwashing liquid. The soap will keep the ants from floating.• If you decide to use a pesticide, choose prepackaged or refillable bait stations instead of sprays. Place them near ant trails and nest openings. Ant bait stations take time to work. It can take five to 10 days before you start seeing fewer ants. In the meantime, keep washing away the ant trails.In my experience, weak liquid boric acid combined with water in specially designed, refillable ant bait stations have proven effective, if given time. Boric acid powders and outdoor refillable ant bait stations are also available for outdoor ant control, especially if they have taken up residence in a long-neglected mulch pile of chipped/shredded tree parts. You’ll discover them in your first shovel full when you finally get around to using that mulch. Put down the shovel and pick up the powdered boric acid. Sprinkle it on the mulch pile and turn it into the middle of the pile. The ants will find it. But give them a couple of weeks before you return to that mulching task.Around the outer foundation of the house, the UC Integrated Pest Management team reports that several refillable bait stations are recommended, including the Ant Café, Antopia, Ant-No-More, and KM AntPro.A slow, but effective way to control Argentine ant populations is with a diluted, liquid boric acid product in a reusable ant bait station. Place the station outdoors near foundations where you see ants on the march.(A version of this appeared in the Dec. 30, 2022 edition of Beyond the Garden Basic

Backyard Chickens - How to Choose Them, How to Protect Them
In Ep. 381 of the Garden Basics with Farmer Fred podcast, Urban Chicken Consultant Cherie Sintes-Glover offered tips on how to protect your backyard chicken flock against the spread of the current version of avian influenza, the deadly H5N1, also known as the Bird Flu.The discussion on the Garden Basics podcast about protecting your flock from the bird flu took up about a half hour. At the top of this newsletter is our full conversation, which is over an hour in length, and touches on many aspects of being a backyard chicken flock owner.In this newsletter podcast, Urban Chicken Consultant and poultry health inspector Cherie Sintes-Glover of ChickensForEggs.com delves into the numerous variables that come into play for first-time chicken owners, including decisions around housing, feeding, and the necessary care and attention required. A significant point we cover is the myth that raising chickens is easy and low-cost; rather, it requires a solid understanding of animal husbandry and commitment to regular care. Cherie warns against believing everything we read online regarding chicken raising, stressing the necessity of consulting reliable sources.In addition, we tackle various questions, including how to differentiate between laying hens and roosters when purchasing chicks, and the importance of understanding the risks associated with chicken health, especially in the context of recent avian flu outbreaks. The discussion also outlines best practices for maintaining biosecurity, including the steps to take when introducing new birds to an existing flock and how to monitor them for signs of illness.Furthermore, we take a closer look at the environmental factors affecting chicken health, from extreme weather conditions to predator threats that can jeopardize backyard flocks. Cherie emphasizes constructing a predator-proof chicken coop while providing ample outdoor space for the birds to thrive.Alongside practical advice, Cherie shares insights into handling sick birds—detailing symptoms to look for, quarantine measures, and where to find local veterinary resources for poultry diagnostics. We address the societal ramifications of the bird flu crisis, particularly on the future of poultry show circuits with youth programs like 4-H and FFA, which are vital in cultivating a new generation of knowledgeable poultry enthusiasts.Bird Flu Infographics from the Center for Disease ControlCherie Sintes-Glover has appeared several times on the Garden Basics podcast over the years. Among the topics of interest to backyard chicken owners:Ep. 315 Choosing Backyard ChickensEp. 310 Homegrown Chicken Food?Ep. 220 Chickens vs. Summer HeatEp. 204 Backyard Chicken CareEp. 006 Backyard Chickens! (Beginner’s basic info)Thanks for reading Beyond Basics: The Garden Basics with Farmer Fred Newsletter! Subscribe to receive new posts and support my work.Thank you for also listening to the Garden Basics with Farmer Fred podcast! It’s available wherever you get your podcasts. Please share it with your garden friends.Fred Hoffman is also a University of California Cooperative Extension Master Gardener in Sacramento County. And he likes to ride his bike(s). This is a public episode. If you'd like to discuss this with other subscribers or get access to bonus episodes, visit gardenbasics.substack.com/subscribe

Valentine's Day Garden Gifts
If you’re reading this today, Friday morning, a gentle reminder: did you forget today is Valentine’s Day? Oops. If you are about to scurry out the door for a "run to the supermarket" or "the trip to the hardware store" to find something romantic for your gardening sweetheart, take your phone with you, especially if you’re headed to the flower shop. You may need to call 9-1-1 for an ambulance when you see the cost of a florist’s bouquet. A dozen long-stemmed roses, in a nice vase, can easily cost you over $100.A more reasonably priced alternative: living plants, currently in bloom. Widely available at nurseries, home centers and florists, these plants will not only save you money, but look nice in the home or office for a lot longer:• One colorful Valentine’s Day present: orchids. Reasonably priced and easy to grow, choose the Phalaenopsis orchid, also known as the moth orchid. It’s not fussy about light or temperature and comes in a wide variety of flower colors, which tend to bloom primarily in winter and spring. Include a tray and small gravel. Set the plant on a tray of gravel, partially filled with water. Be sure the pot is slightly elevated on the gravel so that it isn’t sitting in water. Add a high-phosphorus, water-soluble orchid fertilizer to your gift package.• African violets. Not as temperamental as you might believe, African violets can bloom several times a year, given the right environment: bright, indirect light (such as a south window protected by a sheer curtain), regular water and high humidity, which can be provided by placing the pot on a watery bed of gravel. If in doubt about your sweetheart's gardening luck, choose the easier-to-grow varieties of African violets with solid green leaves, instead of the more difficult kinds that have variegated leaves.• Azaleas. Both evergreen and deciduous varieties come in a wide array of flower colors, from white to deep purple, and just about every shade in between. Transfer these to a permanent home in the garden after the blooms drop, in an area that is protected from our hot, afternoon sun, in well-drained soil that gets regular water. No garden? No problem. Small evergreen varieties make suitable houseplants. Just be sure to give them curtain-filtered sunlight at least four hours a day, out of the direct path of heaters and air conditioners.• Begonias. Rex begonias are noted for their striking, multi-colored leaves, and are sure to look spectacular on the dining room table during a candlelight dinner. Just be sure to place it in an area that gets bright, indirect light afterwards. Since the begonia thrives in high humidity, rest the pot in a tray that contains a layer of gravel and water. Keep the pot just above the surface of the water, though.• Cyclamen. The heart-shaped variegated green leaves are topped with white, pink and red blooms that resemble butterfly wings. When the plant dies back, transplant the tuber outdoors to a raised bed or pot on the shady, north side of the house. The plant will regenerate next winter, producing more blooms.• Nursery shopping for other colorful plants for Valentine’s Day? Don’t overlook the containers of mixed succulents. Combinations of sedums, sempervivums, and echeverias have shallow roots and stay in bounds for quite a while.• Among the colorful shrubs available now are camellias and azaleas.• Although this may not sound romantic, the hard-core gardener in your life will hug you tightly if you return from your morning dash to the nursery with bags of high quality potting soil, compost, mulch, seed starting mix, or… worm castings.• You’ll get bonus points if you convince a tree company to drop off several yards of a mulch consisting of chipped/shredded tree trimmings onto your driveway today. Top it with a heart-shaped, red balloon. And you can earn a gold star if you help shovel it into the raised beds, garden areas, and walkways tomorrow.Thanks for reading Beyond Basics: The Garden Basics with Farmer Fred Newsletter! Subscribe to receive new posts and pledge a subscription to help support my work.Thank you for also listening to the Garden Basics with Farmer Fred podcast! It’s available wherever you get your podcasts. Please share it with your garden friends.Fred Hoffman is also a University of California Cooperative Extension Master Gardener in Sacramento County. And he likes to ride his bike(s). This is a public episode. If you'd like to discuss this with other subscribers or get access to bonus episodes, visit gardenbasics.substack.com/subscribe

Persimmon Tips from the Pros
Recently, a listener’s question did not get fully answered on Episode 378 of the Garden Basics podcast. Katie was asking about how to thwart the squirrels and raccoons that attacked her persimmon tree fruit. But she included this little scenic bypass: “So when the persimmon tree we’ve waited on for NINE years to fruit (it did get fruit in years 6, 7, and 8, but they all dropped. Overwatering? Underwatering?) — when said persimmon developed abundant fruit this year and it began to ripen, I decided to try to ward off the squirrels with stainless steel fruit sleeves.”Debbie Flower and I immediately delved into pest control techniques, but totally overlooked her question about the fallen fruit and watering. Thus the purpose of this edition of the Beyond the Garden Basics newsletter.You can find a good explanation of correct persimmon watering techniques below, answered by the California Rare Fruit Growers. Before that, though, here’s more about persimmons:California's Central Valley was ablaze in October and early November with the other “orange” fruit tree: the brightly colored persimmon. And it's not just the fruit.Persimmon tree leaves can turn a brilliant hue of red before the first big wind and rain storm of late November washes them off their branches. What's left behind is the unpicked fruit, dangling like holiday ornaments during December. That's a feast for our eyes...as well as a banquet for hungry birds and squirrels.Persimmons have adapted well to our California climate: warm, dry summers and mild winters. At least 500 different Japanese persimmon (Diospyros kaki) varieties were brought to California during a major planting spree from 1870 to 1920. In 1877 alone, more than 5,000 plants in 19 varieties were imported from Japan. As a result, 99% of the U.S. commercial persimmon crop is grown here in California.Persimmons are quite nutritious, as well, loaded with Vitamin A, Vitamin C, Fiber, and antioxidants such as Beta-Carotene and Lycopene. If you live in the Central Valley, Southern California, Bay Area or low foothills as well as throughout USDA Zones 8 and 9 ... you can grow that! Japanese persimmon trees will be available at local nurseries throughout late winter. Give them full sun and regular irrigation in the dry months for best production. Persimmon trees can tolerate partial shade.As Warren Roberts explained in the newsletter podcast, persimmons are usually classified as either astringent or non-astringent. For fresh eating straight from the tree, choose a non-astringent, self-pollinating variety such as Fuyu, Giant Fuyu, Yemon or Izu. Astrigent varieties, which need to soften thoroughly before they sweeten, include Hachiya, Chocolate or Tamopan. Those varieties are self-fruitful, as well.Persimmon growing advice (including irrigation info) from the California Rare Fruit Growers (CRFG):Location: Full sun with some air movement is recommended for persimmon trees in inland areas, although they will tolerate some partial shade. Persimmons grown in cooler areas should have full sun with protection from cooling breezes. As an attractive ornamental the tree fits well in the landscape. It does not compete well with eucalyptus.Soil: Persimmons can withstand a wide rage of conditions as long as the soil is not overly salty, but does best in deep, well drained loam. A pH range of 6.5 to 7.5 is preferred. The tree has a strong tap root which may mean digging a deeper hole than usual when planting (when on D. kaki stock).Irrigation: Persimmon trees will withstand short periods of drought, but the fruit will be larger and of higher quality with regular watering. Extreme drought will cause the leaves and fruit to drop prematurely. Any fruit left on the tree will probably sunburn. Some 36 to 48 inches of water are needed annually, applied gradually in spring and tapering off in the fall. Hot inland areas may require 2 or 3 applications weekly, while coastal areas may need watering only once every 6 weeks, depending on the soil. If a drip system is is used, the emitters should be moved away from the trunk as the tree matures.Fertilization: Most trees do well with a minimum of fertilizing. Excess nitrogen can cause fruit drop. If mature leaves are not deep green and shoot growth is less than a foot per year, apply a balanced fertilizer such as a 10-10-10 at a rate of 1 pound per inch of trunk diameter at ground level. Spread the fertilizer evenly under the canopy in late winter or early spring.Pruning: Prune persimmon trees to develop a strong framework of main branches while the tree is young. Otherwise the fruit, which is borne at the tips of the branches, may be too heavy and cause breakage. A regular program of removal of some new growth and heading others each year will improve structure and reduce alternate bearing. An open vase system is probably best. Even though the trees grow well on their own, persimmons can be pruned heavily as a hedge, as a screen, or to control size. They even make a nice esp

The Best Roses for America? One Master Rosarian's List.
Podcast Bonus: High Scoring Roses for Most of the United StatesWe like to check in with Master Rosarian Charlotte Owendyk of the Sierra Foothills Rose Society, to find out which roses have captured her fancy in the last year or two. And beyond that, which roses she recommends because they can be easy to grow in a variety of climates. The Sierra Foothill Rose Society, after all, has California members from near sea level in Sacramento and Roseville all the way up to Lake Tahoe, more than a mile up in the Sierra Nevada mountains. Is there a rose that can be grown in such varied climates? Sure enough, Owendyk has a list that she likes to call, “Bulletproof Roses”. Owendyk didn’t hesitate to respond about her favorite, widely adaptable rose. “One rose that can really take the heat and the cold is ‘Distant Drums’, which has a very distinct coloration,” she says. “The petals are apricot-colored in the center, surrounded by lavender on the outer petals. It’s hardy down to USDA Zone 4, and has a wonderful strong scent with great disease resistance.” We here are considered to be in USDA Zone 9, where winter lows seldom drop below the upper 20’s. USDA Zone 4, on the other hand, has seen lows dip down to 31 below zero in the winter. Yet, ‘Distant Drums’ can do well for your aunt and uncle in North Dakota. Lake Tahoe (USDA Zone 6) is relatively balmy in comparison, where January overnight lows average about 26 degrees above zero.Another top performing rose for most of the United States, according to Owendyk is the floribunda rose, ‘Iceberg”, and its close relative ‘Burgundy Iceberg’. Floribunda roses are noted for their massive, long-lasting, colorful displays of large clusters of white flowers.However, when it comes to a quick turnaround for getting new blossoms, nothing beats “Secret”, says Owendyk. “Normally, hybrid tea roses take five or six weeks to rebloom after deadheading,” says Owendyk. “For ‘Secret’, it’s only four to five weeks. That’s why it’s one of my favorite roses. Plus, it’s very fragrant.”Other rose varieties that Owendyk is fond of in 2022, the ones she recommends for rose growers across the country, include:• “Belinda’s Dream”, a shrub rose (“A tough, soft pink rose, with great disease and heat resistance” says Owendyk.)• “Cinco De Mayo” (“Wonderful ruffled, smoky lavender flowers”).• “Lyda Rose” (“The flowers look like apple blossoms, absolutely stunning”).• ”Gemini” (“This All-America hybrid tea rose winner is very vigorous, with coral-and-cream colored petals”). • “Memorial Day” (“Extremely fragrant rose that blooms all summer, plus the canes don’t have many prickles or thorns”).• “Sally Holmes” (“A shrub rose that can get seven feet tall and is tolerant of some shade”).Other honorable mentions in Owendyk’s list of roses for everyone include “Betty Boop”, “Dick Clark”, Cherry Parfait“, “Julia Child”, “Marilyn Monroe”, “Playgirl”, “Rock N Roll”, and “Quietness”.“Floribunda? What’s That?” A Modern Rose GlossaryMaster Rosarian Charlotte Owendyk and I talked rose pruning in both Episode 162 and was repeated in Episode 377 of the “Garden Basics with Farmer Fred” podcast. The episode may have had you wishing for The American Rose Society’s “Handbook for Selecting Roses” , a great, pocket-sized encyclopedia of roses, and rose information, perfect for anyone shopping for good rose varieties. Plus, it has a lot of handy definitions when trying to decipher head-scratching questions such as, “What’s the difference between a floribunda and a grandiflora rose?” Here then, is a brief glossary of rose varieties, courtesy of the ARS:GRANDIFLORA ROSEIn 1954, the introduction of a rose crossing between the ‘Charlotte Armstrong’ (a hybrid tea rose) and the floribunda rose, ‘Floradora’, resulted in a flower with carmine rose and dawn pink coloration. The cross had the characteristics of a hybrid tea rose, but also the ability to bear clusters or trusses and grow to a commanding height of six to eight feet or more. Thus, the class of Grandiflora was born. The first Grandiflora was named “Queen Elizabeth” in honor of the (at the time) very young queen of England.FLORIBUNDA ROSEThe floribunda class of roses is characterized by its profuse ability to bear flowers in large clusters or trusses with more than one bloom in flower at any one time. Floribundas provide massive, colorful, long-lasting garden displays. Floribundas have the edge on hybrid tea roses. Hybrid teas bloom in cycles every six or seven weeks. Floribundas, on the other hand, can bloom continuously. One standout floribunda, with an ARS rating of 8.6, is ‘Lavaglut’.HYBRID TEA ROSESProbably the most recognizable class of roses, due to the large, shapely blooms, with each flower containing 30 to 50 petals. Flowers are borne on long stems either singly or with several sidebuds. One highly rated hybrid tea rose that is widely available at nurseries is ‘Mr. Lincoln’.MINIATURE ROSESThe height of the average miniature rose is about 15 to 30 inches, making them id

Protecting Your Home with a Fire Resistant Landscape
In today’s “Beyond the Garden Basics” podcast, we talk with Douglas Kent, author of “Firescaping: Protecting Your Home with A Fire-Resistant Landscape”. He has a slightly different view of thwarting home and yard damage for residents of the urban-wildland interface, who are increasingly keeping a wary eye - and nose - in the air for smoke and flames. This is a public episode. If you'd like to discuss this with other subscribers or get access to bonus episodes, visit gardenbasics.substack.com/subscribe

2024 Tomato Winners (and losers)
Previous episodes of the podcast, show notes, links, product information, and transcripts at the home site for Garden Basics with Farmer Fred, GardenBasics.net. Transcripts and episode chapters also available at Buzzsprout. This is a public episode. If you'd like to discuss this with other subscribers or get access to bonus episodes, visit gardenbasics.substack.com/subscribe

Home Grown Tomatoes with Thanksgiving Dinner?
I read an intriguing garden column (many years ago) in the Redding, CA newspaper that suggested one way to get tomatoes to ripen outdoors in Autumn. It said: "A rule of thumb is, in the fall, take off all leaves and stems and all fruit that will not have time to develop before frost. You'll end up with skeletal vines and bare fruit, which is exactly what you want, since now all the plant's energy will go into ripening that fruit."That might work in the mild climate areas of southern California or south Florida, but here in Northern California (and Redding is in far Northern California), you're asking for a quicker end to tomato season if you do that. November temperatures will typically dip down into the 40's here; in late November, nighttime lows in the 30's are quite likely here. When nighttime temperatures are in the 40's and below, fruit development slows to a crawl and causes other problematic issues. Even here in the milder USDA Zone 9 Sacramento region, harvesting red tomatoes in mid-November is an iffy proposition, at best. The typical Sacramento gardener Thanksgiving trick: harvest the remaining tomatoes the day before. Immediately cut off the damaged, ugly portions. Serve the miniscule, pretty remains to Thursday's dinner guests, chopped and mixed into a salad. "Why yes, we can harvest tomatoes on Thanksgiving!" Please don't ask to see the whole tomatoes, though. You might lose your appetite.As the fall weather finally begins to turn cooler, gardeners are faced with this annual dilemma: will those green tomatoes in the garden ripen before temperatures start plummeting into the low 30’s? Depending upon where you are located, that question might start occurring to you in September, in the colder regions of the U.S. In many areas of California and other USDA Zone 9 climates, and perhaps parts of Zone 8, fresh garden tomatoes remain edible until late October or early November. They may not be pretty...but they are still a heckuva lot tastier than any tomato you'll find in a grocery store. By mid-November, remaining tomatoes are subject to harsher, colder, wetter weather leading to more outbreaks of blight diseases, insect infestations and bird pecking.Are you tempted to harvest those green tomatoes, now, hoping they'll ripen up indoors? Here are a few tips.From the horticulture department at Texas A and M:How do you tell when a green tomato, harvested early to prevent freeze damage, will ever turn red and ripen? This can simply be done with a sharp kitchen knife. Harvest a tomato typical of the majority of green tomatoes on your plants. Look at size but pay particular attention to fruit color. Slice through the center of the tomato. Closely examine the seed within the fruit. If the seeds are covered with a clear gel which cause them to move away from the knife, then that fruit will eventually turn red and ripen. If the seeds are cut by the knife then those fruit will never properly ripen. Compare the color and size of the tested fruit when harvesting tomatoes on your plants. Most similar fruit will eventually ripen and turn red.From Colorado State University:Cooler September temperatures help fruit to ripen because the red tomato pigments, lycopene and carotene, are not produced above 85 degrees F; nor is lycopene below 50 degrees F.As late September approaches, gardeners often try to extend the life of their plants by covering with cloth or plastic. Covering plants works well for nearly red tomatoes, but not as well for mature green ones. Though foliage may sometimes be saved, research shows that chilling injury on green fruit occurs at temperatures of 50 degrees and decay losses rise markedly on fruit exposed to 40 degrees F. Red ones well on their way to ripening tolerate colder temperatures.Before frost hits and plants go down, pick and bring fruit indoors to ripen. Clip fruit with a very short stem piece left on but one that’s not long enough to punch holes in other tomatoes. Stems ripped out of fruit will open them to decay. Eliminate (immature) green fruit, as research shows it’s more likely to spoil than ripen and never develops the flavor consumers want anyway. Mature green fruit will develop good flavor. Mature green tomatoes are well sized and have turned light green to white. If cut open, seeds are encased in gel and no empty cavity space is present.In addition to mature green, sort and store fruit by these groups as they will ripen at similar speeds. Fruit may be "turning" with a tinge of pink color showing, "pink" with 30 to 60 percent color showing, "light red" with 60 to 90 percent color present, and others "fully red" but not soft.Store mature green tomatoes at 55 to 70 degrees F. Once fruit is fully ripe, it can be stored at 45 to 50 degrees F with a relative humidity of 90 – 95%. Recommended refrigerator operating temperatures of 40 degrees are certainly too cool to ripen mature green tomatoes and are colder than desired for ripe ones. Ripening enzymes are destroyed by cold temperat

Who's Eating My Persimmons and Popcorn?
Mid-October is usually the time here in Northern California to harvest two of my favorite backyard crops: popcorn and persimmons. But what if the roof rats beat you to the harvest? Today - roof rat control tips! This is a public episode. If you'd like to discuss this with other subscribers or get access to bonus episodes, visit gardenbasics.substack.com/subscribe

What Are The Best Tasting Avocados?
If you listened to the full interview with avocado grower/Master Gardener Greg Alder in Ep. 360 of the Garden Basics podcast, you got a good fundamental education on growing backyard avocados. We covered such topics as: * Growing Conditions for Avocados* Fertilization Tips* The importance of watering avocado trees* The Role of Mulch* Soil Testing for Success* Cold Tolerant Avocado Varieties* The Flavor Profile of Avocado varieties* Top Avocado Varieties to Grow* Understanding Avocado Pollination* The “Single Tree” productivity of avocado trees* Growing Avocados in Different USDA Zones* Avocado Growing across the U.S.* Managing Greenhouse Conditions for Avocado TreesAgain, go back and listen to the original interview in the Garden Basics podcast, Episode 360. The part of our chat with Greg Alder that intrigued me the most, though, was our brief discussion of the flavors of various avocado varieties. It is that part that is excerpted above, at the top of the newsletter. After all, why plant something you wouldn’t be thrilled to eat? His choices for the best tasting avocados included the Hass, Gwen, Sharwil, Reed, GEM, and Fuerte.The newsletter podcast includes the ravings of another fruit-oriented lunatic, Ed Laivo, who has spent most of his adult life talking about, growing, and selling fruit trees. His latest venture is a fruit-based You Tube page “Ed Able Solutions”. The excerpt above includes the audio of one of his You Tube postings, praising the Reed avocado.Another fruit fanatic whose opinion I respect is Tom Spellman, formerly the Southern California representative for Dave Wilson Nursery. When posed with the question, “What are your favorite tasting avocados?”, Tom replied:“Fred, I agree with all of Greg’s picks. Some other favorites of mine are Pinkerton, Jan Boyce, and Stewart. Best recommendations for California home growers is to plant a small collection of varieties including both A and B flowering types that will give you fruit year round. For example, If you had the Fuerte, Hass, Reed, and Stewart, you would have four overlapping varieties so you can almost always be able to harvest from two. Right now I still have Hass and am starting on the Reeds. Hass will finish about the time Stewart comes on. However, in Northern California, you also have to consider adaptability.”Oh yeah, adaptability to other areas. As Greg Alder pointed out in our Garden Basics interview, avocados have a narrow sweet spot for growing conditions: not too hot, not too cold, the correct humidity, minimal drying winds, the right amount of water. Parts of the San Francisco Bay Area come the closest to providing that avocado ideal climate. Here in the Central Valley of California, where temperatures have a wider swing, a successful backyard avocado tree usually has these conditions in common: afternoon shade, protection from heavy winds, lots of mulch, reflective surfaces for winter heat, such as a nearby concrete patio, or a nearby west or south-facing fence. And of course, plenty of water to maintain evenness of the soil moisture. Oh, and that soil - preferably not too much clay - should drain fairly quickly. Years ago, as the area’s chief Avocado Skeptic, I pointed out in a Farmer Fred Rant! Blog Post entitled: “Avocados in Sacramento? Good Luck!” that the varieties that seem to have the best success here are Bacon, Zutano, Mexicola, Fuerte, Pinkerton, Jim, Sir Prize, and Stewart. However, “success” does not necessarily equate “outstanding taste”.But trying to choose avocado varieties based on the information regarding their heat and cold tolerances is not an easy task, nor the complete criteria.From Greg Alder:“There is very little info out there on cold and heat tolerance of avocado varieties because the assessment of this is more complicated than it would seem.One, varieties tolerate cold and heat in different ways. For example, sometimes one variety's leaves get burned in heat while they hold on to their fruit (Pinkerton) whereas another variety's leaves do not get burned but they drop their fruit (Reed). So which is more heat tolerant?Two, many factors beyond the scion variety affect an individual tree's performance in cold or heat: rootstock, timing of the cold/heat, underlying (invisible) health of tree, crop load, and more. So you can see a row of trees all of the same variety with variable damage after a hot or cold spell.But here is what I can say: My place (in Ramona, east of San Diego) is both slightly too hot and too cold for avocados every year. My trees get some cold damage and some heat damage every single year. In this kind of environment, I have learned two main lessons:* Protect trees until they are about six feet tall, and then they can recover well from cold or heat damage. Avocado trees are wimps when young, but they get surprisingly resilient after that size.* All the best varieties are worth trying. There is not a large difference in heat or cold tolerance among the varieties that have the best fr

Why is It That Fall is For Planting?
In this insightful conversation (above), Farmer Fred speaks with Diane Blazek, executive director of All-America Selections and the National Garden Bureau, about the seasonal transition from summer to fall and how it presents an opportunity for gardeners to refresh their landscapes with vibrant fall colors and cool season blooming plants. Diane's extensive experience in the horticultural industry positions her uniquely to share knowledge on regional and national plant varieties, particularly those achieving popularity across the United States.Diane highlights the significance of fall planting, emphasizing it as an ideal time for gardeners. With the energy from the summer season still lingering and the ground remaining warm, fall allows for planting before the onset of hard freezes in the colder USDA Zones. This period often fits well within planting guidelines since it enables various plants, especially perennials and bulbs, to establish robust root systems before going dormant. Diane insists that successful fall planting leads not just to immediate gratification but also ensures future blooms and growth come spring. She suggests that novice gardeners pay attention to hardiness zones and engage with local gardening experts to choose suitable plants for their specific climate.The discussion navigates through practical tips for gardeners, such as understanding the appropriate timelines for planting in areas with cold winters, where the ground may freeze. Diane advises that planting six weeks prior to the ground freezing is optimal for perennials and shrubs, whereas bulbs may have a bit more leeway. The seasoned gardener might experiment with plants that extend beyond their hardiness zone, but careful consideration of a plant's specific requirements is important for beginners seeking reliable results.Farmer Fred and Diane share insights into the benefits of local nurseries and local cooperative extension offices as critical resources for regionally appropriate plant selections. To further aid gardeners, Diane explains the biological aspects of fall planting—specifically, that initial growth is often underground, with plants focusing on root establishment rather than leaf growth in cooler temperatures. This foundational growth is vital for ensuring a plant's health and successful blooming in future seasons.They also address winter protection strategies for hardy perennials in colder USDA zones, emphasizing that mulching can be an effective way to insulate plants during freezing periods. The conversation highlights several flowering plants that are particularly well-suited for fall planting, with Diane showcasing some recent standouts like the ‘Yellow, My Darling’ Echinacea and various cultivars of Buddleja, which bear aesthetic appeal but come with regional considerations due to their invasive potential in certain areas.Diane also outlines several other standout plants, including hardy hibiscus, highlighted by its vibrant blooms and the exciting new hybrid, ‘Holy Grail,’ which features stunning scarlet flowers. The distinctive and visually appealing ‘Backdraft’ Kniphofia, reminiscent of Halloween candy corn, adds further enthusiasm to the list of recommended plants. Ornamental grasses are mentioned for their diverse utility; they add seasonal color, elegance, and even provide habitats for beneficial insects like ladybugs during the winter months.Diane concludes by reinforcing the importance of fall planting, particularly focusing on perennials, as they set the stage for vibrant gardens come spring. She encourages listeners to explore more about these plants through the National Garden Bureau’s resources for further inspiration and guidance. The synergy between seasonal gardening, plant selection, and ecological benefits forms a compelling narrative aimed at empowering new and experienced gardeners alike to embrace the opportunities that fall planting presents.Written by Fred, with a little AI help from Auphonic.==============================================With your help, we raised over $2,000 for the Sacramento Children’s Home Crisis Nursery during the “Farmer Fred’s Ride for the Kids” on Saturday, Sept. 28. 100-mile bike ride was a success. Mission accomplished!=============================================================Thanks for reading Beyond Basics: The Garden Basics with Farmer Fred Newsletter! Subscribe for free to receive new posts and support my work.Thank you for also listening to the Garden Basics with Farmer Fred podcast! It’s available wherever you get your podcasts. Please share it with your garden friends.Fred Hoffman is also a University of California Cooperative Extension Master Gardener in Sacramento County. And he likes to ride his bike(s). This is a public episode. If you'd like to discuss this with other subscribers or get access to bonus episodes, visit gardenbasics.substack.com/subscribe

Weed Killers Just Got More Confusing
In this episode of the Beyond the Garden Basics newsletter/podcast, we engage in an in-depth discussion about weed killers with Debbie Flower, America’s favorite retired college horticultural professor. We delve right into the complexities of weed management, addressing the various options available while navigating the maze of products at our local big box stores. As we stand before a daunting wall of weed killers, the conversation brings clarity to the overwhelming choices, shedding light on the distinctions between the products and their formulations.We start by tackling the widespread confusion surrounding Roundup, a brand historically synonymous with glyphosate. As glyphosate is being phased out, we explore the newer formulations that have replaced it. Many consumers may assume that Roundup still contains glyphosate, but Debbie explains that consumers must be vigilant in understanding the fine prints of these products. According to the University of Tennessee publication, “Update on Roundup-Branded Herbicides for Consumers”, Roundup weed-killing products now encompass a range of active ingredients that may vary significantly in toxicity and efficacy. We emphasize the importance of reading labels thoroughly, highlighting the legal implications of using herbicides incorrectly.Debbie expands on the shift in chemical composition within Roundup by introducing us to several active ingredients like Diquat, Fluazipop, and Triclopyr. We discuss the implications of using these chemicals, including their varying half-lives and their potential effects on soil and nearby desirable plants. Notably, Debbie reminds us that some products can render soil inhospitable for new planting for extended periods, which is crucial information for gardeners planning their next steps after weed control.Throughout our discussion, we touch on the critical aspect of safety. Both Debbie and I stress the significance of protecting oneself when applying any chemical herbicide. We explain how understanding the signal words such as “caution,” “warning,” and “danger” on product labels can help consumers navigate the toxicity levels of different herbicides. The conversation leads us to the point that, while chemical weed control can be effective, many gardeners often overlook traditional methods, like manual weeding and mulching, which can be safer and more environmentally friendly.We tackle alternative options popular on some Internet gardening sites, including vinegar as a natural weed killer but quickly highlight the hazards of using 30% vinegar, which is often found in the cleaning aisle rather than the gardening section. This topic was also covered in depth in the September 3, 2024 edition of the “Beyond the Garden Basics” newsletter. We caution gardeners about the need to treat such products with care, as they can be more harmful than conventional herbicides. This well-rounded dialogue between us brings to light both the benefits and the risks associated with various gardening techniques and products.As we progress, we dig into the technical side of weed killers—discussing how different chemicals are absorbed by plants, persistence in soil, and the necessary wait times before replanting. Debbie provides valuable insights into the environmental impact of chemicals leaching into the soil and waterways and how this can affect crops and landscaping efforts. Our conversation is not merely about identifying the right products but also understanding their broader implications on health and the environment.Finally, we encourage listeners to be proactive and informed gardeners by seeking out educational resources on reading and understanding product labels, as well as considering effective non-chemical alternatives to weed management. With all these insights shared, the overarching message is clear: informed decision-making is paramount in effective and safe gardening practices. We leave you equipped to tackle weed problems while fostering a safe and flourishing garden.And, one more excellent weed suppressant:(authors: Fred and his pal, AI)Farmer Fred's Ride For the Kids!I'm fundraising on behalf of the 2024 Sac Century Challenge on September 28th to raise money for the Sacramento Children's Home Crisis Nursery and I could use your support. Here’s the link for making a donation.On that date, I’ll be riding my bike, a Surly Midnight Special (NOT an e-bike) 100 miles along the Sacramento River to help out the Sacramento Children’s Home Crisis Nursery. I’ve ridden 100 miles in one day plenty of times…when I was younger. But at 73, I could use some moral support, and the Sacramento Children’s Home Crisis Nursery can use your pledge money. So, how about it? Maybe pledge 10 cents a mile (that’s $10) along with a hearty, “You go, Fred!” Or a more generous one dollar a mile ($100), to give me the mental endurance for the entire ride, to dodge the pothole-filled levee roads and pedal harder in the ferocious headwinds that makes this ride a real challen

The Catalina Cherry Tree. The Fruit is for the Birds.
Autumn officially begins on Sunday. Fall planting season, however, is already here. The cooler air temperatures, combined with the still-warm soil, are the perfect growing conditions for a new plant. Increasing in popularity, thanks to increased production by wholesale nurseries and the plants’ needs for less water once established, are an increasing number of California native plants.From the garden e-mail, Evan of San Jose, California wants to know about an evergreen tree or shrub that is native to coastal Southern California but does well in most mild coastal areas of the West Coast that stay above 20 degrees in the winter:“I just ordered a Catalina cherry for my backyard,” writes Evan. “And I remembered that cherry trees need a pollinizing partner to produce fruit. Unfortunately, I can't find any information about which other cherry varieties are compatible with Catalina cherry. I was wondering if you could help me find a second tree to put in my backyard to pollinize the Catalina cherry. And I was hoping for more of an eating cherry other than the Catalina cherry. So, if there's a variety that my kids might like a little more that I can plant next to this one, I would appreciate it. This will be the first cherry in my backyard.”The Catalina cherry (Prunus illicifolia subsp. ‘Lyonii’) is a California native shrub or tree, and it does quite well in coastal zones up and down the Pacific coast from San Diego to Seattle (Sunset Zone 5). And perhaps even a wider range. The “Sunset Western Garden Book” says the Catalina cherry’s progenitor, the Prunus illcifolia (the Hollyleaf Cherry), has a range from Sunset Zones 5-9 and 12-24, which would include areas ranging from the hot valleys of California into the Sierra foothills. The tree can survive cold temperatures down to about 20 degrees. I know that some of you like to experiment with growing species that are outside of your area’s normal plant palette. This might be one of them. But, as always, gardener beware. I hope you have more success with this than I had, attempting to get rhubarb seed to germinate.Some specimens of the Catalina cherry on the coastal Southern California mainland tend to grow on slopes, and that might be a tip for where to plant it, in an area that gets good drainage. And cherry trees are notorious for needing good drainage. The Catalina cherry can be a tree or a shrub, because it only gets 15 to 20 feet tall, in gardens; but it can get twice that size in the wild. And, it is a true cherry, even though the dark red-to-black cherries themselves are not very tasty. Calscape.org, which is a plant finder service of the California Native Plant Society, says that “the fruit on the tree is best left for the birds” and parts may be poisonous. From Wikipedia:The pulp of the (hollyleaf) cherry is edible.[4] However, the seeds of the hollyleaf cherry are considered to be toxic, and the plant must undergo certain leaching processes to make it safe for consumption.[24]Native Americans fermented the fruit into an intoxicating drink.[4] Some also cracked the dried cherries and made meal from the seeds after grinding and leaching them.[25] It has also been made into jam.[26]The method of preparation for the cherry was to first extract and crush the kernel in a mortar, and the resulting powder would then be leached in order to eliminate remaining bad chemicals. The final step was to boil the leached powder into an atole.[24] Once this process was completed, Native Californians would then make soup base, tortillas, or tamale-like foods using the resulting ground meal. Other times, the kernel would be kept whole, leached to remove its hydrocyanic acid content, roasted for a couple hours, and then used to make cakes or balls.[27]Aside from food, the hollyleaf cherry was also used for medicinal purposes by some Native Californian tribes, including the Diegueño and the Cahuilla. Specifically, infusions made from the bark and roots of hollyleaf cherry plants would be used as treatment for common colds and coughs.[27]However, the Catalina cherry tree is quite showy, with spikes of five inch-long white to cream-colored flowers in spring, followed by the cherries.As far as getting more of that fruit that the birds will enjoy, be aware of this: the fruit can stain many hard surfaces. So, plant it well away from the patio or driveway.What would be a good cherry variety to use as a pollenizer? As you are probably aware as a parental gardener, you never want your children to utter the phrase, “the cherries we bought at the grocery store are better than the cherries we're getting in our backyard”. So, get them a sweet, tasty cherry tree that is self-fertile, but also serves well as a pollenizer for other cherry varieties. And one of the best for doing that is the Stella cherry. The Stella cherry is a popular tree that does quite well throughout most cherry growing regions, such as ours. It's good for canning, preserves, cooking, and fresh eating. The Stella takes abo
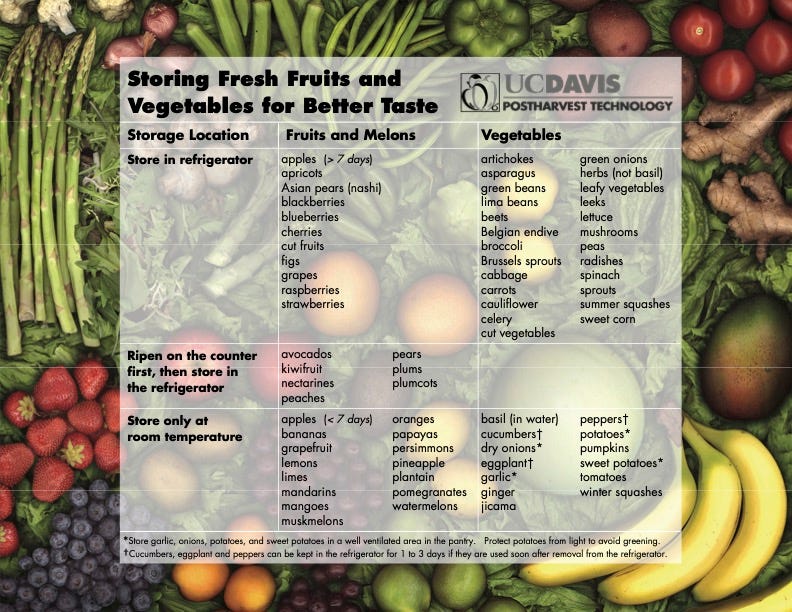
What is a Crisis Nursery?
Today’s newsletter podcast talks about a Crisis Nursery. No, it’s not an emergency room for sickly looking houseplants; although, the gardening entrepreneurs among you may be thinking…”hmm, that may not be a bad idea!”The Crisis Nursery we are talking about today deals with the safety of children, and the role the Sacramento Children’s Home has in its survival.Oh, listen! I hear my dead mother saying, “And what exactly does that have to do with the price of tea in China?” That would be her way of saying, “stay in your lane, Freddie Joe.” Adding, “stick to gardening.”Sharp-eyed readers of this digital scenic bypass-laden newsletter, ostensibly dealing with horticulture, may know that I include a picture of a bicycle in just about every issue. Because, if I am not in the garden, I’m on my bike.And sharper-eyed, highly caffeinated readers will recall that I have been plugging “Farmer Fred’s Ride for the Kids” for a few weeks now. At least, that’s what I’m calling it. The Sacramento Rotary Club would prefer to call it by its actual name, the Sacramento Century Challenge, a fundraising 100-mile bike ride (plus shorter rides) on September 28 to raise funds to support the Sacramento Children’s Home Crisis Nursery program.Now, I know you came for the gardening here. But thanks for letting me talk about the Crisis Nursery in today’s newsletter podcast with the Sacramento Children’s Home Director of Philanthropy, Todd Koolakian. And if you are adverse to listening to podcasts, a transcript of our conversation is below. The internet links mentioned in the podcast are underlined in the above paragraphs.And below the transcript, is my garden gift to you for sticking with me all these years: a chart from the UC Davis Post Harvest Technology Department, “Storing Fresh Fruits and Vegetables for Better Taste”, which answers the question: where do all the tomatoes and zucchini (and other backyard garden favorites) go when you bring them into the house? The counter, the refrigerator, or a combination of the two? You’ll want to print this chart out and hang it inside a kitchen cabinet door, for easy reference.At this point, the sharpest-eyed, super-caffeinated, hyper-critical readers of this newsletter might remark, “Didn’t you publish this in a newsletter two years ago?” Hey, quit waving your trowel at me, Columbo. That time around, it was only the first page of a two page document. Today, it’s both pages of information on storing fresh fruits and vegetables.But no matter your caffeine intake, thanks for listening and reading all these years.What is a Crisis Nursery? The TranscriptFarmer FredComing up Saturday, September 28th, I'm gonna be riding my bike. That is not so unusual. If I'm not in the garden, I'm usually on my bike. Well, on September 28th, that happens to be the date for the Sacramento Century Challenge. It's a 100-mile bike ride along the Sacramento River. It starts in downtown Sacramento (on Capitol Mall), heads south through the Delta Farmland region, and then back to downtown Sacramento.And yes, 100 miles is part of the challenge, as is the bike I'll be riding on. I'm not cheating you. I'll be on an analog bike, not an e -bike. It's my good, trusty, steel-framed Surly Midnight Special. And adding to the challenge, of course, is the route. It's not a very hilly route, the 100 mile route, but it goes along the river on the levee roads, which are full of potholes. And usually in past events in doing this ride, there are some ferocious headwinds, usually on the way back. And making it more of a challenge, and this is where you come in, folks, is helping out the Sacramento Rotary Club raise money for the Sacramento Children's Home Crisis Nursery by spurring me on with a donation for the Crisis Nursery. The Sacramento Children's Home Crisis Nursery is the only program of its kind in Sacramento County. Exactly what do they do? You probably saw the little headline in the newsletter or the podcast that asked the question, “what is a crisis nursery?” And you might be thinking, “some plants are in danger!” It's better than that. We're talking with Todd Koolakian. He is with the Sacramento Children's Home and the Crisis Nursery. And Todd, tell us a little bit about the Sacramento Children's Home and the Crisis Nursery. The Children's Home has been around since what, the 1800’s? Todd KoolakianThat is true. Yes, we've been around since 1867. We originated as an orphanage at that time. During the gold rush days, we were started by a group of volunteer women and we've been continuously operating for 157 years. First, thanks Fred, for having me on to share a little bit more about our events and the beneficiary, the Sacramento Children’s Home Crisis Nursery. I'm also a member of the Rotary Club of Sacramento and I am the immediate past president. So I had the pleasure of leading the organization last year and now in my retirement of being the president of the club, but still a proud member of the Rotary Club of Sacramento. And
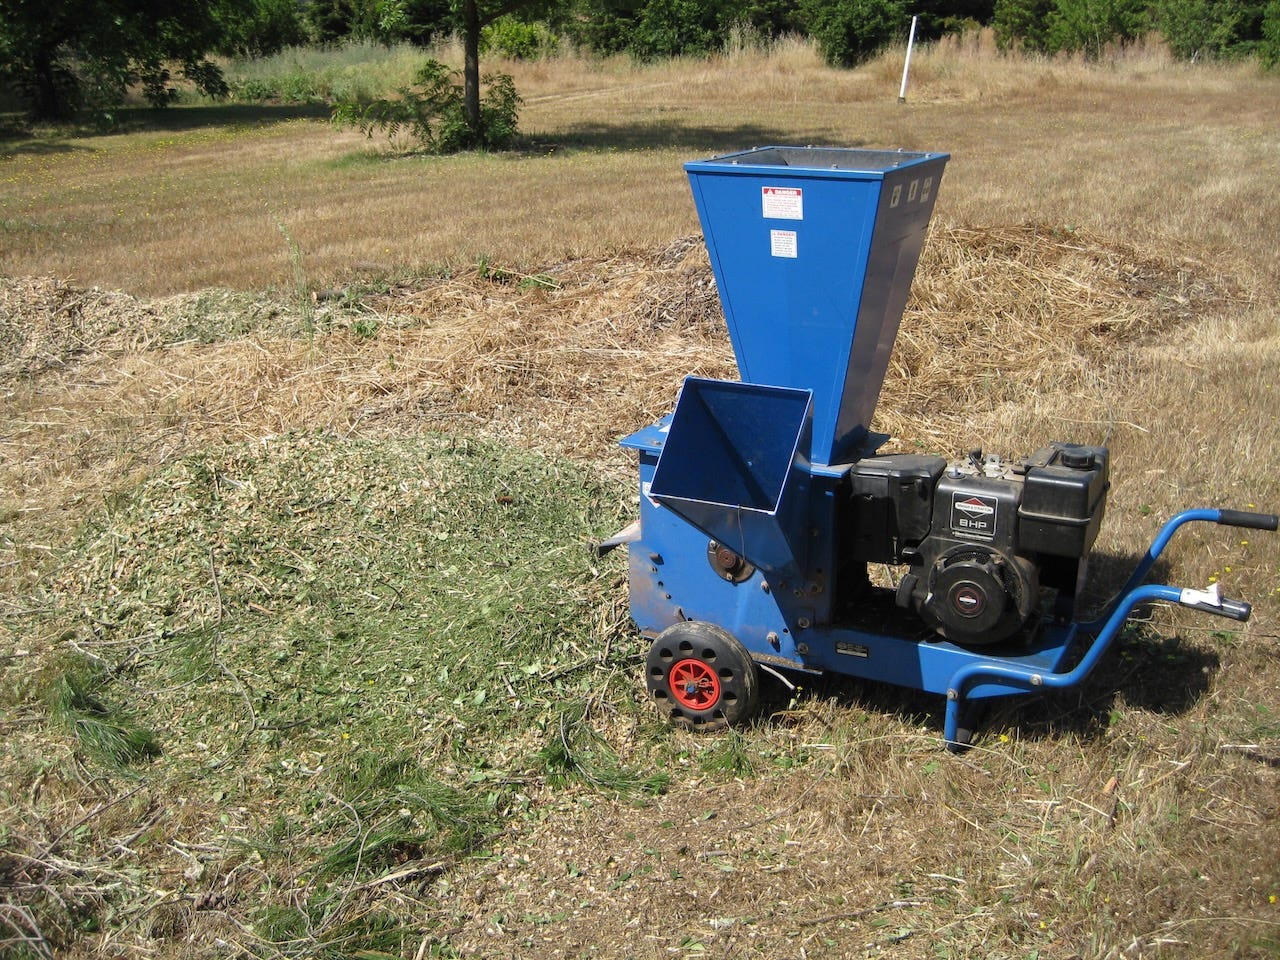
Why You Want a Chipper/Shredder, and not a Rototiller.
With fall approaching, now might be a good time to invest in some equipment to ease autumn and winter chores as well as improve your soil: making mulch from tree branches with a chipper/shredder, or easing raking chores by gathering the fallen leaves with a device that blows them into a pile, sucks them into a 30-gallon bag, and chops them up into little pieces as they head to the bag, where you can then spread those chopped-up leaves as mulch. In today’s podcast (above) we talk with Brad Gay of JB’s Power Equipment in Davis, California about what to look for when shopping for a chipper/shredder as well as the niftiness of owning a piece of equipment such as a Shred n Vac that can reduce those piles of leaves into gardener’s gold: mulch! These segments were recorded during the first wave of Covid, so there may be mask references. However, I bet we all still have a box of masks somewhere handy.What You May Have Missed on This Week’s Garden Basics PodcastBut first, a not-so-subtle plug for the latest episode (#354) of the Garden Basics with Farmer Fred podcast, Lawn Substitutes.Ripping out or reducing a lawn come fall? In this episode, Fred and America’s Favorite Retired College Horticulture Professor, Debbie Flower, discuss lawn elimination and alternative landscape options. They address the challenges of transitioning from lawns to alternative landscapes, including weed management and aesthetics. They explore lawn alternatives that require less maintenance and water, such as no-mow lawns, fescue varieties, and ground cover like dymondia and clover. They caution against over-reliance on artificial turf and emphasize the importance of localized advice and education about plants that thrive in unique ecosystems. They also discuss the need for proper maintenance in all types of landscapes.Chipper-Shredder vs Rototiller Are you thinking about buying a rototiller? How about instead purchasing a chipper/shredder? Now, that's a machine that's going to make easy work of chopping up your garden clippings including tree limbs. it's going to make it into the greatest mulch you could possibly own. The latest research shows that rototilling your soil actually damages soil structure and doesn't do anything good for the soil biology. On the other hand, the end result of using a chipper/shredder is going to provide you with a quality of mulch that we like to call, "gardeners' gold". Northern California Organic Gardening Consultant Steve Zien has some rather strong thoughts on this subject. Go back and listen to his comments back in Episode 89 of the Garden Basics podcast, from 2021.Thinking that perhaps his opinions may have mellowed on the chipper-shredder vs rototiller choice over the last three and a half years, I recently asked for his thoughts. Nope. No change. Here’s what he had to say (in bullets):Chipper shredderPros:• Eliminates or dramatically reduces green waste• Helps eliminate the need for a rototiller• Provides material for mulch or compost• When shreddings are applied to soil surface: • Feeds soil biology – resulting in improvements in: • Soil structure (pore space diversity) • Improve movement in soil by water, air, roots, soil biology • Soil water holding capacity (drought resistance) • Nutrient holding capacity • Biological diversity of soil microbes• Greater variety of nutrients, vitamins etc. available to plants• Improves pest resistance• Plant health improves (drought resistance, pest resistance)• Nutrient availability to plants improve• Availability of natural growth hormones, vitamins improves• Nutrient content of vegetables improves• Sequesters carbon – contributes to the reversal of climate change• Weed management benefits• Mulch created by chipper/shredder moderates soil temperatures• Erosion protection (mulch slows the force of falling rain)• Mulch created by chipper/shredder repels some pestsCons:• Expensive• Hard work. And, when done, you then have to apply the mulch to soil surface• Don’t chip diseased materialRototiller:Pros:• Get to smell actinomycetes• Mental connection to past horticultural practices (although no longer recommended)• Creates fine seedbed – but soil quickly becomes compacted making it difficult for sprouts to developCons:• It’s hard work• Expensive• Destroys soil structure• Compacts soil (reducing aeration, drainage, limit root development)• Fine clays quickly fill in pore spaces• Increases runoff – transporting soil, nutrients and pesticides into our waterways• Kills beneficial soil biology• Makes it harder for your plants to grow• Harder to obtain water, nutrients, growth hormones, vitamins• Increases pest susceptibility due in part to: • Reduced crop health • Pest management provided by soil biology • Reduces nutrient content of food crops • Results in the need for additional irrigation, fertilization, pesticides• Mother Nature’s natural rototillers (earthworms) are killed by the blades.• Creates biological imbalance - abundance of bacteria vs. fungi (raises pH)• Loss in

Can You Grow Rhubarb in a Warm to Hot Climate? Yes!
If you’re a transplant from a colder USDA Zone to a warmer zone, you may have fond memories of rhubarb pie, strawberry-rhubarb jam, rhubarb crisp, or something more exotic, such as Rhubarb-Blueberry Upside Down Cake. But if you now live in USDA Zones 9 or 10, you may be wondering, is it too hot here in the summer to grow rhubarb? Is it too warm in the winter here to grow rhubarb? Yes you can! But leave your rhubarb growing techniques back in Wisconsin. The trick to growing rhubarb here is: start from seed, not roots; use varieties that are developed for milder climates; and grow them in the shade.In the podcast above, we talk with Ronni Kern of the West Los Angeles chapter of the California Rare Fruit Growers Association. She has all the details for growing it successfully here in California and in other milder climates.But before we dive into the pit of endless rhubarb, a bit of business:“It’s All About the Soil (for a Successful Garden!)”Did you listen to Episode 353 of the Garden Basics with Farmer Fred podcast? It’s entitled, “It’s All About the Soil (for a successful garden!)”. We chat with Kevin Marini, a community education specialist with UC Cooperative Extension in Placer and Nevada Counties, about the topic of soil and gardening. We discuss the pros and cons of using native soil versus commercial soil, the importance of improving native soil, the use of bagged mixes and raised beds, and the role of organic matter and fertilizers in gardening. We also touch on the benefits of mulch and the importance of proper watering techniques. Overall, the conversation emphasizes the importance of understanding and improving soil for successful gardening.You’ll want to listen to it twice, as well as reading the transcript, for all the handy gardening tips and tricks we mention to achieve an outstanding garden.The podcast (along with a transcript) is available now wherever you get your podcasts. But if you want an accurate, corrected transcript along with the podcast, go to GardenBasics.net . Thank you for listening (and/or reading!)Farmer Fred’s Ride for the Kids!I'm fundraising on behalf of the Sacramento Rotary Club’s 2024 Sac Century Challenge bike ride on September 28th to raise money for the Sacramento Children's Home Crisis Nursery and I could use your support. Here’s the link.On that date, I’ll be riding my bike, a Surly Midnight Special (NOT an e-bike) 100 miles along the Sacramento River to help out the Sacramento Children’s Home Crisis Nursery. I’ve ridden 100 miles in one day plenty of times…when I was younger. But at 73, I could use some moral support, and the Sacramento Children’s Home Crisis Nursery can use your pledge money. So, how about it? Maybe pledge 10 cents a mile (that’s $10) along with a hearty, “You go, Fred!” Or a more generous one dollar a mile ($100), to give me the mental endurance for the entire ride, to dodge the pothole-filled levee roads and pedal harder in the ferocious headwinds that makes this ride a real challenge!The Sacramento Children's Home Crisis Nursery is the only program of its kind in Sacramento County and directly prevents child abuse and neglect by supporting families with small children at times of crisis. The nursery allows parents to bring their children ages newborn to five for emergency hourly or overnight care during difficult times, with the goal of keeping families together and reducing the number of children entering foster care. To care for our community's most vulnerable children, we rely on support from community members like you. By donating, you empower us to provide a safe haven for children throughout the Sacramento area, offering respite to parents during times of crisis, and building a strong support system for the future. Your support helps provide a safe place to stay local kids in need. Again, here’s the link to make a donation to the Sacramento Children’s Home Crisis Nursery. Or do it because this newsletter is still free (for now).Thank you for your support, and say "Hi!" if you see me pedaling like crazy out there along the Sacramento River on Saturday, September 28th!Can You Grow Rhubarb? Yes!Here’s the transcript of the podcast (above) chat with Ronni Kern of the West L.A. California Rare Fruit Growers. There are lots and lots of hot links in the transcript to get you to more information about rhubarb and more!TRANSCRIPT - How To Grow Rhubarb in USDA Zones 9 and 10.Farmer Fred: As you are probably very aware, I've been answering garden questions here in Northern California for, well over 40 years, actually. And nobody ever asked me about rhubarb until I visited the eye doctor a few months ago. And besides her questions, which are usually, “Which is clearer, the first one or the second one?” “One or two?” Her other question was, “Can you grow rhubarb here?” And nobody in all those years has ever asked me about growing rhubarb before. And I mentioned that to her and I said, well, I'll look into it and see what it is. Now, this was back abou
Dealing with Fruit Tree Varmints
In today’s newsletter podcast, fruit tree expert Ed Laivo of Ed Able Solutions gives us tips for dealing with varmints that get to your tree fruit before you’ve had a chance to sample it. And, he has tips for growing fruit trees in containers. I mentioned in the podcast that we would have a video link to Ed’s Harvest Day 2024 presentation at the Fair Oaks Horticulture Center on August 3, which was about growing fruit trees in containers. That video is not yet available; but here, enjoy Ed talking about that topic on his YouTube page.In the typed remarks below, we get into another way to thwart the crawling, walking, hopping, flying pests that get into your fruit trees, and that is to skirt prune those trees that have low hanging branches, that reach the ground.For those of you who were hoping for stories of the high school girls at U.S. Grant High School in Van Nuys who would surreptitiously raise the hem of their mandatory skirts above the knee near the end of lunch period because the vice principal would leave the premises after one lap through the cafeteria area, sorry. And yes, it was a public school. And yes, skirts were mandatory for the female students. Except for one school day a year (Senior Day) in June, when the senior girls got to wear slacks (but not blue jeans!). How long ago was that? An up and coming band was the entertainment in the high school auditorium that Senior day, Three Dog Night.When to Prune, When Not to Prune, Citrus TreesIf your citrus trees – the oranges, lemons, limes, mandarins, grapefruit, and more – are looking a bit overgrown and bushy, pruning can help reinvigorate them to produce more fruit. But don’t prune them now.Cindy Fake is the Horticulture and Small Farms Advisor for the University of California Ag and Natural Resources in Placer County, who wrote their “Pruning Citrus” webpage. She agrees there are benefits to pruning citrus trees, but the timing is important.“Citrus trees are evergreen trees, generally requiring less pruning than deciduous trees. However, they do need to be pruned regularly for optimal fruit quality and productivity. Pruning can improve fruit quality through increasing light in the canopy. In some cases, pruning out water sprouts (vertical shoots) may improve yields. Reducing tree height facilitates harvesting as well as risk of injury from ladders.”However, Fake adds: “Pruning citrus trees is best accomplished in spring and early summer, after it sets flowers and then again when the small fruit appears.”Retired citrus grower Lance Walheim, author of the book “Citrus”, seconds that motion. “Late summer and early fall citrus pruning is discouraged. Late pruning often stimulates vigorous tender growth, which doesn't have enough time to harden off before cold weather, increasing chances of frost damage. Pruning in late summer, especially here, where triple digit temperatures are common, can cause citrus bark and fruit to become exposed to too much intense sunlight. Citrus bark is highly sensitive to sunburn. The bark can be killed, which can girdle the tree, especially if the tree is in a south or west exposure. Whenever bark is newly exposed to intense sunlight, paint the exposed area with a whitewash, made of 50% water and 50% interior white latex paint.”However, there are a few minor citrus pruning chores that can be done anytime of the year: removing the suckers that begin below the bud union just above ground level; and skirt pruning the citrus tree. “Skirt pruning” is exactly what it sounds like, removing any branches that reach the ground.“Skirt pruning facilitates weeding, mulch laying, and other cultural practices, as well as reducing risk of soil borne pathogens affecting the fruit,” explains Fake. “The pruning may also reduce insect and disease pest problems.”And, as Laivo points out in the podcast, netting the tree can be a somewhat effective pest deterrent, especially if you drape the netting completely over the tree to the ground, and tie it around the trunk of the tree. Try doing that with a non-skirted tree!Fake says to keep an eye out for low-lying branches on mandarin trees, especially. “Satsuma mandarins tend to have pendulous branches that hang to the ground. These are called skirt branches, and they can impede weeding, fertilizer, and compost application, as well as provide pathways for ant populations to use the trees. With heavy fruit loads, these branches can bend, and fruit may touch the ground. Fruit may then be contaminated by soil borne pathogens. These pathogens may be plant disease-causing such as Brown rot, or potential food safety risks.”The Department of Agriculture and Food in Western Australia (actually, it’s the Department of Primary Industries and Regional Development) offers these reasons for commercial growers of citrus to skirt prune their citrus trees (warning: their dates are for the Southern Hemisphere, where summer there is winter here and winter there is summer here):Skirting (skirt pruning)Skirting is t

Fruit Tree Pruning Steps
Today’s Newsletter Podcast features Ann Ralph, author of the book, “Grow a Little Fruit Tree”.Fruit Tree Pruning, Step by StepLast Friday’s Garden Basics with Farmer Fred podcast, Episode 351 - “Honey I Shrunk the Fruit Trees” also dealt with the benefits of keeping the height of fruit trees to no taller than you can reach to the top of the tree to pick fruit. Because, who wants to fall off a ladder?UC Cooperative Extension Communications Specialist - and Consulting Arborist - Kevin Marini walked us through the steps of keeping your fruit trees healthy, and at a reasonable height (listen to the episode for his tree reduction tips).Among our topics:• Maintaining the height of fruit trees at a manageable level allows for easier fruit harvesting and reduces the risk of broken branches.• Thinning fruit trees is necessary to remove crowded fruit and allow the tree to breathe, resulting in bigger and juicier fruit.• Bringing down the height of a fruit tree can be done gradually over a few years to avoid stressing the tree.• Using the right pruning cuts, such as reduction cuts and thinning cuts, helps maintain the structure of the tree and promotes better fruit production.• Cutting newly planted fruit trees at the knees stimulates the growth of lower branches and makes fruit more accessible.• Rootstock selection is important for controlling the height and spread of fruit trees.• Thinning cuts are essential for improving air circulation within the tree and ensuring fruit production in lower areas of the branches. Pruning suckers and water sprouts is essential to maintain the structure of fruit trees.• Removing branches that grow towards the center of the tree helps prevent overcrowding and disease.• Cutting dead, dying, and diseased branches is important to maintain the overall health of the tree.• Proper pruning cuts, including the three-cut method for larger branches, help prevent damage and decay.• Using sharp pruning tools and cleaning them regularly improves the efficiency and effectiveness of pruning.You can listen to our complete conversation here.And one more pruning term, according to the U. Of Florida: Reduction CutA reduction cut (also referred to as a drop-crotch cut) shortens a branch by removing a stem back to a lateral branch that is large enough to resist extensive disfunction and decay behind the cut. This is generally interpreted as cutting back to a lateral branch that is at least one-third the diameter of the cut stem. Sprouts commonly follow a reduction cut. In most cases these should not be removed because they help the retained portion of the branch retard decay. When the branch that remains is less than about one-third the diameter of the cut stem, the cut is considered a heading cut. Heading cuts are not considered appropriate in most instances in the landscape. Heading cuts are sometimes necessary when attempting to restore trees following storm damage.Kevin Marini’s Steps for Pruning Your Fruit Trees For Better HealthFrom the Ep. 351 podcast transcript:Farmer Fred Kevin, you mentioned there are some steps, like four or five steps, when it comes to reducing the height of a fruit tree?Kevin Marini 35:28Yeah, well, let's start with one that maybe doesn't reduce the height, but it's the easiest step. And everyone could do this any time of year. And they don't even have to be very careful about where they make the cut. And that is the suckers. Because fruit trees are grafted on to a root stock, you get suckers that grow up from the ground from the root stock. Believe it or not, this can be a big problem. Because if you let those suckers continue to grow, they can eventually convince you that they're part of your fruit tree until you actually see this weird looking fruit on them. And you realize, Wait, what's that all about? Prune out those suckers. Step number one, go out to your fruit tree anytime during the year. If they're shooting from the ground, obviously, from the root stock below the graft union, cut them out, do not let them take over your tree. So that's easy. Step number one.Farmer Fred 36:21Yeah, let's define that. First. For people who are trying to find the bud union, if a tree was planted properly, that's going to be like a little lump or a little bump that should be just a few inches above the surface of the soil. And so anything that is emanating from below that point, can be removed completely and safely.Kevin Marini 36:39Yes, I'm actually glad you drilled down on that a little bit, because one thing that I have encountered quite a bit is that people bury the graft union. So they buy their fruit tree in a container. And the graft union is above the soil line when they bring it home. But when they pop it out of the container and put it into the ground, many times they'd bury it too deep. And if that graft union is subsurface, if it's underneath the ground, it can absolutely quickly rot. And then you can lose your fruit tree in a nice stiff wind down the road. That's super impo
The Soil Texture Triangle
The newsletter podcast (above) is an excerpt from last Friday’s Garden Basics with Farmer Fred podcast, #350, “New Home? First Garden Tips”. America’s Favorite Retired College Horticulture Professor(℠), Debbie Flower and myself, help out a very rhythmic listener figure out how to prep a garden space at her new home. And one of the first steps to take is to do a home analysis of the soil, referred to as the “Soil Texture Triangle Test”.Although it might look like something designed by a Freemason on Acid, the Soil Texture Triangle is quite ingenious in its design, as well as the ability to give you an insight into many of the qualities of the soil you are attempting to garden in. But before we get into the “why” and the “how” of the Soil Texture Triangle, here’s what you may have missed if you didn't listen to Episode 350 of the podcast in its entirety:• Get a soil test done to determine the texture of your soil and its nutrient levels.• Plan your garden carefully, considering the spacing of plants and the eventual growth of trees.• Hydro-zone your vegetables in raised beds to meet their specific watering needs.• Limiting factors if using raised beds on concrete for gardening in partial sun spaces.The Soil Texture Triangle Test: Why do it?Ahhh, the things you will learn about your soil when you figure out if you have sandy loam, silty loam, clay loam, sandy clay (great name for a Top 40 DJ), something in between, or - Heaven forfend - all sand or all clay.Christine Anne Clark is a soil health specialist with the Crops and Soils Division of the Extension Service of the University of Wisconsin-Madison. She works with farmers, researchers and agricultural industry experts, to help the farmers in Northeast Wisconsin better understand their soils. In this University of Wisconsin publication - “The important role of soil texture on water” - she points out the obviously most important part of understanding the Soil Texture Triangle right there in the title. Know your soil, and you’ll know where the water is going (or not going) in your crops:“It is not nitrogen, but water, that is the most limiting factor in crop production. Soil texture, structure, percent organic matter (OM) and management practices also influence the amount water and nutrients a soil can retain for crop use. You can better understand your farmland’s strengths and weaknesses by digging deeper into the physical characteristics of your soil and where different soil types are located on your farm.Soil texture refers to the feel of soil. Soils are made up of different amounts of sand, silt, and clay. There are 12 soil textural classes according to the USDA classification system. Each soil texture has varying responses to water, affecting major crops like corn, soybeans, wheat, and alfalfa differently. Here’s a general overview:1. Sand: Sandy soils have the largest particle size, which allows water to drain quickly. As a result, sandy soils tend to dry out faster. Sandy soils have low water and nutrient-holding capacity and struggle to retain sufficient amounts for crops. Shallow-rooted crops are more susceptible to drought stress in sandy soils, as they may experience water deficits that hinder their growth and yield.2. Silt: Silty soils have medium-sized particles, providing better water retention than sandy soils. They have moderate water-holding capacity and drainage characteristics. During drought, silty soils can retain moisture for longer periods compared to sandy soils. Silty soils have more plant-available water capacity than clayey soils. 3. Clay: Clay soils have lots of small fine particles with many inner layers creating lots of surface areas that hold water and nutrients tightly. They have higher water and nutrient holding capacity but lower drainage, resulting in slower water movement and potential waterlogging. Also, they have lower plant available water capacity than silty soils because clays hold water tightly as they dry. During drought, clay soils can retain moisture relatively well, which benefits crops like corn, soybeans, and wheat. However, excessive water retention in clay soils can also lead to root oxygen deprivation and negatively impact crop growth in wet years. Any crop with a deeper root system may perform better in clay soils during drought as it can access the stored water.Water infiltration speed and plant water availability are dependent on soil texture. In coarse sandy soils the bigger pore spaces increase the rate of water movement and have higher infiltration rates than fine textured soils. Coarse soils can “soak” up a drenching rain or recharge quickly but is unable to hold as much water as finer textured soils. A coarse sand infiltrates very fast, up to 10 inches per hour, while a clay is the slowest can be less than 0.05 inches per hour. However, sandy soils have a low water holding capacity compared to loamy or clayey soils. On the opposite end, soils with very high clay contents hold water tightly and provide
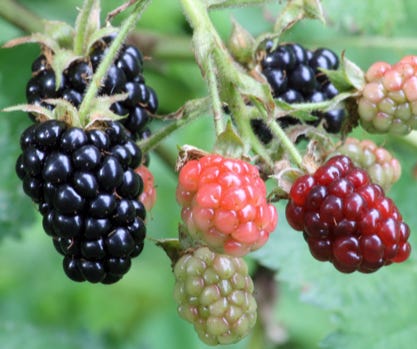
Why Are the Blackberries Turning White?
If you’re wondering about blackberry discoloration this summer, you won’t find that information in the podcast (above). What you will find for your ears: great information about superior blackberry varieties to grow, along with tips for pruning and trellising blackberries.As to why you might start seeing some discoloration in your blackberry patch right now might be due to the weather. But before we shine a light on that, here’s what you may have missed in last Friday’s Garden Basics with Farmer Fred podcast, Ep. 349: “Stressed? Your Garden Can Help.” And haven’t we all seen an increase in the stress levels this past couple of weeks. One easy way to soothe the worried mind: single malt Scotch Take a whiff of the garden. Really! America’s Favorite Retired College Horticulture Professor, Debbie Flower, and myself sniff out the answers that may be in your own yard.• Gardening and spending time in nature can help reduce stress and anxiety.• Forest bathing, or enjoying a slow walk or sit in a natural environment, can have calming effects.• Having a garden or indoor plants can provide stress relief and improve mental well-being.• Aromatic plants, such as jasmine, lavender, and mint, can have a soothing effect on the mind and body.Why Are the Blackberries Turning White?From the garden e-mail bag, Teri asks: "What is wrong with my blackberries?"Dewey & Ann write: "What is causing this problem with my Chester blackberries? This is on the majority of them. I had it last year too. I checked with the local Hmong community farmers, and they also had it and said it was the 111 degrees we had in Oroville. We are at 2500 feet and 10 degrees cooler, but it wasn’t this hot last year. My Black Satin Blackberries were forming and doing well and I thought the problem was only with the Chester. Well, pretty soon I see it on them also. Am I missing something in our soil? It’s not on every one of them. It’s a dried seed eventually, but goes from a pink to beige and then worse if you don’t pick them. I would like to get to bottom of this. Can you help me?"Your local Hmong are wise horticulturists. The recent week of very sunny 100+ temperatures, along with several of triple digit scorchers in the first week of July, could very well be the culprit.Usually when we think of heat stressed plants, the cool season ones that tend to croak when it gets hot come to mind, such as lettuce plants in early summer or snow pea vines by Memorial Day weekend.Even warm season vegetables that like sunlight, especially tomatoes, can be adversely effected by too much high intensity sun. Abiotic disorders such as cracking, solar yellowing or green shoulders are common this time of year on young tomato crops. One remedy for those tomatoes: don't prune off any of the leaf canopy of tomato plants; or, cover with a lightweight row cover to provide some more shade.And now, you can add blackberries to the list of crops that develop problems when it gets too sunny, too hot, dry and windy, especially because of extended heatwaves. The problem is known as White Drupelet Disorder (WDD).According to the UC Integrated Pest Management Guidelines for Caneberries:"White drupelet is a tan-to-white discoloration of one to many drupelets on the fruit. Most often, white drupelets will appear when there has been an abrupt increase in temperature accompanied by a drop in humidity; it is especially pronounced when there is wind. In the Monterey Bay area, white drupelet typically occurs when temperatures that are fairly steady around 70 degrees suddenly go above 90 degrees, and there is an absence of fog.While white drupelets may seem to be directly caused by weather, they are actually caused by ultra-violet (UV) radiation. Weather conditions modulate this by the effect they have on penetration of UV radiation into the fruit. Cool, humid air scatters and absorbs UV radiation, while hot dry air has the opposite effect and allows more direct UV rays to reach the fruit. The movement of humidity away from the canopy by wind only heightens the effect of hot dry air. Additionally, as humidity is moved away from the plant canopy, more UV rays penetrate the canopy and damage fruit that may not even have been exposed to the sun. Fruit inside of the canopy is not acclimatized to UV radiation and is subsequently more susceptible when it reaches them.Some growers of caneberries in the Willamette Valley of Oregon, where rapid changes from a normally mild climate to temperatures up to and above 100 degrees occur through the summer, use overhead irrigation to minimize fruit loss to white drupelet. This is not merely to mist the fruit; instead, large amounts of water are applied to thoroughly wet the canopy and maintain cool temperatures and high canopy humidity for as long as possible. Sprinkling is not done too late in the evening to allow fruit to dry before nightfall.While some varieties, such as Apache blackberry, Kiowa blackberry, and Caroline red raspberry tend to get white drupelets

How to Grow Cilantro in the Summer in Hot Climates
Are you trying to grow a salsa garden? It's great that most of the ingredients for salsa ripen at about the same time in the backyard garden. The main salsa ingredients - tomatoes, peppers, onions, and garlic - are ready this time of year. And if you wait until September or October to make the salsa, there might be some limes ready from a backyard lime tree in citrus growing regions. But there is one ingredient that throws off that salsa recipe timing: cilantro. Cilantro is easy to grow in hot climates in fall, winter, and early spring. But in hot summers? You can forget about it being ready when the rest of your salsa ingredients are all growing fine. Because of the rising frequency of extended, triple digit summer temperatures (“heat dome” seems to be the 2024 phrase that pays), cilantro is going to turn bitter and send up flower stalks (which, by the way, the beneficial insects love).You could buy cilantro at the store or farmer’s market. But the aroma and tangy taste of fresh, homegrown, just-picked cilantro can’t be beat.Before we delve into the solution for getting fresh homegrown cilantro in the summer, here’s what you may have missed in last Friday’s Garden Basics with Farmer Fred Podcast, #348:Right now - mid-summer - is peach and plum harvest time for most of us. Phil Pursel of Dave Wilson Nursery talks about choosing the tastiest peach and plum tree varieties, along with care tips, including watering and fertilization. Phil points out the difference between freestone and cling peaches, the importance of chill hours for peach trees, and the major insect pests of peach trees. Phil’s favorite peach: the Red Baron. Fred’s favorite: a dwarf variety, the Garden Gold peach. Phil’s favorite plum: the Emerald Beaut. Fred’s tastiest favorite plum: The weeping Santa Rosa plum.We’ve talked in the past about ways to improve clay soil; but what about sandy soil? Maser Gardener Gail Pothour offers tips for a listener in Michigan on what to add to that sandy soil to help it retain nutrients and water. And it turns out, Gail is also knowledgeable about how parts of Michigan got its sandy soil to begin with!The episode concludes with our America’s Favorite Retired College Horticulture Professor, Debbie Flower, dissecting a listener’s plan for adding sticks to the bottom of a new raised bed. Even though it’s counterintuitive, that can actually slow down the flow of water through the bed, leading to possible wet soil problems for the plant roots. Unlike what water does above ground (fall through the air, downward). Underground, water must travel along soil particles, not air particles - to head downward. Thus, the importance of using a uniform soil type throughout the container or raised bed. Find out more when you listen to Ep. 348, The Tastiest Peaches and Plums. Improving Sandy Soil. Raised Bed Drainage Tips.How To Grow Cilantro in a Hot Summer ClimateThere is a solution for cilantro lovers who garden in a hot climate, according to Renee Shepherd, owner of Renee’s Garden seed catalog: Grow cilantro as a microgreen. “Pick it when it's very young, just a few inches tall,” advises Shepherd, based in Santa Cruz County, CA. “The hotter the weather, the younger you pick it. I have seen it growing that way in the Napa Valley. I work with a grower there who besides growing the cilantro seed for us, grows very fancy greens for upscale restaurants in San Francisco. And it's very hot in Napa, just as hot as where you are. He's successful growing cilantro as a microgreen. He uses row covers for protection and grows it in an area that gets afternoon shade through the summer.”Shepherd says it is a quick, easy crop to grow as a microgreen in just a couple of weeks. The seeds will sprout in five to ten days. But even though you're harvesting the cilantro at a very young age after just a few weeks of growing, you increase your chances of success by planting it where it gets afternoon shade.That’s just one of the crops Renee discusses in today’s newsletter podcast (above). At Renee’s Garden seed catalog, the Cut & Come Again Salad Garden is prominently featured.Here is a sampler of carefully chosen varieties for growing in the Cut & Come Again Salad Garden from Renee’s Garden, especially when gardening in containers or small space gardens:There are replacements for cilantro that may complement your homemade salsa. Some common substitutes mentioned online include mint, basil, parsley and chives, all of which grow well here this time of year. However, there are herbs that ripen in the summer that contain a more cilantro-like flavor. Most of these herbs originate in Southeast Asia, usually Vietnam, and they're available at better nurseries that have a wider range of herbs. According to Rose Loveall-Sale of Morningsun Herb Farm in Vacaville, CA: “One of the best cilantro substitutes is Vietnamese coriander (Polygonum odoratum), which is also called Rau Ram. The flavor is very similar to cilantro, with a hint of lemon and without the s

In search of a Heat-Tolerant Leafy Green Vegetable
Today’s podcast deals with any hot climate vegetable gardener’s dilemma: what greens can I grow in the summer that are bolt resistant and won’t end up tasting bitter? We talk with Sacramento County Master Gardener and avid vegetable grower Gail Pothour, who talks about the finalists in the heat-resistant greens growing trial held at the Fair Oaks Horticulture Center. And the Fresh Physician (and avid gardener), Florida-based Dr. Laura Varich, who extols the virtues of a diet loaded with green, leafy vegetables. And she has a favorite leafy green vegetable that (in her own yard) can withstand the Florida summer heat.But before we delve into the delicious, nutritious, easy to grow world of leafy green vegetables, here’s what you may have missed in last Friday’s Garden Basics with Farmer Fred podcast, Episode 347: The Garden Basics travel playlist -“Top 5 All Time Episodes” (which was also featured in last week’s newsletter), “Growing Raspberries and Boysenberries”, and “Getting Rid of Slugs in a Compost Pile”.The Take-aways:• Proper spacing, irrigation, and pruning are important for growing berries successfully.• Slugs can be managed in compost bins by ensuring proper moisture levels and using barriers like iron phosphate or copper.Why, thank you, AI, for that succinct, bland recap of a 40 minute-plus podcast! Please, take a WD-40 break and I’ll add the flowers.The ever-ebullient and knowledgeable Master Gardener Pam Bone loves to grow raspberries and boysenberries. And with 40 years of backyard growing experience of those vining sweet treats, she’s got the keys to success down pat. Originally aired in April of 2022.Susan Muckey, Master Gardener and worm whisperer, volunteers at the Fair Oaks Horticulture Center’s Composting/Vermicomposting Demonstration area. And she was surprised, amused and befuddled that a question from a listener asked: “There are slugs in my compost! How do I get rid of them?” We both wondered, how did those slugs get in there? We went through our litany of slug and snail control suggestions, although Susan has one unique take: “Turn the pile at night, so you won’t see them.”Again, all that, plus that Garden Basics playlist of 5 episodes for long car trips, is in last Friday’s episode 347 of the Garden Basics with Farmer Fred podcast.In Search of a Heat Resistant Green (Today’s Podcast Transcript)Originally aired on Garden Basics Ep. 264, “Top 10 Homegrown Vegetables, Part 2”Farmer Fred I have been on a lifelong garden search for a lettuce variety, a loose leaf lettuce variety, that can take the heat. Some are better than others as far as getting through July, perhaps. But it seems like when July turns into August, they all start bolting.Gail Pothour Right. And actually, several years ago, we did an experiment two years in a row at the Fair Oaks Horticulture Center. Because we get this question a lot, “Why can't I grow lettuce in the summer?”. So we thought okay, let's find some varieties, and grow them through the heat of summer and see how they do. First off, you need to start with some varieties that are heat resistant, like Jericho that was bred in Israel, so it's a little more heat resistant. And we tried half dozen or so different varieties we monitored when we planted them, how many weeks it was before they started bolting. Some did better than others. Some did pretty well. But what we found is you need to mulch heavily to keep the moisture in, to keep them well watered, provide shade during their entire lifespan in the summer, and then be prepared as soon as one starts to bolt, take it out and then replant with another transplant. So kind of a succession planting. It is possible but it's a lot of work. It takes a lot of water and shading and monitoring. Not sure if it's worth it or not. Grow it in the shade if you have a shady location but often it's not just the sunlight, it is the heat and that’s true even in the shade in Sacramento. We can be fairly warm in the summertime. So it's a tough thing to do.Farmer Fred The closest green I found that can be grown year round and especially if you do it in the shade it does okay here, and that’s swiss chard.Gail Pothour right yeah, that can be grown year round. I have done it in an area of my yard where it got some afternoon shade in the summertime. And it was able to survive over summer. But yeah, any of the other leafy greens are going to be a little tough. One of my favorites or absolute favorite lettuce is called Pomegranate Crunch. It's a red romaine. And it is very good. I get it as pelleted seeds, which makes it a little bit easier to germinate. Lettuce can have a difficult time germinating. Lettuce does need light in order to germinate. So don't plant the seed too deeply. Pelleted seeds don't have that problem. But I think sometimes if people have difficulty getting lettuce to germinate, it’s because maybe they buried it too deep. It needs light. It's one of the few vegetables that needs light to germinate.Farmer Fred And I bel
Can Termites Live in Mulch?
Before we start digging through the mulch looking for termites, here is what you may have missed in last Friday’s (June 28) Garden Basics with Farmer Fred Podcast, Ep. 346: All About Soil Thermometers, Soil pH, and Cardboard Mulch.• Soil thermometers are precise measuring devices that need to be taken care of properly. They should not be left sitting in the soil or exposed to direct sunlight.• The depth at which you measure soil temperature depends on what you are planting. For seeds, measure at a shallow depth, while for transplants, measure at a deeper depth.• Some soil thermometers have a calibration nut that allows you to calibrate the temperature reading. This can be done by placing the thermometer in a glass of ice water and adjusting the arrow to read 32 degrees.• Soil pH can vary at different depths, especially when using layered mulching techniques. It is important to wait for the layers to break down and mix together before relying on pH readings.• Professional soil tests from reputable labs can provide accurate information about soil pH and nutrient levels. It is recommended to follow the specific instructions provided by the lab when taking soil samples.• Cardboard can be used to smother grass and weeds when starting a new garden bed. It should be plain and unadulterated, and watered before being placed on the soil. It takes time for the cardboard to break down and create a suitable planting environment.=========After nearly five years of podcasts, here are the five most listened-to episodes of the Garden Basics with Farmer Fred podcast:#5. Ep. 263 The Top Homegrown Vegetables, Pt 1 Farmer Fred and Master Gardener/vegetable expert Gail Pothour discuss the top 5 homegrown vegetables. They cover topics such as growing tomatoes, cucumbers, sweet peppers, beans, and carrots. They provide tips for beginners, including starting with easy-to-grow varieties and using supports for indeterminate tomatoes. They also discuss favorite tomato and pepper varieties and share tips for growing cilantro in the summer.#4 Ep. 258 10 More Garden Quick TipsFred presents 10 more garden quick tips. The topics covered include creating a container garden, making a cheaper seed starting mix, storing and washing chicken eggs, taking better pictures of garden insects, growing small apples, and growing the Suncrest peach tree. The episode also features interviews with experts in the gardening field who provide valuable insights and advice. In this conversation, Fred discusses various gardening topics, including growing fruit trees in small spaces, warding off pests, propagating strawberry runners, improving drainage, and growing popcorn. He provides tips and advice on each topic, sharing insights from experts and personal experiences. The conversation covers a range of gardening techniques and practices that can be helpful for both beginners and experienced gardeners.#3 Ep. 256 Container Gardening BasicsFred interviews Pam Farley, author of the book 'The First Time Gardener, Container Food Gardening.' They discuss container gardening for beginners, including tips on choosing the right containers, ensuring proper drainage, and selecting the right plants. They also cover troubleshooting common issues in container gardening and provide a quick planting guide for vegetables, fruits, and herbs.#2 Ep. 266 Cucumber Growing BasicsThis conversation with America’s Favorite Retired College Horticulture Professor (and cucumber aficionado), Debbie Flower, covers topics such as cucumber varieties, growing techniques, harvesting tips, and how to prevent bitterness in cucumbers. The episode also touches on the importance of bees in pollinating cucumber flowers and discusses common pests and diseases that can affect cucumber plants. They provide recommendations for trellising cucumbers and share favorite cucumber varieties. In this conversation, Fred also provides recommendations for further reading and resources.#1 Ep. 319 How to Plant and Care for a Shade TreeConsulting arborist Gordon Mann joins Fred and shares his expertise on planting and caring for shade trees. They discuss the importance of choosing the right spot with good soil, proper planting techniques, and the long-term care required for tree health. They also emphasize the role of soil in tree growth and the need for organic matter and mulch. The conversation covers topics such as tree watering, root pruning, and the correct way to plant a tree. Overall, the episode provides valuable information for homeowners looking to plant and care for shade trees. They also delve into the topic of tree pruning, emphasizing the need for proper pruning techniques and debunking common misconceptions. The conversation concludes with a discussion on the importance of tree diversity and the role of water management in tree care.Mulch vs TermitesFrom the garden e-mail bag, Carol wants to know: “We mulch all over the place, but all those wood chips got me thinking about termites! Has anyone mentione
Helping Your Garden Cope with the Heat
Before we delve into the sweaty details of getting your garden through the summer, here’s what you may have missed in last Friday’s Garden Basics with Farmer Fred podcast, the Heart Healthy Garden, recorded live at the Sacramento Rose Society in February of 2024:• Eating a heart-healthy diet and exercising regularly can help improve heart health and reduce the need for medications.• Fiber is an important component of a heart-healthy diet and can be found in a variety of fruits, vegetables, and whole grains.• Growing your own fruits and vegetables allows you to have a constant supply of fresh, fiber-rich produce.• Choosing heirloom varieties of vegetables can provide higher nutritional content compared to hybrid varieties.• Seeking information from reliable sources, such as university websites, can help ensure accurate and trustworthy gardening advice.What’s in Today’s Podcast at the top of this page?The perfect companion piece to the information below, Debbie Flower and myself discussed more container planting tips, recorded last summer at Harvest Day at the Fair Oaks Horticulture Center, a free community event held the first Saturday of August every year, including this August, on Saturday, August 3. Details here about Harvest Day. This segment originally aired in Episode 278 of the Garden Basics Podcast. Among its highlights:• Why you don’t want to use garden soil in containers. • The best potting mix to use for a container plant. • What’s happening to the roots of plants in containers on a 100-degree day.• How to better protect your outdoor potted plants in a heatwave.• The differences in shade cloth, and how to use it. • How to reuse old potting soil. • Are you watering your container plants effectively? Probably not.• What do you put in the bottom of a plant container to aid drainage? Nothing! We tell you why. • How to save garden seeds to last for years. • And, how to get pepper seeds to germinate in half the time. Helping Plants Cope with the HeatMuch like most of the country, our area here in Northern California just went through the first real heat wave of the season, with temperatures hovering around the century mark for several days this past week. The “Excessive Heat Warning” issued by the National Weather Service for Tuesday through Thursday predicted, “Dangerously hot conditions with temperatures 95 to 108 possible and widespread major heat risk.” As if that was not enough, try getting a good night’s rest with “limited overnight relief with temperatures in the 60s to mid 70s.” My apologies to those of you who normally try to sleep at night when summer nighttime temperatures are above 70.Several meteorologists are calling for more intense heatwaves for the United States this summer. What’s a gardener to do to make their lawn and garden more heat-tolerable? Here are some tips for having a thriving garden during the summer’s upcoming heat waves, as well as save water:• Mulch like mad. Create a one to three-inch layer of organic material such as bark, shredded leaves, or chipped/shredded tree branches, laid on top of the soil. This will reduce moisture loss from soil, moderate soil temperatures, control weeds which compete for water, and will return nutrients to the soil as it breaks down. Be sure to keep mulch a few inches away from the stems or trunks of plants.• Count on compost. Mix compost into the soil to increase the soil’s ability to absorb and hold water, and to slowly release nutrients to plants. This reduces stress, making them less susceptible to pests.• Plant early ripening varieties of vegetables that are mostly harvestable after only 60-65 days of growth. Plant in blocks instead of rows to create shade for roots and reduce evaporation.• Choose vegetable varieties that will produce a lot of food from one plant, such as tomatoes, squash, and peppers. Corn, on the other hand, is a thirsty crop that may only give you one or two ears per stalk, depending on the variety.• Hot afternoons can kill a container plant in a single day. Consider grouping potted plants together in an area that gets some afternoon shade. Or slip that pot into a larger pot so the sun isn’t beating down on the sides of the pot containing the soil.• If you feed plants, use a slow release, organic fertilizer to discourage excessive plant growth that attracts pests and increases water needs. • Hold off on major planting chores. When working on a large planting project, remember that the best time to plant is in the fall when the weather starts to cool. Winter rains will help these plants establish deep, healthy root systems before they are exposed to the summer heat.• The less lawn, the better. Lawns need more water than most other landscaping, so consider reducing or replacing your lawn with water-wise groundcovers, low maintenance perennials or a porous hardscape. If you plant a lawn, chose drought resistant varieties.• Mow lawns less often and raise the height of your mower blade to 3 inches. The longer grass will s

A Tour of Debbie Flower's Garden
Last week, we did a little podcast tour of my garden, with Debbie Flower asking the questions. Turnabout is fair play, so this episode features Debbie’s unique, water-saving landscape and her collections of plants and garden tools that have some very interesting stories.But again, an audio tour is missing the picture. Pictures, to be more exact. So, while you’re listening to this repurposing of Episode 343 of the Garden Basics with Farmer Fred podcast, scroll down to enjoy the visuals that go along with the stories of Debbie Flower’s landscape. But first, here’s a link to what you might have missed on Tuesday’s Garden Basics podcast (Ep. 342) - our weekly Q&A session, this time tackling the challenges of planting carrots in hot climates; and, the pros and cons of using landscape fabric/weed cloth in your garden (the “pros” list will be quite short).Word of Warning: Latin Used Here TodayA word of warning: a lot of Latin-based botanical names are tossed around here. Some people think we’re just bein’ highfalutin’ elitists, jabbering in a dead language. Actually, the botanical names can be very accurate in pinpointing the exact plant. For example, according to the Sunset Western Garden Book, the plant known commonly as “Dusty Miller” could refer to any of five distinct plants with differing growth habits: Artemisia stelleriana, Centaurea cineraria, Lychnis coronaria, Senecio cineraria/Jacobaea maritima (old name/new name), and Tanacetum ptarmiciflorum. The “Dusty Miller” Debbie refers to as a plant she remembers from her youth in New Jersey was the Lychnis; and to avoid any confusion, she only used the term, “Lychnis”. Here in California, I grew up with Senecio cineraria in the front yard, which was always referred to as, “Dusty Miller.”“What Does That Have to Do with the Price of Tea in China?”That was a favorite saying of my mother, to prod me to get to the point of whatever I was talking about. OK, here’s the point: After listening to this, you may be intrigued by one or more of the plants in Debbie’s garden, perhaps the California native plant, Eriogonum grande rubescens that she mentions towards the end of our chat. But, just hearing her say, “Eriogonum grande rubescens” may have you wondering…“What the hell? How do you spell that?” At least, that is what I was thinking when she said it. But I’m too polite to interrupt. Besides, if I had asked the question, “What is the common name for that plant?” There’s a darn good chance the answer would be a variation of, “I don’t keep common names in my brain,” bringing the chat to a standstill, while we ponder the answer. In the interest of keeping the conversational ball rolling, I move forward, knowing I can solve this issue easily enough: CHECK THE OFFICIAL TRANSCRIPT!Don’t check the Substack transcript. Don’t check the Apple or Spotify transcripts. Unless you want a good laugh. And it’s why I include my own edited transcript for each episode of the Garden Basics podcast available at either GardenBasics.net or via my podcast uploader, Buzzsprout. Not only will you get the correct plant spelling (usually), but you will also get the common name, usually (but not always) in parenthesis. For example, here is the portion of the Eriogonum plant chat from the transcript provided at GardenBasics.net:Farmer Fred But this is quite the view, sitting here on your front porch, especially this time of year with the Palo Verde in bloom, and just the understory of all the plants and the flowers of the sage peeking up over the the wall.Debbie Flower And the Eriogonum grande rubescens (red or rosy buckwheat) that's flowering red right now, with the lavenders in front of it. And then the yellow calendulas. I like that combination too. And the pink Pelargonium behind.Now, here is the same portion, generated by AI and used by many podcast transcription services:Farmer Fred this is quite the view sitting here on your front porch, especially this time of year with the Palo Verde in bloom, and just the understory of all the plants and the flowers on the stage peeking up over the the wallDebbie Flower and the Areoginum grandrubescens. That's an flowering read right now with the lavenders in front of it. And then the yellow color Angelus. I like that combination too. And the pink Pelargonium behind, seeAnd this is why we are safe from world domination by Artificial Intelligence. It’s just a robot that has never pulled a weed or smelled a rose in its mechanical life. Nor, even after five years of manually correcting their transcripts to make them more gardener friendly, have they figured out the difference between “root” (as in, a tree root) and “route” (as in, “Get Your Kicks on Route 66”). Even though Oklahoma City is “oh, so pretty,” you’d think they could figure out after all these years, I am probably referring to that bulge in your lawn, not offering melodious praise to Amarillo, TX or Gallup, NM. Or Flagstaff, AZ. (P.S. “Angelus” is not a plant. It’s daily church bells at noon and

A Tour of Fred's Garden, with Debbie Flower
If this newsletter podcast sounds familiar, it should. It is also the current (Ep. 341) Garden Basics podcast where myself and America’s Favorite Retired College Horticulture Professor, Debbie Flower, take a late May stroll through my garden, discussing the plants, as well as gardening techniques. But wouldn’t it be nice to see those plants and garden accoutrements? Well, here you go.But first, a recap of what you may have missed on this week’s two Garden Basics podcasts:Tuesday, June 4:Ep. 340 -Q&A Cross Pollination Concerns. What is the Best City or State for Gardening?• Understanding cross-pollination and its implications for seed saving and plant breeding.• The importance of local conditions and location-specific knowledge in gardening.• The impact of climate and weather on gardening success.• Different perspectives on the best US cities for gardening, highlighting the influence of location on gardening success.Thank you, AI, for your dry summary. Debbie Flower and I are more warm and endearing than that.Friday, June 7: Ep. 341 - Fred’s Yard Tour with Debbie. Or, listen above and scroll below. But we are definitely more entertaining and informative than AI would have you believe:Takeaways• The importance of selecting heat-resistant greens for summer gardening• Strategies for dealing with garden pests like tomato hornworms and cabbage worms• Tips for growing determinate tomatoes and managing peach trees• Insights on using raised beds and root cellars for gardening• The benefits of using vermiculite for seed planting and the use of worm bins for fertilizer• The significance of providing shade for certain plants and the value of using row covers for protection. SmartPot compost sacks are a convenient and effective way to create rich compost for gardening (golly, AI, thanks for plugging the sponsor!)• Clover is resistant to dog urine and can be used as a ground cover in areas frequented by pets.• Fruit trees can be grown in containers, and it's important to control the width and height of the tree to manage root growth.• Different soil types, such as raised bed soil planter mix and pumice, can be used for gardening in containers.• Citrus, blueberries, and potatoes can be successfully grown in containers, providing a versatile option for home gardeners.Again, just punch play above, and begin scrolling here:Thanks for reading Beyond Basics: The Garden Basics with Farmer Fred Newsletter! Subscribe for free to receive new posts and support my work.Thank you for also listening to the Garden Basics with Farmer Fred podcast! It’s available wherever you get your podcasts. Please share it with your garden friends.Fred Hoffman is also a University of California Cooperative Extension Master Gardener in Sacramento County. And he likes to ride his bike(s). This is a public episode. If you'd like to discuss this with other subscribers or get access to bonus episodes, visit gardenbasics.substack.com/subscribe

When Should You Fertilize Your Plants?
Before we delve into the soil, fertilizer in hand, a quick review of what was on the Garden Basics with Farmer Fred podcast this past week;Tuesday, May 28, Ep. 338: Zucchini Sex! Which cherries are best for cooking?Questions tackled on this episode include answering questions about squash that is slow to produce healthy looking fruit (it’s due to the lousy sex life of male and female squash flowers this time of year: “it’s too hot!”, “it’s too cold!” “I’m hungry!” “I’m too full!” (See? Plants are just like us. Except they don’t get headaches.) And, some kind words about growing tart/sour cherry trees. They’re great in pies!Takeaways from Ep. 338• Squash, melons, and cucumbers have male and female flowers on the same plant, and successful pollination requires synchronized flowering.• Pollinators like bees play a crucial role in transferring pollen between male and female flowers.• When fertilizing plants, it's important to consider the temperature and nutrient concentration, especially with synthetic fertilizers.• Organic fertilizers tend to have lower nutrient concentrations and are less likely to cause burning or osmotic problems.• Cherry trees, particularly tart cherries, require good drainage to prevent root rot.Friday, May 31 - Ep. 339 How to Water Clay Soil (and more tips for gardening in clay!)In this episode of Garden Basics with Farmer Fred, the focus is on how to water clay soil and other tips for gardening in clay. Debbie Flower, America’s Favorite Retired College Horticultural Professor, shares valuable insights on the topic. The episode covers the characteristics of clay soil, the importance of organic matter, watering techniques, mulching, and the use of cover crops. The conversation also delves into the impact of soil structure on crop production and the benefits of no-till and cover cropping practices.Takeaways From Ep. 339• Understanding the characteristics of clay soil and the importance of organic matter in improving its quality.• Learning effective watering techniques for clay soil, including surge irrigation and the use of moisture meters.• Recognizing the benefits of mulching and the use of cover crops to enhance soil structure and promote healthy plant growth.When Should You Fertilize Your Plants?From the garden e-mail bag, Danny has been thinking about fertilizing, probably a little bit harder than most of us gardeners: “I am wondering if at a particular temperature, plants can’t feed themselves. Do they just need water if it’s too hot? What time of day is best for feeding the plants: during the day, or at night? Or do they need the sun to eat?”Those were good questions, which we took up on the Garden Basics podcast. You can hear that segment in today’s newsletter podcast post.According to retired college horticulture professor Debbie Flower, Danny is on to a very important aspect of correct fertilization techniques in the garden: plants can’t absorb fertilizer, if it’s too hot.“Research shows that above 86 degrees Fahrenheit, plants don't use fertilizer, don't absorb nutrients,” explains Flower. “They're just pumping water through their system to keep themselves cool, much like a human would sweat in a very hot situation. He asks if they need sun to eat. Plants do need sun to make food. Plants are autotrophs, meaning they feed themselves. ‘Auto’ means self. And they use nutrients which are gathered primarily through the roots and some from the air through the stoma on the leaves to make their own food. And that food would only happen when the plant can collect the energy from the sun or other light source.”Flower also explains that when we fertilize, that food is being processed and absorbed primarily underground, by the plant roots. “When we fertilize, we are just putting nutrients into the growing media. That growing media, in most cases, is the soil outdoors. It can also be the soilless mix in a container you have for a houseplant. Whatever the roots are growing in, that is the media I'm talking about. And that's where the nutrients need to be, that the plant will then absorb. We can apply those nutrients at pretty much any time of day or night. But we really want to apply the nutrients when it's cooler. All we're doing is loading the root zone with the nutrients that the plant then will collect when it's ready to make its own food. The one caveat is it's recommended we not fertilize at very high temperatures, above 86 degrees. If we get any fertilizer on the leaves of the plant, we might cause burning, especially if we applied too much fertilizer at any one time. We can cause burning, because the plant only has a limited ability to choose what it absorbs. If the growing media is just completely full of nutrients, and it's above 86 degrees and the plant is trying to just pump water through itself, it may not be able to get just water if there's too much of the nutrients in the root zone or too much when applying it. Those are the reasons we don't apply when temperatures are very h
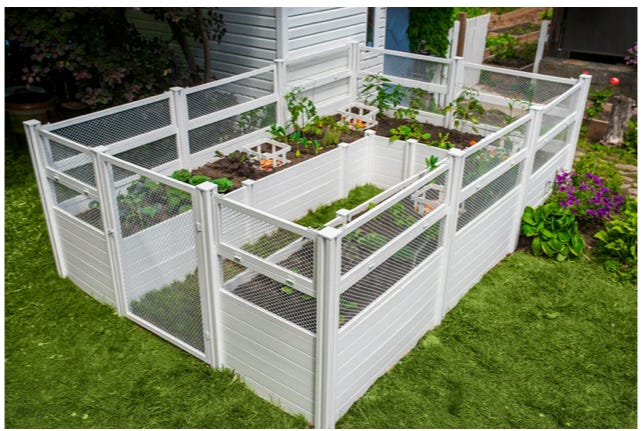
Composting Kitchen Scraps, Both Indoors and in the Garden. Is That a Good Idea?
Composting, Indoors and OutToday’s newsletter podcast deals with options for indoor food scrap composting equipment, specifically kitchen composters (originally aired in Episode 196 of the Garden Basics with Farmer Fred podcast in May of 2022. In our conversation with America’s Favorite Retired College Horticulture Professor, Debbie Flower, she took a scenic bypass to talk about her outdoor garden kitchen scrap composter device, the Green Cone Composter. More information about that is below. But before we get to that, let’s recap what you may have missed on this week’s two Garden Basics podcast, which includes another deep dive into the “kitchen scraps in the garden” debate:Tuesday, May 21: Episode 336 - Q&A Kitchen Scraps in the Garden? When Should You Plant a Flowering Magnolia Tree, Spring or Fall? Takeaways• Burying kitchen scraps in the garden can attract scavengers like rats, gophers, voles, and ants, and may affect the quality of the soil microbiology.• Composting kitchen scraps first or using alternative methods like African keyhole-style gardens or the Green Cone composter are recommended.• The best time to plant a flowering tree like the Magnolia Genie is in the fall, but it can also be planted in the spring with extra care and regular watering.• Keeping a tree in a container over the summer requires frequent watering and protection from heat damage.• Using Smart Pots can help maintain cooler soil temperatures and reduce evaporation in container gardening.Friday, May 24: Garden Basics Podcast, Episode 337 - How to Choose Nursery Plants. Tips for Starting a School GardenTakeawaysChoosing Nursery Plants:• Read the signs and make sure the plant will fit in your garden and take the conditions you have in mind.• Check the plant for health, including good color, no holes or spots on the leaves, and no stickiness or mushiness.• Inspect the media the plant is growing in, looking for weeds, the height of the media, and the presence of roots.• Consider direct seeding certain vegetables like cucumbers and squash, as transplanting them when they have too many leaves can hinder their growth.• Pot up plants in larger containers if you're not immediately planting them in the ground, especially for tomatoes, peppers, and other summer vegetables.Tips for Starting a School Garden:• School gardens can be a valuable educational tool and a source of community involvement.• Getting the school on board and finding funding can be challenges, but reaching out to the principal and parent groups can help.• Students play an active role in maintaining the garden and learn valuable gardening skills.• The garden provides opportunities for hands-on learning, including lessons on composting, integrated pest management, and plant care.• The garden also serves as a gathering place for the community, hosting farmers markets and lunch pop-ups.Burying Kitchen Scraps in the Garden: Is That a Good Idea?Recently, we received a question wondering about the pros and cons of burying kitchen scraps to feed the garden soil.From the garden e-mail bag, Alice confesses: “I am a lazy composter. What we do is bury our kitchen scraps in different holes, all throughout our raised beds, all winter long. And it ends up making truly beautiful soil over the years. And there's lots of earthworms and other microorganisms I can't even see. Anyway, I'm wondering if there would be any problems with that. We do have raccoons, skunks, and possums because we live in the country. But they don't visit the garden. Apparently, they have resources elsewhere. And except for them, I don't see that there's an issue because the soil looks very nice. But you never mention burying garbage in your columns or podcasts. So, I'm wondering if there's some problem that I'm not aware of.”Alice, other possible scavengers of kitchen scraps buried in the garden might include rats, gophers, voles and ants. Especially ants, which could create tunnels throughout your raised bed which could siphon the irrigation water away from plant roots and out the bottom of the bed, or wherever their tunnels might lead. However, whatever you're doing seems to be working.But beware, there are a lot of variables. You want to bury it deep, certainly deeper than 12 inches to keep the four-legged varmints, including the household dogs, away from it. You don’t want to bury meat scraps. Also, avoid any foods soaked in oils, salts or sugars, which can attract smaller pests and possibly effect the quality of your soil.For even more opinions, and they are just that - opinions - the National Gardening Association has a thread at their website (garden.org) entitled, “Kitchen Waste Buried in Garden Soil?” Many people have weighed in on their experience doing that very thing, and it appears to be evenly divided as to whether they like it or not.Some of the comments and opinions:From Florida: “My mother in law (who lived to be 97 years old) had wonderful vegetable and flower gardens and she'd always take kitchen

Roly Polys, Sowbugs, Earwigs - Which One Is Guilty of Garden Destruction?
In today’s newsletter podcast, our America’s Favorite Retired College Horticulture Professor, Debbie Flower, talks about earwigs, a garden scavenger that probably does more damage than you might want a “neutral” garden critter to do. Probably the most famous “neutral” garden insect is the non-selective praying mantis, who doesn’t mind chowing down on your aphids for dinner, with a ladybug for dessert. The big takeaway from that earwig chat? “Don't wear loose clothing in an earwig infested garden.” We also touch on (in a manner of speaking) roly polys (aka, pillbugs).This Week on the Garden Basics PodcastBefore we delve into the answer to that question posed in the headline, here is what is going on in the Garden Basics with Farmer Fred podcast this week:Tuesday, May 14: Episode 334 Q&A Rhubarb for Hot Climates? Lights for Seedlings? In this episode, we answer garden questions from listeners. The first question is about growing rhubarb in hot weather. Master Gardeners Ruth Ostroff and Kathy Morrison (of the Sacramento Digs Gardening newsletter) discuss their experiences with growing rhubarb in Sacramento, which is challenging in a hot climate. (Ruth also names the rhubarb variety she has had success with in the hot Sacramento Valley.) Kathy shares a rhubarb recipe, made as an upside-down cake. The second question is about grow lights for starting tomato and pepper seeds indoors. Debbie Flower and I explain the importance of using a light system that is big enough to cover all the seedlings equally, as well as mixing different bulb spectrum colors. Of course, Debbie also emphasizes the need for air circulation and movement for young plants. We’re old, so we recommend using fluorescent lights, but we discuss the different options available in the market.Friday, May 17: Ep. 335 Roof Rat Control Tips. Asparagus-Lemon Recipes In this episode of the Garden Basics with Farmer Fred podcast, the main topic of discussion with retired UC Cooperative Extension Farm Advisor Rachael Long is roof rats and their impact on gardens and orchards. The conversation covers the behavior and habits of roof rats, their diet, nesting habits, and the damage they can cause to fruit trees. The episode also includes tips for controlling roof rats, such as trapping and using bait stations. Additionally, the episode features a segment on recipes using garden fresh asparagus and lemons, with Master Food Preserver Myrna Undajon-Haskell.Takeaways:• Roof rats are nocturnal creatures that can cause significant damage to fruit trees and orchards.• They have a preference for heights and are known to nest in attics and burrow underground.• Roof rats can be controlled through trapping and the use of bait stations.• Recipes using garden fresh asparagus and lemons are provided.• Preserving lemons and dehydrating citrus are also discussed.So, Who is Eating Your Seedlings? Controlling Sowbugs, Pillbugs and Earwigs in the Garden…and IndoorsFrom the garden e-mail bag, Jessica wants to know: “I have a crazy amount of roly-polys and pincher bugs this year. And the pincher bugs keep making their way into my house, too. Help! Is there anything I can do to drive them away other than bug spray? And can the roly-polys cause damage to my plants? I normally don't have a green thumb but my plants are doing great this year and I'm finally feeling like a good ‘plant mom’ so I don't want anything to mess them up.”Jessica, generally roly-polys (pillbugs) and sowbugs cause few issues with thriving plants. They prefer the dead organic matter on the ground. But if their favorite foods aren’t around, they will go after your plants.According to the creepy, crawly experts at the UC Integrated Pest Management Department, sowbugs and pillbugs feed primarily on decaying plant material and are important decomposers of organic matter. However, they occasionally feed on seedlings, new roots, lower leaves, and fruits or vegetables touching the soil. They sometimes come indoors, which can be nuisance.If pillbugs or sowbugs are a problem, reduce the amount of decaying organic matter on the soil and minimize the wetness of the soil surface. Irrigate early in the day so surfaces are drier by evening. Keep compost and mulch back from plants and building foundations to keep them outdoors. Using raised beds or planting boxes and drip or furrow irrigation instead of sprinklers usually keeps pillbugs and sowbugs from becoming serious problems.Pincher bugs (earwigs) are also a mixed blessing. They will munch on garden plants, but they also eat aphids!Despite their ferocious appearance, earwigs generally don’t attack humans, although they are capable of biting if trapped in clothing or sat upon.Should you be concerned about earwigs in your garden? Yes, and no. If your yard is primarily lawn, trees, woody ornamentals or native plants, let the earwigs do their job, going after aphids.However, if you are growing vegetables, herbaceous flowering plants, sweet corn or plants with soft fruits such
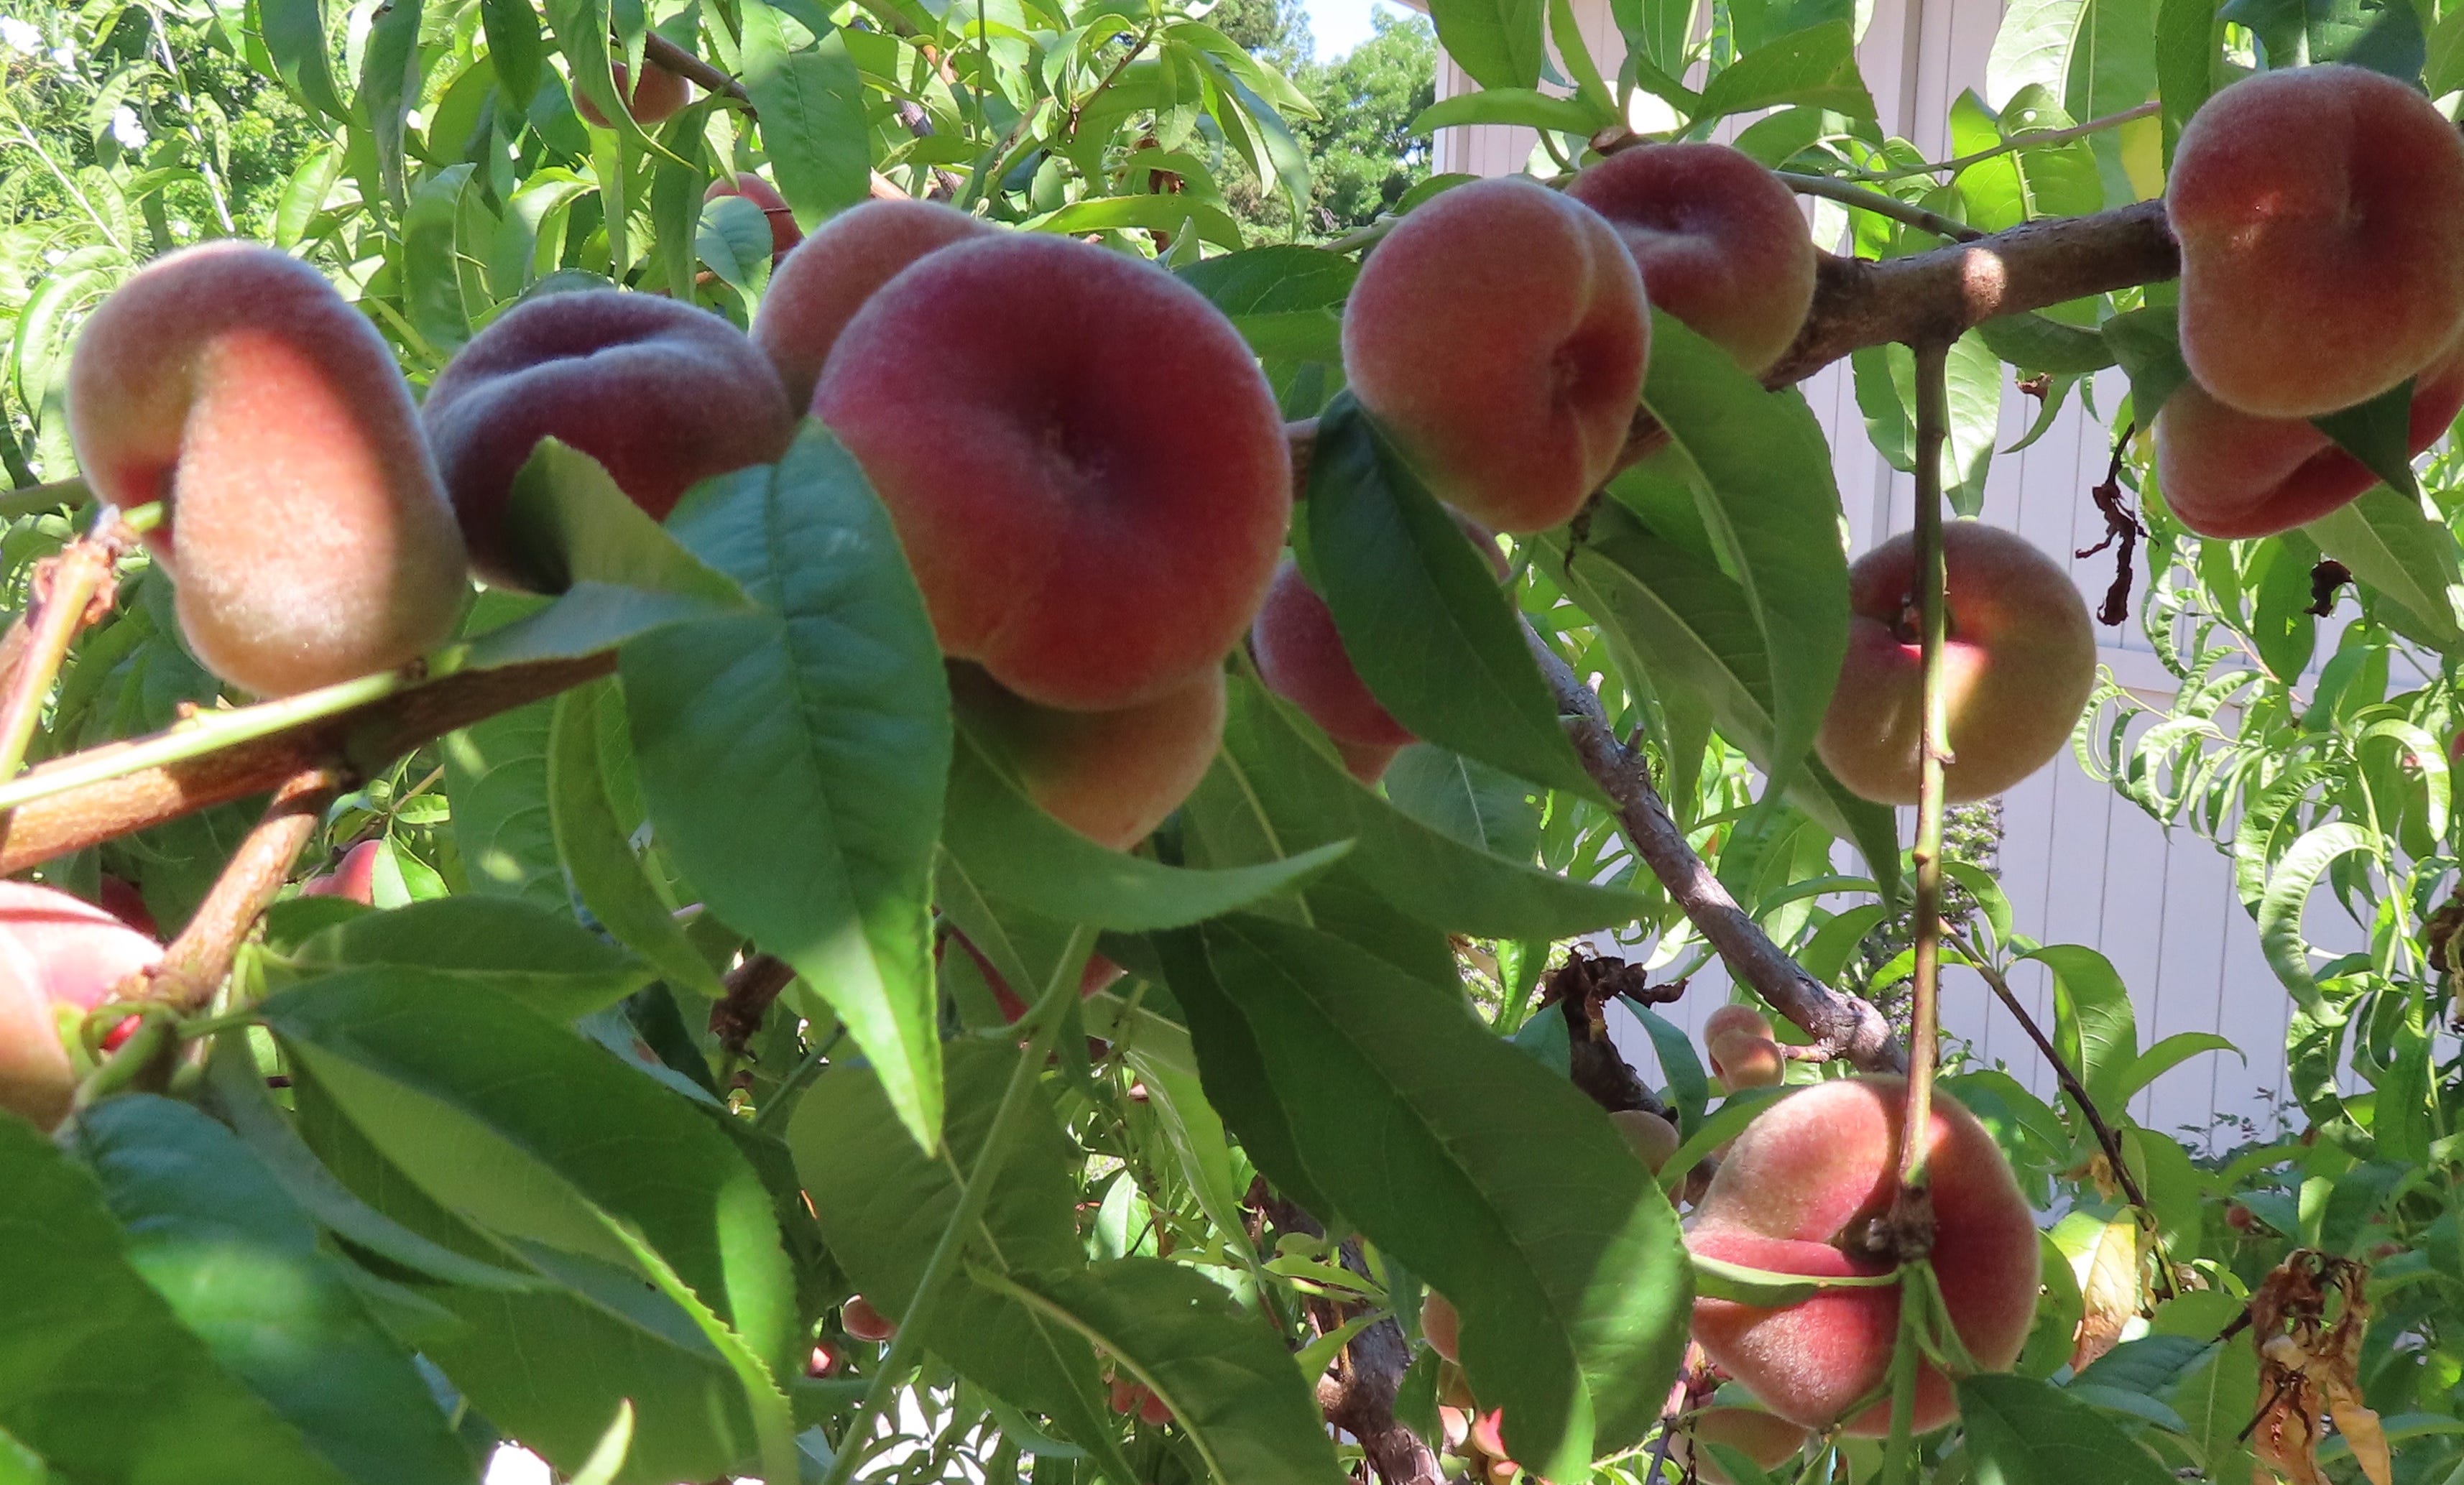
Thin Crowded Fruit Now, For a Lot of Good Reasons
If you’re looking to harvest bigger pieces of fruit from your trees and vines this summer, now's the time to get out your hand pruners and thin off the overcrowded fruit. Other good reasons for thinning lots of little fruit from trees now can also thwart bigger problems later this year, such as undersized fruit, excessive fruit drop, and broken fruit tree branches.Here are some tips for thinning from the fruit tree experts at UCANR:• For apples, European and Asian pears, apricots, peaches, nectarines, plums, pluots, kiwifruits, and persimmons: Remove some of the fruit. Space fruit evenly along each branch, with perhaps six inches between each piece of fruit. More importantly, be sure to leave the largest sized fruits on the tree or vine. Although the trees might appreciate a light feeding now, the best time to fertilize these crops is in July and August, when the trees are setting their fruit buds for the following year. An exception would be peach and nectarine trees attempting to recover from peach leaf curl. For those varieties, thinning and fertilizing now can help redirect the tree’s energy into producing more leaves to replace the fallen ones.• For table grapes, remove grape bunches so that there is at least six inches of space between each remaining bunch of table grapes. Cut off the "tails" from the remaining bunches at that same time. This is the lower one-quarter to one third of the bunch, where it begins to taper down in size. This will send more energy to the remaining grapes on the bunch. The book, "The California Master Gardener Handbook" advises that fertilizer can be applied for each grapevine when the berries are about a quarter-inch big, usually in May. The same book advises gardeners to apply about 50 gallons of water per week per vine, during the hottest months (June through August) here in the Central Valley. Apply less (about 35 gallons a week) during May and September. Adding a few inches of mulch to the top of the soil beneath the vines will help preserve soil moisture.• Because of their small size, cherries are not usually thinned from backyard trees. In addition, nut crops, such as almonds and walnuts, are not thinned.• What about blueberries? The amount of thinning will depend upon the blueberry variety and fruit load relative to the vegetative area of the plant. Larger plants and branches that are more vigorous can support a heavier fruit load.• Citrus trees tend to thin themselves, a phenomenon called “June Drop.” However, citrus fruit thinning now can help a tree drop fewer fruit in late spring.Certain citrus types such as Valencia oranges or some mandarins have tendencies towards alternate bearing. That’s a year with heavy fruit production followed by a year with sparse production. You can reduce the potential of a tree to alternate bear by reducing the fruit load in a heavy fruit set year by thinning out some of the fruit. Pruning the tree will also help to offset alternate bearing. Also, fertilize less in light years and more in heavy years so that the trees needs are met according to the demands of the fruit load. Despite using these strategies, some varieties will just alternate bear.• Do not allow the old citrus fruit to stay on the tree longer than necessary. This may contribute to a smaller crop and perhaps, more fruit drop, for the next crop. And, as you may have noticed, those oranges and mandarins that usually produce ripe fruit in the winter but still have some left on the branches may taste dry, with little or no flavor. Cleaning up fall fruit now beneath citrus trees can help cut down on future pest and disease issues, as well.The University of California’s “California Backyard Orchard” website goes into the science of the benefits of thinning deciduous fruits:Removal of flowers or young, immature fruits early in the spring can lead to increases in fruit size by limiting the number of fruits that continue growing to harvest. It increases the leaf-to-fruit ratio and removes smaller fruit that would never reach optimum size or quality. Apples, European and Asian pears, apricots, peaches, plums, kiwifruits, and persimmons are almost always thinned until the leaf to fruit ratio is favorable for supporting growth of adequately sized fruits. Typically, nut crops and cherries are not thinned.Large fruit come from strong flower buds that grew in full sunlight, and on trees that have a favorable leaf to fruit ratio; not too many fruit per branch. In order to manipulate the tree into having just the right amount of crop that will size well and develop adequate flower buds for next year’s crop the fruits are hand thinned, removed in the dormant pruning process, or both. Apples, European and Asian pears, apricots, peaches, plums, kiwifruits, and persimmons are almost always thinned. Fruits on non-thinned trees are still edible, just smaller.The earlier that fruits are thinned and the leaf to fruit ratio is increased, the larger the fruits will be at harvest and the greater th

Meet the Garden Beneficials, Pt. 2 (and Barn Owls!)
The podcast included with this newsletter features an interview with Rachael Long, University of California Cooperative Extension Farm Advisor Emeritus, and one of the nation’s best sources of information on the benefits of having barn owls prowling over your property to control rodents. Rachael mentions the UC Publication, “Songbird, Bat and Owl Boxes” which is a paid publication. Here’s a link for more information on barn owl boxes; and, another link with specific barn owl box building instructions. This chat originally aired in Episode 40 of the Garden Basics podcast in August of 2020.Before we continue with our beneficial insect hit parade, here’s what has happened this week on the Garden Basics with Farmer Fred podcast:Tuesday, April 30: Ep. 330 - Q&A Controlling Bermudagrass; What about using black plastic in the garden?Gail from California wants to start a vegetable and flower garden in her backyard, which is currently covered in Bermuda grass. Fred and Debbie suggest waiting a year and using soil solarization to kill off the Bermuda grass. They also recommend starting small with container gardening. They discuss the challenges of dealing with Bermuda grass and the benefits of solarization. They also touch on the use of black plastic mulch in the garden.Friday, May 3: Ep. 331 Cucumber Starting and Training TipsIn this episode, Fred and Debbie Flower discuss cucumber planting advice, including starting cucumbers from seed or nursery transplants, training cucumber growth, and choosing the right cucumber plants. They also cover topics such as soil temperature, soil type, watering, trellising, pollination, and harvesting cucumbers. They provide tips for preventing cucumber diseases and pests, as well as suggestions for different cucumber varieties to try.Meet the Garden Beneficials, Part 2Last week, we discussed three of the best beneficial insects to have in your garden: lacewings, ladybugs, and hoverflies. Today, we cover several more garden good guys worth putting to work in your yard to subdue the pests, and the “Welcome Mat” plants they need for extra food and shelter.Soldier Beetles (leather-winged beetles)Like many of the beneficials, it is the larval stage of soldier beetles that do most of the munching on the bad bugs. Whereas the adult soldier beetles feed mostly on the pollen and nectar of flowers - as well as the occasional aphid, insect eggs and larvae - young soldier beetles can be found under the bark of the plant or in soil or litter. There, they feed primarily on the eggs and larvae of beetles, butterflies, moths and other insects.Plants That Attract Soldier Beetles* Celosia Cockscomb* Coreopsis* Daucus carota Queen Anne’s Lace* Echinacea purpurea Purple Coneflower* Pycnanthemum Mountain Mint* Rosa Roses* Solidago GoldenrodParasitic Mini-WaspsMini-wasps are parasites of a variety of insects. They do not sting! The stingers have been adapted to allow the females to lay their eggs in the bodies of insect pests. The eggs then hatch, and the young feed on the pests from the inside, killing them. After they have killed the pests, they leave hollow “mummies.” Among the parasitic mini-wasps:Braconid WaspsBraconid wasps feed on moth, beetle and fly larvae, moth eggs, various insect pupae and adults. If you see lots of white capsules on the backs of a caterpillar, these are the braconid cocoons. Leave the dying caterpillar alone!Ichneumonid wasps control moth, butterfly, beetle and fly larvae and pupae. Trichogramma wasps lay their own eggs in moth eggs (hungry caterpillars-to-be), killing them and turning them black.Plants that attract parasitic mini-wasps:•Achillea filipendulina Fern-leaf yarrow•Achillea millefolium Common yarrow•Allium tanguticum Lavender globe lily•Anethum graveolens Dill•Anthemis tinctoria Golden marguerite•Astrantia major Masterwort•Callirhoe involucrata Purple poppy mallow•Carum carvi Caraway•Coriandrum sativum Coriander•Cosmos bipinnatus Cosmos white sensation•Daucus carota Queen Anne’s lace•Foeniculum vulgare Fennel•Limonium latifolium Statice•Linaria vulgaris Butter and eggs•Lobelia erinus Edging lobelia•Lobularia maritima Sweet alyssum - white•Melissa officinalis Lemon balm•Mentha pulegium Pennyroyal•Petroselinum crispum Parsley•Potentilla recta ‘warrenii’ Sulfur cinquefoil•Potentilla villosa Alpine cinquefoil•Sedum kamtschaticum Orange stonecrop•Sweet alyssum - white•Tagetes tenuifolia Marigold ‘lemon gem’•Tanacetum vulgare Tansy•Thymus serpylum coccineus Crimson thyme•Zinnia elegans Zinnia - 'liliput'TACHINID FLIESParasites of caterpillars (corn earworm, imported cabbage worm, cabbage loopers, cutworms, armyworms), stink bugs, squash bug nymphs, beetle and fly larvae, some true bugs, and beetles. Adults are 1/3 to 1/2 inch long. White eggs are deposited on foliage or on the body of the host. Larvae are internal parasites, feeding within the body of the host, sucking its body fluids to the point that the pest dies. Plants that attract tachinid flies:•Anthemis tinctoria Golden

Meet the Garden Beneficials (and Bats, Too!)
The podcast included with this newsletter features an interview with Rachael Long, University of California Cooperative Extension Farm Advisor Emeritus, and one of the nation’s best sources of information on the benefits of having bats, which are flying mammals (not rodents), in your neighborhood. Originally aired in Episode 180 of the Garden Basics podcast in March of 2022.Before we begin bug hunting, here’s what has happened this week on the Garden Basics with Farmer Fred podcast:Ep. 328 Q&A - Should you add fertilizer to a compost pile? Can planting late-ripening peaches thwart peach leaf curl disease?In this episode of the Garden Basics Podcast, Fred Hoffman and Master Gardener Susan Muckey discuss composting and answer a listener's question about adding nitrogen to a compost pile. They explain that adding nitrogen is not necessary for most compost piles and discuss the ideal carbon-nitrogen ratio. They also provide tips for turning a compost pile and maintaining the right temperature. In the second part of the episode, Quentyn Young, Master Gardener and orchard specialist, joins the conversation to discuss strategies for dealing with peach leaf curl, including planting late ripening peach varieties.• Adding nitrogen to a compost pile is not necessary for most composting methods.• The ideal carbon-nitrogen ratio for a compost pile is 30 parts carbon to one part nitrogen.• Turning a compost pile helps to introduce air and maintain the right temperature.• Late ripening peach varieties can be a good strategy for preventing peach leaf curl.=======================================================Ep. 329 How to WaterIn this conversation, Farmer Fred and America’s Favorite Retired College Horticulture Professor (and former nurseryperson), Debbie Flower, discuss various methods of watering plants, including watering seeds, young plants in containers, mature plants in containers, and lawns. They also touch on the use of sprinklers versus drip irrigation, the benefits of rainwater, and the ancient practice of using Oyas for irrigation. The conversation emphasizes the importance of finding a watering system that works best for each individual and regularly checking plants for signs of distress.• Watering seeds requires keeping the seed bed evenly moist, and watering from the bottom can be an effective method.• When watering young plants in containers, it's important to water each container individually and ensure that the entire column of soil is wet.• For mature plants in containers, using a watering wand with a fine breaker can provide a gentle and effective watering method.• Lawns can be watered using sprinklers or more efficient methods like MP Rotators, and it's important to turn off the water when runoff occurs.• Drip irrigation is a cost-effective method for irrigating crops, but it requires monitoring for breaks and securing the drip tape to the ground.• Oyas, an ancient irrigation method, can be used to slowly release water to plants, but their effectiveness depends on soil type and plant needs.• Regularly checking plants for signs of distress and maintaining irrigation systems is crucial for healthy plant growth.===============================================================Meet the Garden Good Guys and GalsNature wants to make your job as a gardener as easy as possible; but you have to help.We've talked about putting in plants that attract insects whose primary job is to pollinate your garden, helping to insure a bountiful harvest of food and flowers. But what about attracting those other "good bugs", the crawling and flying creatures whose diet includes pests that are ravaging your garden plants? These beneficial predatory insects do not live on aphid steaks alone. They need other natural sources of food and shelter for their entire life cycle before they call your backyard a permanent home. What are these "Welcome Mat" plants and the beneficial insects they attract? Here is a list of three of those good bugs and some of the plants that they like to visit for shelter and as another source of food for their diet and their children. Next week, we’ll have even more beneficials and plants. For best results, group these plants nearby or along the garden border to attract the garden beneficials. P.S. Readers with a long memory will recall much of this information from an earlier post here in May 2022.LADYBUGS (Ladybeetles)Easily recognized when they are adults by most gardeners. However, the young larvae, black with orange markings, eat more pests than the adults, and they can’t fly. Yellowish eggs are laid in clusters usually on the undersides of leaves.Plants that attract ladybugs:•Achillea millefolium Common yarrow•Ajuga reptans Carpet bugleweed•Alyssum saxatilis Basket of Gold•Anethum graveolens Dill•Anthemis tinctoria Golden marguerite•Asclepias tuberosa Butterfly weed•Atriplex canescens Four-wing saltbush•Coriandrum sativum Coriander•Daucus carota Queen Anne’s lace•Eriogonum fasciculatum CA Buckwheat•Foeni
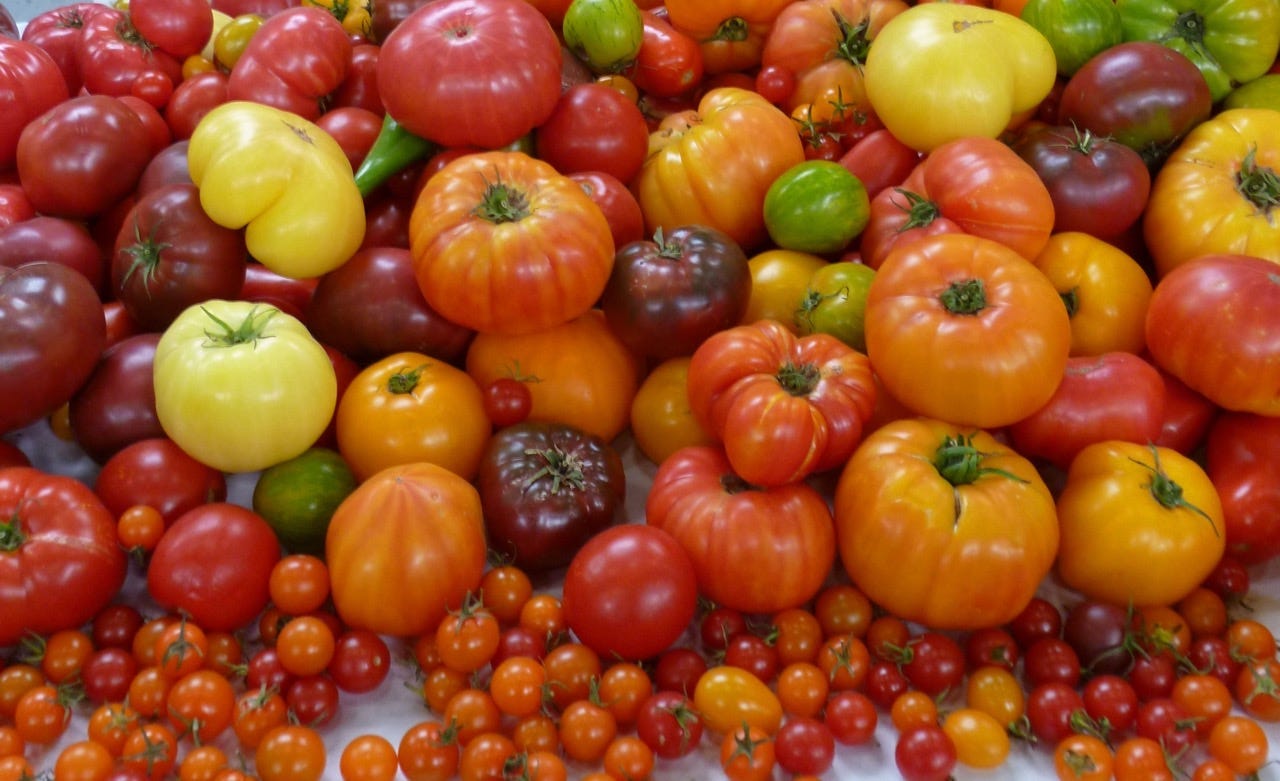
2024 Tomato Preview
Our cohort in all things tomato, Don Shor of Redwood Barn Nursery in Davis, got into a lot of helpful information for tomato gardeners besides just talking about tomato varieties in Episode 317 of the Garden Basics podcast, The 2024 Tomato Preview Show. The mini-podcast (above) highlights four tips we discussed that can make you a more successful gardening tomato-head. Among Don’s tips:• The first thing you should do when you when bring that tomato plant home from the nursery. • And, if you are growing tomato plants from seed, what you need to do before you plant it outdoors.• How to save tomato seeds from open pollinated varieties for next year.• How to save your tomatoes when it gets really, really hot.• How to improve the flavor and texture of supermarket tomatoes.• Plus, I threw in an extra tip on growing fruit trees in containers for a longer fruit production life in tight quarters.The Tomatoes of the 2024 Tomato Preview Show (with links for more info)RugbyChef’s Choice OrangeJulietBodaciousNew GirlTough BoyBlue RibbonPineappleChampionPurple BoyBush Early GirlItz a KeeperSuper FantasticJet StarPrincipe BorgheseRiesetomate tomatoSungoldBarry’s Crazy CherrySweet Carneros PinkPork ChopMichael PollanGardener’s DelightBig Beef4th of JulySweet MillionSuper SauceOrange WellingtonDr. Wyche’s YellowPurple Tomato (a GMO variety)A sampling of our comments of each of those tomato varieties (listen to the full episode for even more tomatoey details)Fred: the big winner last year for me was Rugby, based on your endorsement of that tomato over the last couple of years. And Rugby is just a wonderful tomato. Don: it grows very, very well and a very good producer here. So yes, you and I definitely agree on Rugby. =======================Don: I still highly recommend the Chef's Choice series and I strongly recommend Chef's Choice Orange based on previous years. That's still in my top ten. Fred: Several of the Chef's Choice tomatoes have been All-America Selections winners, as well.======================Don: I have to say every year I have one plant that just grows incredibly robust compared to all the others. It's never the same one, of course, and it produces really, really heavily. And in 2023 for me, that was Juliet. Now I recommend Juliet very highly for a lot of reasons. I did a quick count, just trying to figure out how many fruit my Juliet plant produced. It was something close to 400.====================Fred: One that you have recommended over the years. And I finally broke down and tried it and it was actually it was successful the second year I tried it. And that's another Don Shor rule about planting tomatoes. Give them three years, plant them for three years and see if you still like it. And Bodacious did quite well for me in 2023. It was the the last plant to give up, and I harvested the remaining green ones in November and I finally finished the green ones as they ripen slowly in the garage. I finished those off in late February. Don: Yeah, it's been a very good performer. If you're looking for something in what we sometimes call the beefsteak category, a large slicing tomato with good connective tissue that you could use in a sandwich, Bodacious is probably your best bet here in the Sacramento Valley. Bodacious has great flavor all as well, has taken heat very well for me. Continues to be a good performer for me. ======================Fred: Another one of your perennial favorites - and I've been planting it now for like three or four years - well, I finally ran out of the seed. I'm going have to get some fresh seed. The New Girl tomato.Don: Yes, New Girl has been out yielding Early Girl for me for the last two years.============================Don: There's another one out there called Tough Boy. Some people are doing that one and have had very good results. Tough Boy is another one where they're trying for that same 4 to 6 ounce fruit size, nice round red tomato, good flavor, a good all-purpose tomato. That's another good one.=============================Don: There's one that I've been recommending and it's going to be a hard one to find unless the nursery start it themselves. It’s Blue Ribbon. It doesn't crack, it doesn't split. It didn't get blossom and rot. The fruit is always 12 ounces or so, a good size all the way up to a pound. Sometimes it didn't get sunburned. It just performs really well. It's not just attractive. I mean, the Blue Ribbon refers to the fact it's a very, very good looking tomato. It also has really good flavor, and holds well on the vine. =========================Don: So here's my big surprise from last year. Every year there's one variety that surprises me. Pineapple. The name refers to the rather tangy flavor. This year I got 14 very large fruit on the one plant, each of them about one and a half to two pounds.Fred: An oldie but a goodie.Don: I don't usually tell people heirlooms are going to be your highest yield, but the Pineapple really, really surprised me how much it produced

Small Trees for Small Yards. Medium-Sized Trees for Suburban Lots. Avoid a Tree Disaster in a Storm.
Today’s newsletter podcast (recorded in January 2021) features an arborist discussing ways you can spot when your trees may be in danger of falling, especially in a wet, windy winter.More information about what was discussed in the podcast can be found at the University of California Ag and Natural Resources publication, “Inspect Your Landscape Trees for Hazards”.Small Trees for Small YardsIn this era of "Big House, Small Yard", choosing the right size tree can not only enhance the beauty of your backyard, it can forestall serious and expensive pavement problems that might force you to crack open your wallet in five to ten years. Planting a tree with a future height and spread of more than 40 feet in a small backyard will eventually make you recall that old TV show title, "Dark Shadows". Even spookier will be the repair bills when the extensive root systems of these larger trees start heaving and cracking your concrete patio, driveway, sidewalk and foundation.The Sacramento Tree Foundation recommends planting large trees at least 15 feet away from any hardscaping or construction. If the site you've picked out for a new tree can't be situated that far away from any concrete, electrical systems or sewer pipes, here are some good, small trees that need only six feet of planting distance from building foundations, walks and driveways.Most of these trees will get no taller than 25 feet: Amur maple, Japanese maple, eastern redbud, flowering dogwood, Washington hawthorn, crape myrtle, saucer magnolia and Bechtel crabapple.Needing only 10 feet of "growing room" from tree to concrete are these medium-sized (25-40 feet) ornamental plants: trident maple, hedge maple, Japanese white birch, goldenrain tree, capital pear and chanticleer pear.Before your shovel hits the ground, here is an easier way to plant your tree or shrub: instead of digging deep, dig wide. Then, refill that crater with the native soil. Current research from the University of California has shown that digging a hole an inch or two less than the depth of the tree's root ball (the portion in the container) is more beneficial than digging a deeper, narrow planting hole.The trick to a successful planting also includes loosening the surrounding soil at the planting site. Loosen up the soil (again, to the depth of the root ball) in an area at least twice as wide as the container (for young trees and shrubs) or the entire diameter of the tree canopy. Even better, rototill out to six feet from the location of the tree trunk. A tree that can easily send out its lateral root system will have better access to water and nutrients.Check the tree for girdled roots before planting. If the roots are encircling the rootball, slice through the length of the root ball on four sides about an inch deep. This will help the roots to spread down and out, not round and round.Plant the tree so that the top of the root ball rests on solid soil, one to two inches higher that the surrounding soil; this allows for settling and helps avoid crown rot. Avoid soil amendments; by refilling the hole with the original soil, the tree more quickly adapts to the native environment where it will have to reach out in order to be successful.Staking should only be done if the tree can't stand on its own. And by all means, remove the single stake that comes with the tree from the nursery. Use two stakes, one on either side of the root ball. Tie the tree to the stakes using old nylons or another flat, wide, ribbon-like article. Tie loosely at the lowest point on the trunk where the tree will stand upright. Remove the stakes as soon as the tree will stand on its own, usually not more than one year.Beyond The Garden Basics is a reader-supported publication. To receive complete new posts, have access to past newsletter issues, and support my work, consider becoming a paid subscriber.Lower Your Tree Size Expectations.Freakish high gusts of wind are becoming more commonplace throughout Northern and Central California, especially with the change of the seasons. Last weekend, a Red Flag warning was posted by the National Weather Service for the danger posed by the combination of high winds and dry landscapes that might ignite wildfires. Sure enough, the high winds swept into several sections of our state. The Bay Area office of the National Weather Service reported high winds exceeding 50 and 60 miles per hour in several coastal areas. In Southern California, wind gusts of 50 miles per hour buffeted high profile vehicle traffic on Interstate 5, north of Los Angeles. And a wildfire broke out in Riverside County, which, at press time, was still only 20% controlled. A bit closer to home, we nervously look at our neighbors’ huge conifers shedding small branches on windy days throughout the year.That’s a not so gentle reminder of last January, when one of their 60-foot-tall Atlas cedar giants fell into our yard during a windstorm here in suburbia, a fallen tree that was so large that it caused damage in thr
How to Stake a New Tree
Simple instructions from the Placer County (CA) Master Gardeners on proper tree staking:Q: I just planted a new tree and want to know the best way to stake it.A: It’s important to know that not all newly planted trees need to be staked. In fact, improper staking can harm rather than help. The more freely a tree can move, the stronger its trunk will become and the more likely it will be to withstand storms.There are three situations in which staking is necessary: to protect against damage from equipment, vehicles or animals; to anchor trees whose roots cannot support the tree upright in the wind; and to support trunks unable to stand upright by themselves.Protective stakes only need to be tall enough to be seen and avoided by equipment operators. Three stakes are generally enough and they should not be attached to the tree. Netting or wire fencing can be attached to the stakes to exclude animals.Anchor stakes should be firmly set in the surrounding soil outside the root ball. Short stakes used for protection can do double duty as anchoring stakes by attaching the lower part of the tree to them with broad, flexible ties. The idea is to restrict root ball movement, while allowing the top of the tree to move in the wind.Trees trained properly at the nursery should not need support staking. Most reputable tree growers no longer remove lower branches to create top-heavy, “lollipop” trees. They know that leaving these “nurse branches” on the young tree will help it develop a thicker trunk with healthy taper.To determine if your newly purchased tree requires support staking, remove the stake that came with the tree from the nursery. If the tree stands upright on its own, you should not stake it.However if the trunk flops over, place two stakes in the ground outside the root ball on opposite sides of the tree so that prevailing winds will blow through the stakes. Starting about 2 feet above the ground, use two fingers, one on either side, to support the trunk. Move your fingers slowly up the trunk until the tree stands upright. Flexible ties that allow movement should go 6 inches above this point. Cut the stakes 2 to 3 inches above the ties so that the trunk and upper branches will not be damaged by blowing into or rubbing on the stakes. Check the ties regularly to make sure they are not constricting the trunk.Remove stakes and ties as soon as they are no longer needed.Thanks for reading Beyond Basics: The Garden Basics with Farmer Fred Newsletter! Subscribe for free to receive new posts and support my work.Thank you for also listening to the Garden Basics with Farmer Fred podcast! It’s available wherever you get your podcasts. Please share it with your garden friends.Fred Hoffman is also a University of California Cooperative Extension Master Gardener in Sacramento County. And he likes to ride his bike(s). This is a public episode. If you'd like to discuss this with other subscribers or get access to bonus episodes, visit gardenbasics.substack.com/subscribe

The Benefits of Lingering in the Garden
In today’s newsletter podcast, Debbie Flower, America’s Favorite Retired College Horticultural Professor, extols the benefits of spending time in the garden, and closely observing your plants. And, I talk about how those who took up gardening during the Covid epidemic found out that gardening is good for the gardener, too, in a myriad of ways.Do some gardeners have a natural green thumb? Although there can be a lot said for patience and perseverance when it comes to landscaping tasks, perhaps there are some habits that seasoned gardeners have in common. Such a list was published by the Santa Clara and San Joaquin County Master Gardeners here in California a few years ago entitled, “The Top 10 Habits of Happy and Successful Gardeners.”It is a list that is worth reviewing from time to time, to see which habits you’ve made a normal part of the garden day, along with those habits that might need a bit of refreshing.For those of you that like the quick list, the Top 10 included: “Feed the Soil”, “Learn Before Lopping”, “Embrace Failure”, “Shop Carefully”, “Put the Right Plant in the Right Place”, “Water Intentionally with Both Hands”, “Control Snails and Slugs”, “Never Let a Weed Go to Seed,” “Attract Beneficial Insects”, and “Linger in the Garden”.Successful Habits of Happy Gardeners, by Louise Christy, Santa Clara Co MG (Summer 2018, San Joaquin MG Garden Notes) (Habits 1-5)Habit Number 1: FEED THE SOILHappy and successful gardeners know that taking care of the soil (and learning to love our clay soil) is the first priority.Soil has three main parts. The first is the mineral component, which soil scientists divide into sand, silt, and clay based on particle size. The important thing to know about sand, slit, and clay is that the clay particles are the smallest, and they are really small. The super-small size of the particles makes clay soils highly nutritious for plants.The second component of soil is the organic matter. Good, healthy soil is teeming with life, from big earthworms and pill bugs, to billions of living micro-organisms, fungi, and bacteria. Healthy soil also contains a lot of organic mat- ter, for example decomposing leaves or grass clippings. It is the job of the living organisms in the soil to breakdown the organic matter and return its nutrients, especially nitrogen, to the soil.The third component of soil is the space in-between the mineral and organic particles. This pore space is filled with water and air which are both essential to healthy soil. Plant roots need oxygen in addition to water and all those worms and beetles and protozoa and bacteria that are busy breaking down organic matter need water and air to stay alive."Feeding the soil" means replacing the water and organic matter and preserving the air by not overwatering or compacting the soil. Happy and successful gardeners follow this maxim for improving soil: compost, compost, compost, mulch, mulch, mulch.Compost improves the structure of the soil and makes it crumbly and easier to work. Spread compost all over the soil a couple times per year. If the soil has not been gardened recently, you may want to dig the compost into the soil several inches down. The other key to feeding your soil and increasing the organic matter is to use organic mulch. The most popular mulches seem to be wood chips or bark, but you can also use grass clippings, leaves, straw, or once again, compost.When working with clay soil, avoid overwatering, and let it dry until it is moist and crumbly before you dig. Do not add sand to clay soil. Sand plus clay equals concrete.Great garden soil with lots of clay, organic matter, and microorganisms will be dark brown and crumbly and will smell earthy. It can be dug easily with a trowel, and it will have worms. Be patient and persistent. Building great soil can take years, but with careful treatment and feeding, “impossible clay” can become lovely garden soil.Habit Number 2: LEARN BEFORE LOPPINGHappy and successful gardeners know pruning is a good thing and fun to do, but it can be complicated, so they make a point to learn before lopping.Many gardeners have pruners with them constantly for clipping and trimming their plants. There are many good reasons to prune and clip plants including training young plants, grooming for appearance, to control the shape and size of a plant, to influence flowering and fruiting, to invigorate stagnant growth, and to remove damaged or infested growth. However, improper pruning can ruin or destroy plants.Not all plants respond to pruning in the same way. Happy and successful gardeners are careful to research and learn how their plants will respond to pruning before they prune. This is especially important when talking about a large and valuable tree. Badly pruned large trees may drop branches or die, resulting in hazardous situations and expensive removal costs.Habit Number 3: Embrace FailureGardening is a learned skill. Compare it to medicine. Just like no one is born knowing how to pe
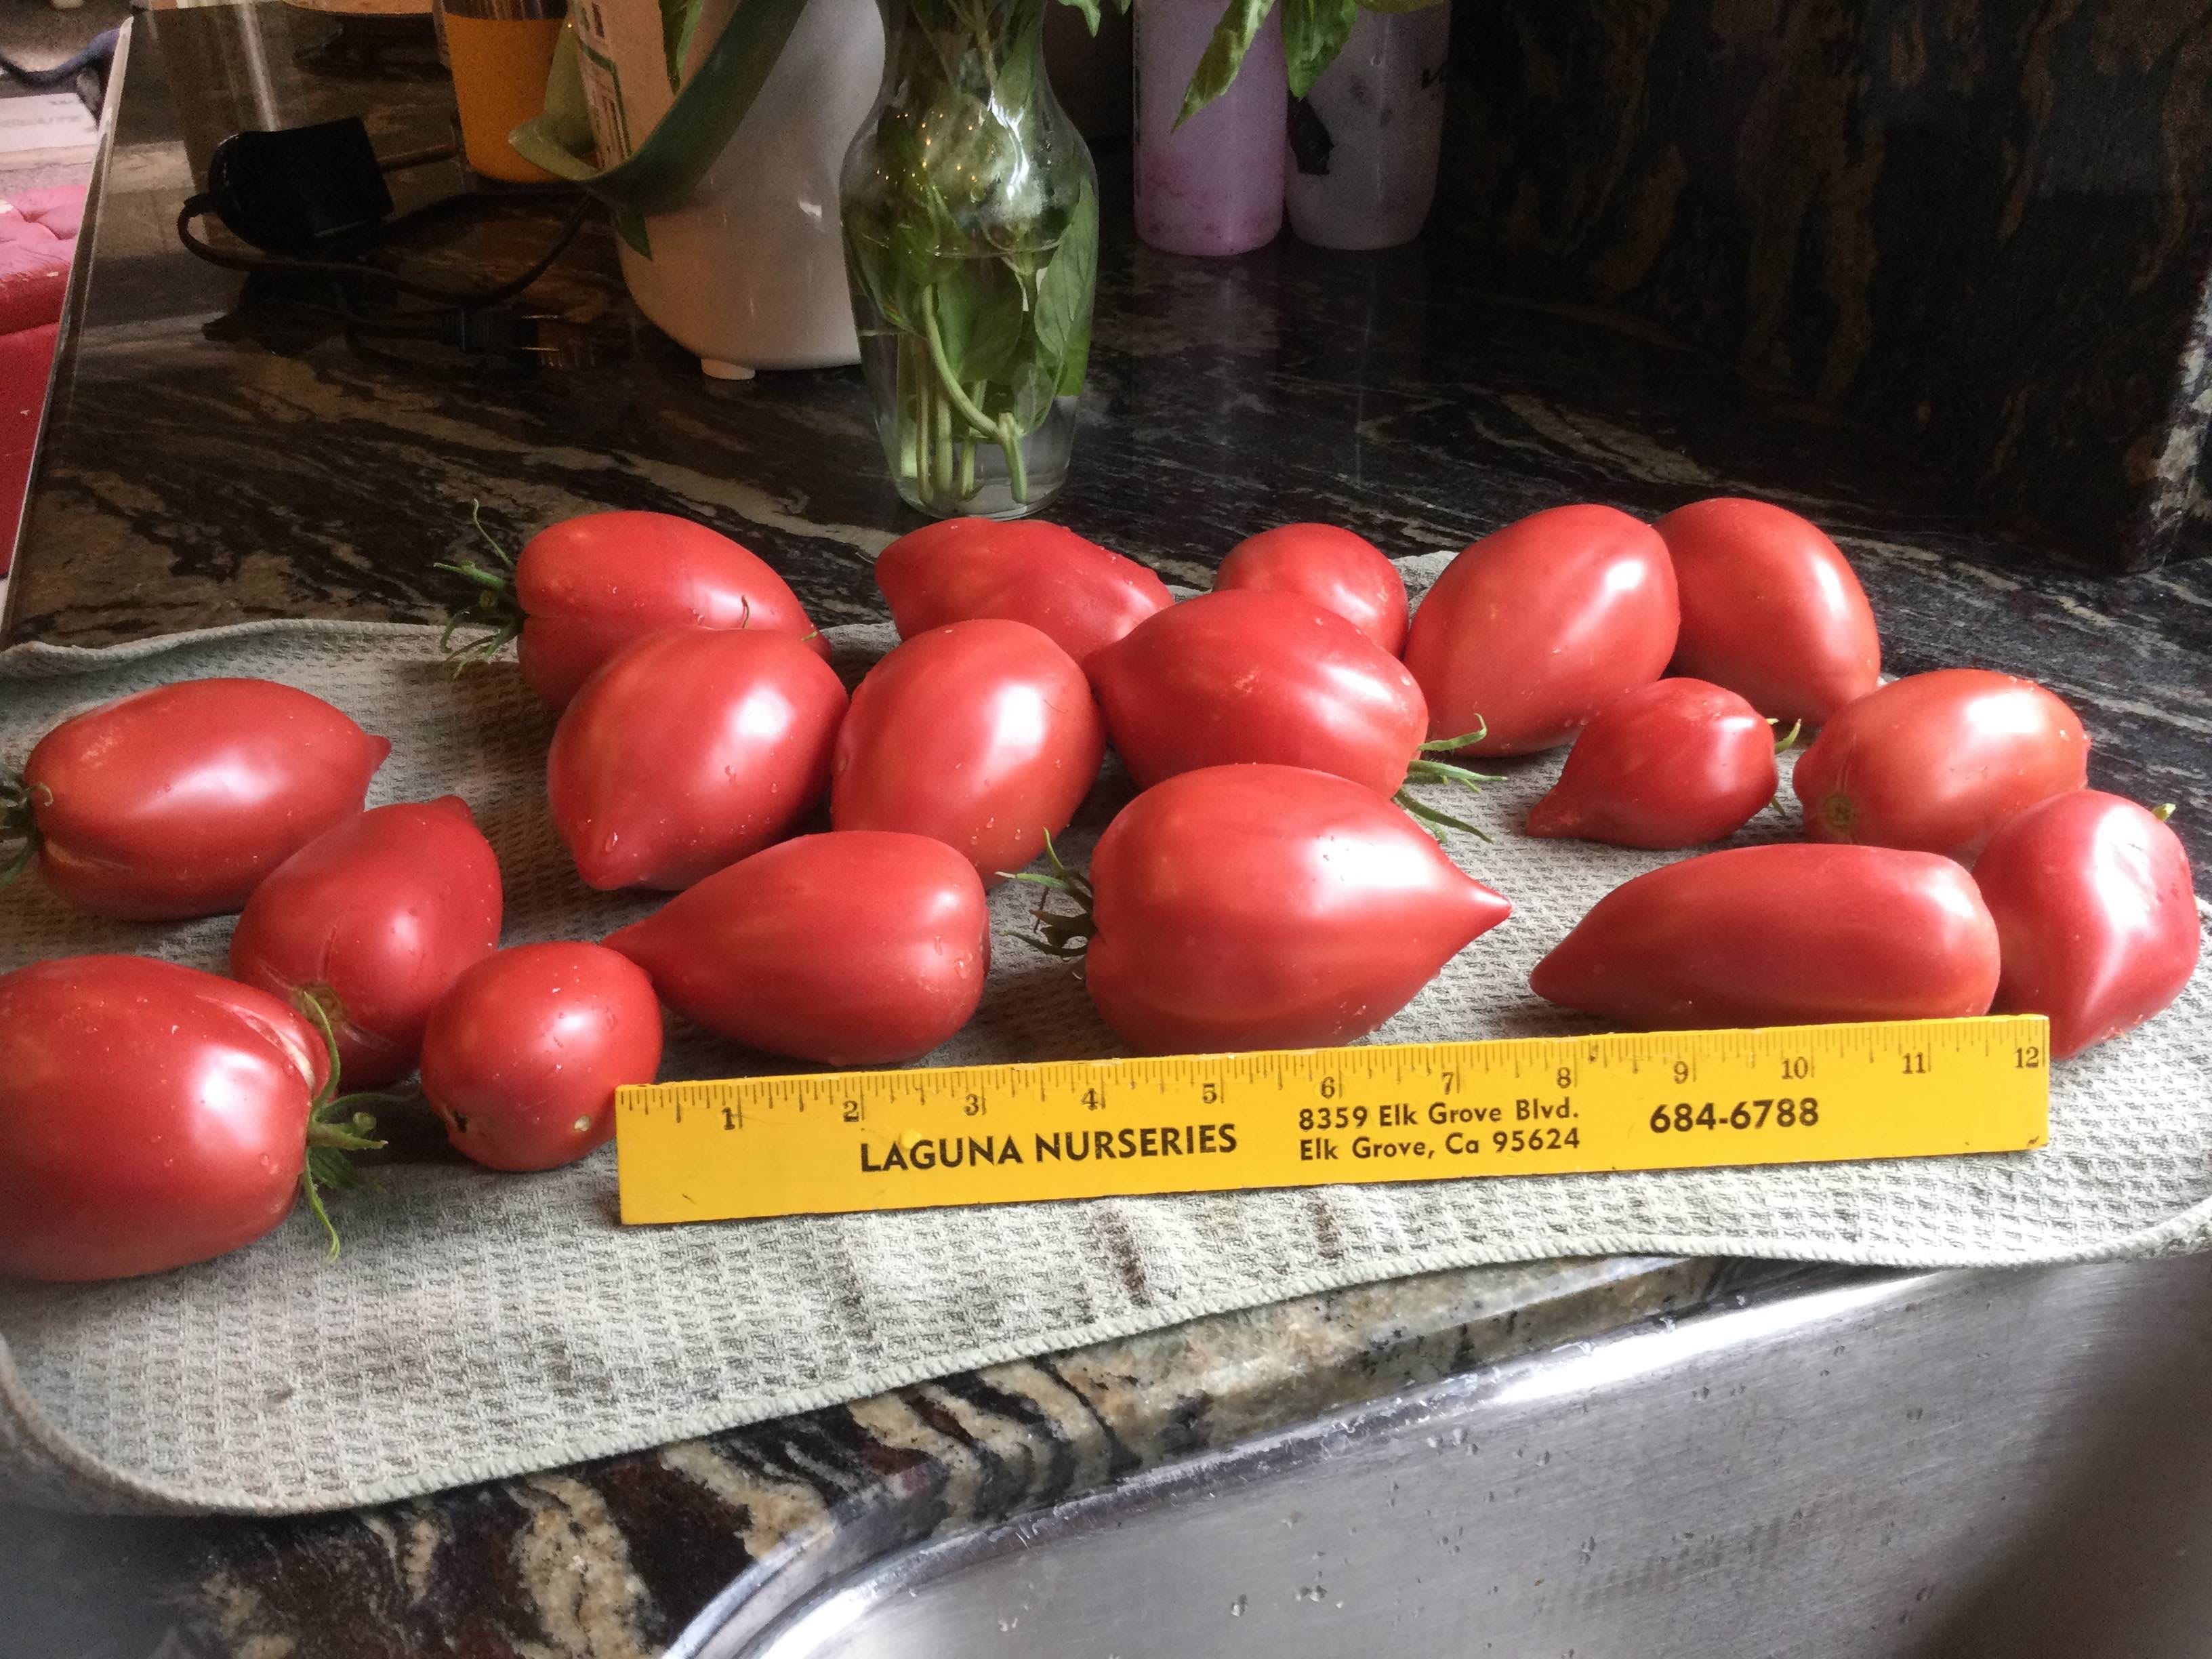
How Was Your Tomato Crop This Year?
In today’s newsletter podcast, nursery owner Don Shor and I share success and failure stories from our 2023 tomato gardens. We both agree that one of the best tomatoes this year that we grew from seed was Rugby F1, a sauce/paste tomato that is large, meaty, and tasty. In our own yard, Rugby was the overall winner for us. Although it is described in several seed catalogs as a Roma-type tomato, don’t be fooled. Rugby is much larger than other Roma canning tomatoes, about seven ounces each. Pink-red in color, Rugby has meaty flesh that is good for canning. But unlike smaller Roma tomatoes such as San Marzano or Roma VF, Rugby takes well to slicing and can be served on a sandwich or in a salad. Rugby is an indeterminate tomato, and did produce throughout the growing season, with great foliage cover to protect fruits from too much sun. There were few – if any – weather related issues with cracking or sunburn. Rugby is also resistant to diseases such as tomato mosaic virus, leaf mold, fusarium and verticillium wilt, crown and root rots, as well as bacterial speck. We will be planting Rugby again in 2024.My tomato failure this year was the industry’s fault: a victim of a seed mixup. Here is the purchased, mismarked, packet.Gardener’s Delight, is an indeterminate German heirloom small tomato, a favorite for years in our garden, with a long growing season and a grape-like shape, a bit larger than a cherry tomato. Oddly enough, although the name on the “Gardener’s Delight” tomato seed package (above) is wrong, the picture was EXACTLY correct. The tomatoes that these seeds produced resembled a run-of-the-mill, red, cherry tomato. That should have been a red flag to me. Whatever variety of cherry tomato that came from the packet of seeds was certainly not one that was a keeper: very little production that ended mid-summer.This is what a Gardener’s Delight tomato is supposed to look like: a bit larger than a cherry tomato, nor perfectly round, as it tapers a bit on the blossom end. Nor does it grow in tight clusters, as some cherry varieties do. Chalk it up to another victim of “Jalapeno-gate”, a country-wide (if not world-wide) seed mixup issue that was initially noted by many pepper aficianados - as well as retail and wholesale nurseries this past summer. Read about it here.However, we enjoy Gardener’s Delight so much, that my plan for 2024 will be to purchase seed of that variety from two different seed catalogs and plant a few from each. I’ll be avoiding the seed catalog source of this year’s Gardener’s Delight failure.More 2023 Tomato Winners and LosersWhich varieties were successful for you this year? Which tomatoes were a bust? Let me know how yours did.Meanwhile, over at the Fair Oaks Horticulture Center, the Sacramento County Master Gardeners conducted their own tomato trials this year. They grew three very popular varieties: Big Beef, Lemon Boy, and Celebrity. And for comparison, they grew the newer, alleged improvements of those three: Big Beef Plus, Lemon Boy Plus, and Celebrity Plus. Were the newer varieties really an improvement? The results were mixed.During a 30-day period of harvesting in July and August, the original Big Beef tomato plant produced 84 tomatoes with an average weight of 15 ounces. Big Beef Plus, however, only produced 75 tomatoes with an average weight of 8 ounces. Still, the taste testers among the Master Gardeners preferred the taste and texture of the Big Beef Plus, 75% to 25%.Both Lemon Boy and Lemon Boy Plus tomatoes that were harvested in that same time frame, and produced about the same number (132 to 111) and size (6.8 ounces to 7.5 ounces), although the Lemon Boy Plus had a few larger tomatoes that were beset with cracking. Lemon Boy was preferred by the taste testers to Lemon Boy Plus, by about a three to two ratio.Celebrity Plus (50 pounds) outproduced the Celebrity tomato (40 pounds), with both varieties having about the same size of tomatoes. The judges were divided on the taste and texture, with 71% preferring the flavor of Celebrity Plus. For texture, Celebrity was favored by 75%. The big difference was the size of the plant: Celebrity stayed fairly compact, about three to four feet tall, while the Celebrity Plus climbed up to the top and over the five-foot cage.“In our limited demonstration, all plants grew well and had no disease issues,” says the Master Gardener’s final report on the tomato trial. “We will probably keep all of the cultivars on our list to grow again.”Thanks for reading Beyond Basics: The Garden Basics with Farmer Fred Newsletter! Subscribe for free to receive new posts and support my work.Thank you for also listening to the Garden Basics with Farmer Fred podcast! It’s available wherever you get your podcasts. Please share it with your garden friends.Fred Hoffman is also a University of California Cooperative Extension Master Gardener in Sacramento County. And he likes to ride his bike(s). This is a public episode. If you'd like to discuss this with othe
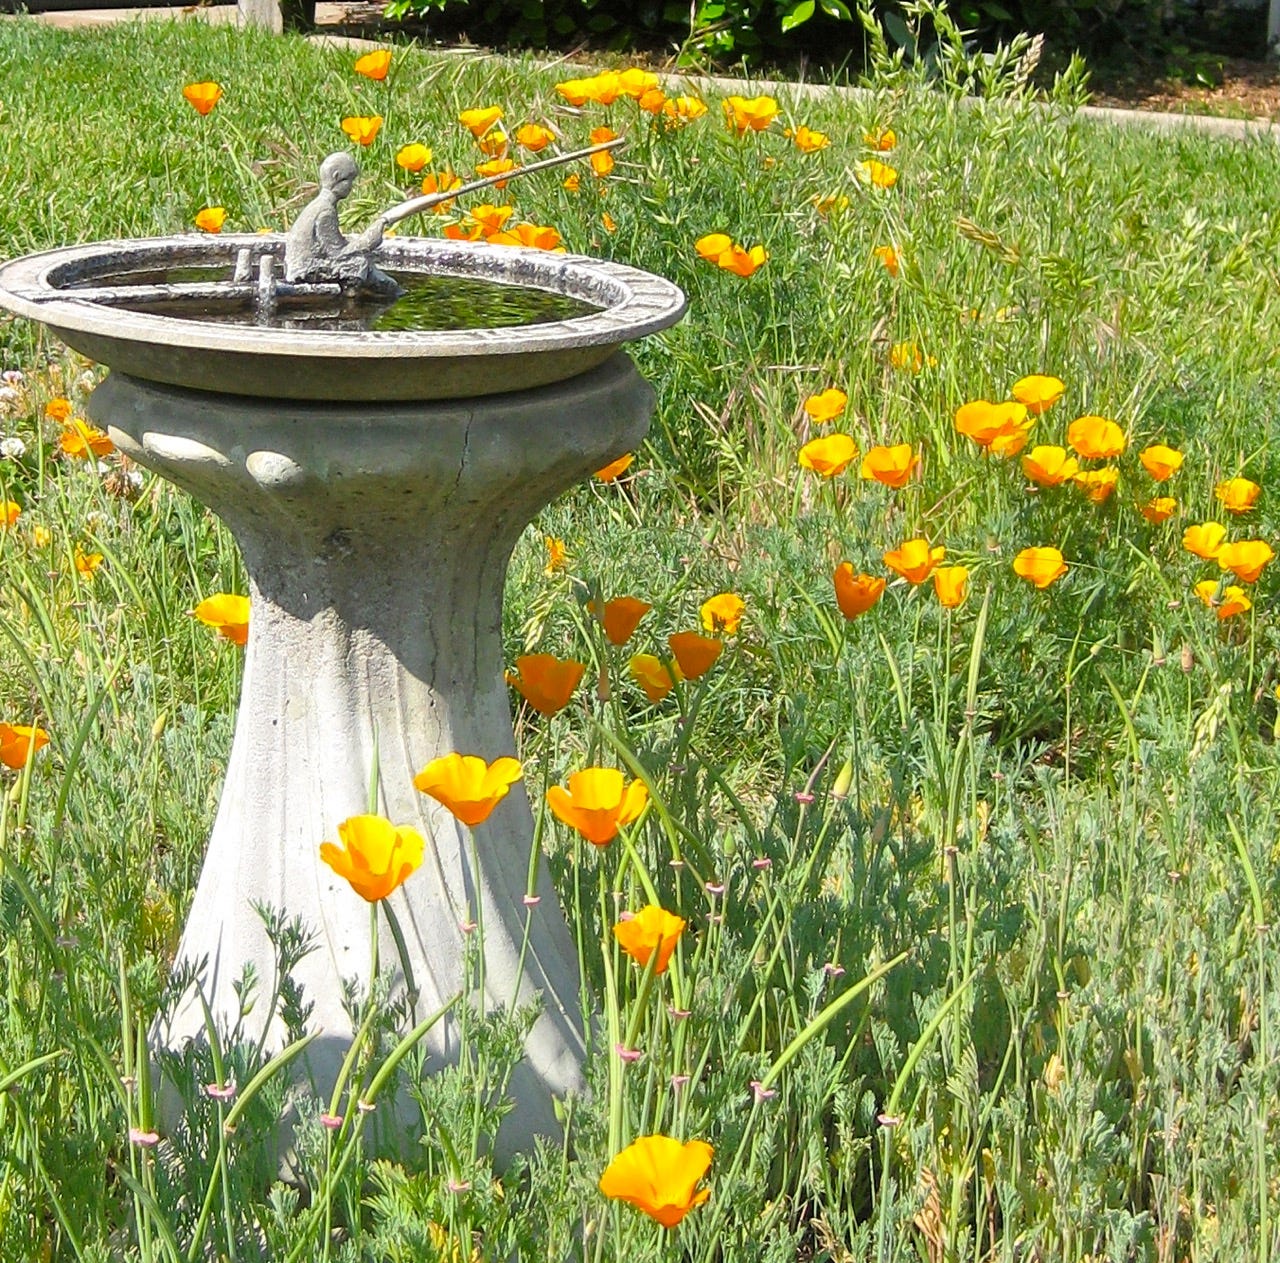
Planting Wildflowers or Cover Crops: Wait for Rain? Or Do It Now?
In today’s newsletter podcast (above), we get tips on starting a wildflower garden from Marina LaForgia, of the Gremer Lab at UC Davis. LaForgia, a 2019 PhD graduate of Davis, is now doing research on seed dispersal and persistence. If you live in an area of the country where you can plant wildflowers or cover crops in the fall, especially in a drought-prone area, you’ll want to listen. Thinking about planting cover crops this fall? The range of cover crop success in the U.S. is rather wide: USDA Zones 10 down to 6B. According to a cover crop study conducted by the Natural Resources Conservation Service in Pullman, Washington (USDA Zone 6B), it really depended on how cold it gets in a particular winter. Peaceful Valley Farm Supply has a cover crop solutions chart that lists many varieties that are reported to take the cold down to 25 degrees.A very informative video from Peaceful Valley Farm Supply about planting wildflower seeds can be found here. (Note: Peaceful Valley is not an advertiser here. They just know their stuff. That’s good enough for me.)What’s Your USDA Zone?Want more zone details? Here’s a link to an eye-numbingly detailed USDA Zone Map from Wikipedia.Fall is for Sowing Cover Crops and Wildflowers. But Should You Wait for the Rain?Early fall - October through mid-November - is usually the time for planting a wildflower garden or sowing cover crop seeds on your bare garden beds here in USDA Zone 9, including most of California. “Usually” being the operative word; “rain” being the wild card. You can increase the chances of germination if the soil bed is prepared by thoroughly moistening it to depth of a few inches. Follow that up with weekly, thorough irrigations until the seeds sprout. However, the shorter, cooler days of October sometimes can fool a gardener into not watering enough, thinking that the rains will soon be coming.Some native plant experts, such as LaForgia, say to wait for the rains before planting wildflower seeds. That event seems to be a long way off, especially with temperatures lately reaching the 90’s. In that wildflower video from Peaceful Valley, Trish recommends waiting until after the first hard frost in her area, which, because of the hilly terrain of Nevada City, could be anywhere from USDA Zones 9B to 7B. This will help the seeds achieve winter dormancy, and then come alive in the following Spring.Meteorologists seem divided on what the next three or four months will bring to much of the U.S., especially for Northern California: no rain until heavy storms begin in late December (according to Weather West meteorologist Daniel Swain); a typical amount of rain, over the next 90 days (the National Weather Service’s Climate Prediction Center); or, we don’t know: “Quite a bit of uncertainty exists during the upcoming 4-months due to widely varying oceanic-atmospheric teleconnection patterns that should create highly changeable weather patterns.”(National Interagency Fire Center).Again, you can try to plant seeds of some wildflowers and cover crops now... Just keep the soil bed moist (not soggy) until germination. And if no rain has begun by that time, irrigate weekly.Peaceful Valley Farm Supply in Nevada City, who are the cover crop experts in the Sierra foothills, urges their customers to plant cover crops at the correct time, rain, or no rain: “Do not delay planting to wait for the rain. It is better to have the seed in the ground waiting for the rain than to plant after fall rains begin. If possible, irrigation should be applied immediately after planting. The irrigation should be long enough to at least wet the soil to one to two inches below the seeding depth, with two or three subsequent irrigations to supplement the early growth if rains don’t happen in the Fall. The more growth these cover crops make in the Fall, the better.”In the University of California publication, “Cover Cropping in Home Vegetable Gardens”, Sacramento County Master Gardener Gail Pothour explains that a cover crop is planted for the purpose of improving soil quality and nutrition as well as attracting beneficial insects. Cover crops add nitrogen to the soil, improve water penetration (due to long roots), suppresses weeds, and adds organic matter to the soil. Drawbacks to cover crops may be obvious, some not so obvious. Although you are taking a portion of the garden out of production of cool season vegetables and flowers, you are improving the soil. The not-so-obvious drawback: cover crops can be a bit of work in late winter and early spring. For maximum benefits, cover crops need to be cut back as flowering begins to keep that nitrogen in the soil. Then, the entire plants need to be chopped into little pieces and worked into the soil for maximum benefits three to six weeks before planting your spring vegetables or flowers.In addition to clover, Pothour suggests using bell or fava beans as a cover crop. “For an upright cool season cover crop that is easy to cut down in the spring, use bell be

Potato Planting Tips
In today’s newsletter podcast, retired college horticulture professor Debbie Flower and Master Gardener Gail Pothour offer tips for growing potatoes. We also talk about the best months of the year to plant potatoes. That answer? It depends where you are. Give it a listen (above).More Potato Planting TipsFrom the garden e-mail bag, Alan asks: “What varieties of potatoes are best to grow here in California?”There are dozens of varieties a potato gardener in California can choose. Among the favorites of the University of California potato experts are Norgold Russet, Red la Soda, Kennebec, and White Rose. One of my favorites is Yukon Gold. Local nurseries and California-based garden catalogs, such as Renee’s Garden, will be getting in and shipping out seed potato varieties such as Colorado Rose, Heirloom Russet Burbank, Purple Majesty, French Fingerling, and Heirloom German Butterball in the winter.One of the keys to homegrown potato success is planting at the right time, to avoid frost damage to young plants. We just passed the summer potato planting season of August and September. However, winter or early spring planting of potatoes is good, January through March in milder areas of California. A general rule of thumb: plant potato pieces about three to four weeks before the final frost. At California’s lower elevations, frost season is usually December and January. Planting in March, though, is good insurance against a wayward frost.Throughout the United States, planting seed potato pieces three to four weeks before the final frost is a good rule of thumb. Find your average first and last frost dates here.Your local nursery is a good barometer for the top potato varieties to grow in your area. Seed catalogs, as well, offer a wide variety of tasty and unusual potatoes that can do well in many climates.Is there a difference between 'eating potatoes' and 'seed potatoes'?Why plant “seed potatoes”? These are certified disease-free varieties, available from nurseries and catalogs. Using grocery store potatoes for planting have two drawbacks: they may have been treated with a sprout inhibitor to increase their shelf life; and, although the potato may be safe to eat, it may still transmit a disease to your soil.Which brings us to another query from the garden e-mail bag. Bill asks: "What's wrong with using some of the potatoes from our earlier harvest to plant a new crop? Is there a difference between 'eating potatoes' and 'seed potatoes'?"Each potato-growing state has tests to certify seed potatoes. These tests include field and storage inspections as well as demanding potato criteria. The seed potatoes are certified to be free of some diseases that can ravage an entire garden, including early blight, late blight, damping off, verticillium wilt and nematodes.Diseases can spread easily, via the wind, plants, soil, and tools. As a precaution, you shouldn't plant potatoes and tomatoes in the same soil within three years of each other. To avoid this issue entirely, heirloom potato growers can plant in large containers, at least 15 gallons in size, using bagged soil.Whether you grow in the ground or in containers, here are some potato planting tips:• Cut seed potatoes into pieces weighing from one and a half to two ounces, each having one or two eyes.• Store cut pieces at room temperature and preferably in a humid place for one or two days before planting to allow the cut surface to form a callus. This decreases the chances of rotting.• In the garden, prepare a planting furrow about four inches deep. Drop seed pieces into the furrows, and cover with two inches of soil.• Leave the furrow this way for 4 to 6 weeks. When the sprouts are a couple of inches high, add 2 more inches of soil so that the seed pieces will be covered at the original ground level.• If planting in containers, start with a couple of inches of soil in the bottom, lay the seed potato pieces on the top, and cover with two inches of soil. As the sprouts grow, repeat that process until you are within a couple of inches of the container top.• With either method, if a frost threatens the sprouts, cover with a permeable frost cloth. Most of the potato crop can be harvested when the vines die, or the skin of the tubers is firm, not flaky. Thanks for reading Beyond Basics: The Garden Basics with Farmer Fred Newsletter! Subscribe for free to receive new posts and support my work.Thank you for also listening to the Garden Basics with Farmer Fred podcast! It’s available wherever you get your podcasts. Please share it with your garden friends.Fred Hoffman is also a University of California Cooperative Extension Master Gardener in Sacramento County. And he likes to ride his bike(s). This is a public episode. If you'd like to discuss this with other subscribers or get access to bonus episodes, visit gardenbasics.substack.com/subscribe

The "Fast Food" Garden: Microgreens & Baby Greens
I’ve often heard from dietitians and health food aficionados that consuming microgreens and baby greens provide more nutrition than their full grown counterparts. Is that true? In a 2021 published study of two greens - spinach and roselle - researchers discovered that these plants - when harvested within 20 days of sowing - have some critical nutritional benefits greater than the full grown plant, according to the National Library of Medicine:“Compared to field grown mature foliage, greenhouse-grown micro/baby-greens were lower in digestible carbohydrates and CA (calcium) but higher in digestible protein, P (phosphorus), K (potassium), Mg (magnesium), Fe (iron), Mn (manganese), and Zn (zinc).”From the National Library of Medicine (Nov. 2021): Nutrient Content of Micro/Baby-Green and Field-Grown Mature Foliage of Tropical Spinach (Amaranthus sp.) and Roselle (Hibiscus sabdariffa L.)So, for certain nutritive boosts, nature’s “fast food” (greens harvested at microgreen or baby green stage) is the way to go. Better yet, it’s quick from the garden to the plate, reaching cutting stage in 10 to 20 days after sowing in optimum conditions and temperatures.In today’s “Beyond the Garden Basics” newsletter podcast (above), Master Gardener Gail Pothour discusses how to grow and harvest microgreens, and how they can be used in various dishes.Below, Renee Shepherd shares her secrets for growing and harvesting baby greens, perfect for the freshest salad and other recipes. This is a transcript of a conversation we had with Renee, back in Episode 282 of the Garden Basics with Farmer Fred podcast.THE CUT AND COME AGAIN FOOD GARDENFarmer FredOne of the healthiest garden plants that you can grow our greens. But if you live in a hot climate, maybe you're limited to only growing greens during the cool season. Or if you live in a cold climate, it's your summer crop. But because greens are so healthy, you should be able to grow them year round. And, you know something? You can, with the advice of our guest today. It’s Renee Shepherd, the founder of Reneesgarden.com. She is widely regarded as a pioneering innovator in introducing international vegetables, flowers, and herbs to home gardeners and gourmet restaurants. She founded the Shepherd's Garden Seeds back in 1985. And she sold the company later on, and then established Renee's Garden to do what she likes best: searching out the very best seeds from around the world, testing them in her own garden, cooking and developing recipes around their unique characteristics, and sharing them with other gardeners. I've been a Renee's customer for years and years. I love her choices and introductions, especially the Sunset Mix sweet pepper. Renee is the one who gave me a tip a few years ago when I was bemoaning the lack of cilantro to make salsa in the summertime. Cilantro, here in USDA zone nine, is basically a cool season crop. But you'd like to have some cilantro when you're making salsa in the summer, when the tomatoes and garlic and peppers and onions are ready. She said all you got to do is cut and come again with cilantro. Just grow it from seed in a shady spot. Then, when it gets a couple inches tall, you cut it and use it. Isn't that right, Renee?Renee Shepherd That's the cut and come again method. It gives you a way to get several harvests of a lot of things that really wouldn't be able to take the heat.Farmer Fred Actually, I think it's perfect for anybody who wants to garden. With a cut and come garden of greens, all you probably need, if you're starting it now, is a shady spot to grow it in, a large container, or if you have the room, a garden bed. But I would imagine, too, in a sunny window inside you could grow this.Renee Shepherd Well, I'm not 100% sure that you would have great results on a windowsill, because it needs so much more light. You might get one cutting out of it. I suggest you grow it outside for the best result.Farmer Fred How about indoors with grow lights?Renee Shepherd Indoors with grow lights? That's certainly a possibility.Farmer Fred All right, we've just sold some more equipment there. But there's a lot of greens that take well to the cut and come again method. You have a YouTube video at Reneesgarden.com that explains how you do that. So go ahead and explain it for our podcast audience. How exactly do you grow leafy greens that will come back after you cut them?Renee Shepherd We think the cut and come again method is the way to grow the most greens in the smallest space in the shortest time. So it works for all lettuce mixes. And it works for spinach, chard and kale, Asian greens, a lot of different things. It's not just for hot weather, it's really a way to get a lot of results from a small space and it's a different way of growing things. So either in a bed or in a large container. You prepare the soil. You get a seed mix and you pour out the seed in your hand. And then you shake the seeds through your fingers so it kind of goes into the bed like gras

Fall Worm Bin Care and Feeding
One of the best soil amendments to add for happy plants are worm castings, also known as worm poop. However, the price of a bag of worm castings approaches twenty dollars, so you may want to tack on a new “to-do” item for the soil in your garden: vermicomposting, which is raising worms, usually in a worm bin. Those worms will feast on many of your kitchen scraps, giving you back a soil amendment teeming with microbial activity, perfect for plant roots to enjoy. And you don’t have to worry about the worms if you go on a three-week vacation. Give them some extra food before you leave and re-dampen the bedding. They won’t complain.Worms do best at temperatures slightly less than room temperature. Putting them in a cool indoor room or basement is an excellent idea. If you maintain the right balance of food, the bins won’t smell, either.Here are tips from the Sacramento County Master Gardeners on starting and maintaining a worm composting bin:• All you need to create worm castings is a worm box, bedding material, red wriggler worms (not earth worms) and food scraps.• Bins can be purchased or homemade. Use a solid color (not clear) plastic storage box or a sturdy wooden box with a tight-fitting lid to keep out pests and protect your worms. If making your own bin, be sure to drill ¼-inch holes in the bottom to allow for drainage.• Worms will not escape; they dislike light and will migrate toward the center of the box.• A commercial vermicomposting system that feature stackable bins take up a house-friendly smaller footprint, perhaps 24 by 24 inches.• Moistened, shredded newspaper or corrugated cardboard, shredded leaves, purchased pine shavings, or coconut fiber (coir) bedding provides worms with a balanced diet as well as a damp, aerated place to live.• Always keep the bedding as moist as a wrung-out sponge.• Place the worm bin in the shade or indoors. The worms will tolerate a wide range of temperatures, but the best temperatures are between 55° and 75°F. However, today’s newsletter podcast guest, Sacramento County Master Gardener Susan Muckey, prefers to be more of a “tough love” worm parent. She lets her worms deal with temperatures that range from 40 to 80 degrees. Listen to what she has to say in the podcast at the top of the page.• Worms love most fruits and vegetables, used tea bags, used coffee grounds and filters. Do not feed them animal products, dairy, onions, or processed foods. Limit citrus peels to less than 20% of the food. Some worm parents say that the total citrus contribution to the worm bin should be closer to zero percent.• Chopping the food into small pieces, one inch or less in size, will speed up the composting process.• To avoid fruit flies and odors, cover the food with at least one inch of bedding.• Use red wigglers or red worms. They can be purchased at some nurseries, worm farms, and fishing supply stores.• The castings are ready when they are dark and fine in texture. Separate the worms from the castings. Place the worm castings in your garden bed before planting. Work the castings lightly into the soil with a rake. Cover with mulch or compost. If you soil could talk, it would thank you!Thanks for reading Beyond Basics: The Garden Basics with Farmer Fred Newsletter! Subscribe for free to receive new posts and support my work.Thank you for also listening to the Garden Basics with Farmer Fred podcast! It’s available wherever you get your podcasts. Please share it with your garden friends.Fred Hoffman is also a University of California Cooperative Extension Master Gardener in Sacramento County. And he likes to ride his bike(s). This is a public episode. If you'd like to discuss this with other subscribers or get access to bonus episodes, visit gardenbasics.substack.com/subscribe

What is Organic Gardening?
If I was to ask you, “What is organic gardening?” You might squint a little, and say something along the lines of, “Well, organic gardeners don’t use chemicals in the garden”. That wouldn't be correct. After all, water is a chemical, and all gardeners probably use water. And, there are chemicals used in organic gardening, including manufactured fertilizers that are OMRI certified as organic. OMRI - the Organic Materials Review Institute - is a nonprofit organization that provides an independent review of products, such as fertilizers, pest controls, livestock health care products, and numerous other inputs that are intended for use in certified organic production and processing.Pondering the question, “What is Organic Gardening?”, is interesting. If you go online and search for a definition of organic gardening, it runs the gamut.The University of Massachusetts, for one, says even among those claiming to be organic gardeners, it differs as to exactly what constitutes organic gardening.“In general, organic gardening differs from traditional gardening in two important ways, use of agricultural chemicals and use of artificial or processed fertilizers.”However, they don't say exactly what “agricultural chemicals” are.Then, UC Davis’ Sustainable Agriculture Research and Education Program states, “Organic agriculture is the practice of growing, raising, or processing goods using methods that avoid the use of most synthetic pesticides and fertilizers, as well as bioengineering, ionizing radiation, and sewage sludge.”Alright, now we're starting to narrow down the definition of “organic gardening”.The University of Georgia says that a generally accepted definition of organic gardening is: “The use of cultural practices to improve soil and plant health in order to reduce plant problems without the use of synthetic fertilizers and pesticides.”This is becoming very interesting.So we turn to the Royal Horticultural Society in jolly old England, and they say: “Organic gardening is commonly used to describe cultivation systems which make minimal use of manufactured chemical substances. These are practical elements of a broader philosophy which takes a holistic view of gardening, emphasizing the interdependence of life forms.” That “broader philosophy” may include the tenets of permaculture.And then we have the thoughts of a man we had as a guest about a month ago. IHeart was there discussing phosphorus, a soil macronutrient, and some of the possible dangers or cautions one should employ if using phosphorus fertilizers.It was garden book author, Robert Kourik. And I wondered about the manufacturing of phosphorus.I asked him, “Is the process that makes phosphorus fertilizers, in your estimation, not organic, even though phosphorus fertilizer is considered organic?”And he said, “I like to think of it as considering a cradle-to-grave review of organics.”Well, that needed some expansion.So back for his expansion time is Robert Kourik, author of the book, Sustainable Food Gardens as well as many other garden books.“The way I define organic gardening is what I call a full-cycle ecosystem,” says Kourik. “In other words, using as few external inputs as possible, while harvesting as much as possible. If you have an organic garden and you truck everything in from five miles away, and you buy bone meal, and you buy blood meal, and you buy phosphate fertilizers and more, you have a tremendous amount of inputs coming from near or far. That doesn’t reflect what would naturally happen if you weren't bringing in that nutrition and those other products. I’m trying to keep it as a closed loop as much as possible. So when I talk about ‘cradle to grave”, let's look at what it costs to produce these inputs, how they’re produced, what it takes to truck them around, as well as what do you get out of it, and what are the alternatives that you could use in your own garden, instead.”Listen to the podcast (above) about how you can transition to a more self-sustaining organic garden. Perhaps it won’t be a fully self-sufficient ecosystem, but you will have lessened your carbon footprint, if you’re a big-picture kind of person. Perhaps closer to your own reality, you will have saved some money, one cover crop or mulch pile, at a time.Thanks for reading Beyond Basics: The Garden Basics with Farmer Fred Newsletter! Subscribe for free to receive new posts and support my work.Thank you for also listening to the Garden Basics with Farmer Fred podcast! It’s available wherever you get your podcasts. Please share it with your garden friends.Fred Hoffman is also a University of California Cooperative Extension Master Gardener in Sacramento County. And he likes to ride his bike(s). This is a public episode. If you'd like to discuss this with other subscribers or get access to bonus episodes, visit gardenbasics.substack.com/subscribe
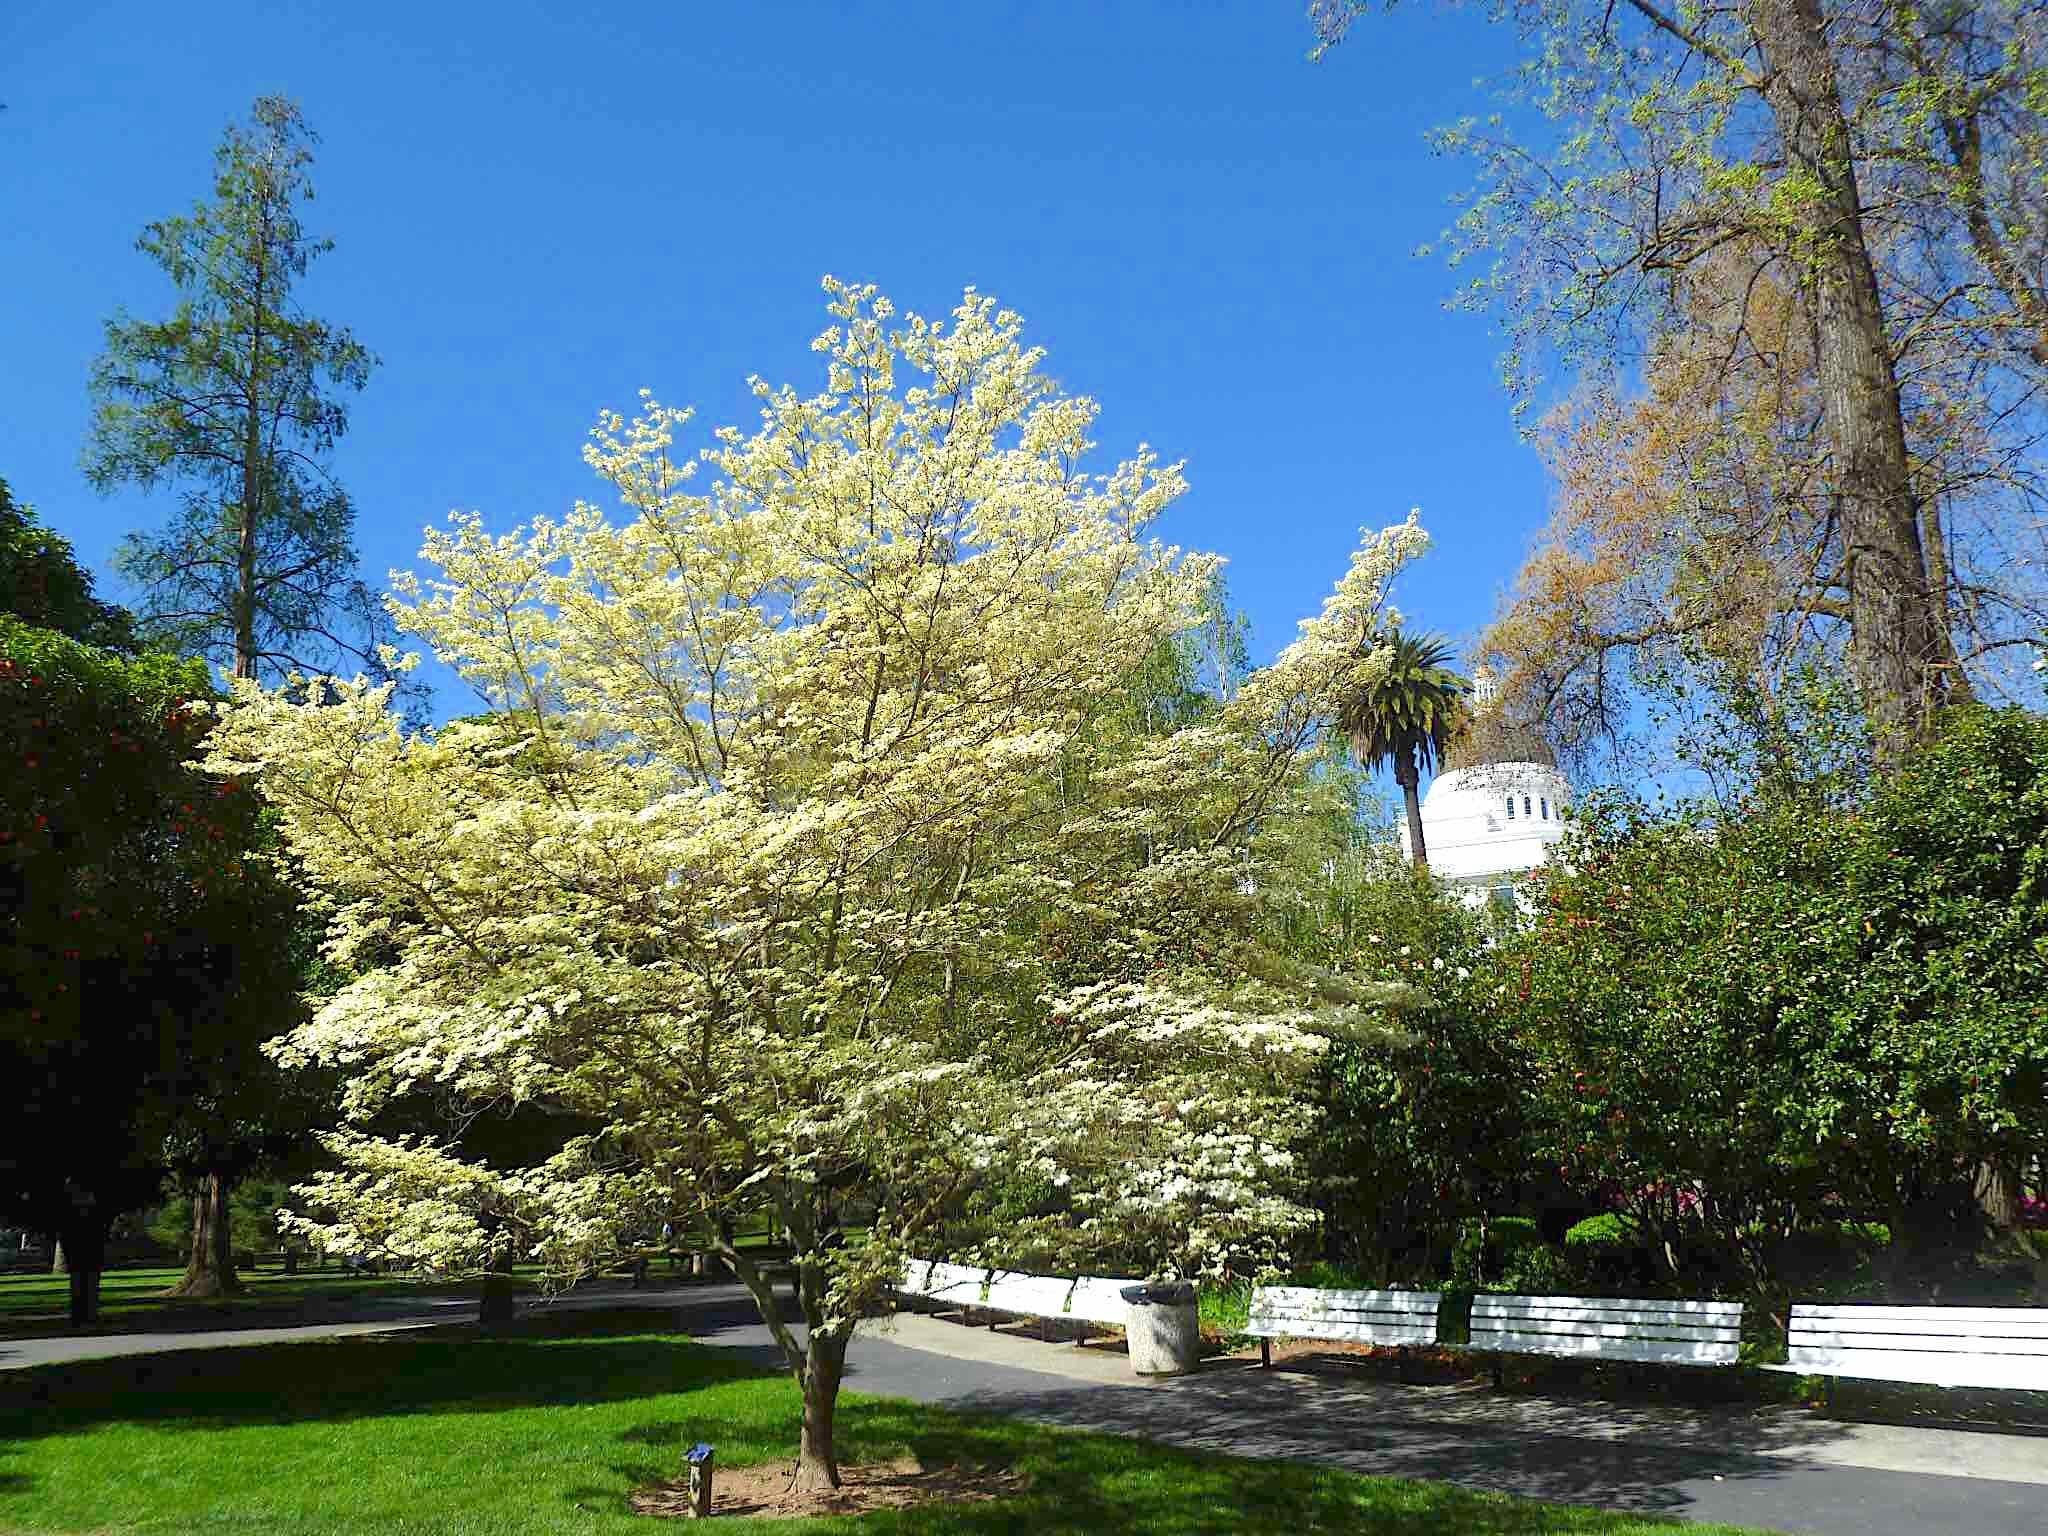
What's Stressing Your Dogwood Tree? It Could Be You.
A dogwood tree is easy to love: flowers in the spring, beautiful orange/pink/red fall leaf color; a small to medium height tree, perfect for a patio area.The University of Florida lists the dogwood tree’s strengths and weaknesses:“The state tree of Virginia, the flowering dogwood grows 20 to 30 feet tall and spreads 25 to 30 feet. It can be trained with one central trunk or as a picturesque multi-trunked tree. The flowers consist of four bracts which subtend the small head of yellow flowers. The bracts may be pink or red depending on cultivar but the species color is white. The fall color depends on site and seed source but on most sun grown plants will be red to maroon. The bright red fruits are often eaten by birds. Fall color is more vivid in USDA hardiness zones 5 to 8a. Branches on the lower half of the crown grow horizontally, those in the upper half are more upright. In time, this can lend a strikingly horizontal impact to the landscape, particularly if some branches are thinned to open up the crown. Lower branches left on the trunk will droop to the ground, creating a wonderful landscape feature.“The tree is not suited for parking lot planting but can be grown in a wide street median, if provided with less than full-day sun and irrigation. Dogwood is a standard tree in many gardens where it is used by the patio for light shade, in the shrub border to add spring and fall color or as a specimen in the lawn or groundcover bed. It can be grown in sun or shade but shaded trees will be less dense, grow more quickly and taller, have poor fall color, and less flowers. Trees prefer part shade (preferably in the afternoon) in the southern end of its range. Many nurseries grow the trees in full sun, but they are irrigated regularly. Flowering dogwood prefers a deep, rich, well-drained, sandy, or clay soil and has a moderately long life. It is not recommended in the New Orleans area and other heavy, wet soils unless it is grown on a raised bed to keep roots on the dry side. The roots will rot in soils without adequate drainage.Several of the cultivars listed are not readily available. Pink-flowering cultivars grow poorly in USDA hardiness zones 8 and 9. 'Apple Blossom'—pink bracts; 'Cherokee Chief'—red bracts; 'Cherokee Princess'—white bracts; 'Cloud 9'—white bracts, many blooms, flowers at early age; 'Fastigiata'—upright growth while young, spreading with age; 'First Lady'—leaves variegated with yellow turning red and maroon in the fall; 'Gigantea'—bracts 6-inches from tip of one bract to tip of opposite bract; 'Magnifica'—bracts rounded, 4-inch diameter pairs of bracts; 'Multibracteata'—double flowers; 'New Hampshire'—flower buds cold hardy; 'Pendula'—weeping or drooping branches; 'Plena'—double flowers; var. rubra—pink bracts; 'Spring Song'—bracts rose red; 'Springtime'—bracts white, large, blooms at an early age; 'Sunset'—supposedly resistant to anthracnose; 'Sweetwater Red'—bracts red; 'Weaver's White'—large white flowers, adapted to the south; 'Welchii'—leaves variegated with yellow and red; 'White Cloud'—flowers more numerous, bracts white; 'Xanthocarpa'—fruit yellow.“Aphids may be controlled by spraying them with a strong stream of water from the garden hose.Several borers will attack dogwood. Try to keep the trees healthy with regular fertilization, and irrigation during dry weather. Indications of borer problems are holes in the trunk, leaves smaller than normal, and dieback of the crown.Dogwood club gall midge causes galls at the branch tips. The leaves on affected branch tips may be distorted and the branch may fail to form a flower bud. Prune out the galls as soon as they are seen.Leaf miners cause brown blister-like mines on the undersides of leaves. The adult leaf miner skeletonizes the leaves.Scales can build up to large numbers before being detected. Horticultural oil will help control overwintering stages.Twig girdlers prune the tips of small branches. They are more of an annoyance than a serious problem unless you are a nursery operator.“Dogwood anthracnose may be the biggest concern with growing flowering dogwood. Infection is favored by cool, wet spring or fall weather. Drought and stressed trees appear to be most affected, as are those at higher elevations. Trees on the coastal plain may be much less likely to become affected. Consecutive years of infection can kill trees. Keep the tree healthy with regular irrigation in dry weather but avoid overhead irrigation. Plant the tree in an area which allows the leaves to stay as dry as possible. Consult a local pathologist for the latest in control measures. Cornus kousa is thought to be resistant to anthracnose and it can be planted in areas where anthracnose is a problem. It is a very beautiful tree.Early symptoms of dogwood canker are smaller and paler leaves than normal. Leaves on infected branches are red earlier in the fall. At first the symptoms appear only on the infected side of the tree but become more general as the canker enlarges. T
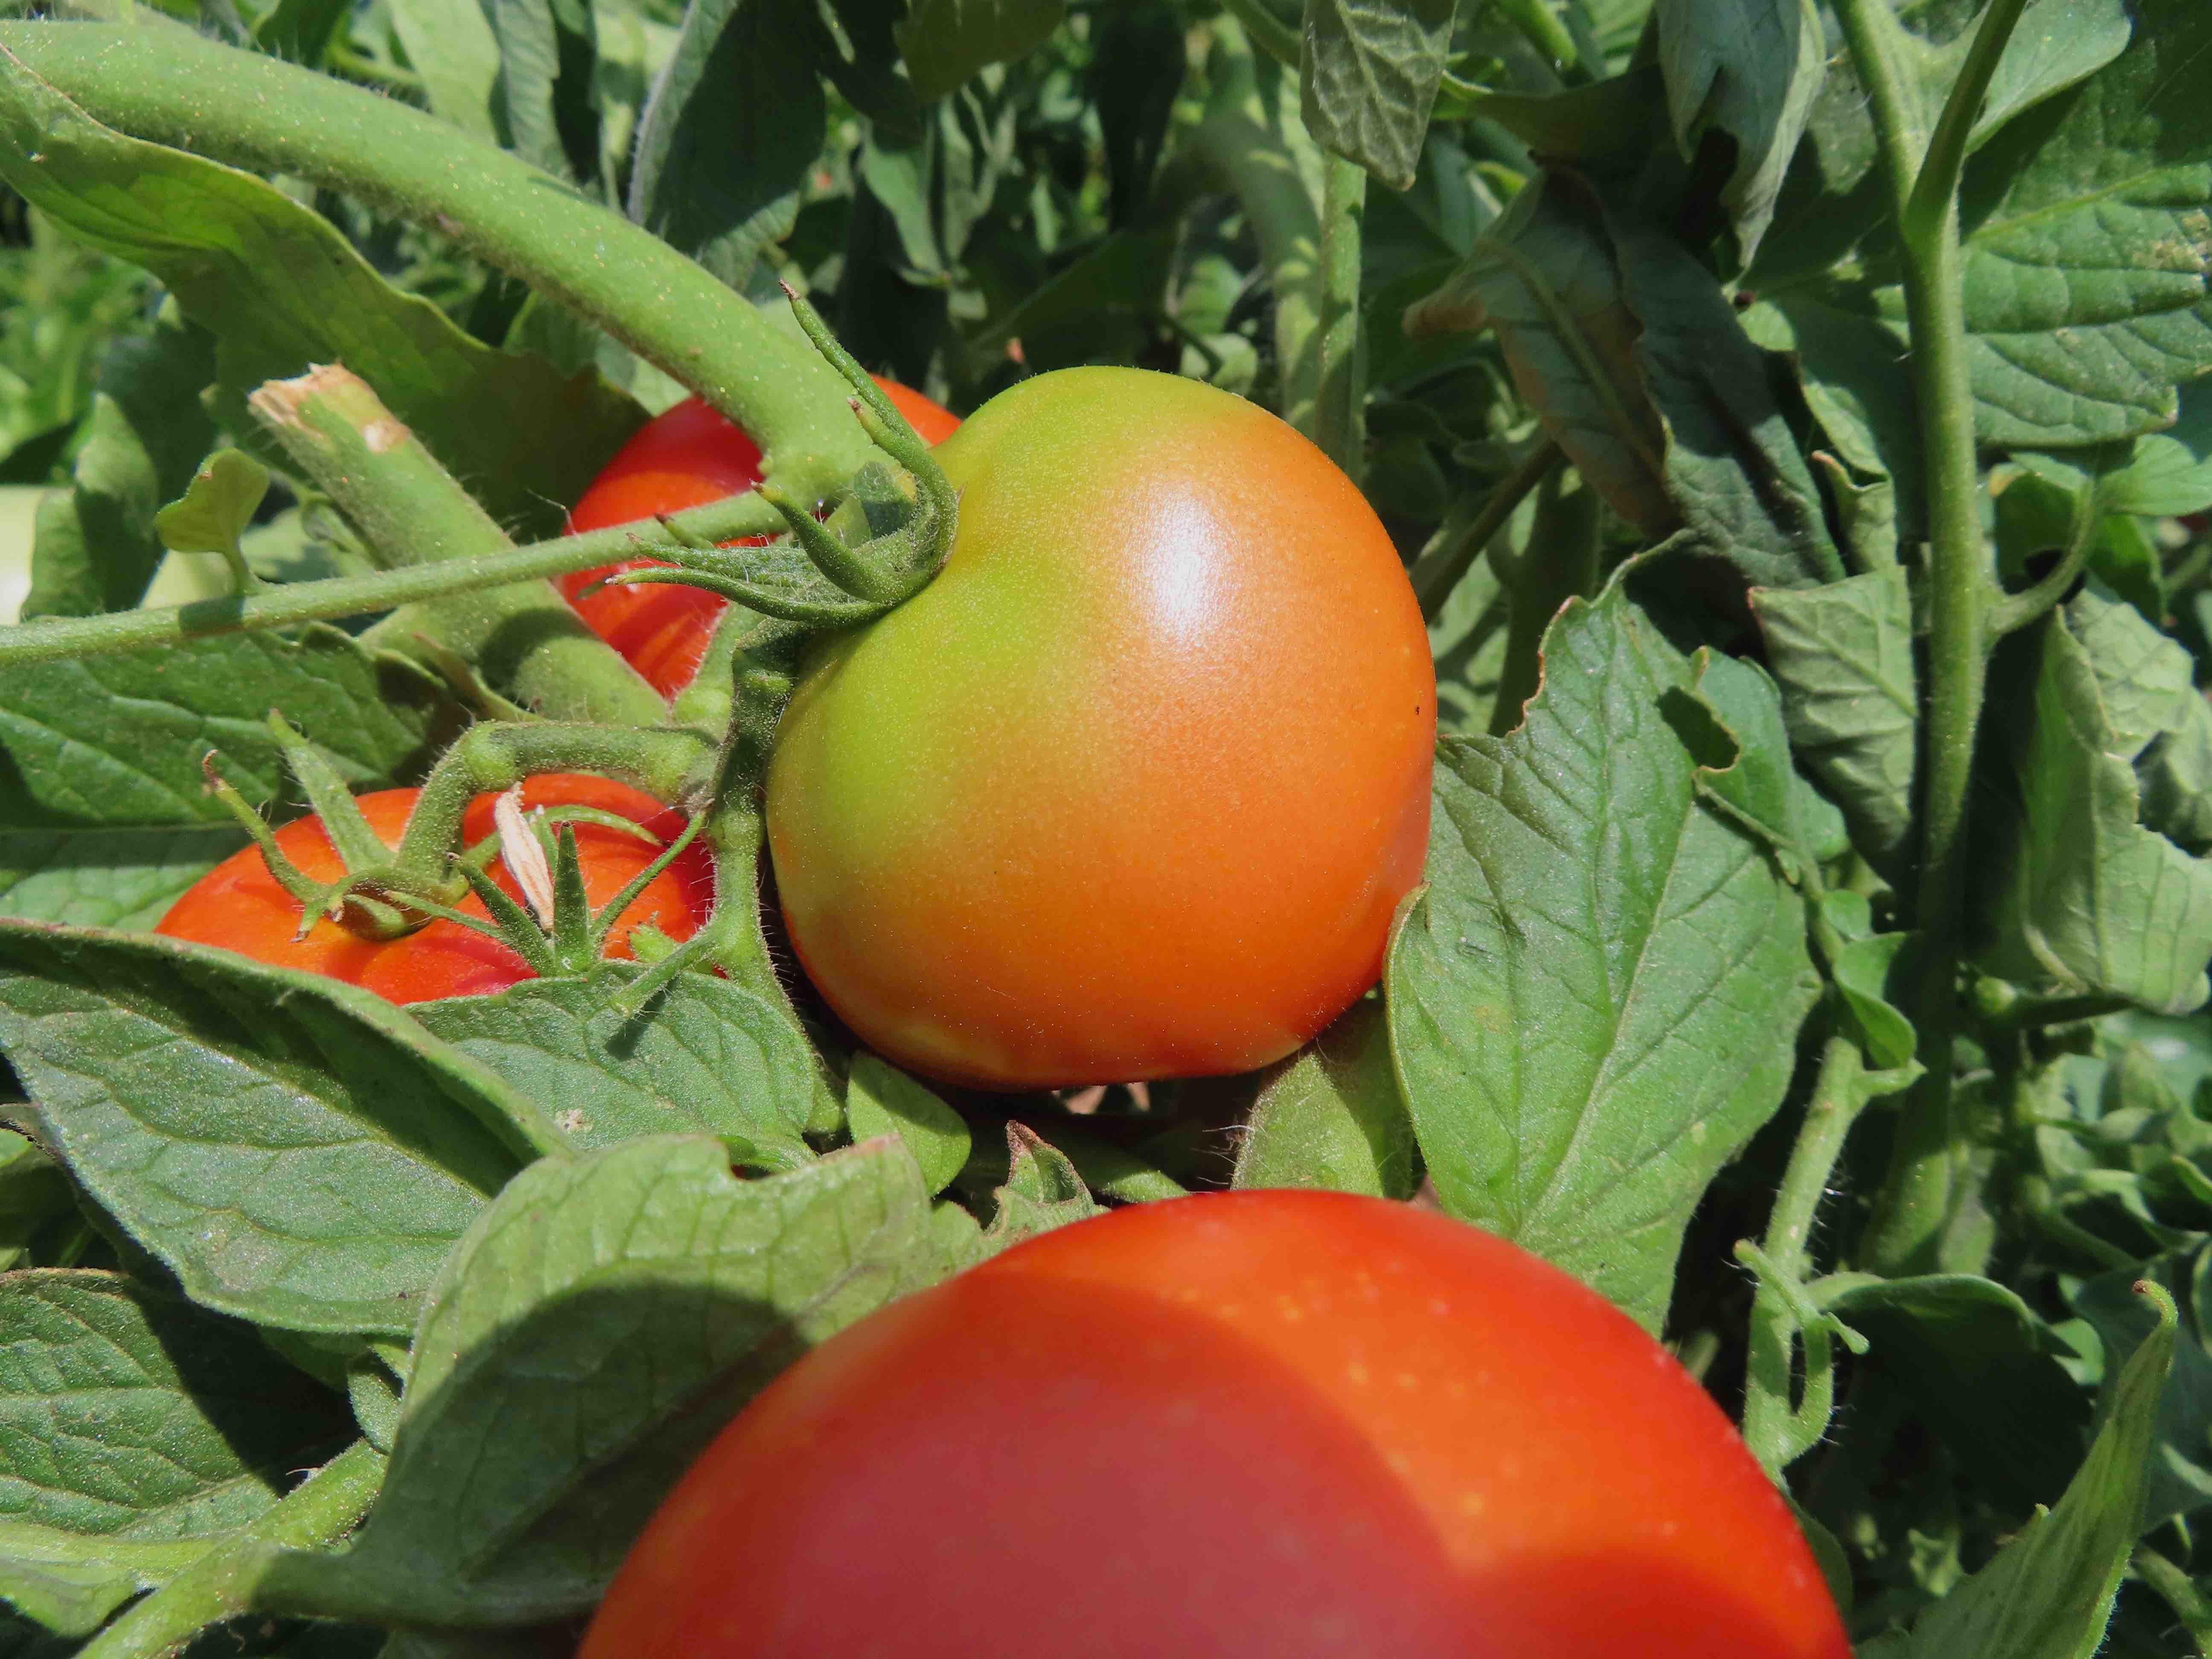
Tomatoes Not Ripening? Blame the Heat.
Back in July, we discussed “Six Common Tomato Problems.” Among those maladies were abiotic disorders (problems that are caused by factors such as weather, soils, chemicals, mechanical injuries, or cultural practices; and, not caused by insects or disease). Tomato abiotic disorders include blossom end rot, fruit cracking, leaf rolling, solar yellowing, sunburn, and tomato flower drop…all related to weather or watering issues. In that column, I mentioned we would tackle an annual tomato-related issue, tomato worms, in a future edition. Well, here it is, in the podcast, above. America’s Favorite Retired College Horticulture Professor, Debbie Flower, waxes rhapsodic about the three “worms” (caterpillars, really) that can damage your tomato plants: Tomato/Tobacco hornworm, tomato fruit worm, and tomato pinworm, along with the moths that laid those eggs. She reassures us that nature has supplied us with plenty of “good guys” to help control these munchers and burrowers. Links that are listed in the notes for that podcast include: descriptions of tomato hornworm, fruit worm, and pinworm; and two posts from the Farmer Fred Rant blog, “Plants that Attract Beneficial Insects”; and, “The Good Bug Hotel”.Today’s Beyond the Garden Basics newsletter tackles another abiotic disorder: tomatoes that are slow to ripen because of heat spikes this summer. And who hasn’t suffered through that this year? (Put your hand down, San Francisco.)Why Are My Tomatoes Slow to Ripen?From the garden e-mail bag, Vinnie asks: “My tomatoes are very slow to turn from orange to red, and several have yellowing as my bushes are not as leafy as I would like. They also are rather firm, though the plants have done well up to this point, with a decent amount of fruit as well as setting new tomatoes higher up on the plant. My “Sweet Million” cherry tomatoes also are having difficulty turning red, the same with the “Early Girl” and “Champion” full-size tomatoes. I planted the tomatoes in mid-April. They only get about six to eight hours of direct sun, depending on the season. But it seems I’ve had tomatoes for weeks at the same state of not turning fully red in color, so I was a little curious and disappointed in that. The plants are healthy, but not very bushy.”You are not alone, Vinnie. Many area gardeners are wondering about the lack of color of their tomatoes now, in late summer. Blame the triple-digit heat spikes that have occurred coast to coast for the slowdown this summer.Researchers from across the country have studied the effect of excess heat on ripening tomatoes. Their consensus: don’t worry, be happy. Those tomatoes will still be edible. And if you want to speed up the ripening process, harvest those tomatoes that are beginning to show color before the next forecast triple digit heatwave hits. Let them ripen indoors, in a dark place on the kitchen counter.However, too much shade or lack of foliage on outdoor plants can also impede ripening tomatoes.The University of California’s Contra Costa County Master Gardeners Newsletter says: “A key resource that tomatoes need for ripening is plenty of leaf surface for photosynthesis. Often by late summer, some of the leaves on the tomato have started to dry up and wither and are no longer helping to nourish the plant. The plant is less vigorous than it was earlier in the season, so it takes longer for the green tomatoes to ripen. If you've run out of patience with slow ripening tomatoes, one thing you can do to speed up ripening is to remove some of the green tomatoes. Then the tomato plant can put all its energy into ripening the tomatoes that remain on the plant.“Soil temperatures are also important. For optimal growth, tomatoes need soil temperatures that are less than 80 degrees. Hot air temperatures raise the soil temperature. Containers may be particularly vulnerable to soil temperature rise if they sit in the hot afternoon sun. Mulching can help keep soil temperatures lower. Also, if your tomatoes are hit by afternoon sunshine, you might consider erecting some shade barriers to keep the sun off the containers.“If you've run out of patience with slow ripening tomatoes, one thing you can do to speed up ripening is to remove some of the green tomatoes. Then the tomato plant can put all its energy into ripening the tomatoes that remain on the plant. You can ripen the green tomatoes you remove on your kitchen counter. They won't be as yummy as the ones that ripen on the vine, but they're still better than store bought tomatoes.”As a final caution, don't be tempted to fertilize the tomato plant thinking it will speed up production. Fertilizing now will probably just cause the tomato to go into a vegetative growth mode that is too late in the season to be helpful.”Kansas State University chimes in: “Tomato color can also be affected by heat. When temperatures rise above 95 degrees, red pigments don’t form properly, though the orange and yellow pigments do. This results in orange fruit. It doesn’t af
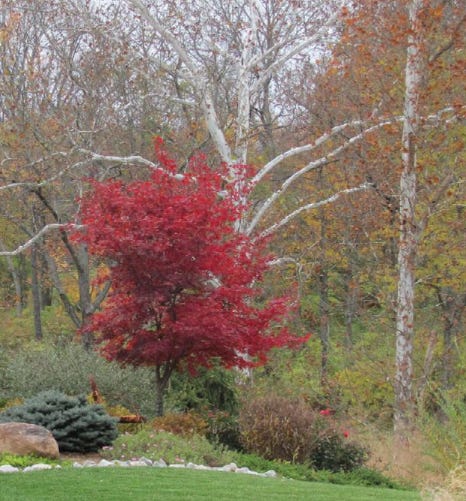
Japanese Maples vs. the Heat of Summer
If you own a Japanese maple tree, or pass by one on your daily strolls, check the leaves. Are they getting a little brown around the edges? Are the leaves beginning to fall off? Welcome to late August and early September, where the quadruple whammy of triple digit temperatures, hot dry winds, reflected heat from a nearby wall/concrete surface, or irregular watering can make many Japanese maples start to suffer. Note the location of those Japanese maple trees. Are they in full sun more than six or eight hours a day? Is it facing a direction where winds are common in the hot afternoon? Around here, it is primarily west and southwest winds.Although most Japanese maples prefer morning sun and afternoon shade, there are several varieties that can take the full sun.Chris Aycock of El Dorado Nursery and Gardens in Shingle Springs, CA has his favorite Japanese maples for sun or partial sun. “An old standard is the ‘Bloodgood’ Japanese maple,” says Aycock. “It gets about 20 feet tall and wide. If you want something smaller, ‘Fireglow’ is a nice 12 to 15 foot, upright growing variety. If you're looking for a lace-leaf Japanese maple, ‘Orangeola’ is one of my favorites. It's a very fast growing, cascading lace-leaf-style Japanese maple, with orange-red foliage. It’s very tough and very vigorous.” Hear more of Aycock’s comments and tips about Japanese maple trees in today’s newsletter podcast (above).Scott Paris of High Hand Nursery in Loomis, CA says he has found three Japanese maples for sunny areas in Northern California: ‘Seiryu’, ‘Pine Bark’, and ‘Tobiosho’.“The ‘Seiryu’ is amazing,” says Paris. “It is the only upright growing lace-leaf variety. With its beautiful red fall color, it is a showstopper. When stressed in the heat, it is very rare that it flags. Instead, it gets a cinnamon hue.”Paris is also high on the ‘Pine Bark’ Japanese maple. “This has cool-looking leaves, and the bark resembles a pine tree, with stunning red fall color.”One of Paris’ most consistent performers among Japanese maple trees is the ‘Tobiosho’. “It’s a basic green maple in the summer,” Paris explains. “People usually cruise by it and yawn. But no, this maple is a consistent grower with outstanding fall color.”That’s good information if planting a Japanese maple is on your fall to-do list. But for those with suffering Japanese maples right now, here are some do’s and don’ts.• If the leaves on the Japanese maple tree are browning, fight the urge to pull them off. Those browning leaves, while hanging on the tree, can help the tree avoid sunburn to the branches and trunks.• Be careful with watering. Check the soil moisture at a depth of eight or 10 inches before you irrigate. Japanese maples need regular watering, but too much standing water can lead to soil-borne diseases in the root area.• Remove any lawn beneath the tree that is competing for the water. Because turf roots are shallower, they will get first dibs on any water from sprinklers or drip irrigation systems.• Add mulch beneath the tree to help preserve a more consistent soil moisture level. Arborist Anne Fenkner of Davey Tree Company suggests the “4-4-4” rule for mulching beneath trees: “Place wood chips that are four inches deep, starting four inches away from the trunk of the tree, and extend that mulch four feet out all around the tree.”• Aycock seconds that mulching motion, with an added tip: “Mulching is very critical, it helps keep the roots cool. Although we will recommend full sun for quite a few of the varieties, we will tell you to plant it away from the house so there's no reflective heat. You're better to have it out in the open rather than up against a hot wall.”• Don’t fertilize a suffering Japanese maple in the heat of the summer. The best season for a single application of fertilizer for Japanese maples, according to Paris, is spring. “Japanese maple trees are not greedy,” says Paris. “But maples resent quick-release ammonium sources of fertilizer. Apply in early spring and not more than once a year.” All-purpose, slow-release organic fertilizers, usually with nitrogen, phosphorus, and potassium content in the single digits, are widely available. Remember, too, that as the mulch layer around your Japanese maple tree breaks down, it is feeding the soil, too.Thanks for reading Beyond Basics: The Garden Basics with Farmer Fred Newsletter! Subscribe for free to receive new posts and support my work.Thank you for also listening to the Garden Basics with Farmer Fred podcast! It’s available wherever you get your podcasts, including our home page, GardenBasics.net . Please share it with your gardening friends.Fred Hoffman is also a University of California Cooperative Extension Master Gardener in Sacramento County. And he likes to ride his bike(s). This is a public episode. If you'd like to discuss this with other subscribers or get access to bonus episodes, visit gardenbasics.substack.com/subscribe
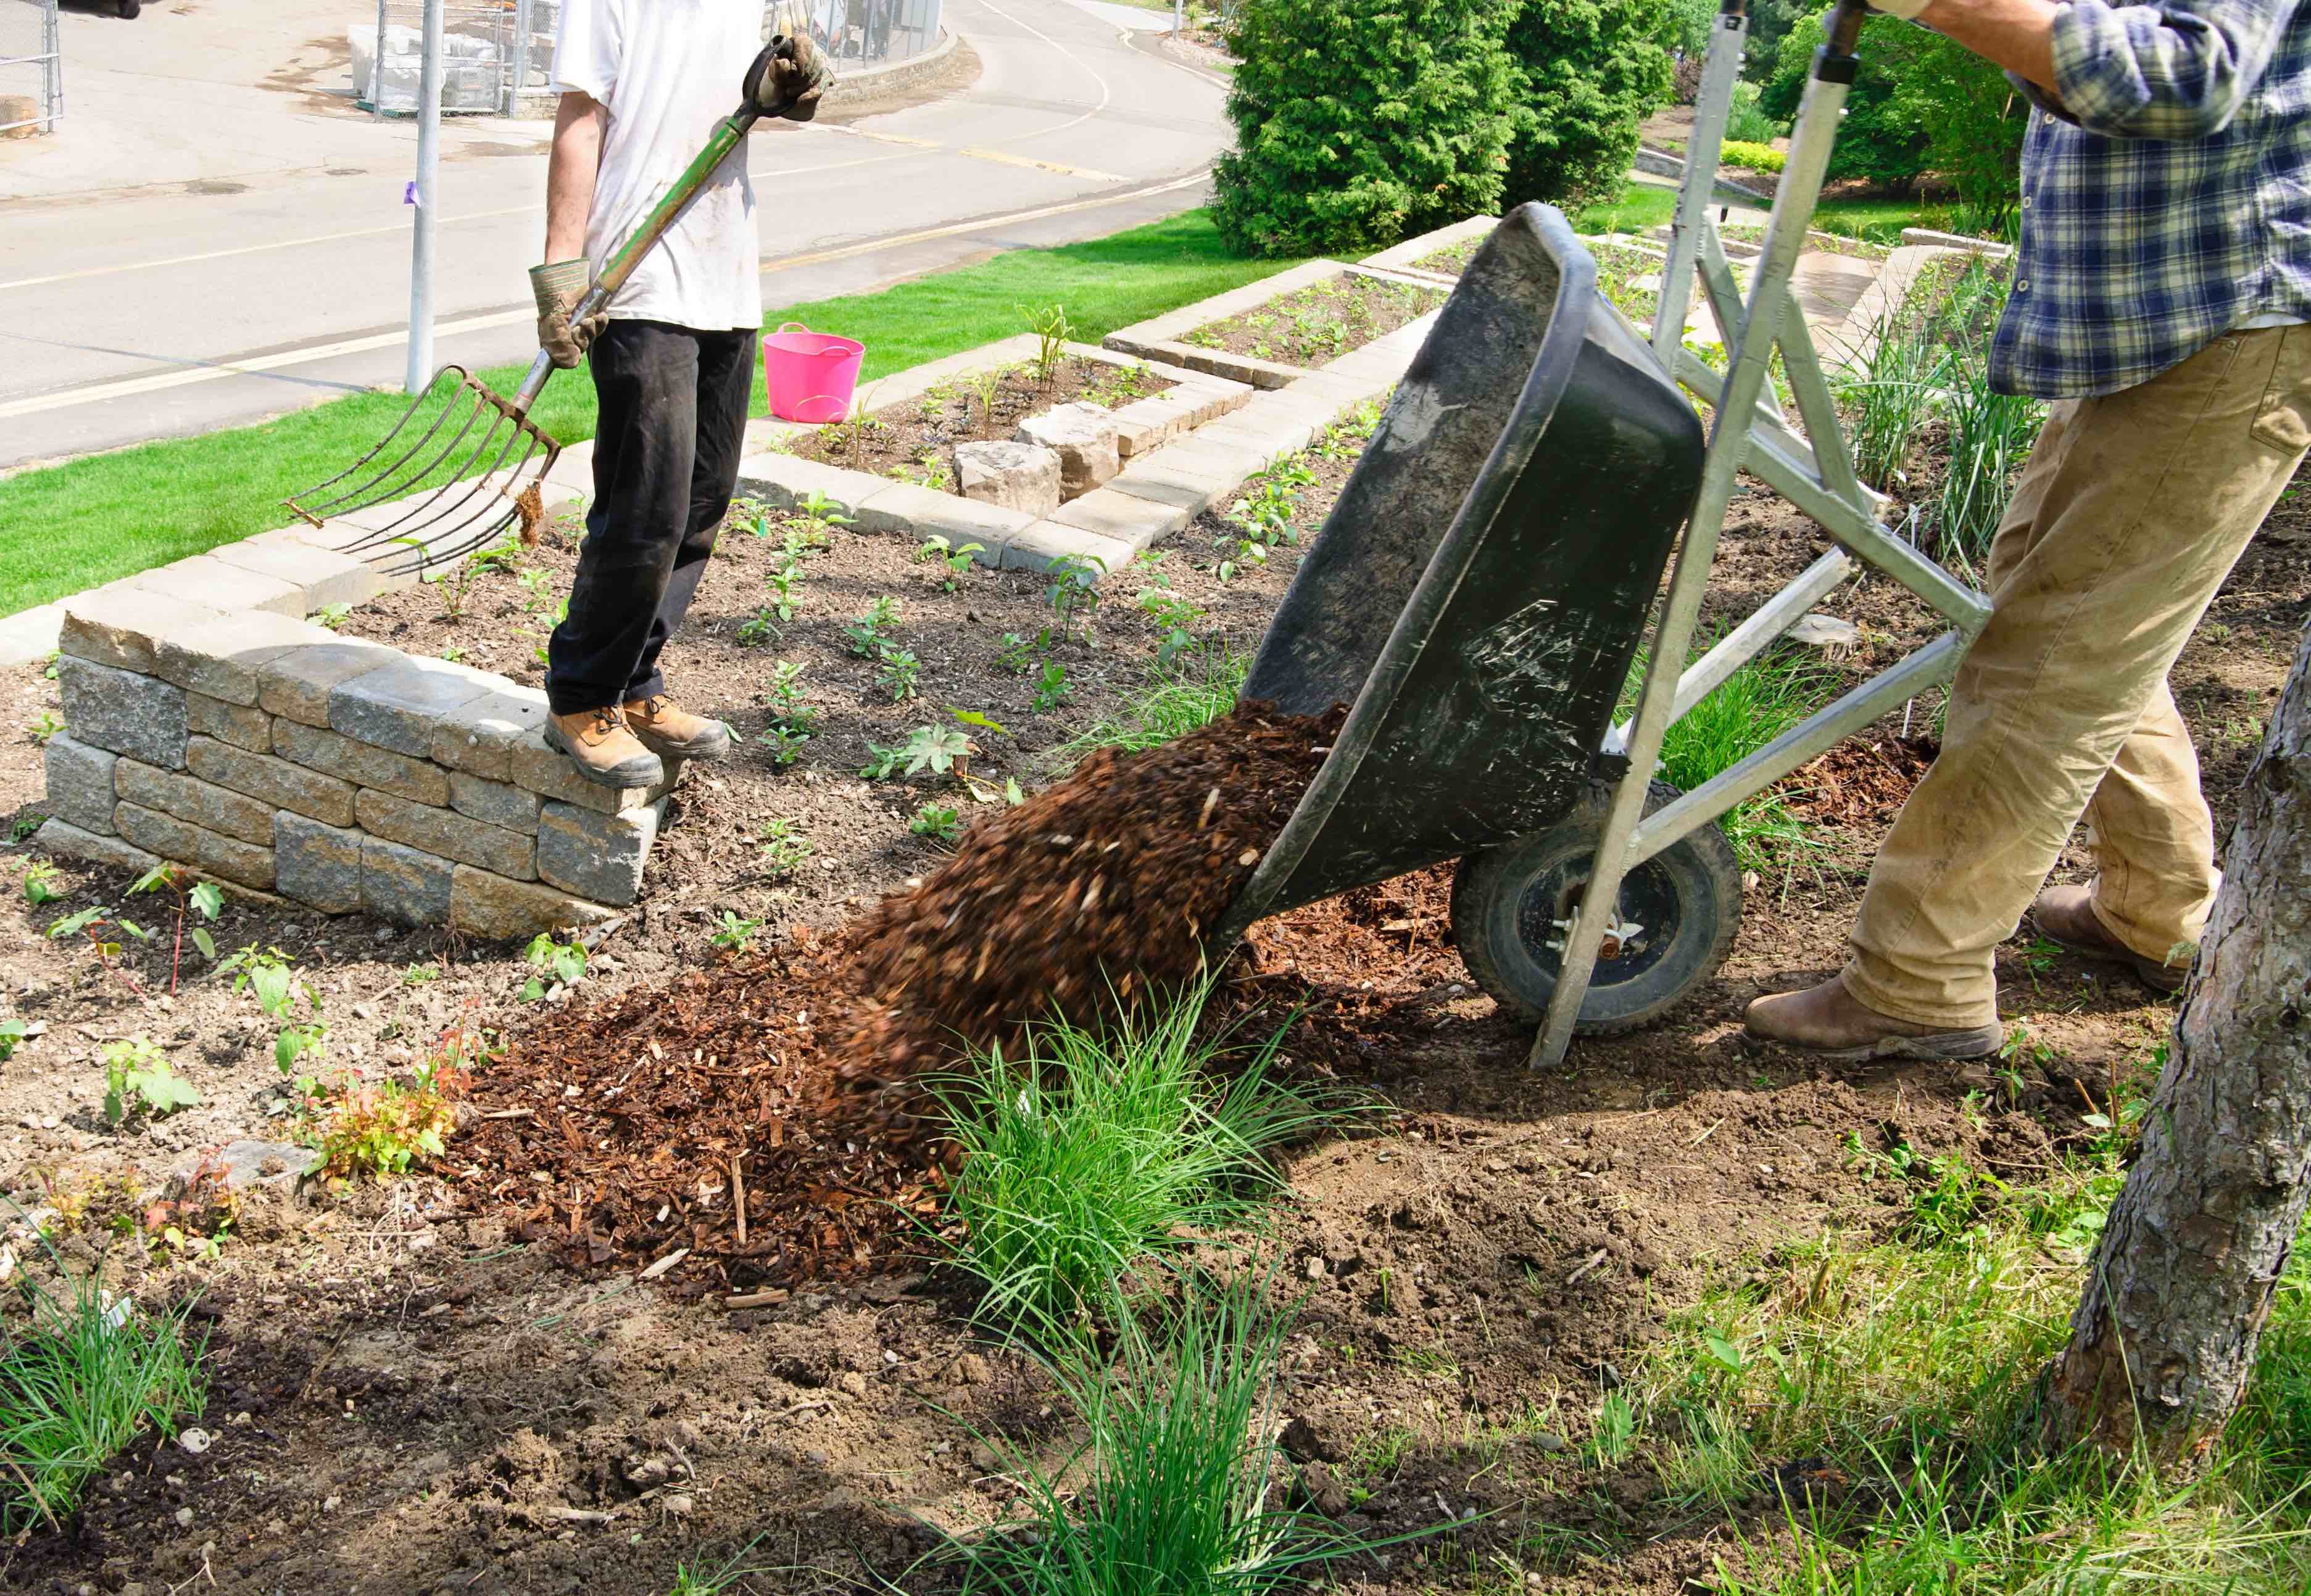
More Hot Weather Garden Tips
In today’s Beyond the Garden Basics Newsletter podcast (above), Debbie Flower and I tackle a question from Liz, who asks: “I just purchased from the local nursery, a lavender plant and also a sage. I'm sorry, I don't know the exact name. But they're common. The plants were in pots. Each plant is about one foot tall. I already planted them in the yard early yesterday morning. They were fine all day yesterday. Everything was moist, the soil was prepped. Today is 100 degree weather. They are not looking like they're happy campers. So I'm wondering about these drought tolerant plants. I don't want to overwater them. Is this wilting natural, or should I be doing something else?”We have tips for Liz. Tip #1:Heat Protection for Your PlantsBursts of triple-digit temperatures are occurring across the United States this summer, lasting anywhere from a couple of days in a row, to weeks on end (hello, Phoenix!). However, even for short periods, the combination of too much bright sun, too much heat and not enough water are enough to vex the garden as well as the most experienced gardeners when they encounter sickly-looking plants this time of year.First of all, take care of yourself in the heat. Work early in the morning in the sunny areas, work in the shade in late mornings, then wrap things up for the day (if possible). Wear sun protection and take plenty of water breaks. According to the garden experts at the University of California’s Agriculture and Natural Resources Division, here are four quick and easy ways to help make sure your perennials, shrubs and trees not only survive, but also thrive in the summer heat.• Add mulch, mulch, and more mulch. When temperatures get extreme, having a good layer of mulch prevents soil from heating up excessively and losing water to evaporation. Apply four inches of a medium shredded bark mulch to insulate the soil. This protects the fine roots that plants use to feed from the surrounding soil. Mulch also helps maintain healthy soil ecology with earthworms and other de-composers that promote nutrients and oxygen in soil. Mulch will pay for itself by maintaining more consistent soil moisture so you can water less and have better success with your plants. Be sure to maintain the depth of your mulch to ensure you can benefit from all the services it provides.• Don't fertilize permanent plants during hot summer months. When a fertilizer is applied, especially one that is high in nitrogen, a plant is triggered to produce more green growth. An increase in growth means an increase in water and nutrient needs. During hot spells, it is especially hard to keep up with plant water and nutrient needs as soils dry out quickly and water may not be readily available. Save your plants from stress by stopping fertilizer application when triple digit temperatures are forecast. However, warm season annuals should continue to be fertilized.• Water trees deeply and less frequently. “When watering trees you want to consider the roots below the tree and you want to encourage a network of deep roots. If you are only watering for short periods at a higher frequency, the roots will remain shallow since that is where the tree finds its water supply,” said Janet Hartin, UC ANR environmental horticulture advisor. “Deep roots mean a healthier tree that is less susceptible to disease.”In general, young plants or new transplants require more water than older, more established plants. Clay soils absorb water slowly so watering can take longer but is typically done less frequently. This is a contrast to sandy soils that moisten and drain quickly. Typically, watering sandy soils is done more frequently.• Wait to introduce new shrubs or trees until the fall when the weather is cooler. Because root systems on new plants are smaller and need time to develop, these plants require more water, more frequently. New plants introduced into a landscape during hot summer months have a significantly higher rate of failure. On the other hand, plants will take root more easily when air temperatures are in the 70’s, yet soil temperatures are still warm. Container Plants vs Heat? Smart Pots is a WinnerAnother tip (self-serving, but true, based on personal experience): Keep the soil from overheating in container plants located in full sun by growing them in Smart Pots, whose porous, yet sturdy fabric structure allows the soil to remain as much as 30 degrees cooler than plants grown in plastic pots; 10-15 degrees cooler than plants grown in fiber or terracotta pots.This is why we like say, “Fall is for gardening!”For more hot weather gardening tips, check out the July 21st edition of this newsletter.Thank you for also listening to the Garden Basics with Farmer Fred podcast! It’s available wherever you get your podcasts. Please share it with your garden friends.Fred Hoffman is also a University of California Cooperative Extension Master Gardener in Sacramento County. And he likes to ride his bike(s). This is a public episode. If you