
The Principles of War - Lessons from Military History on Strategy, Tactics, Doctrine and Leadership.
211 episodes — Page 2 of 5

S1 Ep 106106 - Combined Arms Doctrine Development in the First World War
This is the first in a three part interview with Dr Robert Lyman about 'Victory to Defeat: The British Army 1918-40', a book he cowrote with Lord Dannatt, who served as the Chief of the General Staff from 2006 to 2009. This episode looks at the doctrine development that occurred in the First World War as the British Army developed it's skills in Combined Arms, culminating in the ability to fight and win the battles of the 100 days. We look to answer the question - how does an Army learn to learn, whilst in contact. Check out the show notes for this Professional Military Education podcast for all of the information that we cover in this episode as well as the images and other details that didn't make it into the podcast. There is also a catalog of episodes on Leadership, the Principles of War, military history and Mission Command.
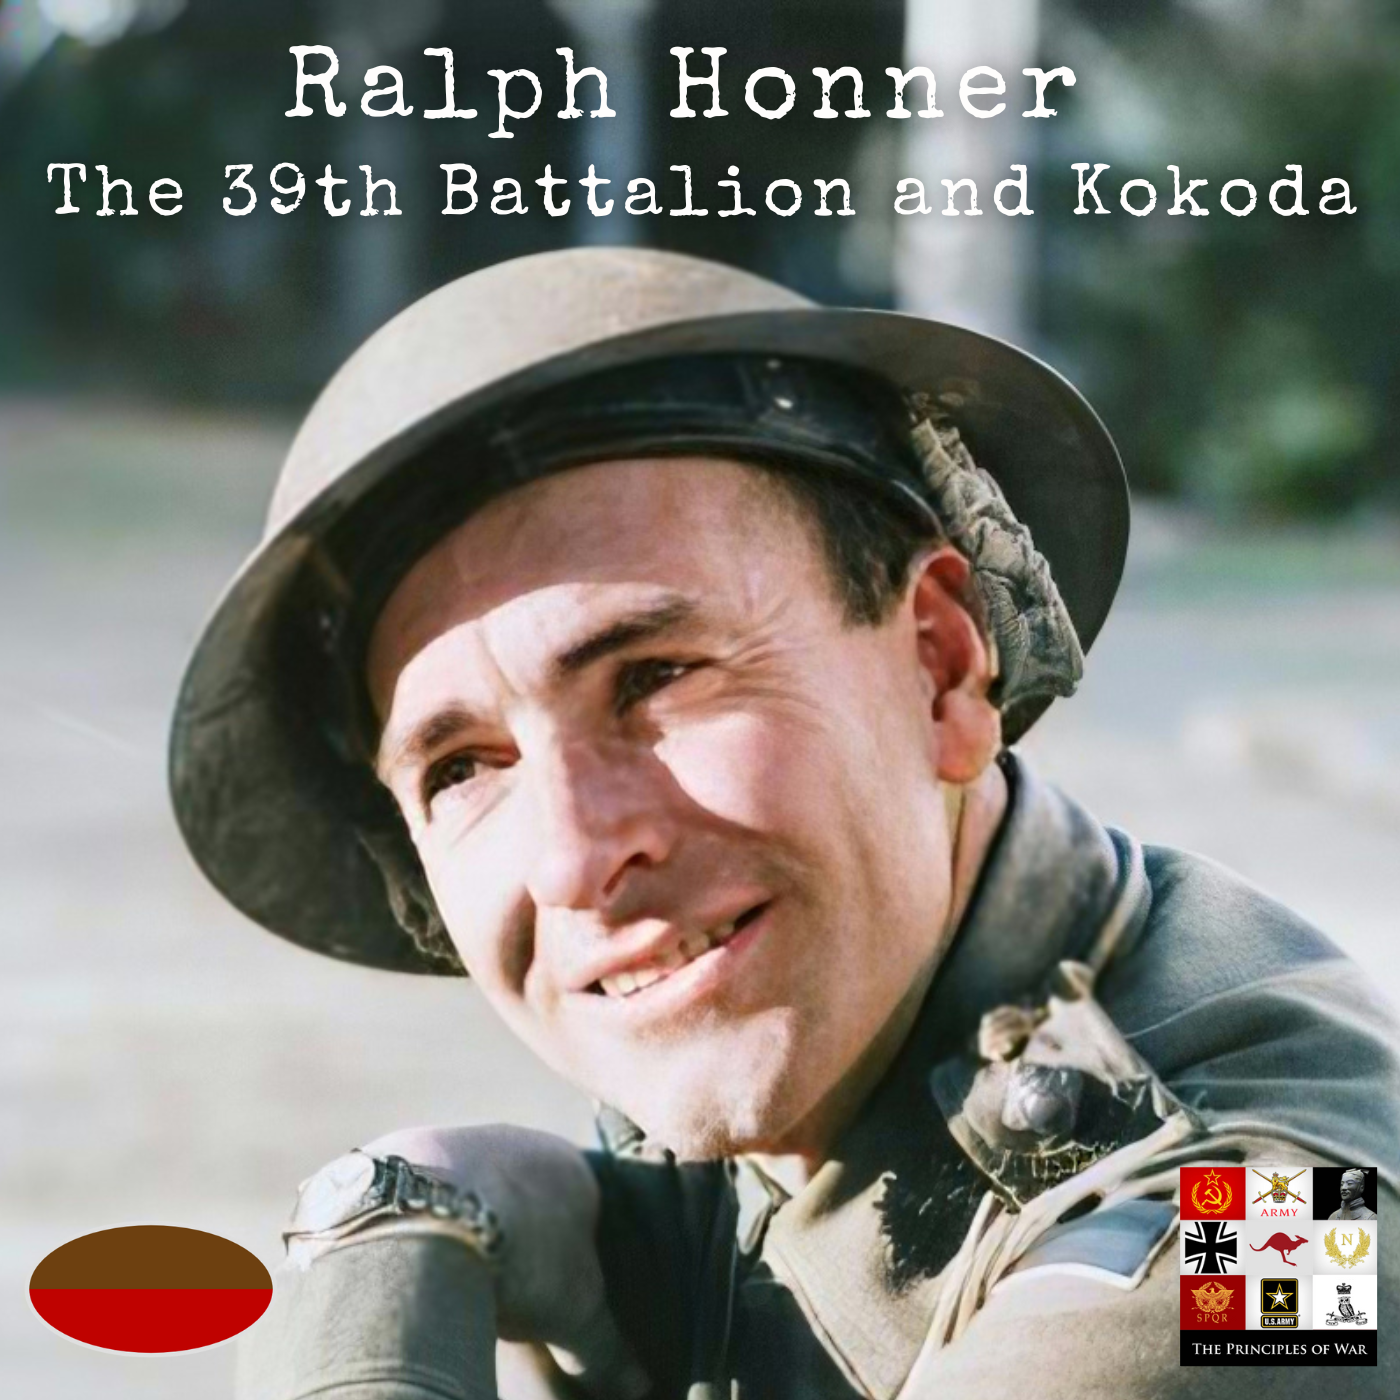
S1 Ep 105105 - Ralph Honner, the 39th Battalion and Kokoda
This is Part 10 of our series looking at the Kokoda Campaign, looking at the combat performance of the 39th Battalion. The 39th Battalion was one of Australia's best Battalions. Formed in Victoria, it's story is similar to that of the 53rd Battalion- but with some key differences. We look at those differences with Dr David Cameron, an expert on the Battles of the Kokoda campaign. Have a listed Dr David Cameron, an expert on the Kookoda Campaign as he discusses the history and performance of the 39th Battalion. Check out the show notes for the podcast for all of the information that we cover in this episode as well as the images and other details that didn't make it into the podcast. Dr David Cameron's Biography David Cameron received first class Honours in Prehistory, University of Sydney and a PhD in Palaeoanthropology, Australian National University. He has written over twenty books covering Australian Military History, Colonial History, and Evolutionary Science with over 70 internationally peer reviewed papers published in various journals and book chapters. He is a former Australian Research Council Post Doctoral Fellow, School of Archaeology, Australian National University; and an Australian Research Council QEII Fellow in the Department of Anatomy and Histology, University of Sydney. He has conducted and led several international fieldwork projects in Europe (Hungary), Asia (Vietnam, India, and Japan), and the Middle East (Turkey, Jordan, Israel, and the United Arab Emirates) and conducted extensive museum studies and conferences (United States, Europe, and Asia). Before retiring in 2023, he was a senior analyst in the Australian Intelligence Community. Books on the Papua Campaign by Dr Cameron: Cameron, D.W. (in preparation – December 2024.) The Battle for Milne Bay, Big Sky Publishing Cameron, D.W. (in preparation – August 2024) Sanananda, Bastard of a Place: The Battle for the Beachhead, 1942-43, Big Sky Publishing Cameron, D.W. (in press – November 2023) Bloody Buna: The Battle for the Beachhead, 1942-43, Big Sky Publishing Cameron, D.W. (2023) Gona's Gone: The Battle for the Beachhead 1942, Big Sky Publishing Cameron, D.W. (2022) Retaking Kokoda: The Australian Advance Across the Owen Stanleys, Big Sky Publishing Cameron, D.W. (2022) Saving Port Moresby: Fighting at the End of the Kokoda Track, Big Sky Publishing Cameron, D.W. (2022) The Battle for Isurava: Fighting on the Kokoda Track in the heart of the Owen Stanleys, Big Sky Publishing Cameron, D.W. (2020) The Battles for Kokoda Plateau: Three Weeks of Hell Defending the Gateway to the Owen Stanleys, Allen & Unwin Australia

104 - The 39th Battalion on the Kokoda Track
This is Part 9 of our series looking at the Kokoda Campaign, looking at the combat performance of the 39th Battalion. This episode discusses the formation of the 39th Battalion, it's preparation for combat and how it performed on the Kokoda Trail. The 39th Battalion is one of the Australian Army's most famous Battalion, a militia battalion that bore the brunt of the Japanese attacks down the Kokoda track. What enabled it to fight so well? Have a listed Dr David Cameron, an expert on the Kookoda Campaign as he discusses the history and performance of the 39th Battalion. Check out the show notes for the podcast for all of the information that we cover in this episode as well as the images and other details that didn't make it into the podcast. Dr David Cameron Biography David Cameron received first class Honours in Prehistory, University of Sydney and a PhD in Palaeoanthropology, Australian National University. He has written over twenty books covering Australian Military History, Colonial History, and Evolutionary Science with over 70 internationally peer reviewed papers published in various journals and book chapters. He is a former Australian Research Council Post Doctoral Fellow, School of Archaeology, Australian National University; and an Australian Research Council QEII Fellow in the Department of Anatomy and Histology, University of Sydney. He has conducted and led several international fieldwork projects in Europe (Hungary), Asia (Vietnam, India, and Japan), and the Middle East (Turkey, Jordan, Israel, and the United Arab Emirates) and conducted extensive museum studies and conferences (United States, Europe, and Asia). Before retiring in 2023, he was a senior analyst in the Australian Intelligence Community. Books on the Papua Campaign by Dr Cameron: Cameron, D.W. (in preparation – December 2024.) The Battle for Milne Bay, Big Sky Publishing Cameron, D.W. (in preparation – August 2024) Sanananda, Bastard of a Place: The Battle for the Beachhead, 1942-43, Big Sky Publishing Cameron, D.W. (in press – November 2023) Bloody Buna: The Battle for the Beachhead, 1942-43, Big Sky Publishing Cameron, D.W. (2023) Gona's Gone: The Battle for the Beachhead 1942, Big Sky Publishing Cameron, D.W. (2022) Retaking Kokoda: The Australian Advance Across the Owen Stanleys, Big Sky Publishing Cameron, D.W. (2022) Saving Port Moresby: Fighting at the End of the Kokoda Track, Big Sky Publishing Cameron, D.W. (2022) The Battle for Isurava: Fighting on the Kokoda Track in the heart of the Owen Stanleys, Big Sky Publishing Cameron, D.W. (2020) The Battles for Kokoda Plateau: Three Weeks of Hell Defending the Gateway to the Owen Stanleys, Allen & Unwin Australia

S1 Ep 103103 - Principles of Training for War
This is Part 8 of our series looking at the Kokoda Campaign, Battle of Isurava, the 53rd Battalion, how they fought and how they were prepared to fight. This episode looks at the Principles of Training and how they were(n't) applied by New Guinea Force. We compare it with the preparation of the 6th Division in preparation for it's first battle at Bardia. Bardia illustrates what right looks like for preparing troops for combat. Check out the show notes for the podcast for all of the information that we cover in this episode as well as the images and other details that didn't make it into the podcast.
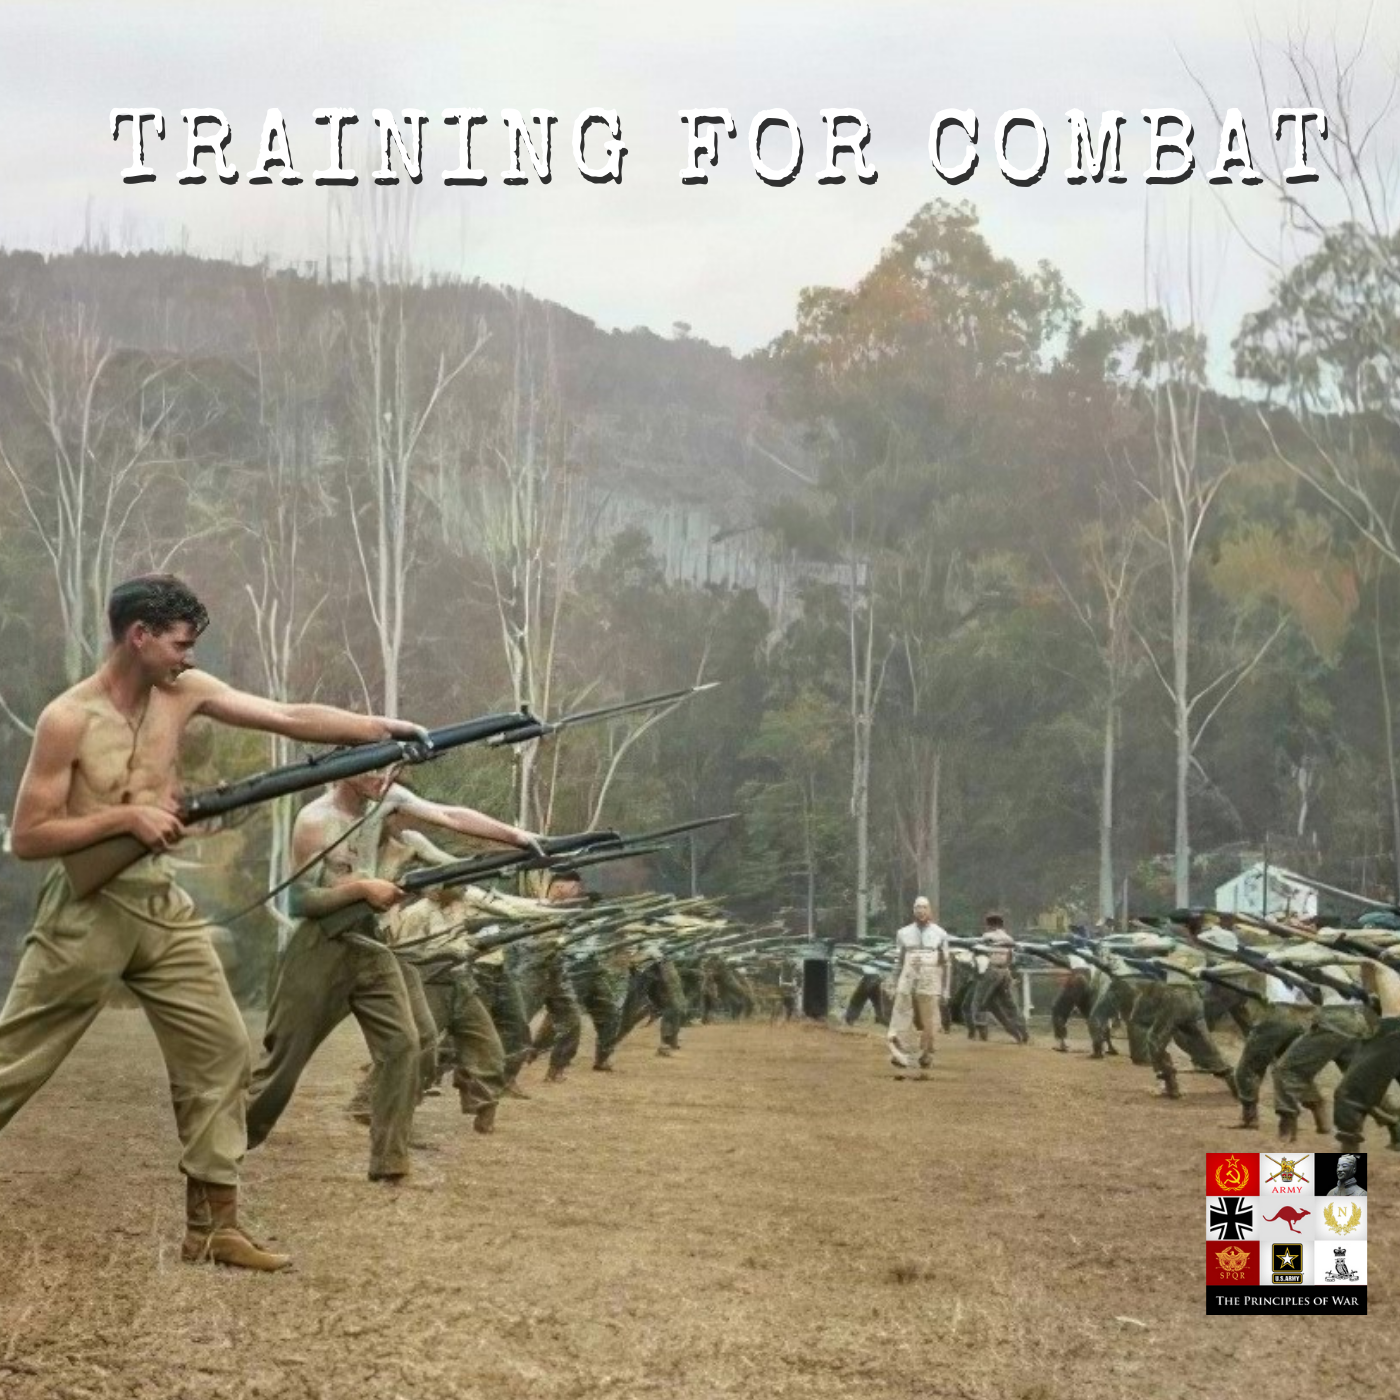
S1 Ep 102102 - Training a Battalion for War
This is Part 7 of our series looking at the Battle of Isurava, the 53rd Battalion, how they fought and how they were prepared to fight. This episode looks at the arrival of both the 39th and 53rd Battalions to Port Moresby, the conditions that they encountered and how that impacted their preparation for combat. What was a day in the life of the soldiers like? How well were the soldiers trained? What were their weapon handling skills like? How well prepared were they for combat in the Jungle? Check out the show notes for the podcast for all of the information that we cover in this episode as well as the images and other details that didn't make it into the podcast.

S1 Ep 100100 - The fall of Isurava
This is the fifth episode in our Kokoda Track series looking at the performance of the 53rd Battalion. The 53rd, a militia Battalion, had some incredibly brave men. Virtually untrained, poorly equipped, with inexperienced leaders, they fought a battle-hardened enemy in some of the worst terrain in the world. This episode looks at the fall of Isurava. Japanese troops in increasing numbers, with increasing persistence and increasing ferocity forced Australian troops to withdraw. Australian efforts to retake Kokoda will need to wait for another day. Check out the show notes for the podcast for all of the information that we cover in this episode as well as the images and other details that didn't make it into the podcast.

Ep 101101 - Mobilisation Mistakes with the Mice of Moresby
This is the sixth episode in our Kokoda Track series looking at the performance of the 53rd Battalion. The 53rd, a militia Battalion, had some incredibly brave men. Virtually untrained, poorly equipped and with inexperienced leaders, they fought a battle-hardened enemy in some of the worst terrain in the world. This episode looks at the mistakes in mobilisation that we made that sowed the seeds for the performance of the Battalion on the Kokoda Track at the Battle of Isurava. What are the similiarities between the formation of the 53rd Battalion and the mobilisation of Russian Reserves for the war in Ukraine? How was the Battalion formed? What was the Shanghai incident? How did they get to Port Moresby? Why were so many of the troops surprised on the Aquatania after it left port? What lessons are their we can learn from the 53rd Battalion if Australia was required to mobilise rapidly for war in the future? Check out the show notes for the podcast for all of the information that we cover in this episode as well as the images and other details that didn't make it into the podcast.

S1 Ep 9999 - The Death of a CO
This is the fourth episode in our Kokoda Track series looking at the performance of the 53rd Battalion. The 53rd, a militia Battalion, had some incredibly brave men. Virtually untrained, poorly equipped, with inexperienced leaders, they fought a battle hardened enemy in some of the worst terrain in the world. This episode looks at the events on the 27th of August, 1942. We discuss how the CO, LT COL Kenneth Ward was killed and the impact it had on the 53rd Battalion and Maroubra Force as they fought desperately to defend Isurava. Check out the show notes for the podcast for all of the information that we cover in this episode as well as the images and other details that didn't make it into the podcast.

S1 Ep 9898 - Creating the doctrinal and cultural changes for effective Mission Command with Jim Storr
This is part 2 of our interview with Dr Jim Storr, the author of Something Rotten: Land Command in the 21st Century. We discuss the correct size for a Headquarters. We discuss the selection and training of officers within the Wehrmacht. How do we affect cultural and doctrinal change within Armies to support the effective use of Mission Command? Jim Storr was an infantry officer in the British Army for 25 years. He served in the British Army of the Rhine for five years in the 1980s. A graduate of the Army Staff College, Camberley, he also worked in the Ministry of Defence, the Defence Evaluation and Research Agency, and wrote high-level doctrine. He was a professor of war studies at the Norwegian Military Academy for four years. His published works include 'The Human Face of War', 'The Hall of Mirrors' and 'Something Rotten'. Check out the show notes for the podcast for all of the information that we cover in this episode as well as the images and other details that didn't make it into the podcast.

S1 Ep 9797 - Time and the importance of timeliness in orders with Jim Storr
This episode is with Dr Jim Storr, the author of Something Rotten. Preparing a set of orders is a core function of a Headquarters. Why have today's procedures changed from the what was done in WW2, what have we learnt and are modern HQs fit for purpose? We discuss the form and functioning of Headquarters, looking at people, processes, products and purpose, comparing WW2 doctrine with what is happening today. Jim Storr was an infantry officer in the British Army for 25 years. He served in the British Army of the Rhine for five years in the 1980s. A graduate of the Army Staff College, Camberley, he also worked in the Ministry of Defence, the Defence Evaluation and Research Agency, and wrote high-level doctrine. He was a professor of war studies at the Norwegian Military Academy for four years. His published works include 'The Human Face of War', 'The Hall of Mirrors' and 'Something Rotten'. Check out the show notes for the podcast for all of the information that we cover in this episode as well as the images and other details that didn't make it into the podcast.

S1 Ep 9696 - The 53rd Battalion at Isurava during the Kokoda Campaign
This is the third episode in our Kokoda Track series looking at the performance of the 53rd Battalion. The 53rd, a militia Battalion, had some incredibly brave men. Virtually untrained, poorly equipped, with inexperienced leaders, they fought a battle hardened enemy in some of the worst terrain in the world. This episode continues to story of the 53rd Battalion as they start patrolling the jungle around Isurava. Check out the show notes for the podcast for all of the information that we cover in this episode as well as the images and other details that didn't make it into the podcast.

S1 Ep 9595 - A militia Battalion on the Kokoda Trail
This is the second episode in our Kokoda Track series looking at the performance of the 53rd Battalion. The 53rd, a militia Battalion, had some incredibly brave men. Virtually untrained, poorly equipped, with inexperienced leaders, they fought a battle hardened enemy in some of the worst terrain in the world. This episodes looks at just 4 weeks in the history of the Battalion, from when the started up the track, during their contact with the Japanese and through till the time the were order to leave the battlefield. There is much to learn from their experience. We look for lessons in training, leadership, strategic surprise and mobilisation from the 53rd on the Kokoda Trail. Check out the show notes for the podcast for all of the information that we cover in this episode as well as the images and other details that didn't make it into the podcast.
S1 Ep 9494 - The 53rd Battalion on the Kokoda Trail
This episodes starts a new series looking at the Kokoda Track at the tactical, operational and strategic levels. This series will look for lessons from the experience of the 53rd Battalion. The 53rd is a sister Battalion to the 49th and the excellent 39th Battalions. There is a marked difference between the 39th and 53rd. Despite incredible bravery, the 53rd struggled to achieve some of that tasks assigned to it (through no fault of their own.) Indeed, many of the men went on to fight bravely in the 55th/53rd and 39th Battalion after the 53rd was disbanded. We look for lessons in training, leadership, strategic surprise and mobilisation from the 53rd on the Kokoda Trail. Check out the show notes for the podcast for all of the information that we cover in this episode as well as the images and other details that didn't make it into the podcast.
S1 Ep 9393 - Chinese Deception Planning on the Yalu River, 1950
This episodes looks at PLA doctrine in 1950 and how it was used to surprise the UN forces on the Yalu River as well as looking at how deception is employed in contemporary PLA doctrine. Check out the show notes for the podcast for all of the information that we cover in this episode as well as the images and other details that didn't make it into the podcast.
S1 Ep 9292 - Deception and self deception on the Yalu River - 1950
Stunning intelligence failures, rigidity of mind and excellent Chinese tactical camouflage led to a stunning reversal of fortunes for the UN forces in late 1950 on the Yalu River? What deception measures did the Chinese use? How did MacArthur contribute to the surprise? A fascinating look at Chinese military deception and American intelligence failings. Check out the show notes for the podcast for all of the information that we cover in this episode as well as the images and other details that didn't make it into the podcast.
S1 Ep 9191 - Principles for Employment of Artillery at 2nd Alamein
This episode looks at the the principles of employment for artillery 2nd Alamein and is part of our Battles of Alamein series. We discuss Why the German artillery performed so poorly. How Montgomery's use of artillery replicated the principles of war today; and How integration was achieved with the manvoeuvre plan Check out the show notes for the podcast for all of the information that we cover in this episode as well as the images and other details that didn't make it into the podcast.
S1 Ep 9090 - Counter Battery Fires at 2nd El Alamein
This episode looks at the Counter Battery battle at 2nd Alamein and is part of our Battles of Alamein series. Ramsay and Kirkman denied Axis Artillery the ability to interfere with the commencement of Op Lightfoot. How did they do it and what role did the 4th Survey (Durham) Regiment play, along with the Desert Air Force and Engineers in constructing a process to find and neutralise Axis Artillery. How was the fire plan developed to support the infantry as they crossed the LD? Check out the show notes for the podcast for all of the information that we cover in this episode as well as the images and other details that didn't make it into the podcast.
S1 Ep 8989 - Artillery at 2nd El Alamein
This episode looks at the development of artillery doctrine leading up to 2nd Battle of El Alamein. 2nd Alamein was the apogee of Australian Artillery in the Second World War and we will look at the role that BRIG Ramsay from 9th Div Arty built a team and capability to support the 9th Div and MAJ GEN Morshead. The lessons learnt from Ex Bumper - the largest exercise ever conducted by the British Army in preparation for a German invasion of England. The required improvements in artillery C2 Centralisation at the Divisional and higher level. The lack of the AGRA - the Army Group Royal Artillery. Montgomery, who had fought in WW1, understood the impact that artillery can have and was keen to restore it's capability to delivery decisive effects on the battlefield. How did he do this? Check out the show notes for the podcast for all of the information that we cover in this episode as well as the images and other details that didn't make it into the podcast.
S1 Ep 8888 - The Role of Artillery at 2nd Alamein
We look at the roles of Artillery, including how it integrated with all of the Forces within 8th Army. 2nd Alamein is the apogee of Australian Artillery in the Second World War and we will look at the role that BRIG Ramsay from 9th Div Arty built a team and capability to support the 9th Div and MAJ GEN Morshead. We will look at: Field Artillery Medium and Heavy Artillery Anti Aircraft Artillery Survey Anti Tank Artillery Met Comms C2 Check out the show notes for the podcast for all of the information that we cover in this episode as well as the images and other details that didn't make it into the podcast.

Ep 8787 - Julian Corbett and British Maritime and Grand Strategy with Professor Andrew Lambert
This episode is an interview with Professor Andrew Lambert about Sir Julian Corbett, the premier maritime strategist in the 20th century. We discuss Corbett, Maritime and Grand Strategy, Churchill and the Dardenelles Campaign. We also look at his contribution to PME. If you would like to know more about the impact the Corbett had in Maritime and Grand Strategy, please read Professor's Lambert's excellent book - 'The British Way of War'. Check out the show notes for the podcast for all of the information that we cover in this episode as well as the images and other details that didn't make it into the podcast. Andrew Lambert is Laughton Professor of Naval History in the Department of War Studies at King's College. After completing research in the Department he taught at Bristol Polytechnic,(now the University of West of England), the Royal Naval Staff College, Greenwich, and the Royal Military Academy, Sandhurst. He is a Fellow of the Royal Historical Society and also Director of the Laughton Naval Unit. In 2020 he was made a Fellow of Kings College London (FKC).
S1 Ep 8686 - Lessons learnt from the 2nd Battle of El Alamein
This is the 6th episode in our El Alamein series. This episode looks at the conduct of the 2nd Battle of El Alamein, the impact that it had on the Second World War and the lessons learnt. This episode looks only at Operation Lightfoot, and examines the battle predominantly from the viewpoint of the 9th Australian Division and the critical role that they played in the fighting. Check out the show notes for the podcast for all of the information that we cover in this episode as well as the images and other details that didn't make it into the podcast.
S1 Ep 8585 - Monty fights to buy time for the 8th Army at Alam Halfa
This is our 5th episode of our 2nd Battle of El Alamein series. This episode looks at Rommel's attack at Alam Halfa just 17 days after Monty took command. Why did Rommel attack? How did Monty prepare for the attack? How did the Battle go? What lessons were learnt? Check out the show notes for the podcast for all of the information that we cover in this episode as well as the images and other details that didn't make it into the podcast.
S1 Ep 8484 - Montgomery, Fighting Power and turning morale around in the 8th Army
This is our 4th episode of our 2nd Battle of El Alamein series. This episode looks at when LT GEN B L Montgomery took command of 8th Army. He didn't like what he saw, so using the concept of Fighting Power, we look at the changes that he took to get the Army ready to take on the Desert Fox. Check out the show notes for the podcast for all of the information that we cover in this episode as well as the images and other details that didn't make it into the podcast.
Ep 8383 - Op Bertram - Operational Deception at 2nd El Alamein
This is part of a 2 part military deception miniseries looking at why Rommel placed his Divisions where he did and how his mobility was limited by deception. We look at Op Bertram, the Operational Deception plan for 2nd El Alamein and provide a checklist for deception planners. Check out the show notes for the podcast for all of the information that we cover in this episode as well as the images and other details that didn't make it into the podcast.
Ep 8282 - Military Deception at the Strategic, Operational and Tactical level - examples from the 2nd Battle of El Alamein
This is part of a 2 part military deception miniseries looking at why Rommel placed his Divisions where he did and how his mobility was limited by deception. We review doctrine on Surprise and Security. Deception is often a critical partner to Surprise, but without Security, your deception measures are unlikely to be effective. We look at the large contribution to the battle (and the war) made by the 2/24th Battalion at the battle of Tel el Eisa when they captured the German Sigint company. This episode is part of our series looking at decisive artillery battles in the history of Australia and is part of our 150 years of Australian Army commemoration. Check out the show notes for the podcast for all of the information that we cover in this episode as well as the images and other details that didn't make it into the podcast.
81 - The 2nd Battle of El Alamein
This episode looks at the lead up to the 2nd Battle of El Alamein, including the Gazala Gallop, the 'Flap' and Ash Wednesday in Cairo. This episode is part of our series looking at decisive artillery battles in the history of Australia and is part of our 150 years of Australian Army commemoration. Check out the show notes for the podcast for all of the information that we cover in this episode as well as the images and other details that didn't make it into the podcast.
80 - The Fireplan for the Battle of Vimy Ridge
This is a special miniseries on Vimy Ridge to celebrate 150 years of Permanent Artillery since the formation of A and B Batteries, Royal Canadian Artillery. This episode discusses the 4 phases of the artillery support and discusses how it set the conditions for the infantries successful assault of Vimy Ridge. Check out the show notes for the podcast for all of the information that we cover in this episode as well as the images and other details that didn't make it into the podcast.
79 - The development of Canadian Artillery technology leading up to Vimy Ridge
This is a special miniseries on Vimy Ridge to celebrate 150 years of Permanent Artillery since the formation of A and B Batteries, Royal Canadian Artillery. This episode looks at Flash Spotting, the work of Andrew McNaughton and the role of the CBSO. We look at the development of the 'dark art' of artillery and in particular Counter Battery fires. Check out the show notes for the podcast for all of the information that we cover in this episode as well as the images and other details that didn't make it into the podcast.
78 - The conduct of the Battle of Vimy Ridge Part II
This is a special miniseries to celebrate 150 years of Permanent Artillery since the formation of A and B Batteries, Royal Canadian Artillery. This episode details the conduct of the Battle of Vimy Ridge, a stunning success for the Canadian Corps. This follows on from our Bullecourt series. The Battle of Bullecourt occured 48 hours later and 30 km south of the Battle of Vimy Ridge. We will compare and contrast Vimy Ridge with Bullecourt to highlight to real cost of failing to correctly plan and resource an attack. Check out the show notes for the podcast for all of the information that we cover in this episode as well as the images and other details that didn't make it into the podcast.
77 - The Battle of Vimy Ridge Part I
This is a special miniseries to celebrate 150 years of Permanent Artillery since the formation of A and B Batteries, Royal Canadian Artillery. Vimy Ridge is seen as the birth of the Canadian nation. It is a model of a well planned Corps attack. Well resourced, well planned and very well rehearsed we look to understand what went right at Vimy Ridge. This episode details the planning for Vimy Ridge. This follows on from our Bullecourt series. The Battle of Bullecourt occured 48 hours later and 30 km south of the Battle of Vimy Ridge. We will compare and contrast Vimy Ridge with Bullecourt to highlight to real cost of failing to correctly plan and resource an attack. This is part of our 150th Anniversary of the Royal Australian Artillery series. Check out the show notes for the podcast for all of the information that we cover in this episode as well as the images and other details that didn't make it into the podcast.
76 - Lessons for the Employment of Artillery from the Battle of Bullecourt
This is the 4th episode in our Bullecourt series. "With artillery support we can keep the position till the cows come home." So wrote CAPT Harry Murray, VC, OC A Coy after the 4th and 12th Brigades had fought their way into the Siegfried Line - they didn't get it and were forced to conduct an extremely difficult withdrawal under heavy machine gun fire. Why didn't he get the support that he needed? This is part of our 150th Anniversary of the Royal Australian Artillery series. Check out the show notes for the podcast for all of the information that we cover in this episode as well as the images and other details that didn't make it into the podcast.
75 - Operational Level Lessons Learned from 1st Bullecourt
What mistakes occurred at the operational level in the planning of the Battle of Bullecourt? What role did Gough play in the debacle? Why did he make such grievous errors of judgement? 'Bullecourt, more than any other battle, shook the confidence of Australian soldiers in the capacity of the British command; the errors, especially on April 10th and 11th, were obvious to almost everyone'. Charles Bean, Official Historian. This is part of our 150th Anniversary of the Royal Australian Artillery series. Check out the show notes for the podcast for all of the information that we cover in this episode as well as the images and other details that didn't make it into the podcast.
74 - Failing to Plan or Planning to Fail? First Battle of Bullecourt
What planning was done for the First Battle of Bullecourt and why was it so flawed? We discuss artillery logistics and planning, mission analysis and how the plan came about in the time available. This is part of our 150th Anniversary of the Royal Australian Artillery series. Check out the show notes for the podcast for all of the information that we cover in this episode as well as the images and other details that didn't make it into the podcast. Join the conversation on Twitter or Facebook.
73 - 1st Battle of Bullecourt - The Australian Infantry's most brilliant achievement
This Episode looks at the lessons for the employment of Artillery at the 1st Battle of Bullecourt. CEW Bean, the author of the official History wrote that Australian troops braved the odds in numerous battles, but that Bullecourt was the most brilliant of these achievements, impressing both enemy and friends alike. This Bullecourt miniseries is part of our 150th Anniversary of the Royal Australian Artillery series. We look at the strategic picture in 1917, with Germany realising that time is on the side of the Allies. The commencement of unrestricted warfare is an attempt to deny Great Britain the resources required to remain in the war, setting the conditions for the war to be won, before the United States mobilisation makes victory impossible. The last of the ANZAC Divisions arrived on the Western Front in November 1916 - this was Monash's 3rd Australian Infantry Division. On the 23rd of February, German troops started thinning out the line and Operation Alberich, the withdrawal to the Siegfried Line. The Germans termed the withdrawal Operation Alberich, after Alberich the dwarf who fashions a ring out of Rhine Gold. The ring he forges grants the power to rule the world. The Siegfried Line was named after a legendary hero of Germanic legend who slew a dragon and was later was later murdered. He may have been based on Arminius of the Tuetoburg Forest. These legends were featured in Wagner's Ring Cycle, an epic Opera over 4 nights with the last night entitled Gotterdammerung, The Twilight of the Gods. The winter of 1916-17 was the worst in the last 40 years and the conditions took a terrible toll on the soldiers in the front lines. Here Australian Army Medical Corps members evacuate cold casualties. In December 1916, Joffre was replaced with General Robert Nivelle. Originally Lloyd George wanted to place Haig under Nivelle, which would have simplified command arrangements, but Haig would not countenance the idea. Haig was keen to create his own breakthrough if possible, but this would be difficult with the main effort, the Nivelle Offensive, receiving the majority of the guns and ammunition. Supporting the French Nivelle Offensive was the reason for the Arras Offensive. The British would draw German troops into the Arras area, and potentially trigger the German committal of their Reserve, setting the conditions for the French breakthrough further North. Gough, was termed the Thruster. Commander of Fifth Army. A cavalry Officer, he exhibited the best and worst tendencies of cavalry officers. Bullcourt, in the Queant area was to support Allenby's Third Army's attack at Arras. Allenby's attack was also supported at Vimy by the Canadian Corps under LT GEN Byng. This will be the subject of another podcast partially to celebrate 150 years of Canadian Artillery - UBIQUE!, and partially to compare and contrast with Bullecourt. The Battle at Bullecourt literally became the textbook example of how not to conduct a battle - it was taught in British Staff Colleges of the dangers of poor planning. Vimy Ridge is almost the perfect juxtaposition - Byng vs Gough, detailed planning vs big hands small map, artillery vs no artillery, CBSO vs little effective counter battery effects, ammunition allocation (50,000 tons were fired in pre H-Hour fires), vs an inadequate allocation, enough guns vs clearly insufficient numbers of batteries, and coordination and cooperation across corps vs little coordination. The Vimy Ridge battle was an exemplar of how to attack a strongly defended objective in the First World War and many of the techniques developed at Vimy would be used by Monash in 1918 in his first Battle as Corps Commander in the Battle of Hamel. The Bullecourt Battle was a support effort to Allenby's Third Army Arras Offensive. Join the conversation on Twitter or Facebook.
72 - Panzergruppe Kleist - German Centre of Gravity - Battle of France Part VIII
This is the fifth part of our CoG analysis for the Battle of France series. We discuss the task before Panzergruppe Kleist as it becomes the German Schwerpunkt. Thank you to the British Army's Lessons Exploitation Centre for the assistance with getting the resources for this podcast series. Check out the show notes for the podcast for all of the information that we cover in this episode as well as the images and other details that didn't make it into the podcast. Join the conversation on Twitter or Facebook.
71 - German Center of Gravity - Battle of France Part VII
This is the fourth part of our CoG analysis for the Battle of France series. We discuss the Center of Gravity for Germany. An interesting case as the Strategic Center of Gravity was unable to defeat France, so the Wehrmacht developed a highly risky operational Center of Gravity to defeat France in just 46 days - something that they could not achieve in all of WW1. How did the German's temporally dislocate themselves at the Strategic level? How could they avoid the nightmare of a two front war? Would they succumb to the siren song of the Schlieffin Plan and a quick win with all the risk that entails? Thank you to the British Army's Lessons Exploitation Centre for the assistance with getting the resources for this podcast series. Check out the show notes for the podcast for all of the information that we cover in this episode as well as the images and other details that didn't make it into the podcast. Join the conversation on Twitter or Facebook.
70 - The French Centre of Gravity - Battle of France 1940 Part VI
This is the third part of our CoG analysis for the Battle of France series. We discuss the Centre of Gravity for the French. What was their CoG? Was it effective and why did the Wehrmacht strike right at the heart of it? Thank you to the British Army's Lessons Exploitation Centre for the assistance with getting the resources for this podcast series. Check out the show notes for the podcast for all of the information that we cover in this episode as well as the images and other details that didn't make it into the podcast. Join the conversation on Twitter or Facebook.
69 - British CoG under Churchill - Battle of France 1940 Part V
This is the second part of our CoG analysis for the Battle of France series. We discuss the Centre of Gravity under the Churchill Government. What was Churchill trying to achieve and what was the one entity that was going to achieve it? Thank you to the British Army's Lessons Exploitation Centre for the assistance with getting the resources for this podcast series. Check out the show notes for the podcast for all of the information that we cover in this episode as well as the images and other details that didn't make it into the podcast. Join the conversation on Twitter or Facebook.
68 - British Centre of Gravity Analysis - Battle of France 1940 Part IV
This is the first of a 4 part miniseries on Centre of Gravity analysis for the Battle of France, 1940. Thank you to the British Army's Lessons Exploitation Centre for the assistance with getting the resources for this podcast series. Check out the show notes for the podcast for all of the information that we cover in this episode as well as the images and other details that didn't make it into the podcast. Join the conversation on Twitter or Facebook.
67 - Overview of the Battle of France 1940 II
Battle of France II - Campaign Overview. This episode is the second part of our overview of the Battle of France Campaign. Thank you to the British Army's Lessons Exploitation Centre for the assistance with getting the resources for this podcast series. Check out the show notes for the podcast for all of the information that we cover in this episode as well as the images and other details that didn't make it into the podcast. Join the conversation on Twitter or Facebook.
66 - Overview of the Battle of France I
Battle of France II - Campaign Overview. This episode is the first part of our overview of the Battle of France Campaign. Thank you to the British Army's Lessons Exploitation Centre for the assistance with getting the resources for this podcast series. Check out the show notes for the podcast for all of the information that we cover in this episode as well as the images and other details that didn't make it into the podcast. Join the conversation on Twitter or Facebook.
65 - Battle of France 1940
The German Army's tanks were outnumbered 1.7:1 and most of the tanks were inferior, and yet the French were defeated extremely quickly. This podcast series will focus on the counter attack at Arras, but we will look at a large number of issues throughout the Battle of France. Thank you to the British Army's Lessons Exploitation Centre for the assistance with getting the resources for this podcast series. Check out the show notes for the podcast for all of the information that we cover in this episode as well as the images and other details that didn't make it into the podcast. Join the conversation on Twitter or Facebook.
64 - In Action - The Boer War and the First Shot of the First World War
This is the first of a special series of podcasts commemorating 150 years of permanent Artillery in Australia. This episode looks at A Bty's deployment to the Boer War, the action that it saw and the firing of the first shot of the First World War. Check out the show notes for the podcast for all of the information that we cover in this episode as well as the images and other details that didn't make it into the podcast. Join the conversation on Twitter or Facebook.
63 - The Birth of Australian Artillery
This is the first of a special series of podcasts commemorating 150 years of permanent Artillery in Australia. This episodes looks at the early years. The birth of 'A' Battery The range of batteries, and their equipment and how they trained The first deployment The birth of the School of Artilllery Check out the show notes for the podcast for all of the information that we cover in this episode as well as the images and other details that didn't make it into the podcast. Join the conversation on Twitter or Facebook.
62 - Sir Max Hastings and Lessons Learnt from Vietnam
This is Part II of our interview with Sir Max Hastings, the author of Vietnam, An Epic Tragedy. Check out the show notes for the podcast for all of the information that we cover in this episode as well as the images and other details that didn't make it into the podcast. Join the conversation on Twitter or Facebook.
61 - Vietnam - An Epic Tragedy and Moral Centers of Gravity
This is Part I of our interview with Sir Max Hastings, the author of Vietnam, An Epic Tragedy. Check out the show notes for the podcast for all of the information that we cover in this episode as well as the images and other details that didn't make it into the podcast. Join the conversation on Twitter or Facebook.
60 - Nelson and the Amphibious Raid on Tenerife
This is Part V of our look at Lord Horatio Nelson and the practice of Mission Command. Check out episode 1 of our Nelson and Mission Command series. This covers the amphibious raid on Tenerife and what went wrong in Nelson's worst defeat. Check out the show notes for the podcast for all of the information that we cover in this episode as well as the images and other details that didn't make it into the podcast. Join the conversation on Twitter or Facebook.
Nelson, Tenerife and Mission Command
This is Part IV of our look at Lord Horatio Nelson and the practice of Mission Command. Check out episode 1 of our Nelson and Mission Command series. This covers the lead up to the Battle of Tenerife - Nelson's worst defeat. Check out the show notes for the podcast for all of the information that we cover in this episode as well as the images and other details that didn't make it into the podcast. Join the conversation on Twitter or Facebook.
58 - Reflections and lessons learnt from the Battle of Long Tan
This is Part V of our interview with LT COL Harry Smith, the OC of Delta Coy / 6 RAR at the Battle of Long Tan. If you missed the first episode, check it out here. He reflects on Delta's performance during the battle and also gives us his thoughts on the Danger Close movie about the Battle. We've also interviewed Dave Sabben about the Battle of Long Tan. Check out the show notes for the podcast for all of the information that we cover in this episode as well as the images and other details that didn't make it into the podcast. Join the conversation on Twitter or Facebook.
57 - The Battle of Long Tan - C2 and Logistics
This is Part IV of our interview with LT COL Harry Smith, the OC of Delta Coy / 6 RAR at the Battle of Long Tan. If you missed the first episode, check it out here. We've also interviewed Dave Sabben about the Battle of Long Tan. Check out the show notes for the podcast for all of the information that we cover in this episode as well as the images and other details that didn't make it into the podcast. Join the conversation on Twitter or Facebook.